
Every facet of photography is about controlling light, from the amount of light we allow to enter our camera via the aperture of a lens to the duration of our exposure set by the shutter speed. But how does the camera measure the brightness of the scene to set these settings automatically? How do you, the photographer, know how much to adjust your exposure settings to achieve a specific result for the final image? This is achieved with an in-camera light meter.
What Is Metering?
Metering is how a camera evaluates the available light to determine the proper aperture, shutter speed, and ISO. The meter in action visually indicates whether an image is under or overexposed via a gauge that appears in the camera’s viewfinder, rear screen, or top LCD. In the center of the gauge sits a 0. This number represents a neutral exposure. Not too bright, not too dark, but perfect if following what is known as the 18% gray rule (we’ll touch more on this later). To the right of the 0 sits numerical values with a plus (+) icon that indicates overexposure; to the right of the plus (+) icon you’ll see a minus (-) icon that indicates underexposure.
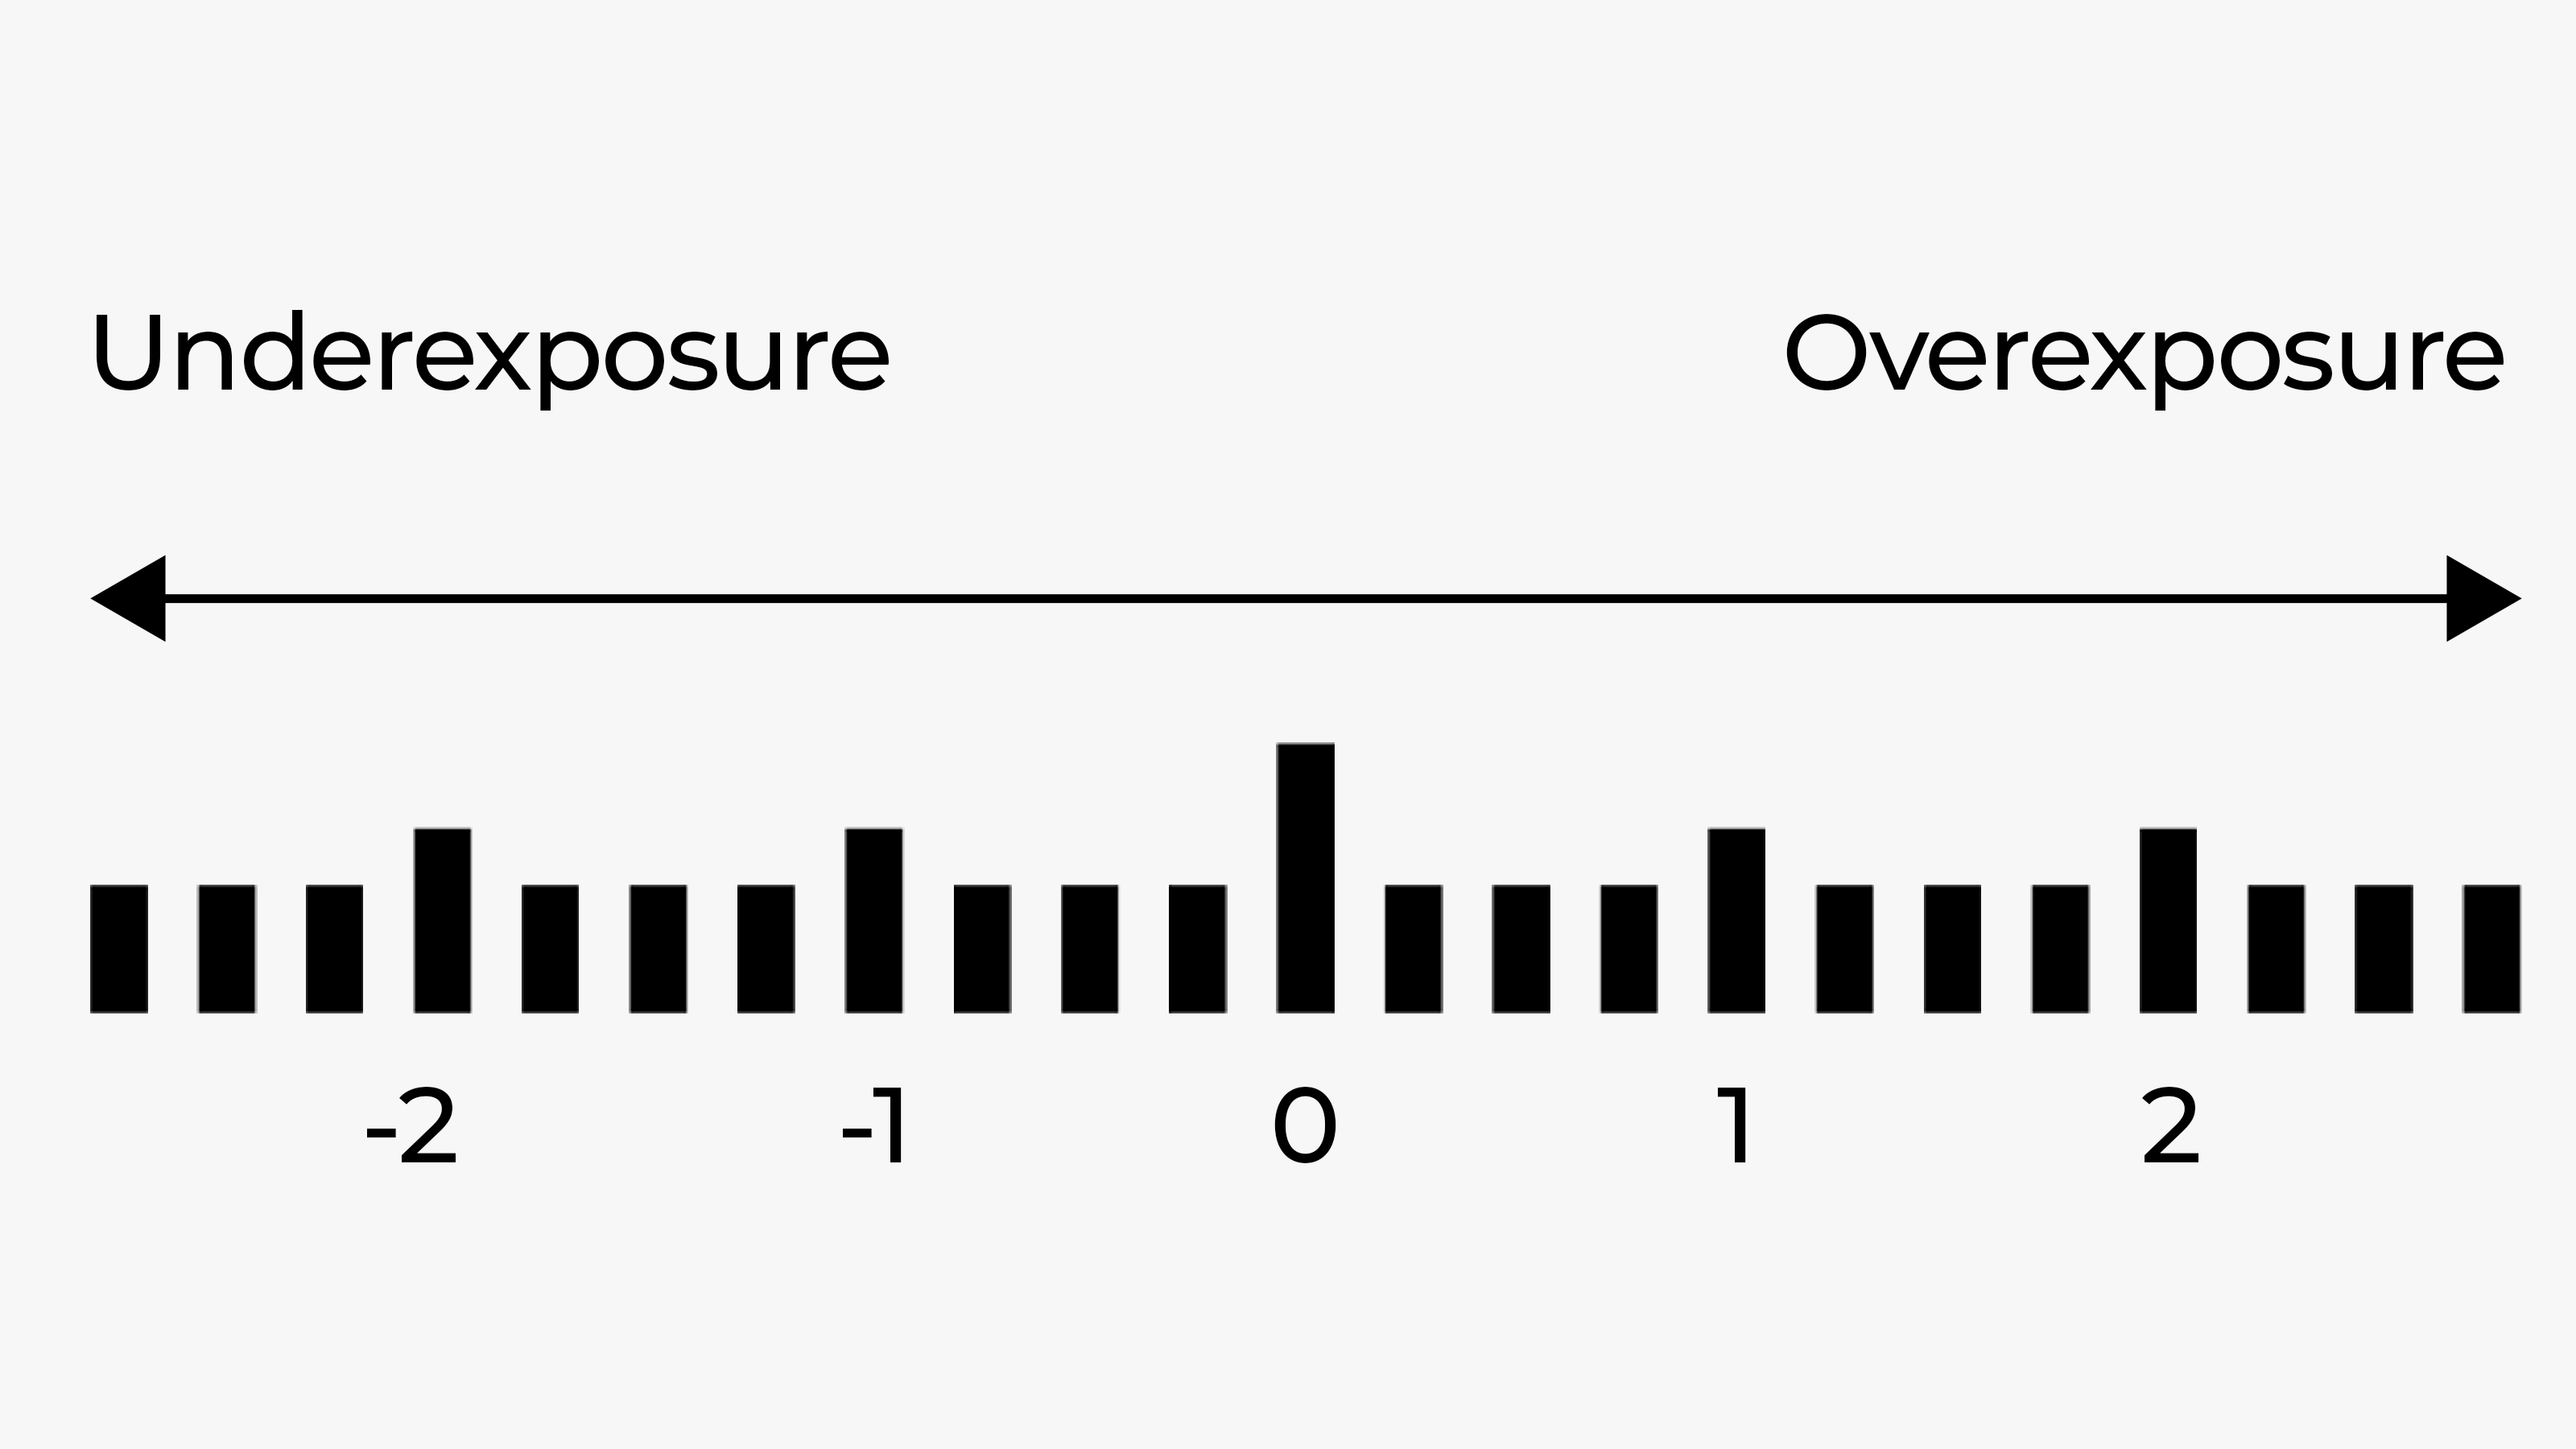
Modern-day mirrorless cameras read light directly on the imaging sensor, though this is a relatively new innovation. DSLR cameras relied on a separate metering sensor that they carried over from film SLRs. The gauge sabove has long been the standard metering display, though alternatives have appeared from time to time. This version is a relic of the classic handheld light meter.

We say classic, but this style of meter is still very much in play. Film shooters rely on these photographic tools to this day, and there are even app versions available for smartphones. Technology has progressed, though the significance of the light meter remains the same. Below, we’ll explore not only how meters work in the field, but how to use them to our advantage.
The Good and the Bad
If there’s one aspect of metering and exposure to know right off the bat, it’s that the photographer is smarter than the camera. We know the image we want to take before we press the shutter button. Whether we previsualized it months prior in the seconds leading up to the decisive moment, we have an idea of the image before it happens.
Your camera’s meter, although a good guideline, is not perfect. It will get you in the right direction but is designed to capture neutral exposures. These are not necessarily the right exposure for your particular scene. This is not due to some flaw, rather, how it functions. It is doing exactly what it is designed to do, which is achieve a neutral exposure halfway between black and white on a logarithmic curve.
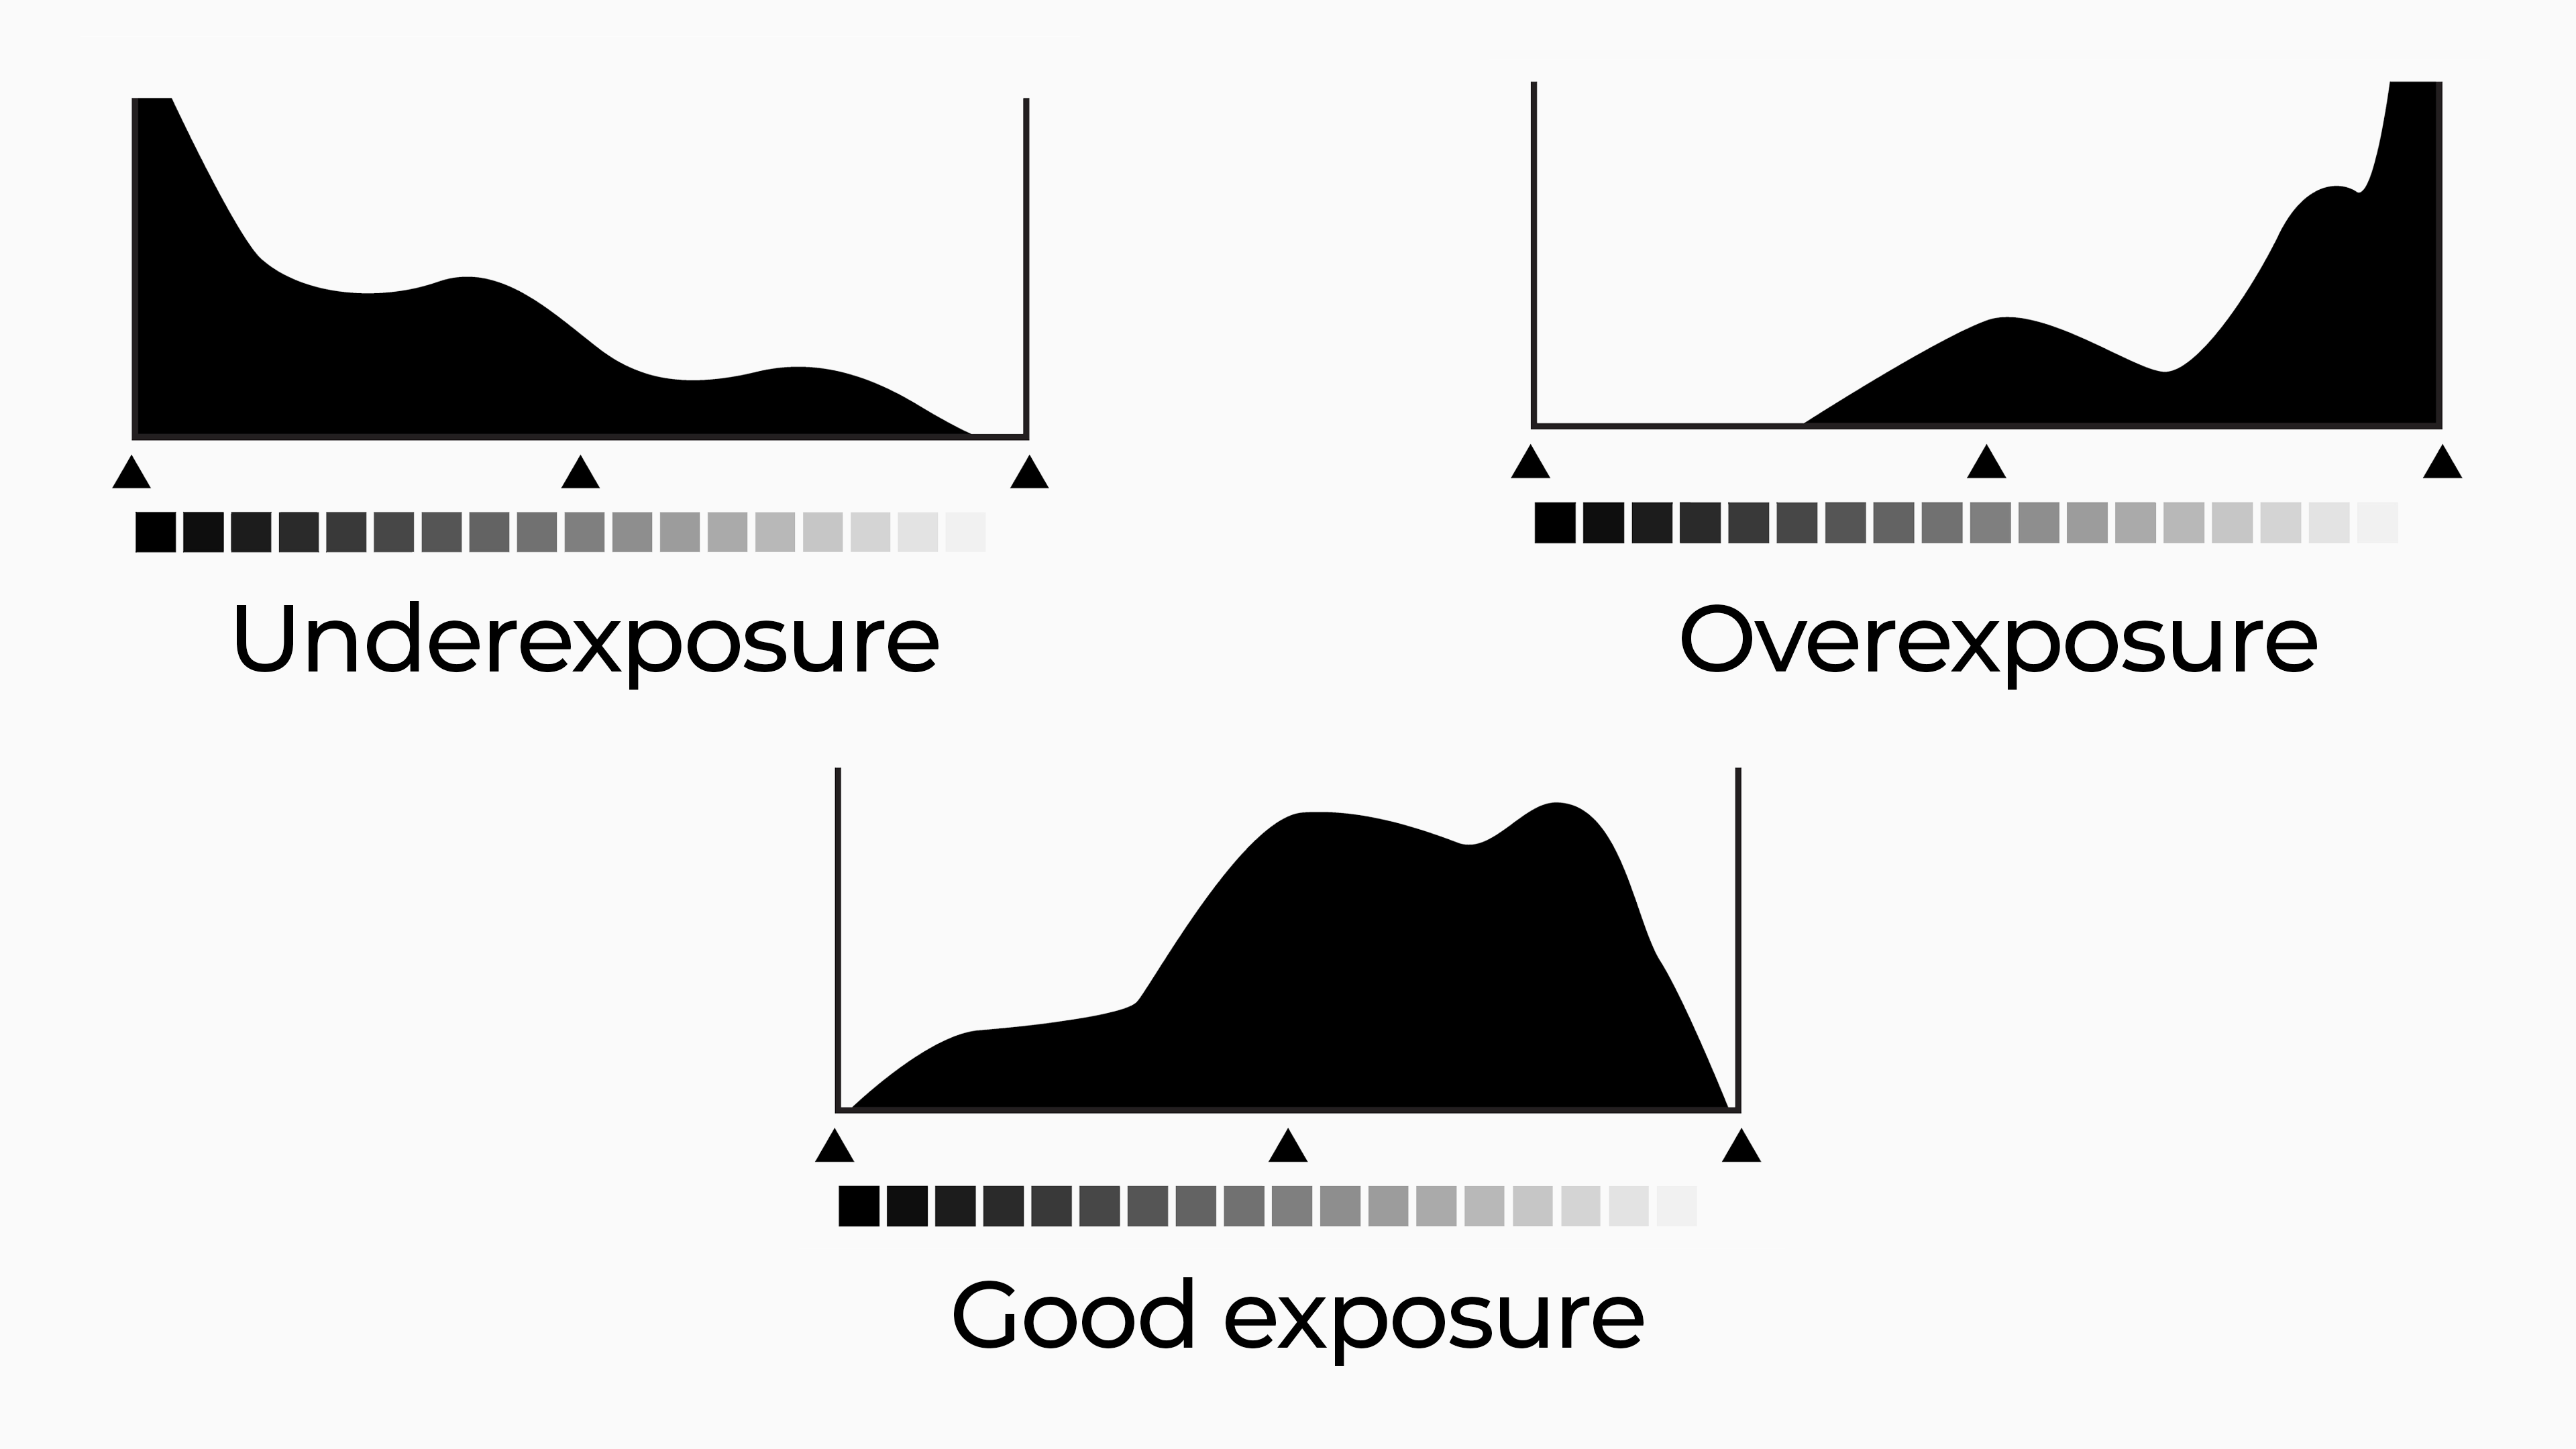
In simple terms, this is 18% middle gray. It is the level of brightness meters are calibrated to though it is not always perfect. For instance, when photographing something bright white like snow, we want to capture it as we see it. If we rely solely on our meter, the snow will appear as a drab, middle gray. Far from the wintry wonderland we aim to capture. For this reason, many photographers seek to take greater control of their camera settings, though this comes with time and practice.

To at least some capacity, we will need to rely on our meter to get us the proper exposure. As we learn, we can fine tune how our meter works to best suit our style and subject matter. In this guide, we’re going to explore metering and the most common ways in which we can set our cameras to do so. The most practical way we can improve the way in which our meter works for us, is to tell the camera how we would like it to do so.
Metering Modes
There are a number of metering modes that can be found within our cameras. These range from broad areas to focused ones, varying in priority from a small to the entire imaging area. While many never consider this oft-forgotten setting, it can be detrimental to getting the exposures you desire. The modes go by many names, with some generic and others proprietary.
Some brands even have proprietary modes like Canon’s. What matters most is how they read available light and the resulting effect they have on our photography.
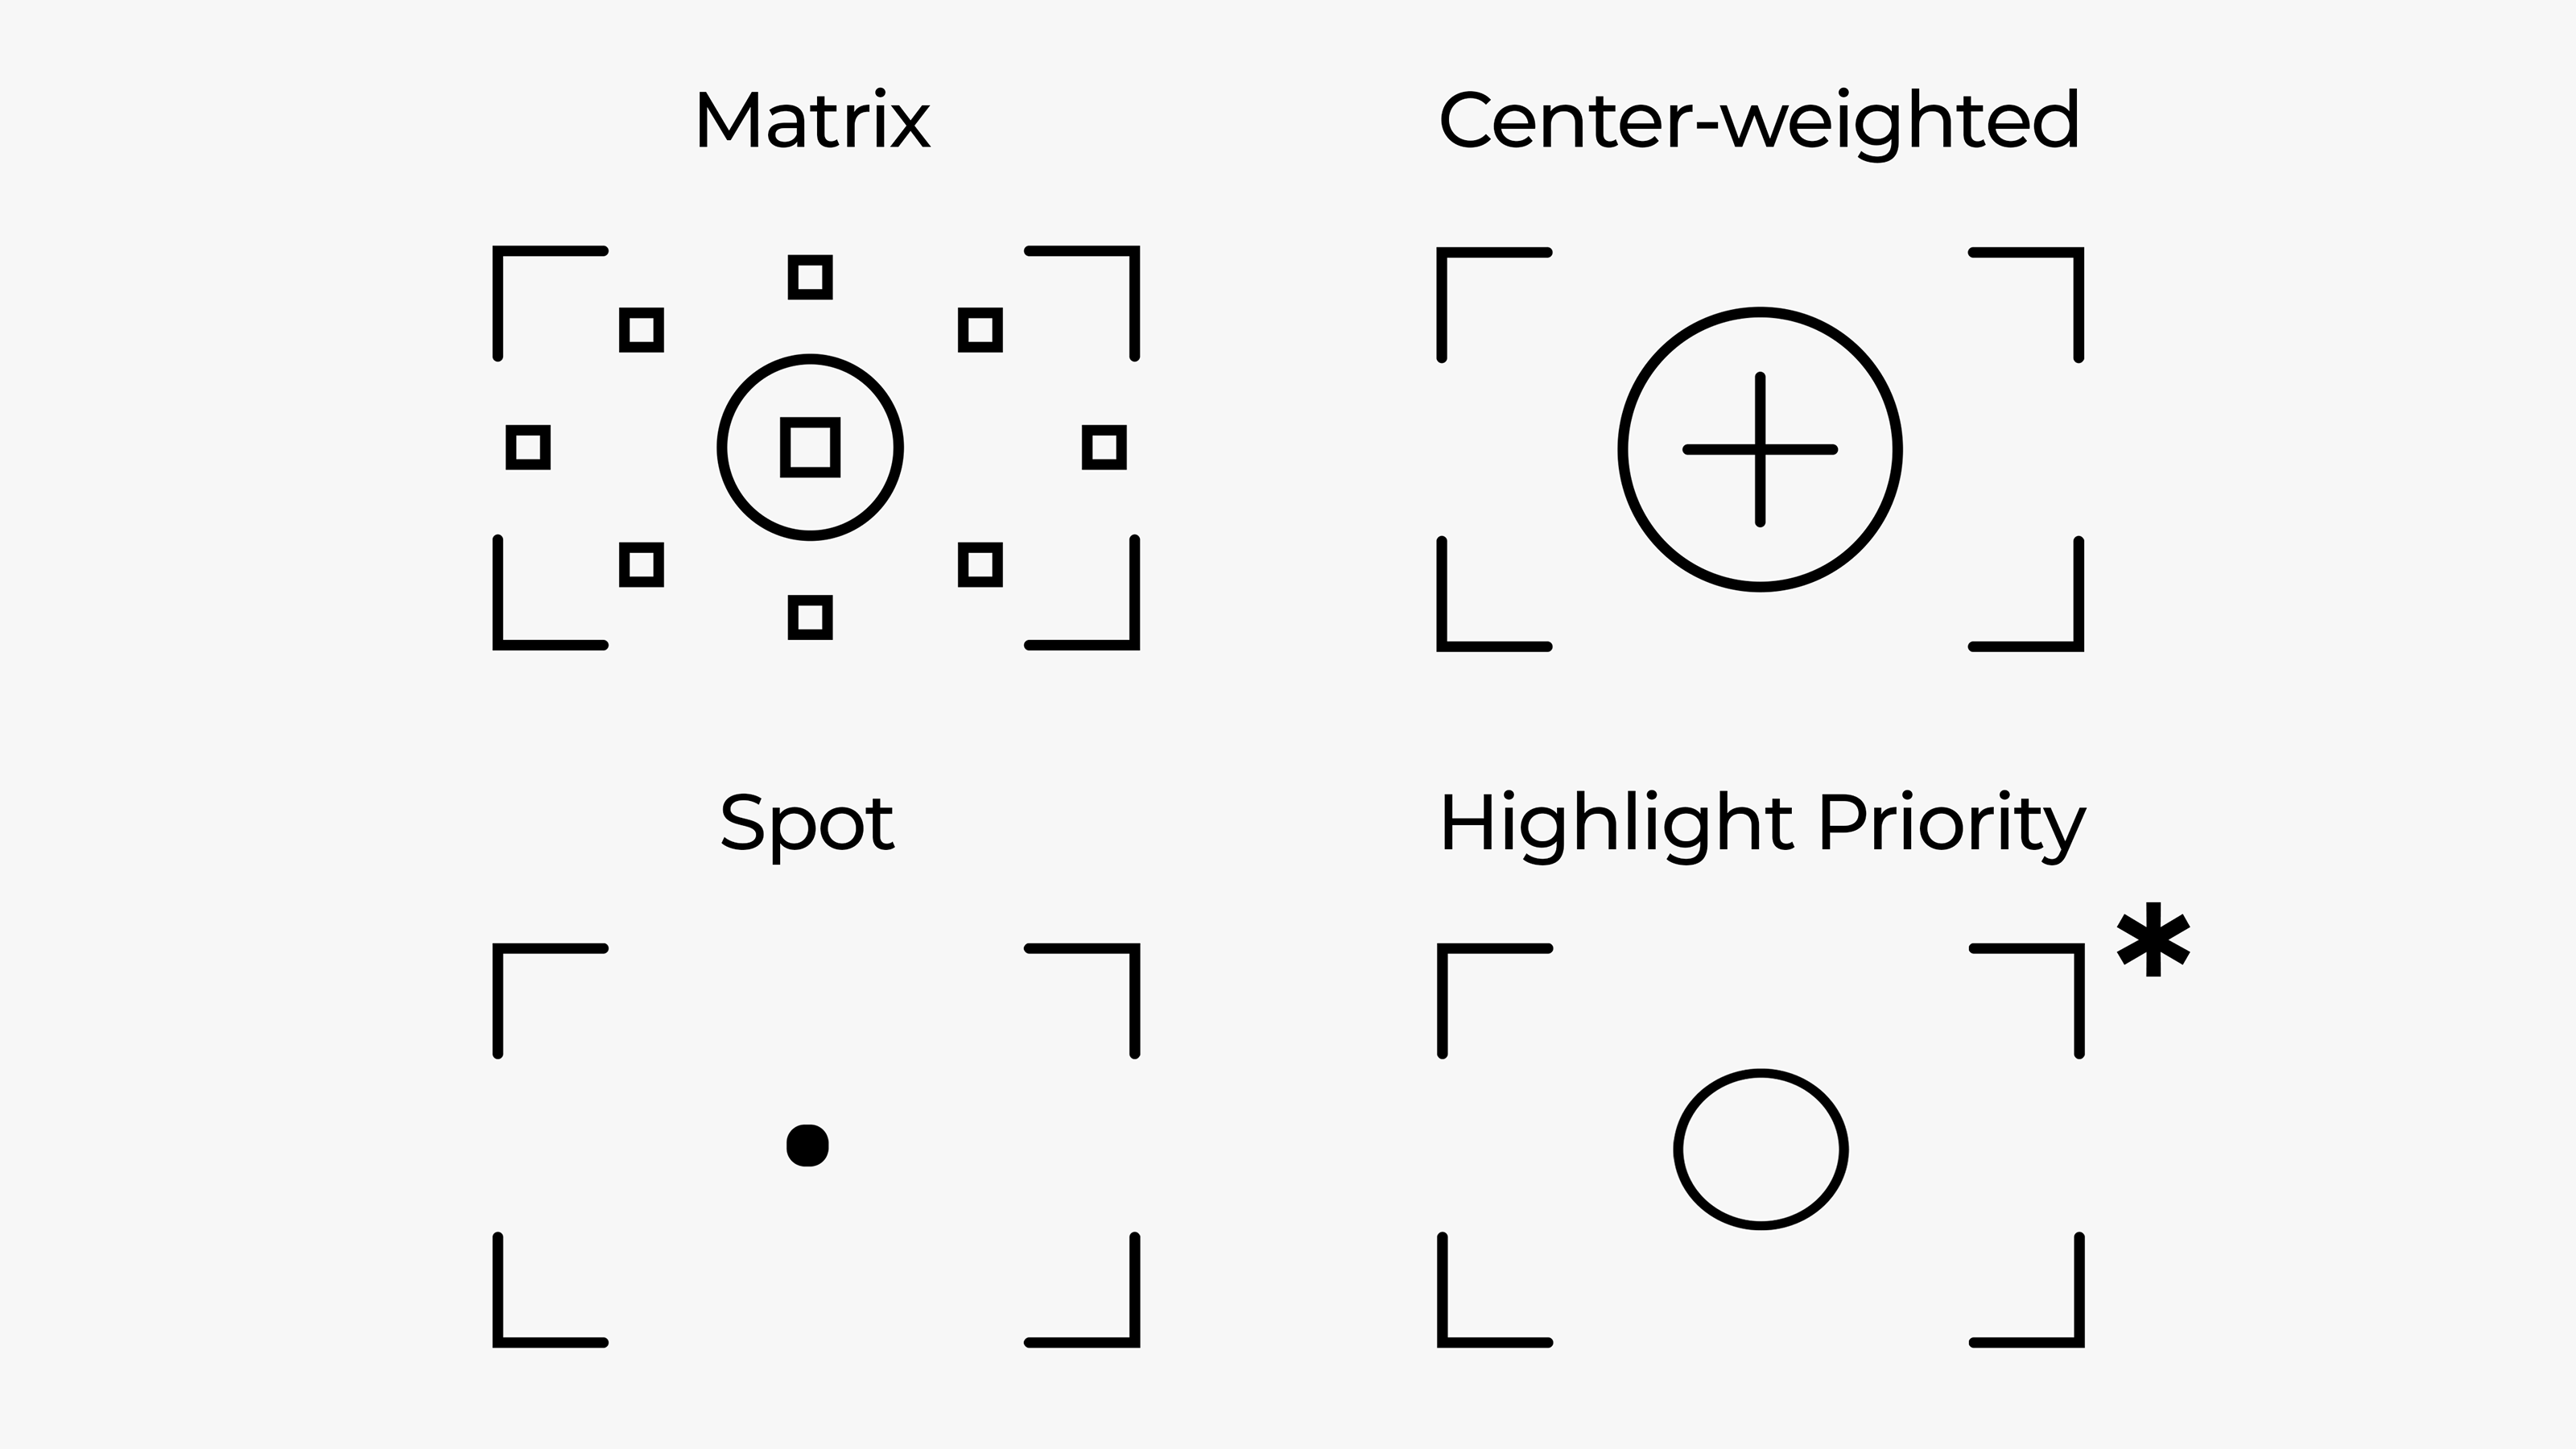
Evaluative/Matrix
Evaluative or Matrix Metering mode is the default setting on most digital cameras today. This mode makes use of the entire imaging area to determine the proper exposure value. One of the traits that makes this such an effective mode is its ability to prioritize where in the frame the focus point is set while factoring in the rest of the frame. We recommend sticking to this mode for most uses, as it suits the widest variety of situations.

Spot Metering
Spot metering uses a single point or small area in the middle of the frame. Pre-digital, the “spot” was glued to the center region of our imaging area, however it is now corelated to your primary focus point. This is the most precise metering mode and puts all focus on the subject. This is especially useful when there is a large disparity in brightness between the subject and the background.
If we use an older camera where the spot we’re metering off is locked, there is a solution. This is a technique known as recomposing where we dial everything in from focus to settings when the spot is on the subject, but move the subject to where we want it in the frame when done.
But hold on. Won’t moving the spot away from the subject alter our exposure? Yes, but we can prevent this by using a setting called “Exposure lock” which can be programmed to a button within thumb reach for easy activation. Simply focus, dial in your exposure, then lock it before re-composing. Some cameras have this automatically assigned to a button on the rear of the camera.

Center Weighted
For those moments when using the whole frame just isn’t practical, but we don’t need to be so specific as to use spot, we have Center Weighted Metering. This metering mode covers only a small center portion of the frame, larger than the pinpoint area used in spot. Some brands offer other variations of this mode that integrate the rest of the frame while prioritizing the center. Use this mode for close-up portraits or scenes where the subject is relatively large in the frame, but towards the middle of the frame.

Highlight Priority
Highlight priority behaves similarly to evaluative, though with one major difference. Highlight priority metering is designed with intent on keeping highlights or bright areas of your image in check. The use case for this mode is highly situational and may never be used.
This mode can be quite useful if you have a scene with important highlights that you don’t want to overexpose, like a white dress against a dark background. That said, it can also be detrimental to our exposure, resulting in images that are too dark and whites that are closer to gray as addressed above.

Other Tips & Tricks
Exposure Compensation
When metering modes fail, we have two options. First, assume control of the camera and manually set your exposure, however, if you’re reading this guide, you’re likely not quite ready to make that jump just yet. If you’re using program or a priority mode, you can employ a handy tool called exposure compensation.
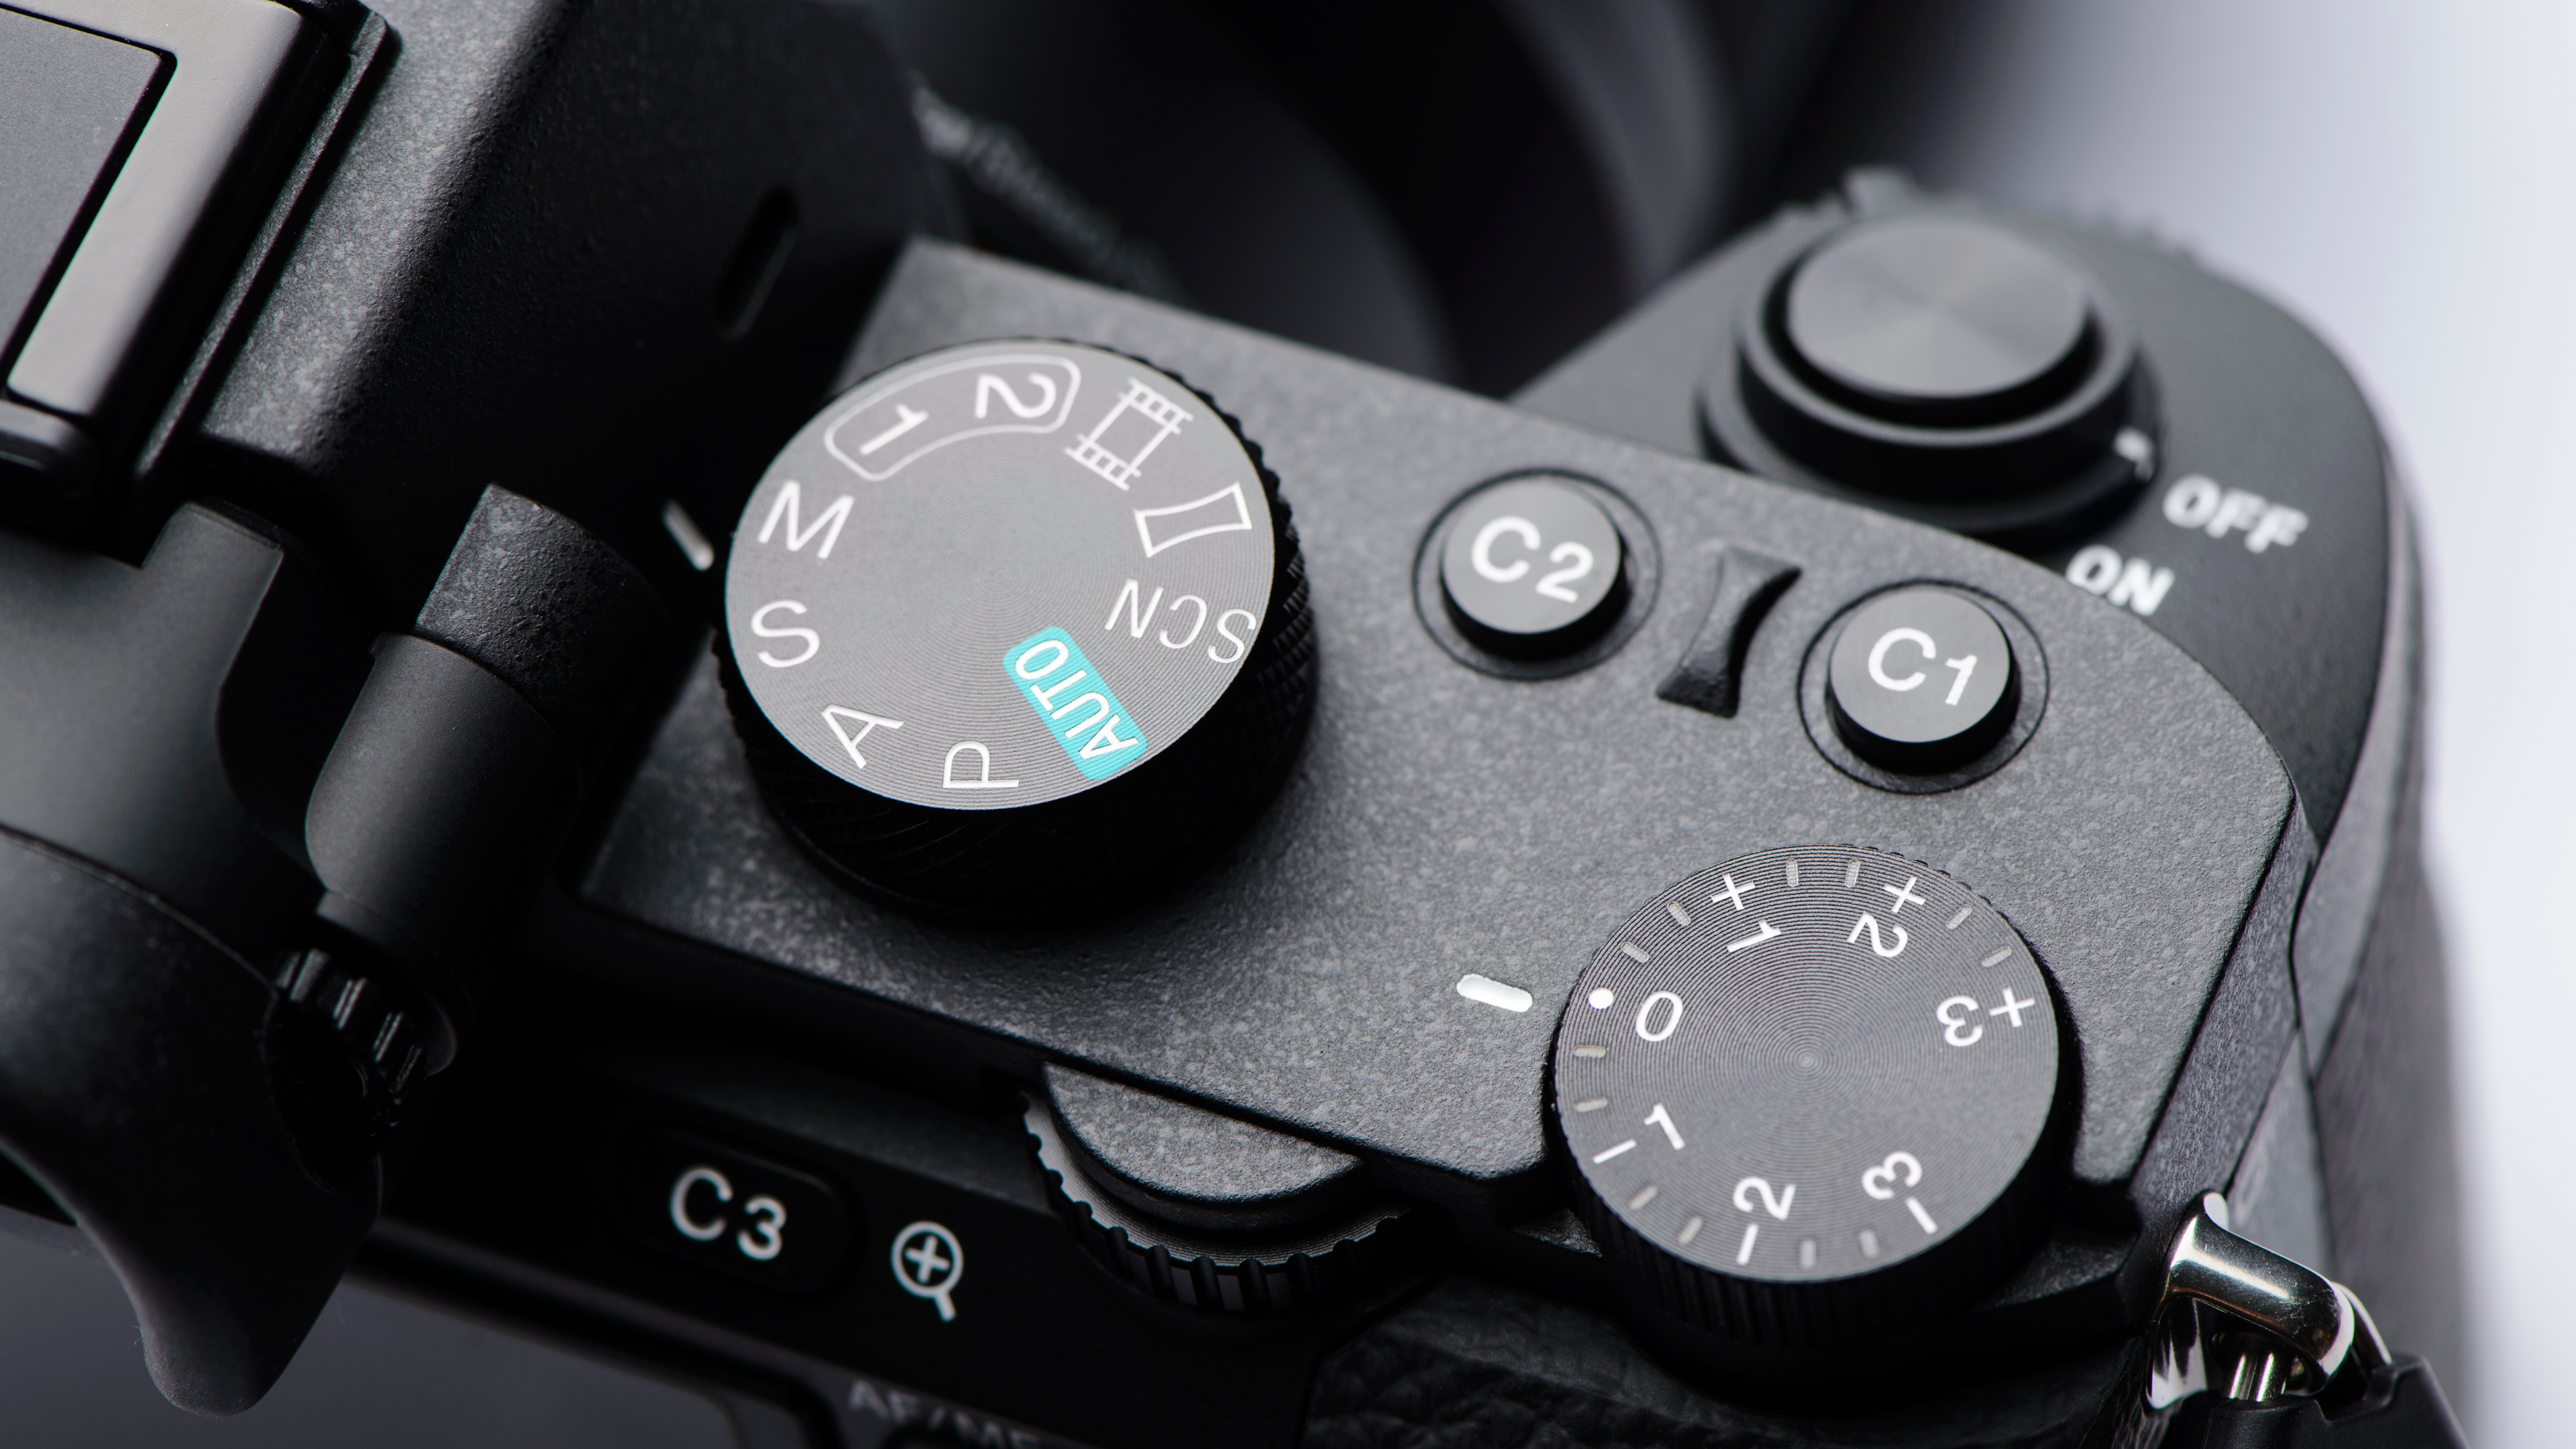
Exposure compensation is a setting that allows photographers to manually override the cameras automatic exposure settings. With the turn of a dial, you can re-trick the meter to over or underexpose your images without worrying about specific settings.
Expose to the Right
When photographing a brightly colored subject, such as a white flower or dress, it’s better to slightly overexpose your image. Why? As mentioned earlier, if we trust the camera to do its own thing, our whites will come out as a muddy neutral gray color. We want our highlights to be true white, and we’ll want our shadows to be well exposed with visible detail as well. Even with the advantages of shooting in a RAW file format, trying to recover shadows in post will only hurt our image quality and add additional noise to our images.
One of the most challenging subjects to properly expose is one where you have both shadows and highlights. Think of a bride and groom, or a bald eagle for example. The meter will likely get this bird wrong as the contrast between the head and body is simply too much for any camera to process. To nail these tricky exposures, keep an eye on your meter and keep it to the right. The exact level of overexposure can vary from +1.0 stops to +2.0 stops. How can we tell if our image is too bright?

Put It to Practice
As you can see, exposure isn’t as straight forward as we may like it. What our camera’s light meter determines to be a proper exposure, and what we as the artist want, sparingly align. A mastery of exposure is a mastery of bypassing the meter to bring our artistic vision to life. Cameras have other useful features to aid us in nailing our exposures, and one of the most prolific is the histogram.
The meter is a helpful guide, and if you know how to use it, you’ll be ready for some of the most challenging lighting conditions. If you’ve enjoyed reading, take a look at our other guides, articles, and reviews on the B&H Explora page!
