Photography
- Recently Added
- Popularity
- Name
About 1368 filtered results

Posted
As the 2026 World Cup comes to a close, we had the opportunity to look back at all of the action with Nikon ambassador and sports photographer Andrew Hancock as he shares his experience photographing one of the world’s biggest sporting events.
Côte d'Ivoire vs Norway at the

Posted
Join the authors of Twenty One Summers, Derrick Connell and Thomas Werner as they address the challenges we face as we work to define and achieve our goals, and offer practical strategies to navigate them successfully.
0:00 - Intro
2:24 - Chapter 1 reading
7:09 - Art & tech
11:24 - 17 stories
21:54 - The challenge of creating
27:49 - Agile vs. Waterfall
35:10 - Excuses are boring
37:02 - Knowledge is a wall
40:27 - What defines you and your work?
41:57 - The iterative process
44:11 - Make me comfortable
54:18 - Email isn't enough
55:34 -
Posted
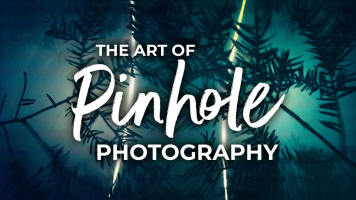
Experience the magic of pinhole photography with Heather Palecek. Learn how to build (and where to buy) a camera and receive tips for best practices. You'll be inspired to explore your creativity with this unique photography.
0:00 - Intro
4:48 - Info & history
20:42 - Different pinhole cameras and how to make them
37:27 - Dynamic pinhole photography
40:00 - Basic composition tips
41:13 - Portfolio
1:01:31 - Solar Journaling
1:04:10 - Community Garden project
1:07:16 - Surrender
1:08:27 - Observing the flow
1:11:04 - Transcendence
1:12:52

Posted
Photographing birds in flight is a truly challenging genre of wildlife photography. It’s also a lot of fun. Photographer Melissa Groo shares all the tips and techniques from gear to ethics so you can capture the beauty of birds flying.
0:00 - Intro
3:23 - Camera
13:42 - Camera settings
16:23 - Exposure triangle
21:44 - Pre capture feature
24:51 - Become a naturalist
31:05 - Direction of light
35:49 - The effects of wind on birds
38:28 - Brace yourself
41:57 - Ways to elevate your image
48:38 - Know the rules like a pro
50:46 - Importance of
Posted
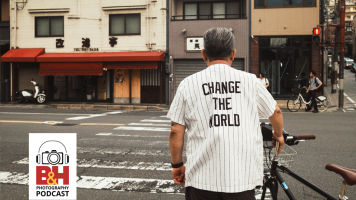
The B&H Photography Podcast is getting a facelift. After more than a decade of audio-driven chats featuring many of the photo world’s most inspiring voices, we’re transitioning to a video podcast—in our own dedicated studio!
Above Photograph © Derek Fahsbender
In this short farewell to audio, podcast host Derek Fahsbender reflects on inheriting the mic, pays tribute to the show’s founders and colleagues who’ve helped shape the show, and elaborates on all he’s learned from guests who’ve dedicated their lives to the craft.

Posted
Sports photographer Jean Fruth shares her journey from documenting women’s baseball to capturing the world of women’s hockey. In this conversation, she shares insights on navigating changes in projects while maintaining true to your style.
0:00 - Intro
1:34 - The start of Jean's sports photography
5:18 - Photographing different sports
12:05 - It's bigger than the sports, it's the movement
17:35 - Think bigger than your style
25:35 - The approach to photographing new sports
29:28 - Behind the scenes stories
33:02 - The difference in the

by Jill Waterman · Posted
There is perhaps no truer sign of summer than Independence Day in the United States. The Fourth of July is when the summer season kicks into full gear, with barbeques, pool parties, family gatherings, and road trips galore—not to mention the fireworks!
One lead-up to this holiday that I will never forget found me hurtling down the New Jersey Turnpike at sunset in a Greyhound bus. As the twilight deepened, bright bursts of fireworks began shooting up past the tree line, close by and at a distance, reflecting in the darkened glass of the

by Jill Waterman · Posted
As a follow-up to Part 1 of our fireworks story, it’s worth noting that photographing a fireworks show is no easy feat. Readers seeking a how-to guide to this subject need look no further than this Explora article, by Todd Vorenkamp.
Yet, as that article notes, and the photos featured here make evident, the challenge of capturing bursting pyrotechnics in images offers great opportunities for experimentation and fun. This is perhaps

Posted
Posted
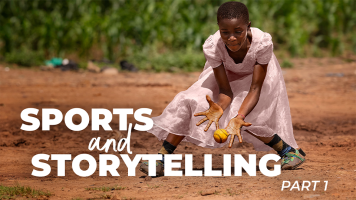
Sony Artisan of Imagery Jean Fruth is known for capturing the stories behind the athletes in her images. Jean starts a new series with the B&H Event Space discussing sports and storytelling. The first part is all about the process of completing long-term projects.
0:00 - Intro
2:29 - Storytelling with long-term projects
5:50 - The start of Jean's projects
9:45 - How do you know it's the right project
17:01 - Sticking with the theme of the project
23:10 - Approaching new projects
26:26 - As a woman sports photographer, connecting with the


Posted
Let's talk trip planning. Specifically, planning for a nature photography trip. Sam shares how she prepared for our trip to Everglades National Park, from apps to tour guides.
0:00 - Intro
0:46 - Leave No Trace
2:29 - Why Hire a Guide?
3:32 - How to Track the Sun & Moon
4:33 - Packing (Camera Gear, Clothes & MORE)

Posted
Music photography has always been a listener favorite, and through the years we’ve gathered countless stories from legendary photographers about what it takes to document all aspects of the music scene.
Above Photograph © Jim Marshall, from the new book The Beatles By Jim Marshall: Live At Candlestick Park, in bookstores June 2, 2026
As we temporarily pause in recording new episodes while we build out a studio for video podcasts, we decided to take a trip down memory lane

Posted
Since 1584, Hahnemühle have been artists' trusted source for paper. Nearly 450 years later, they've maintained that tradition and are the premier choice for fine art photographers who wish to print their work. In this video, Lotta returns to her roots in Germany, nearby the legendary Hahnemühle paper mill, and gets an inside look at the history through to the working mill today. You'll learn about their passion for tradition, innovation, and sustainability.
0:00 Who Are Hahnemühle?
2:27 Lotta Returns to Her Roots
5:10 Hahnemühle's Sustainable

Posted
Your photos are captured with the camera, but your vision comes to life in the edit. Cliff Pickett walks you through how to see the final image within the raw file—and the steps to bring it there. Creating your best work starts with recognizing the potential in the image before anyone else can see it.
0:00 - Intro
4:27 - Recognizing Potential
7:32 - What's your subject?
11:03 - Frequency illusion
12:41 - Set & raising your standard
37:17 - Removing distractions
53:43 - Presets
1:06:13 - AI tools
1:12:45 - Editing demo – presets