So far, the weather is definitely the biggest challenge I’ve experienced in my 100 Nights project. So much so, that I could have called the project 100 nights of bone-chilling cold. Seriously, I keep finding new limits to the amount and duration of cold I can endure. I can’t even tell you how many nights I’ve shot in temperatures below -30° Celsius in the Canadian Rockies. But somehow, I keep coming back for more!
I joke that my camera batteries last longer than I do, because I leave my cameras running while I sit in the car trying to get warm. There is a beauty in these extremely cold temperatures that you don’t often get to see when the weather is warmer. Frost flowers form, creating beautiful foreground elements in the frozen landscape, and fog hugs open water, as the air temperature dips below the not quite frozen temperature of the open water.
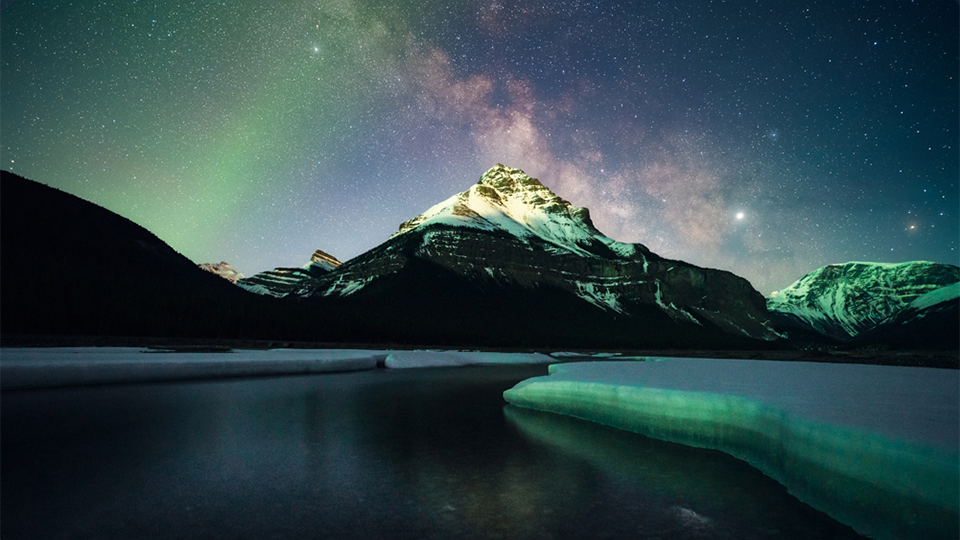
Photographs © Rachel Jones Ross

You’d think that, given my experience in the frozen Canadian North, I’d be used to cold conditions. But I was back in the desert only a few weeks ago with Jess and it snowed, “which never happens.” And being naively Canadian, I didn’t think I had to bring my snow pants and parka to the desert.
Jill Waterman: When shooting in extreme cold conditions, what, if any, considerations do you need to keep in mind, for yourself and for your gear, and are there any specific pieces of gear or accessories that you depend on for this?
Rachel Jones Ross: One of the biggest considerations for myself and others is trying to avoid sweating. If you sweat, and then stand around in the cold taking pictures, you are more likely to get frostbite. I dress in layers and, when I hike, I always have additional dry under layers with me to put on.
I have a pair of gloves from The Heat Company that I consider essential gear. They have an inner liner and an outer wind-proof mitten. The mittens have pockets that hold chemical warmers, as well. Good gloves for photographers are hard to find; I can’t recommend these enough.
My gear has been subjected to far worse conditions than what I can bear to shoot in. I have left my cameras to time-lapse overnight in -20° Celsius. I’ve never had any issues with the batteries or the camera getting too cold. But I do recommend putting an OP/Tech USA rain sleeve on your camera if it’s really cold, because this will protect your gear from frost (which will turn to water when it melts!).


JW: Do you have any time-saving tips for setting up or shooting at night when you’re in frigid conditions?
RJR: Absolutely! One of my favourite features for night shooting on the Sony Mark III cameras is bright monitoring. It’s basically like night vision on your camera; when you turn it on, you can see elements of the landscape and even the core of the Milky Way in real time. This makes finding a composition in the dark so easy. I can set up a camera in minutes, without the need for taking tedious and time-consuming test shots.
JW: Do you ever have problems with your lenses fogging up in very cold conditions, or when going out into the cold from a warm interior, or vice versa? If so, do you have any recommendations for minimizing or resolving this issue?
RJR: I can’t recall having problems with condensation when going from a warm building or car to the cold outdoors. But, if you bring your gear into a warm room after it has been out in the cold it will fog up, and condensation will form over every surface. I never take my cold gear out of my camera bag when I’m indoors. Rather, I let the whole bag come to room temperature before I take the camera or lenses out.

JW: Do you recommend using a UV filter to protect the lens in cold or wet conditions?
RJR: The quality of the glass in a UV filter won’t ever compare with the quality of glass in my lens, so I don’t use UV filters in general. That’s just one more piece of glass for light to penetrate (and for me to clean). There are specialty filters that help reduce light pollution, but I haven’t tried those yet.
When I’m teaching night photography workshops, I’ve sometimes had students come to me frustrated that they can’t focus. Often all I’ve needed to do to help them was take off their UV filter.
JW: Do you plan differently for night shots if you’re shooting with a longer lens versus a wide angle? What about when adding a teleconverter? Please describe any differences to your process based on lens choice.
RJR: I definitely use different techniques when shooting long versus wide. Focal length (along with aperture and your camera’s sensor) determines how long you can leave the shutter open before stars begin to trail. For many years, photographers used a “500 Rule” to determine how long they could leave the shutter open before getting movement in the stars. But the technology in sensors and lenses has advanced so much that the 500 Rule isn’t even close to accurate anymore.
I use an app called PhotoPills to aid in my planning for every single night shoot that I do. One of the coolest features of this app is a function called Spot Stars. You simply enter your camera info, focal length, and aperture and the app will give you the values for pin-point stars, as well as stars with minimal trailing.
To read more from Rachel Jones Ross’s 100 Nights Project, click here for the companion articles in this five-part series: 100 Nights of Photography Under the Stars, 100 Nights in Bone Chilling Cold, 100 Nights Under the Clouds, 100 Nights of Learning, and 100 Nights of Inspiration.
Thank you for joining our journey into night photography! For more Visualizing the Night content, please click here: Visualizing The Night and share your enthusiasm for this theme in the comments section below, or reach out to us on social media using #visualizethenight. Thanks for reading!
