
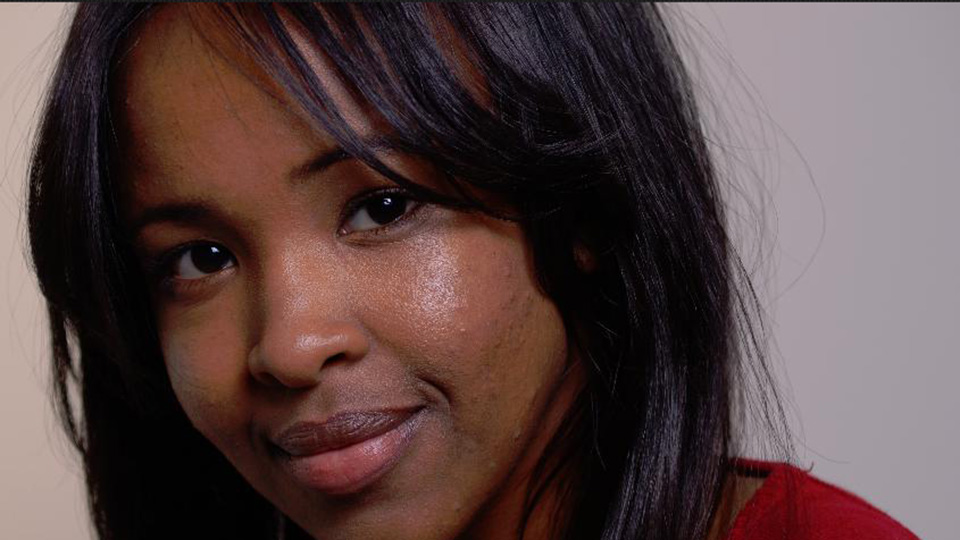
No matter how advanced your skill set, if you shoot portrait, fashion, or beauty photography, your images will require some manner of retouching once the shoot is finished. Even the most beautiful model—with perfect makeup, hair, and lighting—can use at least a tweak or two, especially beneath the unforgiving eye of today’s high-resolution digital cameras. Whether it’s as simple as erasing a wayward blemish, or as complex as smoothing an entire face, re-coloring hair and eyes, and reshaping features, there’s no denying the need for digital manipulation when presenting photos of people at their most attractive.
For photographers looking to streamline the process, whether to meet increasingly short turnaround times or simply reduce wear and tear on overworked eyes and wrists, there are dedicated programs that attempt to make beautifying a subject as quick and easy as possible. Some of these do much more than that, as I discovered after using PortraitPro 12, which has quite a few tricks up its sleeve, including a couple of features all its own.
Compatible with Mac and Windows 32- and 64-bit systems, PortraitPro 12 can be used as a stand-alone or as a plug-in with Adobe Photoshop, Photoshop Elements, Lightroom, or Apple Aperture, depending on how you like to work. Either way, it keeps things simple, and works very quickly (even on my creaky PC).
Getting Started
If you aren’t opening PortraitPro 12 from within another program, the first thing it will do is ask you to select an image—or images, if you have the Studio Max edition, which adds fully automatic batch processing for working quickly with large groups of photos. The less comprehensive Studio edition lacks the fully automated process, but does have the ability to use a batch dialog to expedite working with multiple images. Regardless of the batch processing features you require, both the Studio and Studio Max versions will handle JPEGs, TIFFs up to 48-bit color depth, various raw file formats, and Adobe DNG files.
Once you open a file, the program will try to recognize any faces within the picture and outline the main features to be enhanced. At this point you’re only asked to select the gender and age range.

If, for some reason, the software can’t pick out the face (for instance, the image is too dark or some features aren’t obvious due to shadows or objects), then you’ll have to define the features manually. PortraitPro makes it pretty painless. After you’ve selected the gender, as I have in the left-hand image below, you’ll be asked to click on the corners of the eyes, mouth, and tip of nose:

From there, the software calculates the shape of each feature and surrounds it with a blue outline—which you can fine-tune by grabbing and dragging the control points. A reference image is provided on the right so you know how it should look.

It took me a bit of practice to align the three parts of the eye (pupil, iris, white), but even if you just rough them into position, you can always tweak them later if you’re not happy with the resulting enhancement. After each feature is done, hit the spacebar, until you end up with something like this:

Note that even when PortraitPro successfully recognizes the face and identifies the features for you—which I was pleased to see it did most of the time—you may still want to zoom in afterwards (using the very responsive zoom slider) to make sure each feature is properly outlined. Since those blue markers determine the range of each enhancement, too much misalignment can over- or under-accentuate certain effects.
To Sculpt or Not To Sculpt?
PortraitPro will then analyze the features and apply a default preset for that age and gender (a default you can change), after which it will display Before and After images for you to begin tweaking. You can also select the After view by itself, for a larger image, and toggle between the two versions.

If you’re like me, who prefers a more natural look, you may find the program’s initial adjustments a bit heavy-handed, especially as it not only brightens, sharpens, and enhances each feature but automatically applies face sculpting, changing the shape of the face itself. For me, altering features should be a last resort, done only if something in the angle or lighting of the shot makes the model look strange (I expect a lot of magazine editors will disagree with me here). So right away I deactivated the Face Sculpt Controls, which are one of eight sets of sliders used to enhance the image. Any one of these slider groups can be toggled on and off by clicking the green circle to the right.

I also went ahead and changed the default preset from Female Standard to Female–No Sculpt using the Manage control button, so that my imported images will be spared unwanted morphing in the future.

Presets and Sliders for Every Occasion
Of course, none of the changes PortraitPro makes is permanent or can’t be adjusted with one of its numerous manual sliders or presets. The presets alone give you all sorts of handy one-click options, from changing the basic look (Glamorous, Natural, Young) to altering specific features (for example, Red Lips, Eye Color, Darken Skin, Lighten Hair) to applying lighting effects (Right/Left Shadow, Spotlight, Rembrandt) to affecting the overall image (Sepia, B&W, High Contrast). There are also presets for removing individual enhancements—such as Eye Shaping or Skin Coloring—or, best of all, you can make your own presets based on settings you come up with using the control sliders.
About those sliders: Along with the already mentioned Face Sculpt Controls, there’s Skin Smoothing, Skin Lighting, Eye, Mouth & Nose, Hair, Skin Coloring, and Picture Controls. In addition to a Master Fade slider, each of these contains a group of sub sliders to control every facet of that particular enhancement.

So, if you want to decrease overall skin smoothing but increase the effect around the eyes due to wrinkles or dark circles, you can adjust three different sliders for each eye!

And that’s not even counting the controls dedicated to the eyes themselves, which provide 11 different ways to change their appearance, including brightening the iris, darkening the pupil, or adding a reflection in shots where your model turned just a bit too far away from the key light (hey, sometimes you do what you have to—as long as it looks natural!).

Want to darken the lips or whiten the teeth? There’s a slider for that. Change hair color? Add a tan? Reduce shine on the nose? Add a splash of rouge to the cheeks? There are sliders for that, too.
You can even change the lighting on the face itself—perhaps atoning for a misplaced fill light or that kicker you didn’t have time to set up. Or maybe the image is lacking a touch of drama, and adding a spot effect or a smoky look under the eyes is just what you need. Using the face re-lighting technology, you can move the virtual light around the virtual head and adjust the sliders until you find a look you’re happy with. Be careful about going too extreme, though, as, like airbrushing itself, it can definitely produce unnatural results.

Using the Touch Up Brush
Of course if you do nothing else with PortraitPro, you’ll want to make sure your subject’s skin maintains an even tone and is free of blemishes or other discolorations. Despite the vast assortment of skin-smoothing controls at your disposal, there will always be times when you need to grab a digital brush and start painting locally over the most troublesome spots. That’s where the Touch Up Brush, located at the top of the screen, comes in handy. Similar to the healing brush in other software, it can be adjusted in size and strength and does an excellent job of smoothing away pimples, blotches, stray hairs, and other imperfections.

(Note the very helpful tool tip that appears when you hover your cursor over a feature—great for when you’re still finding your way around the program, and easy to turn off in the settings once you know what’s what.)
Here’s the same part of the image after a few strokes of the Touch Up Brush:

The forehead could use a bit more cleaning up in Photoshop, but the heavy lifting has been done with minimal time and effort; all I have to do now is exit the plug-in screen and back into Photoshop to apply the finishing touches.
Manual Control over Every Feature
What’s cool about PortraitPro is the way its sliders allow full manual control over every aspect of the face, so you’re able to maintain a healthy naturalism even while eliminating potentially distracting flaws. The fact that its face-recognition technology adjusts to different genders and ages is also a real bonus. Here’s the little girl from the top of the page, starting with the original image (which admittedly was under-lit):

The main areas to address are the forehead, with its stray hairs, and the dark circles under the eyes. Below is PortraitPro’s initial correction, including some manual touching up of the forehead, some small slider adjustments around the mouth, and a bit of added exposure:

Much better, but the bags under the eyes could still use a bit of lightening. With a few quick strokes of the Touch Up Brush (using a small size and strength), we reduce them enough so they’re no longer distracting. I also added a bit more exposure via the Tone Curve slider in Picture Controls, and used the Hair Controls to brighten the girl’s hair, the details of which were getting lost due to my low lighting. The final result:

To me that’s a vast improvement, yet the changes are still subtle enough that if you hadn’t seen the original image, you wouldn’t necessarily assume it had been retouched.
Here’s one more example, this time demonstrating a level of skin enhancement that would have been far more time-consuming—and in my case, less effective—if done solely in Photoshop:

From this very pleasing result, a quick jaunt back into Photoshop or Lightroom lets me manage the stray hairs (and anything else not face-related), adjust curves, and deliver a headshot I can be proud of.
Going Where No Photoshop User Has Gone Before
As a dedicated Photoshop user, I’d never really considered using this type of software. But after spending a few days with PortraitPro 12 Studio Max, I have to say I’m genuinely impressed. Not only is the program incredibly smart and intuitive, it turns out to offer a lot more control over the final image than expected—you can make your subject appear as natural (or artificial) as you like. And yes, it’s very easy to use.
If you’ve tried previous versions of the software, this latest iteration offers improved skin and feature enhancements, more accurate face and feature-finding, better color correction, improved face-slimming and sculpting, a 4x bump in processing speed, and 64-bit availability. And then there are the completely new features, which include the already mentioned gender and age detection, batch processing, and face re-lighting, as well as Facebook integration to allow easy sharing of your Before and After pics.
Having shot and edited thousands of portraits, headshots, and fashion photos, I know what it means to stare at the screen until my eyeballs sting and my mouse hand cramps, meticulously removing blemishes, dark circles, and stray hairs while doing everything in my power to give the impression that all I did was put a beautiful person in front of the camera, snap the shutter, and poof!—perfection. Certainly the years have made me quicker and more efficient at the process, but I’ve often wondered if there was an easier and less time-consuming way. With PortraitPro, I think I may have found it.
