
For some time, Capture One has built its reputation on its efficiency and quality. Much like Phase One’s cameras and other hardware, Capture One has the aura of a truly professional tool, with few unnecessary features, but a whole lot of functionality available for nearly all aspects of image editing. Best known for its tethered-shooting feature set, Capture One has also gradually shifted into being an all-inclusive post-production tool for all aspects of image editing.
In December, 2016, Phase One released Capture One Pro 10—an apt name for the tenth version of this software—and, compared to previous releases, this newest edition is mainly focused on refinements to an already proven strong tool set. While most of the changes seem subtle at first, I started to notice the differences between Capture One Pro 10 and previous versions, even 9, in terms of performance speeds and fluency when working with high-resolution files. These arguably subtle changes are certainly welcomed improvements, and do positively affect how you interact with the software in a much more intuitive manner. Phase One claims to have rewritten performance-related code with this version for faster caching of images and quicker transitions when making adjustments—while I’m unsure of a measurable boost in speed, the new Capture One Pro does feel snappier than version 9, and it’s more pleasant to work with files from a Nikon D800, as well as high-resolution scans of film.

Beyond just performance enhancements there are, of course, new features in this version. On paper, the most striking update to the tenth edition is the inclusion of not just one, not just two, but three methods of sharpening: Input, Creative, and Output Sharpening. Rather than viewing these as three different sharpening methods, though, Phase One posits them more as stages or phases (no pun intended, I hope) of sharpening to be used throughout the entire editing process. Beginning with Input Sharpening, this tool is found in the Lens Correction pane, and mainly deals with degraded sharpness due to diffraction (hence the reason this tool is found in the Lens Corrections pane). At the same time you correct for chromatic aberrations, this sharpness tool can be used to help increase the apparent sharpness around edges caused by using a lens at a smaller aperture position—this is different from simply a focus or blur issue, which is why Capture One has created and segregated this tool.

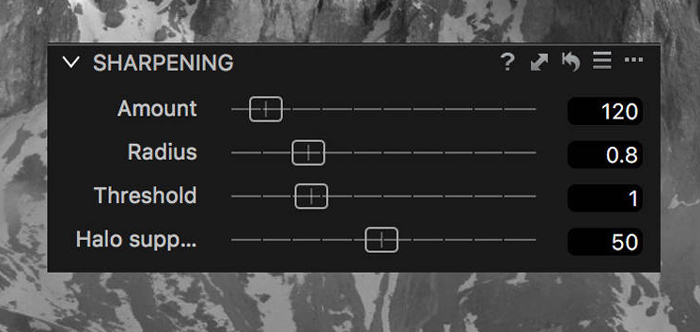
The second type of sharpening is the one most people are familiar with already, and has been re-named Creative Sharpening. This is found in the Details pane, and has the same three sliders that have been around for a while: Amount, Radius, and Threshold. Capture One Pro 10 ups this with a fourth slider—Halo Suppression—to counteract the negative effects sometimes caused by adding a little bit too much sharpening to the image. In the amount of time I spent working with this tool, I didn’t find too much of a need to apply Halo Suppression since I wasn’t adding much sharpening to begin with, but I suppose for instances that call for a noticeable amount of sharpening, this new slider will help to clear up haloing around well-defined edges for a more natural appearance.
The third and final sharpening phase is Output Sharpening, which I found to be the most intriguing of the three sharpening methods because it is basically the master control for all. It is in the Process Recipe pane and has four different selections: No Output Sharpening, Output Sharpening for Screen, Output Sharpening for Print, and Disable All. Disable All is a straightforward choice, and effectively disables both former methods of sharpening when processing your files. No Output Sharpening, somewhat similarly, allows you to control the sharpness of the image fully by just using the Import Sharpening and the Creative Sharpening tools; this is just a spiffed-up way of saying this tool is not being used. Output Sharpening for Screen, conversely, gives you the traditional three sharpening sliders and is used typically when down-sampling original files for posting online. And, as you guessed, Output Sharpening for Print is mainly used for retaining the original resolution when processing a file, and just includes Amount and Threshold sliders, as well as a Distance slider to select the appropriate viewing distance of your eventual print. To confirm the amounts of Output Sharpening for either screen or print, a new eyeglasses icon (Show Recipe Proofing) has been added to the top toolbar for proofing your image prior to export.

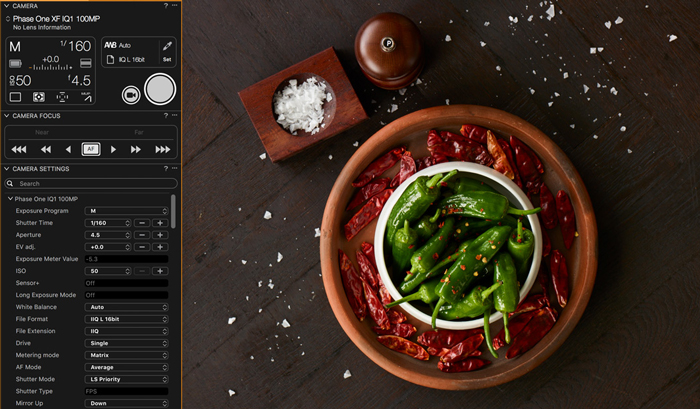
The bulk of the other updates to Capture One Pro 10 lie in some interface tweaks and additions of minor, yet helpful features to expedite the process of working with it. I didn’t get a chance to try shooting tethered with this new version, but I did discover the addition of the Camera Focus pane in the Capture tab, which has been separated from the Live View pane where focus control previously lived. By separating it, it a) makes it a clearer, easier-to-use tool, and b) allows you to adjust focus when shooting without being in live view on the camera; however, this second feature is only supported by Phase One cameras.
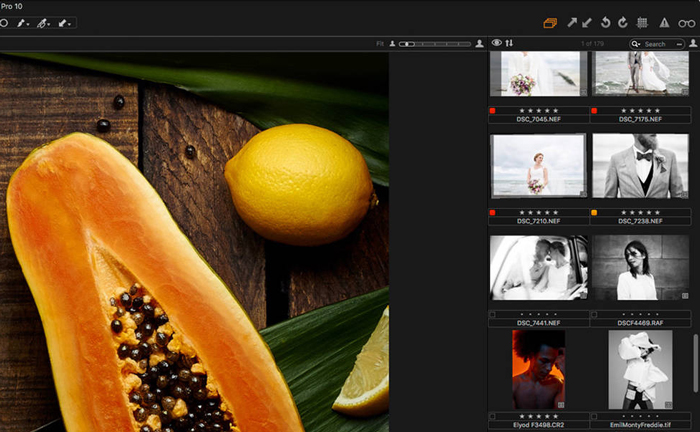
Other changes around the interface include the ability to sort files based on the orientation—horizontal, vertical, or square. One unique caveat with this filtering I noticed, though, is that it seems to require image files to have shooting metadata to be sorted by orientation; my scans from film could not be sorted by orientation despite some images being horizontal and others being vertical. Lastly, the few remaining updates with this new version deal in usability and performance, including enhanced Lens Cast Calibration (LCC) support for compressed raw formats (Canon and Nikon’s small and medium raw files), faster overall generation of new LCC profiles, and masking is available for images created with Fujifilm X-Trans sensors.
Taking all of this into consideration, I think that Capture One Pro 10 is a solid release for the series. It doesn’t have the same impact as when Catalogs were first introduced as an alternative to Sessions, or when updated color adjustment tools were added, but the reformatting of sharpening as a concept into a three-phase tool feels smart. It isn’t going to give you results that were unattainable before Pro 10, but it is going to make it much easier, faster, and more intuitive to achieve varying sharpening levels for various output needs. The other additions to Pro 10, well, they are your standard upgrades for a new version of software, and the boost in performance speeds is an especially welcomed addition. Beyond the new features, Capture One Pro 10 remains a tool I feel very comfortable working with, and it serves its purpose as the first place to go when shooting tethered or processing raw files. I still leave the heavy lifting for other applications, but it is great to know that as Capture One continues to evolve, it is incorporating a broader and broader feature set to encompass all aspects of a post-production workflow, from file management and sorting to exporting print-ready files.
