
Depth of field (DOF) is defined as the area in a projected image, forward and aft of the focal plane, which also appears to be in focus in the image. When you pass light through a lens and focus that light to form an image on a piece of film, digital sensor, projection screen, etc., the area of the image that is in true focus is razor thin—the focal plane. Everything else is out of focus, to some degree. However, because of the subtlety of the out-of focus regions, we do not notice the softness of the image until, as objects are located farther away from that plane of focus, the blur reaches a certain level; our eyes, and cameras, see a region of depth in an image where everything appears to be in focus.
Let’s set up a visual aid to help you “see” the phenomenon. Instead of visualizing arbitrary light rays being reflected from a subject, for the purposes of this article, we can imagine we are taking photographs of a single tiny point of light. If that glowing point of light is in focus, it looks like the single point of light that it is. If it is out of focus, it looks like a larger, blurrier point of light. Right?

If you review my article about focus, you will see simplified diagrams showing rays of light reflecting from a subject, passing through a lens with a moving focus element, and then being focused, ideally, onto the sensor/film or image plane. The rays of light that converge before or after that image plane, when the focus lens is moved toward or away from the subject, are rendered out of focus at the plane. Now, let us imagine fixing the focus lens element at a constant distance from the subject. Assuming the subject is three-dimensional, only those light rays that are at the focus distance are converging correctly onto the image plane. Any light rays reflecting from the subject at different distances from the lens are going to either converge before or after the image plane. This creates a blurry spot at the image plane. However, many of those convergences are happening just prior to or just after the plane; close enough that the blurry spots are tiny and we do not notice that those reflected areas of the subject or scene are not in true focus.

Now, here is the cool part: there are physical variables in photography that allow us to adjust the depth of the region of what looks to be sharp before and after the plane of focus—the DOF.
Factors Affecting DOF
The depth of the DOF region is described in several ways. A DOF that does not encompass a great distance is called shallow, small, narrow, or short. A DOF that covers a great distance is known as deep, large, wide, or long. These terms are synonymous and can be used interchangeably. No term is more correct than another, but I have found that, for simplicity, describing DOF as “long” or "shallow" works the best and helps to reduce misunderstanding.
There are four factors that affect, or control, the DOF in an image:
1. Circle of confusion (COC)
2. Aperture of the lens
3. Lens focal length
4. Focus distance (distance between lens and subject)
DOF is not specific to a certain camera or lens. It is a combination of these four things that creates the DOF we get to observe in a projected image. The first factor is somewhat confusing and intricate. The final three factors are easily controlled by the photographer.
If you feel a wave of confusion bearing down on you and you do not want to reference diagrams, talk about blurry spots, or look at formulas, the following is for you:
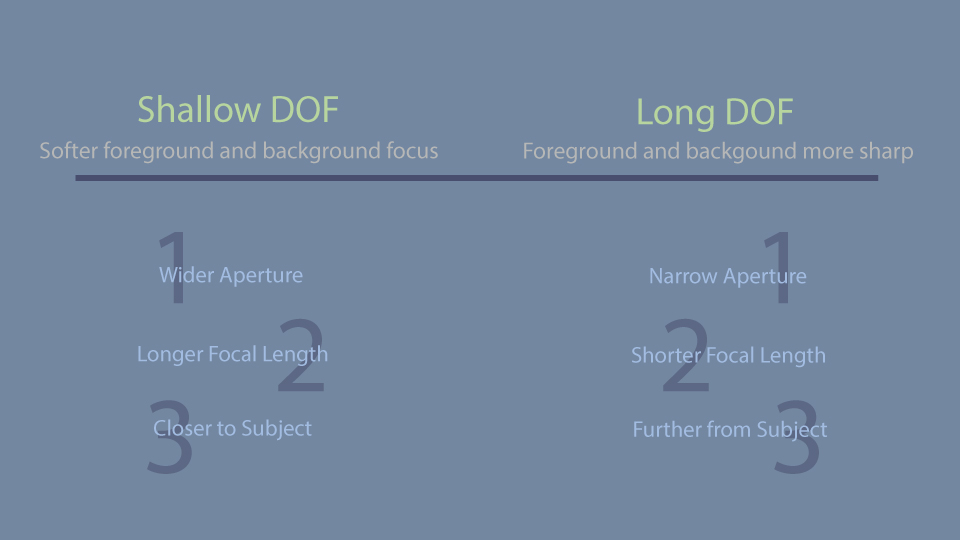
If you want to take an image with a softer focused background, a shallower DOF, you may use a larger aperture, a longer focal length lens, or get closer to your subject with a given lens. To get an image where the background appears more in focus, a longer DOF, you should narrow your lens’s aperture, use a shorter focal length lens, or get further away from your subject.
If your curiosity is heightened and you want to know more about how and why this happens, please keep reading! Then, if you want to know the math behind it, we have you covered in Part II.
Circle of Confusion, Simplified
Confusingly known as the disk of confusion, blur circle, blur spot, and circle of indistinctness, the circle of confusion (COC) is the most complex and difficult DOF concept to grasp.
 at the image plane.")
The COC is defined as the size of the largest blur spot that still appears as a single point (in focus) in an image. What COC brings to the DOF equation is a standard criterion for sharpness. You may have seen other definitions of DOF that refer to the term: “acceptable sharpness” or “acceptable focus.” By itself, “acceptable” is a subjective term. What might be acceptably sharp or in focus to one viewer might be horribly blurry to another. So, for optics and camera engineers, we need to make this a definitive measurement and not subjective. The term “acceptable” will reappear in this article, but know that, when calculating DOF, “acceptable” is a mathematically defined quantity when discussing sharpness or focus.
COC is a function of:
1. Viewing distance
2. Enlargement
3. Visual acuity

Viewing distance: Let’s get back to that point of light in an image. If you put your nose to the computer screen, or up to the print or poster, that point of light might look like a blurry spot at very close range. However, if you stand across the room and look at that same spot, it will now look like a single point.
If your eye is closer to the reproduced image, the DOF is shallower. Points of light must be points to not look blurry. If you are farther from the image, the DOF is longer. Blurry points might look not-so-blurry from a distance.

Enlargement: The larger the image is reproduced, the shallower the DOF. The smaller the reproduction, the longer the DOF. This factor is similar to the viewing distance described above. Reproduce a blurry spot on a giant highway billboard and it’s a huge, blurry spot. Reproduce it on a tiny wallet-sized print and it might look like a single point of light.

Visual acuity: We apologize to those with less-than-perfect eyesight. If that point of light looks blurry to you because your eyes are not focusing correctly, your DOF is longer than those who can see the point of light more clearly. The better your vision, the shallower the DOF.
Now that we have COC out of the way, the DOF discussion gets much easier to understand moving forward. We are also about to discuss the elements of DOF that we can control directly with our camera and lens.
Aperture
Aperture, the relative size of the opening of the lens, not only controls how much light enters a lens, it has an effect on DOF.

The larger the aperture, the shallower the DOF. The smaller the aperture, the longer the DOF.
Light entering a lens with a diaphragm that has been opened to its maximum aperture will have to be bent more to meet at a single point at the sensor. Many light rays are passing through the aperture, far from the optical axis of the lens. Because they are bent more, they intersect the image plane at a greater angle than light passing nearer the optical axis. When the light rays converge before or after the image plane—out of focus—the greater angle causes a larger blurry spot to be produced at the image plane and, therefore, produces shallower DOF.

Light passing through a narrow opening on the lens, a smaller aperture, is passing through the lens much closer to the optical axis and is not refracted as much as light entering at the extreme edges of the lens. This reduction in refraction means that the defocused light rays are closer together when they intersect before or after the image plane—forming a smaller blurry spot at the image plane. Even though the light rays are intersecting before or after the image plane, the smaller angle creates a smaller blurry spot and this gives you a longer DOF.
So, to give your photographs longer depth of field, dial in a smaller aperture (larger F-stop number). If you want shallow depth of field, open the aperture (smaller F-stop number).
Focal Length
The focal length of the lens, the distance from the rear nodal point of the lens to the image plane when the lens is focused at infinity, has an effect on both your field of view and your DOF.

The shorter the lens focal length, the longer the DOF. The longer the lens focal length, the shallower the DOF.
With aperture, we noted that the more refracting of light rays meant a larger blurry spot at the image plane and, therefore a shallower DOF. Here, we have the greater refraction due to the focal length, but, because the lens is a different physical size, we are also changing the distance at which those points are reproduced before and after the focal plane. This change of distance is having an effect on DOF.
Why is that? A shorter focal length lens has to bend the light entering the lens at a sharper angle to meet the image plane, because the lens and image plane are closer together. Because of the greater angle of refraction, the out of focus intersections happen closer to the image plane. This shorter distance causes a smaller blurry spot to be created, resulting in longer DOF.

The farther you move the lens from the image plane—a longer focal length—the less the light needs to bend to intersect at the image plane. This means the out-of-focus intersections will happen at a greater distance from the image plane, meaning a larger blurry spot, thereby causing a shallow DOF.
If you want comparatively shallower DOF, use a lens with a longer focal length. A wider-angle lens will give you longer DOF.
Focus Distance or Subject-to-Lens Distance
The true variable for DOF equations is: focus distance, assuming you have focused on a finite subject. This is the distance from the lens where the focal plane exists. Older lenses had markings on the barrel that told you exactly how far the lens was focused, but many modern lenses have eliminated those markings.

Having the focal plane at a short distance from the image plane renders shallow DOF. Conversely, the farther the image plane is from the focal plane, the longer the DOF.
This is most easily visualized when you think about some photographs you have likely seen. A close-up portrait features a background that is not in focus, while a landscape photograph taken across an expansive view will show the foreground river and trees to be in focus, as well as the mountains dozens of miles beyond it.
At a greater distance from the subject, light rays will have a narrowed path through the lens and, when the out-of-focus rays intersect before or after the image plane, they will produce a smaller blurry spot and create longer DOF.

Conversely, place the camera close to your subject and the light rays must be bent more to intersect at or near the image plane. Again, just as with focal length, the change of distance produces a larger blurry circle and, therefore shallower DOF.
If you want to have a shallow DOF effect on your image, get closer to your subject. Conversely, move farther away from your subject if you want longer DOF where more of the background will appear in focus.
Seeing DOF While You Photograph
Let’s finish with: How do I “see” DOF?
Way, way back, when you connected a lens to a camera, the image you saw on the ground glass or viewfinder showed you the light that was making its way through the camera through whatever aperture opening you had dialed in, or at which the lens was fixed. Auto-diaphragm changed this on SLR and other types of cameras. Auto-diaphragm means that when you attached a lens, the camera automatically opened the aperture on the lens to its maximum setting. Why do we want this? If the lens aperture is open fully, you will get the brightest possible image in the viewfinder from which to compose your image.
Without auto-diaphragm, what you saw on the ground glass or through the viewfinder showed your depth of field (and sometimes a very dark image). The invention of the “depth of field preview” button allowed photographers with SLR cameras to depress a button and close down the diaphragm to whatever F-stop they had selected. The image would get darker (if you chose an aperture smaller than maximum) and then you could pre-visualize the depth of field for that scene. Release the button and the auto-diaphragm feature would open the lens to its maximum aperture again.
Today, with mirrorless interchangeable-lens cameras and point-and-shoot digital cameras, as well as DSLR cameras with live view, the image you see on your LCD monitor or in the electronic viewfinder will show you the live DOF without having to press a dedicated DOF preview button.
Part I Conclusion
The bottom line is that, if you know that you can change your DOF by changing aperture, changing your distance from the subject (or focus distance), or by changing the focal length of your lens, and you know how those three things affect your DOF, then you are all set and you can go out and start manipulating DOF while you take photos!
Adjusting your DOF changes the way your image looks. Shallow DOF is sometimes used to enhance portraits or close-up macro images, aesthetically. Long DOF is used often by landscape photographers to make sure that both the foreground and the background appear to be in focus.
One of the most common questions asked at the photo counter at B&H is, “How can I take portraits with a blurry background?” Utilizing your knowledge of DOF to open up your aperture and close the distance between you and your subject will help you achieve this.
The possibilities of creative DOF are endless, and it all comes down to how you want your image to look, and what DOF your lens is capable of producing on your camera.
If you care to dive into the proverbial weeds of DOF, click on Part II to see how mathematics is at the heart of the way DOF is calculated. If you don't give a hoot about the math, and are more into the mythology, proceed directly to Part III.
There are a great many articles on DOF online. I sometimes find mistakes in the articles, or conflicting information. What you have read above has been carefully researched and is the best information I feel that I can present. Thanks for reading!
