
As photographers, we are always looking for ways to capture beautiful photos that will stand out from the mundane. Sometimes, if we visit a popular location, capturing a scene in a unique and interesting way that no one might have already seen a million times in their social feeds can be challenging. I’ll share my Top 7 Compositional Tips with you, which will, no doubt, take your photographs to new vistas and will help you create more striking images that will get your work noticed.
1. Leading Lines
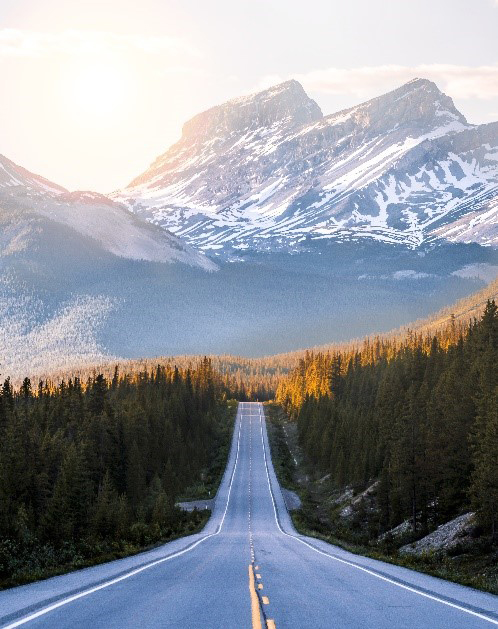
These are lines that guide your eyes to the main subject in your photo. These lines can be implied lines, such as paths, fences, bridges, rocks, patterns, etc., or they can be vertical, diagonal, or curvilinear, as long as the goal is the same—leading the eye to the subject.

2. Foreground
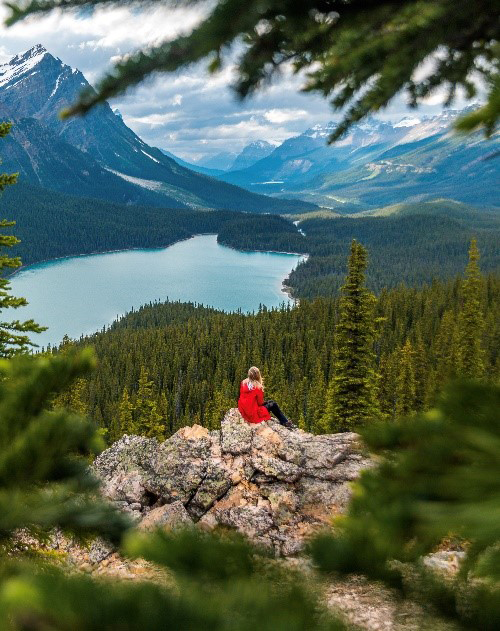
A foreground will create depth in your photography, making it look three-dimensional and inviting the viewer to feel as if they are in the photo. Capturing a foreground is best done with a wide-angle lens, to create an imposing stage that can compete with the background elements. This is particularly effective in landscape photography, and it will draw the viewer directly into the scene, allowing them to experience it as you did. Make sure the placement of your foreground is directly linked to a relevant and interesting background.
3. Framing
Another technique that will draw attention to your subject is to frame it—this involves placing elements in front of your subject, such as leaves, windows, arches, or anything else that will frame your subject and lead the eye to it. This also gives the viewer a “frame” of reference regarding where the photo was taken.

4. Subjects for Scale
Many landscape photographers prefer excluding people from their landscapes. However, sometimes placing a human subject can make the mountains/oceans/valley appear bigger and more vast. This can really add drama and appeal to your scene. If there is nobody around, consider placing yourself in the frame and using a self-timer to take the shot.
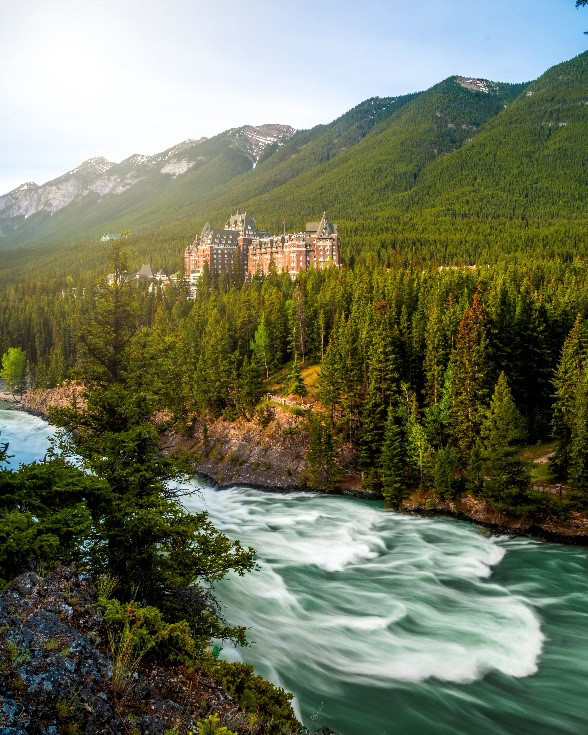
5. Long Exposure
This consists of creating texture by having static elements in your photograph paired with moving elements. The contrast between soft and hard visuals also adds an aspect of drama to your photo. Long exposures will keep your shutter open to capture the flow of water, trailing of the sky, vehicle light trails, or people. If you’re making long exposures, your essential gear will be a tripod and ND filters to decrease the amount of light striking your film or sensor, allowing you to keep your shutter open for longer periods of time.
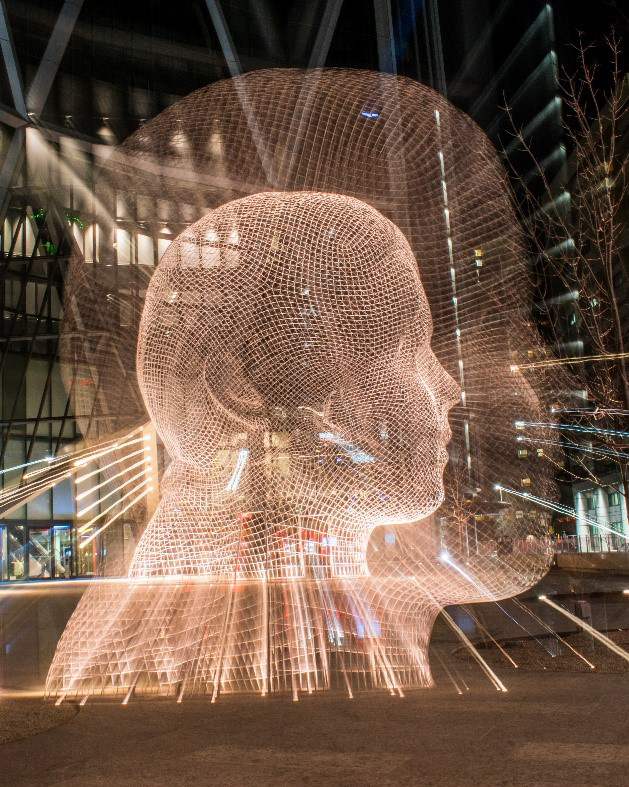
6. Zooming During Long Exposure
This involves turning the zoom ring on your lens during a long-exposure shot. This is best done at night, when you can create the special effect of lights “zooming” out of the photograph. This is a very creative and underused technique that requires trial and error to achieve the desired outcome. The more you twist that zoom ring, the more lights will come out. Subtle twists will still provide you with a relatively clear image of the light source.

7. Sunrise and Sunset
Shooting at sunrise will almost always give you a photo that very few other people have—not many are willing to wake up that early to drive somewhere for photography. It requires a great deal of will power and discipline. I shoot at sunrise if I am familiar with the area and know exactly where to set up. Arrive 20 minutes before sunrise to scout your location and do test shots. Trust me, the last thing you want to do is get flustered and waste time trying to set yourself up. You have about a 30-minute window before the sun rises completely.
Sunset is my personal favorite time to shoot, for two main reasons: 1) You can get extremely accurate weather forecasts for that area. You’ll know if it’s going to be rainy, sunny, cloudy, windy, etc. with a narrower margin of error. 2) Sunset provides amazingly rich colors. It is a transition of yellow/orange/red and blue as night descends. The colors are particularly richer because of the pollution in the air. If it’s a cloudy day, I recommend using an ND filter and doing a 3-4 minute long exposure for a very dramatic photo that captures movement.
Conclusion
I will leave you with two of my favorite apps to check for wind speeds and cloud coverage.
Windy
This app allows you to track wind speeds. If you are photographing reflections, this can be particularly useful. If the wind is 1-2 km/hour and the gusts are less than 10 km, it is a guarantee that will get mirror reflections.
Astrospheric
This will allow you to track cloud coverage and visibility if you are chasing a colorful sunrise/sunset. If the area of interest has cloud coverage between 40-70%, you are likely to see a very dramatic and colorful sky.
In the end, the best advice I can give you is to take your time. When you arrive at a specific location, change your lenses, alternate between standing or crouching for your photos, try long exposures, change your aperture, and take as many photos as possible. You might walk away with 200 different images from one location and present a perspective that nobody else has seen before. I always regret not giving it 100% and getting lazy. While you are there, make the best of it.
Planning on incorporating these tips into your photography? Let us know in the Comments section, below!
Robin Laurenson is a landscape and urban photographer based in Calgary, Alberta. She has worked with local and national tourism boards who have used her images to promote tourism in Alberta and Canada. If you have not visited the Canadian Rockies, you can get inspired by viewing her work on Instagram @motherpixels.
