
There is no doubt that digital photography is here to stay, and film has certainly seen better days, in terms of availability and affordability. However, what if you’re a digital photographer who simply wants to shoot a roll of film every once in a while, for fun? Film photography has a distinct look that, even with the latest and greatest 50MP cameras, cannot be duplicated by digital imaging. It’s subjective to say whether one look is better or worse, but there is no denying that there is a unique quality to film. Back in the halcyon days of film photography, you could easily drop your rolls off at the local lab or drugstore, come back an hour or day later, and have nice 4 x 6" prints along with a sleeve of negatives. Nowadays, this simple convenience is becoming harder and harder to acquire, and even if you’re able to find a professional lab to develop your film, you usually won’t want to pay the premium for all of those prints to be made.
This is where being able to scan your negatives makes practical sense. Incorporating a common process that photo labs have been using for years, as well as nearly any kind of printing production process, a scanner acts much like your regular camera; its job is to record an image. The difference is that the scanner is a very specific image-making device, designed only for reproduction.
Scanning is a common process that most film shooters in the last 20 or so years have come to incorporate into their practice in some manner, whether it is for scanning film or your prints to share online or make digital prints. While a scanner is certainly a sound investment for those who shoot and need to scan large amounts of film, sometimes it is not the most practical investment. If you’re the type of photographer who will only shoot a handful of rolls a year, or if you’re the type of photographer who enjoys using medium and large format films, finding a suitable scanner can become a greater expense.
Luckily for most photographers, a truly sound tool for digitizing your film is something you likely already have: a digital camera. As previously mentioned, a scanner functions much like a regular picture-taking camera, and likewise a camera can be used to perform similar functions as a scanner. Chief among these is the ability to rephotograph or duplicate your film for digital use. And with digital cameras’ resolutions on the rise, along with the wider dynamic range and raw recording capabilities of modern sensors, you now have the ability to produce high-quality digital files of your film for printing and simple online sharing.
The Process and the Tools
The process can be handled in a number of ways, either by photographing your film on top of a light table or lightbox or through the use of a dedicated tool for rephotographing film, such as the Nikon ES-2 Film Digitizing Adapter Set. In either case, the goal is simply to evenly backlight your film and then photograph it as clearly as possible.
In addition to the lightbox, you’ll need a DSLR or mirrorless camera, and then you’ll also need a macro lens. Ideally it will be a true macro lens with a 1:1 or greater maximum magnification, but you can get away with a 1:2 magnification lens with some extra work. Alternatively, you can also use extension tubes, reversing rings, or other accessories to help increase magnification of a lens, but nothing beats the simplicity and accuracy of a true macro lens, especially for this purpose, where you want your results to be as clean and clear as possible, with no distortion or vignetting.
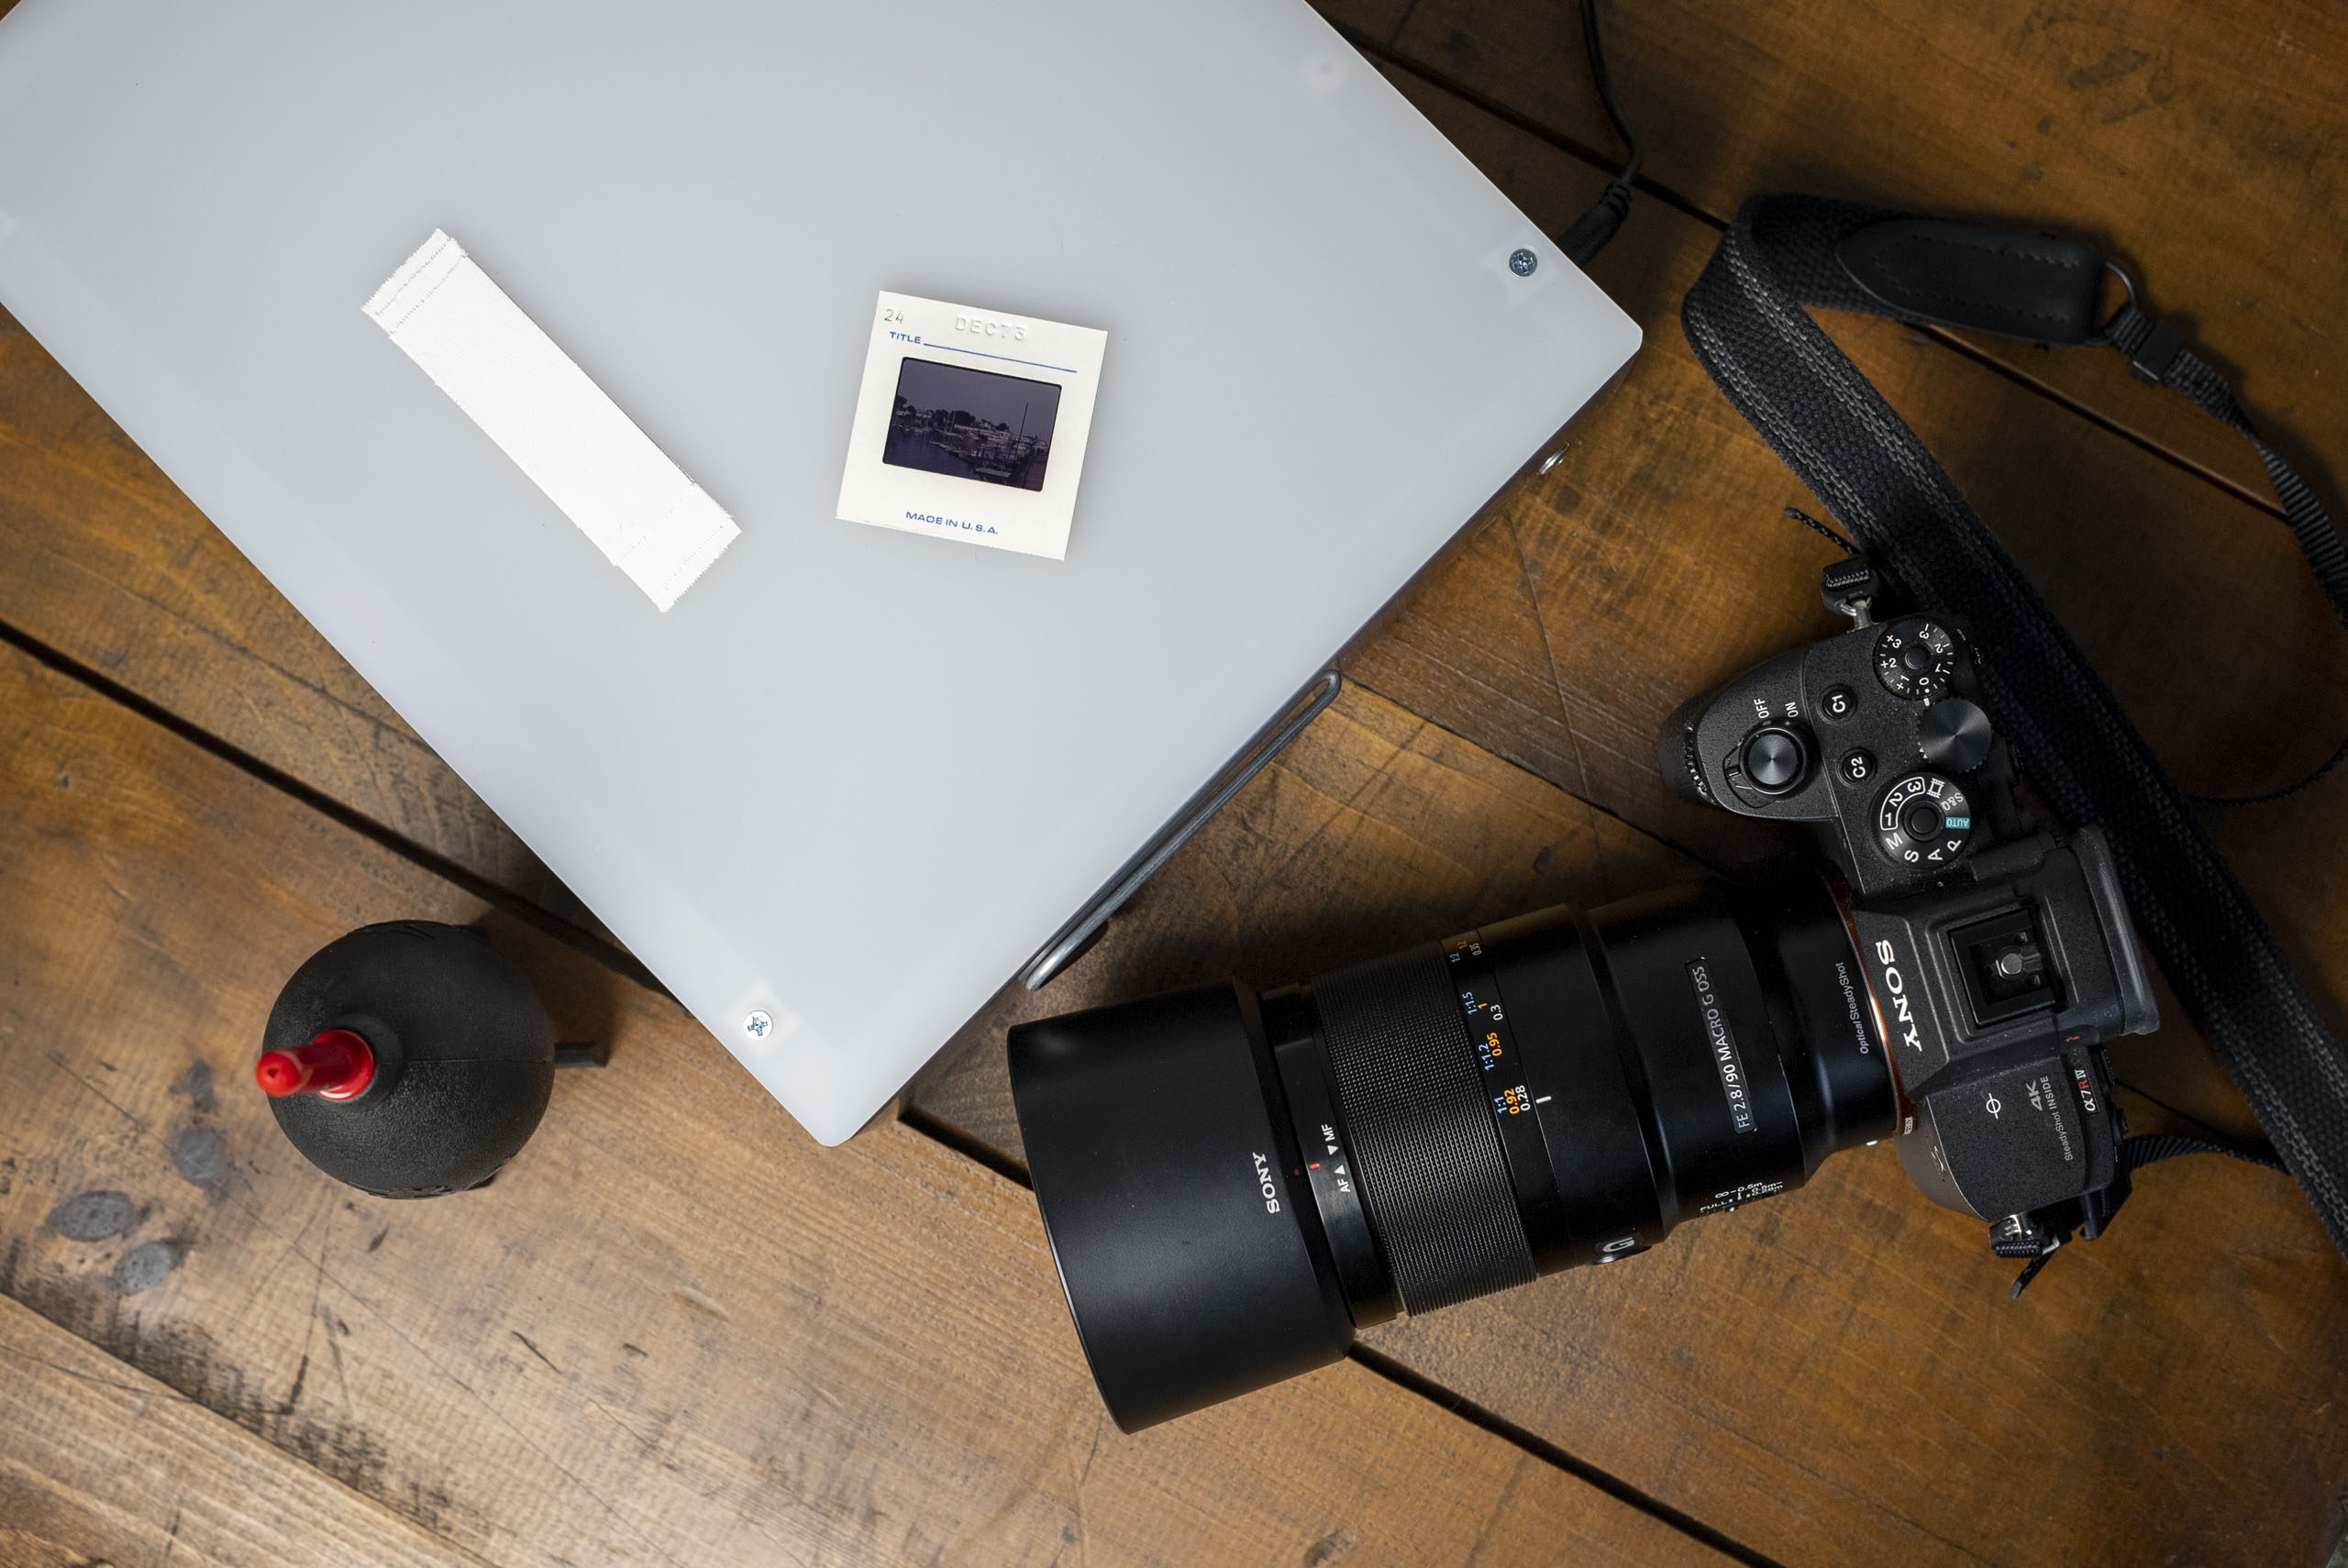
The final essential item you’ll need specifically for this process is a film holder of some kind—something to keep your film still, in place, and taut. Holders also help with registration and help to expedite the process of photographing multiple frames of film, assuming you can keep the holder in the same place throughout the process. A film holder can take the form of a simple cardboard sheet with a window cut out to fit your film format, or you can find dedicated metal holders, such as those from Negative Supply, for more precise and repeatable results.


Now, for the Process
As stated before, the basic premise is to photograph your film against a plain, backlit surface. Ideally, you’ll have a copy stand to hold your camera steady, but a tripod will also work in a pinch.
Load your film into your film holder, whether that be a makeshift cardboard window or a sophisticated purpose-made metal holder; the whole point is to have something that keeps the film taut, registered, and in place.
Blow the dust off your film prior to photographing it. I recommend using a bulb-type air blower for this process as canned or pressurized air might be too powerful in this instance (depending on your film holder). Getting rid of dust prior to shooting will save you lots of time during the editing stages.

Now, with the film dusted, in the holder, and in front of the lightbox, it’s time to get your camera set up. Working in live view (using your camera’s rear screen) is preferred to using a viewfinder, in my opinion. Even better, shooting tethered to a computer monitor will make framing and critical focus much easier.
Compose your shot so the individual frame of film is filling as much of your sensor area as possible, depending on the aspect ratio of your digital camera, the aspect ratio of the film, and how closely you can focus. Getting a tight composition is another one of the helpful steps that saves time during post-production and also helps to eke out the greatest resolution possible. It’s also helpful to set your lens to manual focus for this process so you can prevent any accidental focus shifts during the shooting process.
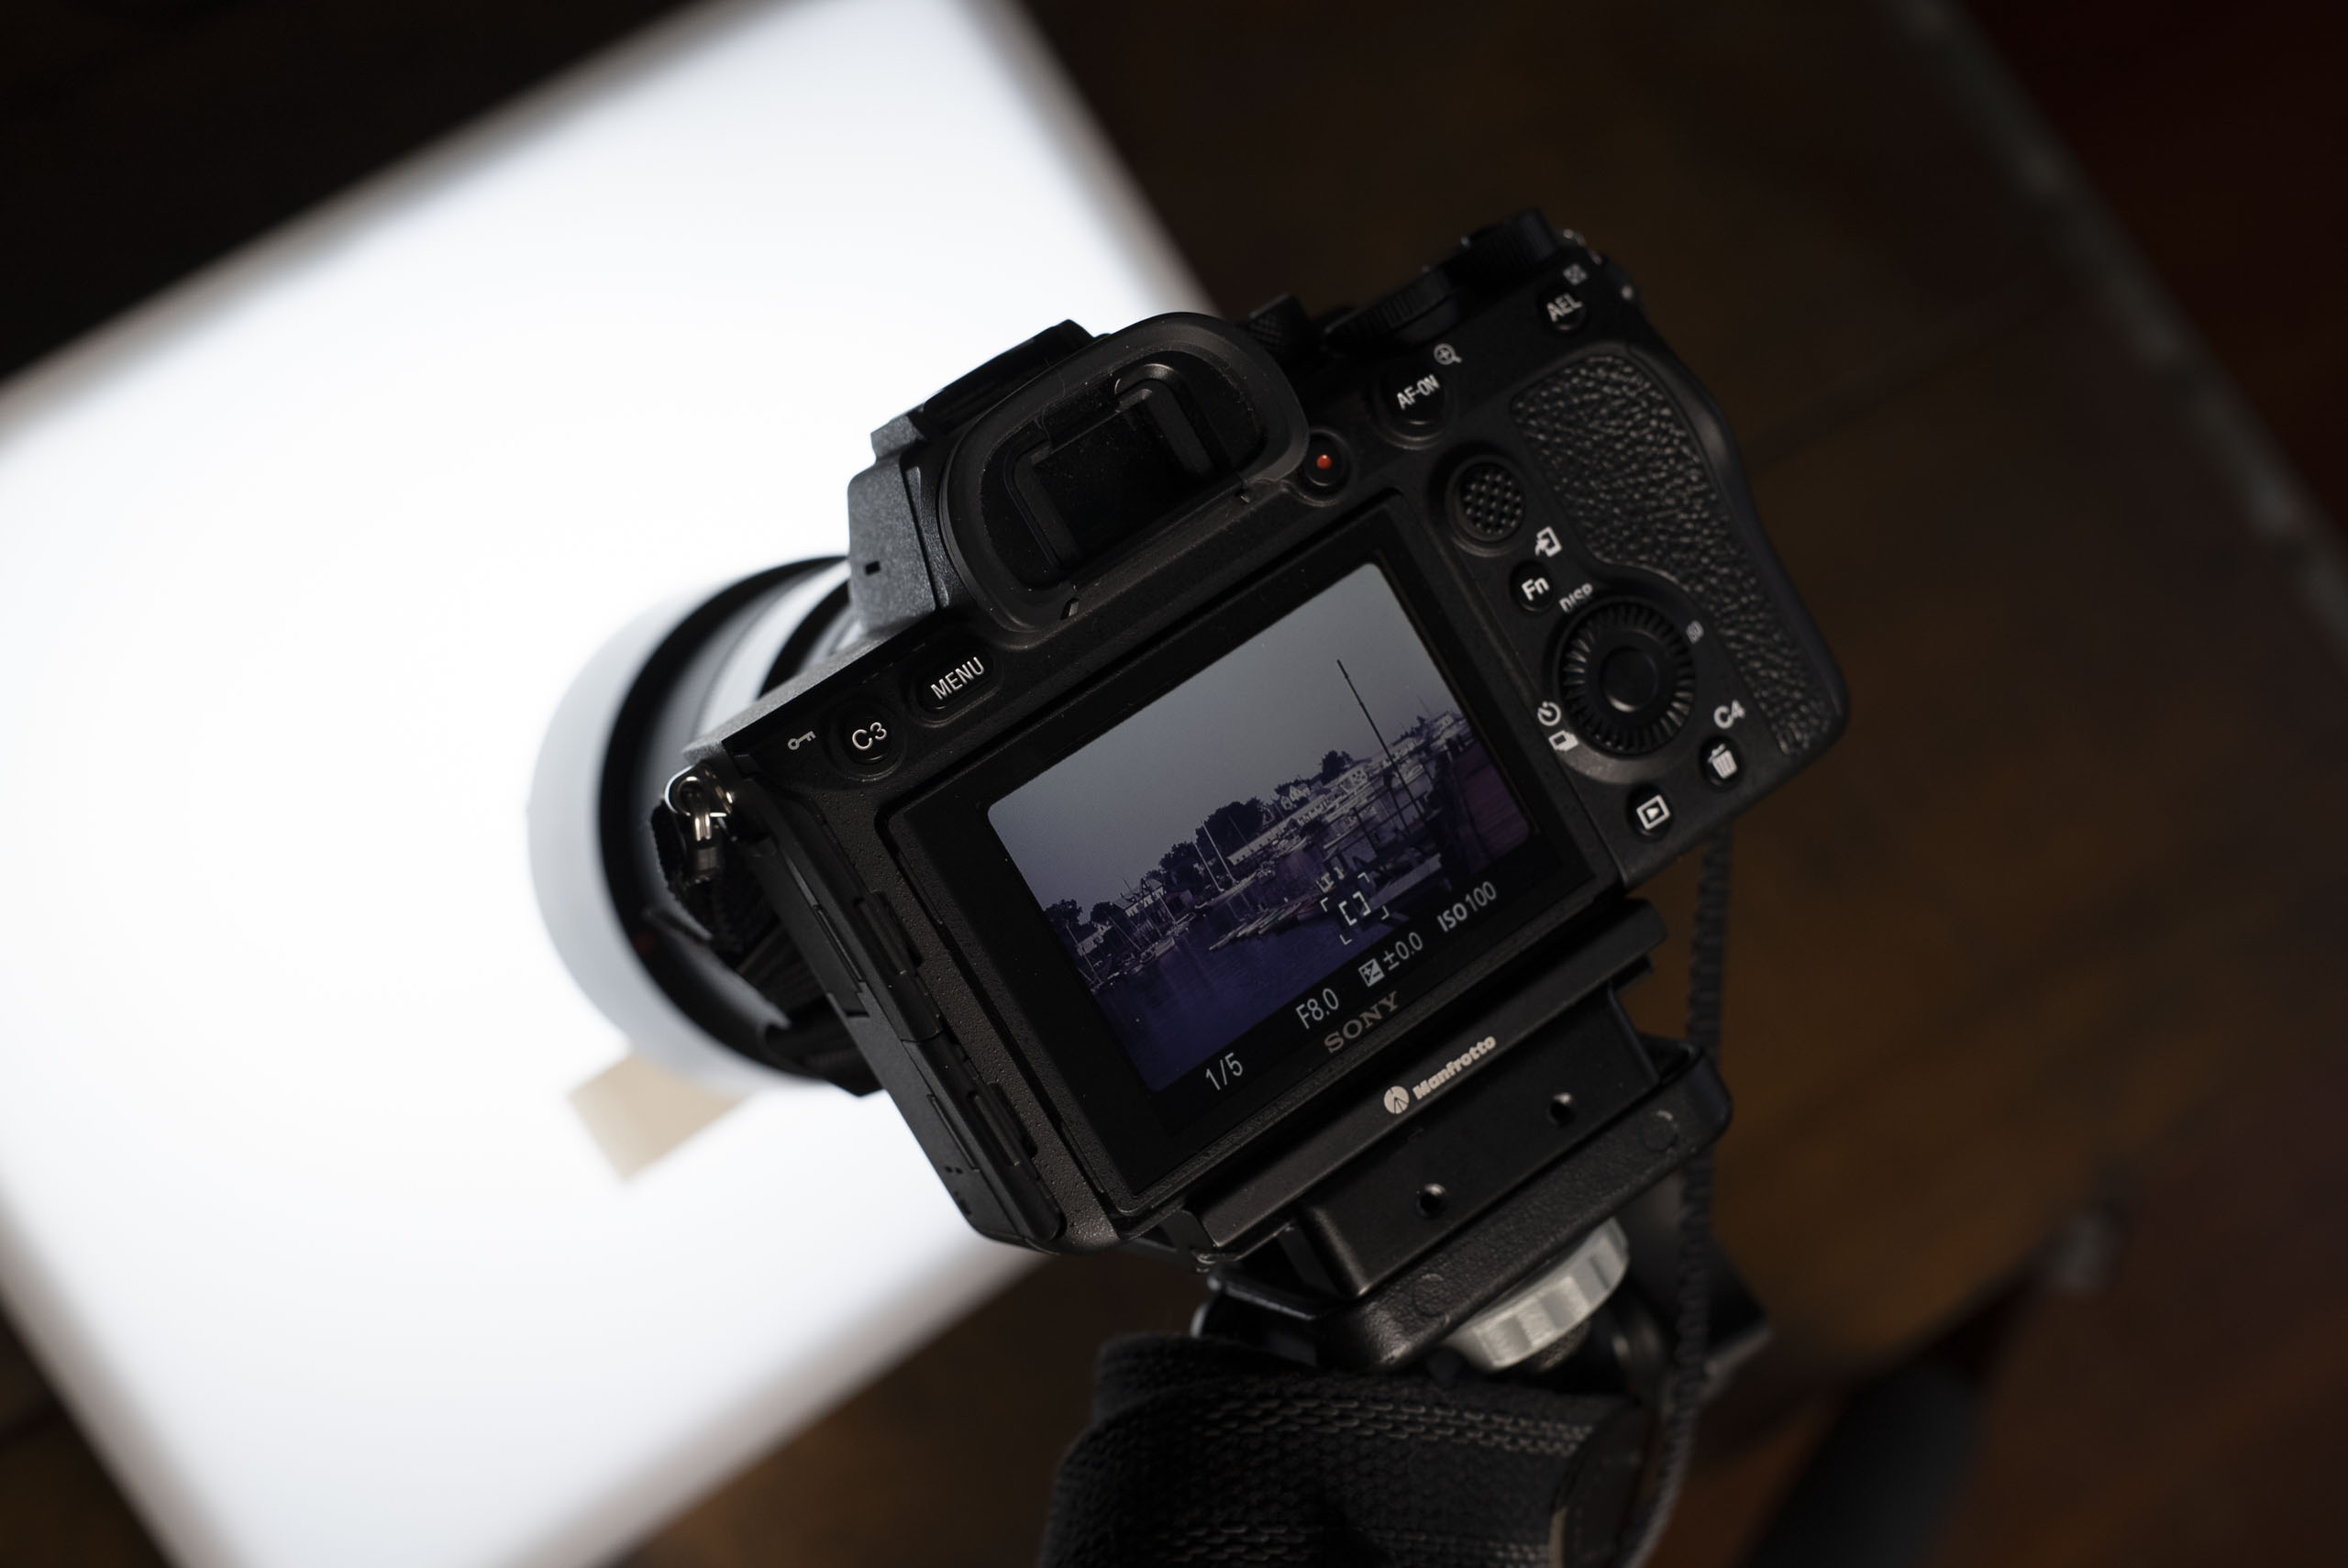
In terms of exposure settings, you’ll want to use the most optimum settings possible: highest resolution setting, best quality, show in raw if possible, and using a middle aperture setting or the “sweet spot” of your lens. Also, when making the exposure, I like to bracket my shots by a stop over and under (just to be safe) and also make sure to use a remote shutter release or the camera’s self-timer function to avoid any unwanted camera shake.
And finally, shoot!
Once you get a couple down, you’ll start to develop a rhythm and this whole process will go by quickly. Just do everything in your power to keep your files and film strips organized and clean; you’ll thank yourself later. And one other tip: This process can be used to make contact sheets of an entire roll of film that has been cut into strips and sleeved, just like you’d do in the darkroom. This is an efficient way to get a better look at numerous shots and narrow down which specific images you want to re-photograph rather than having to perform this routine for every frame in a roll.
Post-Production
Equally as important as the actual photographing of your film, the post-production and editing stages are key to getting realistic and quality results from your efforts. If you’re photographing positive (slide) film, then the editing stages are simply doing some color tweaks and removing dust from the frame. If you’re working with negatives, then things can be a bit more complex, especially if it’s color negative film. Below, I’ll walk through a couple of examples of how I converted both black-and-white and color negatives to positive image files.
When converting the negatives to positives, I chose to work in Adobe Camera Raw with my raw files, prior to doing any fine-tuning in Adobe Photoshop. Here are the basic steps I used to convert the black-and-white negative to a positive grayscale image.

1. Since color casts aren’t going to affect black-and-white imagery as much as color images during post-production, I moved straight to the curves in Camera Raw and inverted the curve.

2. I had a pretty flat image, mainly due to the overcast lighting conditions and the development process I use for my film. Much like when recording video or even shooting stills, a flat image is much easier to work with than an overly contrasty one. Here I just bumped the contrast some and tinkered with the other exposure controls before opening in Photoshop.

3. I still have an RGB image when I start working in Photoshop, so I use the black-and-white conversion tool to bring a bit more contrast out of any remaining color in the file prior to converting the image to a grayscale working space.

4. I use a curves adjustment layer to fine-tune the contrast and brightness of the image.


Overall, this is a pretty simple process with nothing too special going on. The tonality is really nice, and the photograph of the negative has contained the highlights and brought out the shadow details well.
Moving on to a color negative, the process is going to be a bit trickier due to the orange mask of the film. Scanners are tuned to deal with this mask already, so the effect of it is pretty moot when using a film or flatbed scanner. When photographing the negative, however, it can be more of a concern.

1. The most effective way I have found to negate the orange mask is was to treat it as a strong color cast, so here I pull the color temperature slider down to 2000K to compensate for the overwhelming orange tone.

2. I then move over to the curves tab and invert the curve to give me some semblance of a positive image.

3. My first attempt to bring a bit of contrast to the image here—notice how much more dramatic the shape of the curve is compared to the black-and-white one.

4. Moving back to the exposure tools, I add a bit more contrast and tinker with the exposure, highlights, shadows, blacks, and whites sliders. Note that since you are now effectively working with a negative image, as in how Camera Raw sees it, the exposure controls are in reverse (i.e., moving the exposure slider to the left makes the image brighter).

5. Finally, I open the image in Photoshop, flip the image horizontally since I shot it backward, use a curves adjustment layer to fine-tune my contrast, and move on to working in the individual color channels to keep working at getting a neutral color balance.


If comparing color balance between three capture methods—photographing the film, scanning on a flatbed, and using a dedicated film scanner—it is noticeable how each process negotiates the orange mask of the color negative film in a different manner and requires a decent amount of fine-tuning to balance the highlights, mid-tones, and shadows across the spectrum. The variance in color casts is mainly present due to the comparative nature of seeing three different versions next to one another, but it should be pointed out that none of the images are unusable or show gross, uncorrectable false colors or irrecoverable details.


Pros and Cons
Photographing your film is a great way to digitize your filmic images from yesteryear or even from yesterday. It’s a sound process that, with a bit of attention to detail, yields some very usable results. I’d argue it’s not quite as good as using a dedicated film scanner, but it is a process that you can perform without needing to buy specialized machinery.


Pros:
· Digitizing your film is accessible. Especially if you already have a macro lens and a tripod, the only new pieces of equipment you’ll need are a lightbox and a film holder. This can save you money and space, especially if you’ll only seldom be digitizing film.
· Gives results that easily rival many low- to mid-range film scanners. Considering how incredible many of the latest digital cameras and lenses are, it’s no surprise that they will yield image quality that surpasses many of the more affordable scanners out there.
· Can accommodate different film formats and types. This is a big one; many film scanners, even high-end ones, only support 35mm strips of film. This means if you have an archive of medium format or large format shots, then you’re out of luck. By photographing film, though, you’re only limited by how large your lightbox is.
Cons:
· Difficult to get consistent results. One of the biggest benefits of a dedicated film scanner is how easy and efficient it is to get repeatable results.
· Time-consuming. Again, compared to a dedicated scanner, it can be a more drawn-out process to manually photograph your film one frame at a time compared to a film scanner with built-in motors and batch scanning features. If you’re only scanning a few frames, it’s no big deal, but if you’re digitizing hundred or thousands of frames, a scanner will make the process much easier.
· You get out of it what you put into it. Not necessarily a con, per se, but a harsh reality is that you need to be very precise throughout this process to get the best results. You need to ensure the film is kept taut, so sharpness isn’t affected, make sure your exposure is spot on, and manage to get a good digital conversion. When scanning, many of these concerns are automatically taken care of.


Overall, I admit that I’ve been surprised many times by how well the process of “scanning without a scanner” really works. I’m still an avid film photographer and rely on my film scanner as an integral part of my process nowadays, but I’m grateful to know that digital cameras can also be a useful complement to my filmic process. Digitized images have the potential to show tremendous depth and color and can even be pushed further if you were to make multiple exposures of the same frame and stitch and composite them together. It’s exciting that a digital camera can be the new unlikely addition to your bag of film tricks.
Let us know if you have any questions about the process, or share your stories on photographing your film, in the Comments section, below.
