
ISO, which stands for International Organization of Standards, is a measure of the sensitivity of film or a digital sensor to light.
This article is part of a multi-part series about photographic Exposure.
1. Introduction: The Exposure Triangle
2. Aperture
3. Shutter Speed
4. ISO
If you have ever photographed with film, you are familiar with the different numbers associated with a package of film that you used to buy at the store. Kodak Gold 200, Fujifilm Velvia 50, Agfa APX 400, etc. The numeral in the film's nomenclature referred to its speed, sometimes given as an ASA number, and the higher the number, the more sensitive the film was to light. This sensitivity was a function of the size of the photosensitive grains on the piece of film, as well as the characteristics of the different chemicals used to create the film.
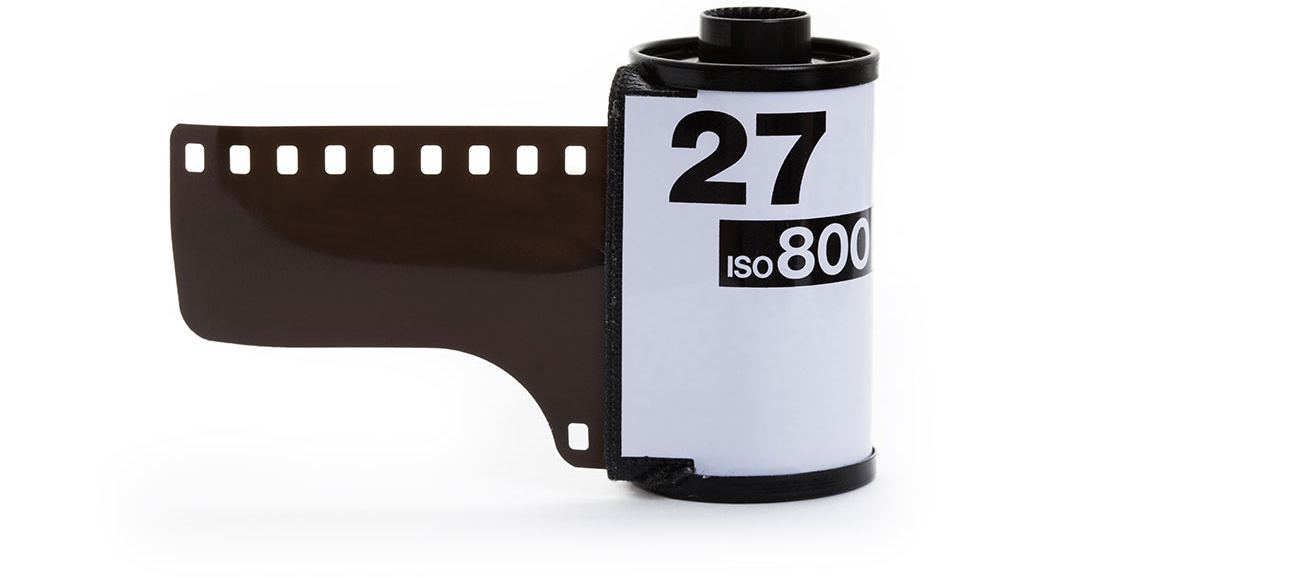
There are different international standards applied to color negative film, black-and-white negative film, and color slide film, but the numbering system remains constant.
In order to adjust ISO, film shooters have only the option of changing to a different speed film. Once loaded, the ISO is a constant for a given roll of film.
When digital photography entered the fray, the ISO developed speed standards for digital sensors. Thankfully, they assigned the same number system to the digital sensors as they did to the film standards. If you never shot film, you probably are not concerned that the ISO is spoken in the same language, but for those transitioning from film to digital, it is a welcome convenience.
One huge game-changer of digital photography is that, when it comes to ISO, you can virtually change the sensor's sensitivity while you are shooting. ISO is now an electronic function of the camera and not a fixed value as it was with a particular roll of film. So, with the turn of a dial or flick of a switch, you can change your camera sensor's ISO for each image, if you want.
The technical ins-and-outs of how ISO is calculated are complicated and not especially useful to most photographers, but, what is important is how the ISO numbers relate to exposure and exposure values. Just like with aperture and shutter speed, we want ISO to work in EVs, because we are still controlling exposure and we want all three variables to speak the same language.
ISO, like shutter speed, is linear. (Thank the folk at the ISO for saving us from the Inverse Square Law!) A film with an ISO of 200 is half as sensitive to light as the same film with an ISO rating of 400. Double the ISO, double the sensitivity. Half the ISO, half the sensitivity. Easy peasy!
So, assuming all else is constant, if you change your camera's ISO from 400 to 200, or change to a roll of 200 speed film from a roll of 400 speed film, you will introduce a -1 EV shift, as you have just made the sensor, or film, half as sensitive to the given light. ISO 800 changed to ISO 1600; double the sensitivity; +1 EV.
Now let us talk about the "side effects" of ISO. With film, the higher ISO films had larger grains that were impacted by greater numbers of photons. The larger the grains, the "grainier" the image would be. Depending on the type of photo and film, the grain of the film could be a real benefit to the texture and feel of an image. It was something that you had to deal with when shooting film and you could make the grain work in your artistic favor.
With digital sensors, when we adjust ISO, we are not changing the size of the pixel, but we are increasing its sensitivity electronically by, in layman's terms, increasing the voltage to the sensor. The process of increasing ISO, performed internally with the camera's software and sensor, is very similar to increasing the gain on a microphone. Discussion about camera ISO can get incredibly complicated and nuanced but, for most photographers, thinking of ISO as the sensitivity of the sensor is the best way to avoid headaches.
The unfortunate side effect of increased ISO is called digital noise. The higher the ISO, the more digital noise is introduced into your image. Camera manufacturers, while seemingly always adding megapixels to their new cameras, are constantly trying to reduce the amount of noise at a given ISO. While film grain could improve a photograph's feel and texture, no one has really proven to me that sensor noise is an artistic improvement in a digital image!
In the digital realm, there are three types of ISO: native, amplified, and simulated. Native ISO is the ISO setting that does not require the camera to increase the voltage to the sensor. The camera's native ISO is not usually published by the manufacturer in the specifications for a given camera, but a quick Internet search may show you what your particular camera's native ISO is—it is not always the lowest ISO available on the camera. Amplified ISO is an ISO that requires an increase in voltage to the sensor to achieve. This is when noise starts to creep into your images: the higher the ISO, the greater the noise. And, finally, simulated ISO is when the camera uses a software algorithm to simulate even higher (or lower) ISOs. Regardless of whether the increased ISO is amplified or simulated, you will see an increase in noise over the native ISO setting. And, regardless of the type of ISO, the numbers still adhere to the same linear relationship with EVs.
It's all EVs!
So, let us bring this exposure journey full circle, shall we?
In the three segments, we discussed how, in order to control the amount of light striking a piece of film or digital sensor, we have two physical controls that we can utilize inside the camera—aperture and shutter speed. We can further control the sensitivity of the sensor by adjusting the ISO on a digital camera (or by getting a roll of film of a different ISO).
We also discussed how each of these three adjustments can be quantified into EVs and that by doubling or halving the amount of light (aperture and shutter speed) and by doubling or halving the sensitivity of the photosensitive surface (ISO) we can adjust EVs up or down.
In order to maintain the exposure you are searching for, be it a proper exposure or intentional over- or under-exposing of an image, when you allow more photons into the camera, or increase the sensitivity of the film or sensor, you will need to compensate in the opposite direction with the other camera controls.
So, let's make this all practical by looking at a few photographic scenarios where you would adjust one of these three elements.
1) Outdoor Portrait
I am outdoors in sunlight and I want to take a photo of a friend. I saw some photos the other day that featured a lovely blurred background behind the model and I want to emulate this characteristic of those photos. In order to do this, I know from reading B&H Explora that I need to open my aperture as wide as I can to shorten the depth of field. When I turned the camera on in Auto mode, the camera said it was going to take a photo at f/8 and 1/500th of a second. I want to shoot at f/2.8 to get my blurred background. I am outside in sunlight, so my camera should be set at its native ISO and there should be no reason to adjust that. I have a few options now:
- I can switch my camera to Aperture Priority mode and let the computer determine the correct shutter speed for a proper exposure.
- I can switch to manual mode and, in my head, figure out that when I went from f/8 to f/2.8 I made a +3 EV shift to my exposure as I have opened up the aperture by 3 stops (f/8 to f/5.6 to f/4 to f/2.8) and thereby allowed more light into the camera. To maintain the balanced exposure using shutter speed, I need to reduce the amount of time that the shutter is open by 3 stops in the other direction. Therefore, I will change my shutter speed from 1/500th to 1/4000th of a second (1/500th to 1/1000th to 1/2000th to 1/4000th).

2) Landscape Image
I am taking a picture of a city skyline or beautiful snow-capped mountain range and my friends want to be in the image in the foreground and are forgoing the opportunity for yet another selfie (thank goodness!). I have my SLR camera and we can get a better shot than with our phones. I want to keep my friends sharply in focus but also show the cityscape/mountain in focus, as well. The camera is suggesting a photo at f/4 and 1/1000th of a second at the native ISO. I want to increase the depth of field to keep my foreground friends in focus while making sure the background does not become a bunch of unrecognizable blurry shapes—f/16 might work. My options:
- I can use Aperture Priority mode, change the setting to f/16 and let the camera determine the best shutter speed.
- I can, using Manual mode, shift to f/16. This will reduce the size of the aperture opening by 4 stops that I must now compensate for with shutter speed. Why can't I compensate with ISO? Well, in theory, you can, but if your camera is already on the native ISO setting, you probably will not be able to desensitize the sensor or film by the needed 4 stops in this scenario. So, you will have to compensate with a slower shutter speed. Four stops from 1/1000th is 1/60th of a second (1/1000th to 1/500th to 1/250th to 1/125th to 1/60th).
3) Kids' Soccer Game
You need action shots of your kid's heroics on the local youth soccer pitch and want to try out your new telephoto lens. The key to freezing action is a fast shutter speed. Because the light on the field might be very dynamic, this is a good opportunity to use either Shutter Priority mode or Aperture Priority mode and let the camera do the EV math for you at high speed. This may be a scenario where an ISO adjustment will come into the fray.
- If you use Shutter Priority mode, you can set you shutter speed to something very quick, say 1/1000th of a second. You will see the camera compensate by opening up the aperture near or all the way to its maximum width to let in as much light as possible for the quick shutter opening.
- If you use Aperture Priority mode, you can open up your aperture as much as possible. The camera will compensate by giving you the fastest shutter speed available for that amount of light.
- So, hold the phone. It is a cloudy day and you noticed that in Shutter Priority mode your images (if you are shooting digital and can instantly review the photos) are looking dark even when the computer is giving you your maximum aperture. In Aperture Priority mode, your images are looking blurry because the shutter speeds are not sufficient to freeze the action. What do you do? This is where you can increase the EV value for the given aperture or shutter speed by making the sensor more sensitive to the photons. So, dial up the ISO number by one or two or three or more EVs and see if that helps brighten your Shutter Priority photos or sharpen your Aperture Priority pictures. Be careful, turning the ISO up too high will result in unattractive noise!

4) Handheld Low-Light Photo
One of the things that many photographers dream of is the ability to capture a photograph in a dark space, such as a bar or restaurant, without using a flash for extra light or a cumbersome tripod. In the past, you needed a very fast (high ISO) film and a lens that allowed a very large aperture. The lens portion of the equation remains true in the digital age, but not quite as much as the low-light performance of high-ISO digital images is getting better and better. So, here is how I approach the image:
- Depending on how dark the environment is, how large I can make my aperture, and how long I have to set up the image, I will either start at the native ISO or bump it up one or two EVs. I will then open my aperture to its maximum diameter and see what kind of shutter speeds the camera is giving me in Aperture Priority mode. If they are still too slow for me to eliminate the blur caused by camera shake, I will turn the ISO up even more.
You may have noticed that in all of the above examples I was adjusting the camera in full-stop or EV increments. Many cameras let you select and change exposure settings (ISO, Aperture, Shutter Speed, and Exposure Compensation or Shift) in 1/2 stop or even 1/3 stop increments. If your math skills are on par with mine, I recommend setting your camera to work in full or 1/2-stop increments to simplify the calculations. I'm sure there are those who will argue against that, as you might lose some of the precision-exposure capabilities offered by 1/3 step adjustments, but I accept tradeoff in the name of easier math.
Conclusion
I hope you enjoyed this series on exposure and how to control exposure in a camera. One key to getting the photographs you want is knowing how the different variables not only affect each other when exposing an image, but also knowing the different side effects of adjusting each variable (depth of field, motion blur, noise, etc). As I wrote at the beginning, photography is art. You should always feel free to experiment with changing your camera settings to achieve the objectives of your artistic vision by altering exposure, depth of field, motion blur, etc. Good luck, have fun, take great photos, and make art!
87 Comments
From the above article, I understand that "the lower the ISO setting on a camera, the less grainier and better looking a picture will be...for the most part.
One thing I would like to know is "what is the full meaning of the initials 'EV'?" I didn't see the meaning anywhere in the article. Thanks.
Hi Ahmad,
Thanks for the question! I am sorry we left the description of "EV" out of this article, but we did get into it in Part 1.
https://www.bhphotovideo.com/explora/photography/tips-and-solutions/und…
Feel free to click over there and let me know if you have any questions!
Best,
Todd
So the correct pronunciation is I S O, correct? Not "Ice-o"
Hey Debra,
On the ISO.org website we find this information:
It's all in the name
Because 'International Organization for Standardization' would have different acronyms in different languages (IOS in English, OIN in French for Organisation internationale de normalisation), our founders decided to give it the short form ISO. ISO is derived from the Greek 'isos', meaning equal. Whatever the country, whatever the language, we are always ISO.
With that info, I would say it is proper to say "ISO" as "eye-so." If you say it as "I.S.O" as an acronym, I think you will be OK as well. Or, at least I won't correct you! :)
Thanks for reading!
Best,
Todd
Thanks for such a well-explained article with such excellent examples for different conditions. I was wondering—is dynamic range affected by ISO adjustments? Many thanks.
Hi Michael,
Thank you for the kind words! I very much appreciate it!
Great question and the answer is: Yes.
I don't want to get super technical here (and, to be honest, I would have to do a bit of research), but basically, all you need to know is that the further from your native ISO setting you go, the lower your dynamic range will be. Is this dynamic range degradation significant? I honestly haven't really noticed in my own photography, or, if I did, it was subtle. I am sure that the degradation is also very sensor dependent and affected by things like ISO invariance and other factors.
So, keep on shooting and know that you are lowering your dynamic range a bit with boosted ISO settings, but probably not significantly.
Thanks for reading and let me know if you have more questions!
Best,
Todd
Could you also please write an article about how to determine native ISO in a traditional (ENG or handheld) video camcorder, which often has gain settings but not ISO. Is there a simple formula for determining that based on the spec sheet's sensitivity rating, or is it just something that needs to be experimented with? I'm trying to set the ISO on my light meter correctly for most situations where I'm just shooting with 0dB gain.
Hey Dale,
I wish I could write such an article, but video is well outside of my wheelhouse of limited knowledge! However, I will forward this to our video writers to see if any of them want to take a swing at it.
I am not sure if this helps, but, in my experience with digital cameras, the native ISO is the lowest setting you can call up without selecting an "L" ISO...basically the lowest number they allow you to "dial" up.
Also, Google might be a good source of information for your particular camera(s) if you search for "native ISO Camera X" or "native gain Camera X" — this is how I have passed along "lowest native ISO" information to readers/customers in the past for cameras I am not intimately familiar with.
Sorry I am not much more help. I will pass the question to our video folks to see if they want to reply here or create a dedicated article!
Thanks for reading!
Best,
Todd
Hi Dale,
UPDATE!
I spoke to videographers/writers Steven Gladstone and Mary Latvis on our team and they said that in order to find the base native gain for a video camera you need to use an 18% gray card, a waveform monitor, and a light meter to figure out the ISO range for a camera, if the specs are not listed by the manufacturer.
And...that sounds super complicated to this stills photographer!
Mary also recommended a few resources: Cinematography Mailing List and Film & Digital Times...for more information.
Thanks again for reading!
Best,
Todd
Great series of articles. I loaded Kodak Ektar 100 in my Canon A-1 for the Final Four: the launch of Space Shuttle Atlantis; finding ISO 100 speed film turned out to be a scavenger hunt in my hometown. Later, I got an invite to see Atlantis land. I should've ordered Kodak TMAX 3200 from B&H with next day delivery, but when I got the news, it was close to the Sabbath; so I went with Kodak BW400 and push 2 stops. I had to dump photos of Ektar before reloading with BW400 in the pre-dawn hours; but I was surprised with the photos from the parking lot and press building. No stunning photo of Atlantis, but the the parachute deploy could be seen.
I photographed a night time baseball game. I had ISO 3200 film, Kodak TMAX and Ilford Delta. It may seem counterintuitive, but I photographed the game using aperture priority instead of shutter priority. My reasoning was because my zoom lens had a f4.5. I set it for f4.5 and let the shutter speeds fall where they may.
Thank you, Ralph!
Good stuff.
I use the same aperture priority technique when I photograph action...maximum (or maximum sharpness) aperture and the computer automatically gives you the best shutter speed possible for the shot.
Thanks for writing in! Sorry we were closed on that Saturday!
I found the formula for the exposure triangle.
2^EV=Aperture^2/ShutterSpeed. 2 to the power of EV=Aperture squared divided by the shutter speed.
Reference: Stimson, A., Photometry and Radiometry for Engineers, John Wiley and Sons, Inc., New York, 1974.
Are you trying to ruin my week by starting me off with mathematics on a Monday morning, Ralph? :)
Wait for it...wait for it....headache. Check.
I know that B&H closes earlier on Fridays and is closed on Saturdays. It's something that I plan around.
B&H does a great job in providing notice of the Jewish and US holidays that they are closed.
Hey Ralph,
Thanks for the kind words! If you really want to plan ahead, our closing calendar is located here:
https://www.bhphotovideo.com/find/HelpCenter/StoreInfo.jsp#hoursOfOpera…
Best,
Todd
Appreciate the article. One minor point, I would contend that the process of manually determining shutter speed is not necessarily as complicated as described. My own method is to choose the aperture and then adjust the shutter speed while viewing the on screen histogram. Most cameras these days have a histogram and I think it is relatively clear when you are properly exposed.
Hey SCOTT,
Thanks for the comment. I may have gotten too verbose with my description, but I do find that many new photographers either miss the sound of a slow shutter, or wonder why their images are not super sharp when they get home due to camera movement. I tried, perhaps awkwardly, to describe my through process when approaching low-light handheld photographs.
Your method is definitely sound, but remember that not every camera has live view or a live histogram to reference!
Thanks for reading and taking the time to comment!
Really helpful and so clearly explained. Thank you!
You are very welcome, Patrick! Thanks for reading!
So my A7SII's Sensor's Native ISO is 3200, but I can't take shots at day very well because of that, how do I do longer exposusures?
Hey Stanley,
I was under the impression that the A7S II's native ISO was ISO 1600. A true low-light machine, I guess!
Well, if you stop your lens down and you are still getting through-the-roof shutter speeds (or not getting the DOF you want) you''ll just have to dial down the ISO to a more manageable setting.
The disadvantage of the artificially low ISO settings is that you lose some dynamic range (but probably not much). You will not see increased noise at lower ISOs like you do at boosted ISO.
First world problems, right, Stanley?
Todd
great series . TYVM
I am trying to take portraits in sunlight w fill flash (to get under the hat and show the eyes) but either the camera will say I dont need the flash or I can force it to flash w some of the scene modes and try to physically lower the flash but it amlost always overexposes and washes skin tones out-or under and red...what am I doing wrong? ty
Hi Billy,
What kind of camera are you using?
If the camera allows it, you should be able to shoot on full manual mode and fire the flash on command. I would take a shot and then check the LCD to adjust your exposure with the flash firing.
Thanks for stopping by!
Why does my Cannon D40 Only go up to ISO 1600? How can I u8se it for Concert Photography when a flash is forbidden? thanks
Hey Jeff,
Older digital cameras only had a portion of the ISO range available on today's cameras. Why only ISO1600? That is for the Canon engineers to answer.
For low light scenarios, when shooting handheld, the only way you can get more light to the sensor is to shoot a lens with a large maximum aperture. If you are shooting zoom lenses, look for at least an aperture of f/2.8. For prime lenses, try lenses that open up to f/1.2, f/1.4, or f/1.8. You can get f/1.8 prime lenses at very reasonable prices—no zoom, but they let a lot of light in!
Let me know if you have follow-up questions! Thanks for stopping by!
Todd thanks; I have a cannon 28 x 135mm Lens; Tameron 70 x 300mm Lens and my largest is HQ Optics 500mm Mirror Lens ! thanks Jeff
Hey Jeff,
Yeah, you are definitely fighting physics with those lenses. They aren't bad lenses at all, but none are going to maximize your light-gathering potential. The best thing to do is to get something like a 50mm f/1.8 or 85mm f/1.8 lens and get much much closer to the stage with the lens aperture wide open and start shooting!
With the mirror lens and the Tamron, you are in the telephoto to super-telephoto range...lots of issues with camera shake with shutter speeds slowed by the dim lights of the concert hall(s). So, getting a shorter focal length prime lens will help with that as well.
Good luck!
Hi, sometimes I see a 503 site message when I browse your webpage. I thought you may wish to know, best wishes
Thanks, again, Murv!
Very good series about how to control exposure, Thank you.
Thank you, Darek! Thanks for reading!
Todd,
Thanks for writing such a great series on camera exposure! I've been teaching an Introduction to Video seminar, and your series has been more helpful - in terms of providing a clear description without oversimplifying - than most of my video books. You should write your own book on this subject!
Hi Shimon!
Thank you very much for the compliments! I very much appreciate it.
Should I sign you up for an autographed copy of the book? :)
Thanks for reading!
Great series and educational for Old men with Cameras as well as keen starters in this amazing craft of photography. We can get to obsessed with the technical that we forget about the creativity and the enjoyment of capturing an everlasting moment. With Social media and so many pictires taken today, the lifspan of 90% plus of all images is less than 5 seconds. For those who do ir as a serious hobby or as a means of income and a full time craft, the key is to understand our equipment and optimise. The search by the manufacturers continue for optimisation of mega pixels, ISO levels, focus speed, 4K video and what comes next. Some of these aspects are needed for the advancement of the commercial work, however the best work still is produced by those that know how to optimise that tools. Moving from film to digital, the ISO optimisation is the biggest challange, each camera has their limits on ISO performance and so has every photographer ito how far you want to push it. Thanks for a great series
Hey Jakes,
Thank you for the awesome comment! It sounds like we are on the same page!
There is a time and place where low-noise/high-ISO is good for my photography (and that of many others), but 98% of my images are taken at ISO 200...so the technology is usually lost on me. For some, it is critical to their work as it certainly expands the possibilities of natural light shooting in unfavorable lighting environments.
Regardless, amazing high-ISO performance does not a great photograph always make.
Thanks for stopping by!
'One huge game-changer of digital photography is that, when it comes to ISO, you can change the sensor's sensitivity while you are shooting.' - Not really. It depends on what you mean by 'sensitivity', but to a first approximation the sensitivity of a digital camera does not change (with a few exceptions which use the DRPix technique to make a step change somewhere in the ISO scale). ISO is 'output sensitivity', it has nothing to do with the sensor, it just determines the grey scale value that will be used for a given exposure measured by the sensor.
Hi Bob,
I believe you are correct. However, "sensitivity" seems to have been accepted as the best way to describe the function of ISO as part of the exposure triangle. In fact, every major camera brand uses the term when describing the concept of digital ISO.
I had a long back-and-forth over email (see below) with a gent about how it is really "amplitude" and not "sensitivity."
I find that when I teach photography to beginners, there is absolutely zero to be gained by getting into the weeds about ISO. Many find the concept difficult enough without delving into wiring diagrams and electronics!
However, I appreciate you taking the time to read and leave a comment! Knowledge is good! Thanks!
Iso does not stand for the International Standards Organization. It is the International Organization of Standards. IOS in America/UK, OIN in france. Go to the International Organization of Standards web site Iso.org. Go to the tab "About us". Then roll down to " It's all in the name".
From iso.org:
"It's all in the name
Because 'International Organization for Standardization' would have different acronyms in different languages (IOS in English, OIN in French for Organisation internationale de normalisation), our founders decided to give it the short form ISO. ISO is derived from the Greek isos, meaning equal. Whatever the country, whatever the language, we are always ISO."
Hey Dan,
Thank you for the sharp eye and the correction! We will change the text to reflect the correct name!
...just when I thought I was perfect! Darn!
Thanks for reading!
You might not be "perfect", you just thought you was. We, fellow man, are neither BUT also could think that same thought. Ain't that right?
Regardless, perfection is a worthy goal, Franco!
Thanks for reading!
I had a unfair advanage. I used to have to teach this and other stuff to employees of companies adopting ISO standards.
Keep up the good work.
Thanks, Dan! We should always take advantage of unfair advantages!
For shooting in low-light conditions where I want a photo even if it may end up not being a good one, I have been using Automatic ISO. I have found this very helpful when shooting in cities at night or photographing indoor concerts (which I get asked to do more than I want). In manual mode, I set the aperture at the widest I can tolerate for the depth of field I want, and I set the shutter speed at the longest exposure I think I can hold steady with image stabilization. Then, with Auto ISO, the camera determines the exposure and sets the ISO to get the shot. Sometimes the high ISO results a photo that is too grainy, but usually I get good enough results to impress my friends.
Hey Glen,
Good technique! Auto ISO has become a very viable tool in the digital photographer's quiver. If you want to avoid the noise associated with very high ISO, be sure to set the Auto ISO upper limits to something that will not produce an unfavorable amount of digital noise.
Also, keep an eye on it. I have seen, on my cameras, more than one instance of the ISO being abnormally high when I didn't feel that a high ISO was required.
Thanks for writing in, Glen!
At last I understood those terms, ISO, aperture! Such a relief. :-)
Thanks a lot!!!
You are very welcome, Orli! Thank you for reading!
Guru
After reading many articles , I finally got this mathematics in my head. A human eyes n camera is grt way to explain. Aperture vs zoom in or out ... Have a relation isn't it..?
Guru in India is ancient which meant teacher , :)
Thanx Todd
Hi vishal,
Thank you for the question for the Guru!
Question: Aperture vs. zoom in or out...Is there a relation?
Answer: That depends on the lens.
Some zoom lenses have what are called variable apertures. This means that the maximum aperture is not consistent throughout the zoom range of the lens. When the lens is zoomed to its widest angle, the maximum aperture will be at its widest. As you zoom in towards the telephoto range of the lens, the maximum aperture will get smaller. When shopping for a zoom lens, look for the name of the lens to have two numbers for the aperture. Example: 18-200mm f/3.5-5.6
Zooms with constant-apertures will have the same maximum aperture through the zoom range. The names of these lenses will only have one aperture number. Example: 70-200mm f/2.8
I hope this answers your question. Thanks for reading!
Great articles and aperture video, Todd, et.al. We have some HS summer interns and these materials will provide them with a good introduction to exposure, backed-up nicely with enough of the physics, math, and cross-references to film-based photography.
You make mention of "camera shake" a couple of times, but didn't go further. I know this can be a frustrating occurrence of novice photographers as they remember a sharp image in the viewfinder, but the camera "took a blurry picture." A brief discussion (like you did for the "side effects" of aperture) would go a long way--especially the relationship between focal length and the appearance of camera shake. [Back in the dark ages (before VR), we had the shutter speed rule-of-thumb of 1/focal length for hand-held shooting.]
Hello SciTech,
Thanks for the compliments and thanks for reading!
You are correct, I guess I could have expanded on camera shake a bit more. I will pitch an article dedicated to the subject to see if we can give it a good round turn.