
With the year winding down and arrangements for family gatherings in the works, some advance planning for recording these moments through photographs is a worthwhile consideration. It’s no longer the era of your grandfather’s Kodak, with family members captured stiff as a rail or suffering from red-eye. There are lots of exciting imaging options out there, all of which involve slightly different approaches. In an effort to help you to make sense of the current spectrum, we’ve outlined these seven tips to walk you through the process, and to come out the other side with successful results.
1. Camera Formats: So Many Choices!
Perhaps one of the most popular formats for capturing family photos today is the ubiquitous smartphone camera. This cannot be beat for portability and ease of use, and its unobtrusiveness is ideal for capturing candid moments. Mobile phone camera technology has made tremendous advances in the past few years, so keep in mind that, generally speaking, the newer your phone, the better the quality of the resulting image files.

Mobile shooting brings with it a nearly endless supply of apps for creative effects or otherwise customized images. Yet, a few native camera functions also stand out when it comes to memorable family photos. The first of these is the HDR setting, which effectively merges exposures for highlights and shadows into a single file, offering greater detail in challenging lighting situations. Another function that’s prevalent in current model mobile phones is the panoramic setting, which can be useful in creating an overview of your loved ones in situ. Simply stand in the middle of the room with the panoramic setting ready to go, click start and slowly rotate in the direction of the arrow while holding the camera on a steady line. With a bit of practice, you can cover a full 360 degrees, to really impress your family and friends. For more information, check out our article on How to Make Panoramic Photographs.
As a step up from mobile phones, don’t forget to pack your favorite point-and-shoot before leaving for a family gathering. In addition to a larger sensor size and more versatile lens, most point-and-shoots offer more flexible exposure options through preset shooting modes, named for (but not limited to) particular activities. Sports mode can be extremely helpful in freezing the action of kids at play, for example. Portrait mode subdues tones for a smooth, pleasing appearance with closer subjects, while Nighttime mode slows the shutter and increases your exposure time, providing greater detail in low light. The names for each preset can vary between camera manufacturers, so consult your manual for full details, and then test all your presets in a neutral setting to see the effects firsthand.

If moving up to larger mirrorless cameras or DSLRs, you can expect to gain even greater flexibility in shooting control, along with the added abilities of working with different lenses for versatility and larger sensor sizes for upped image quality and improved low-light performance.
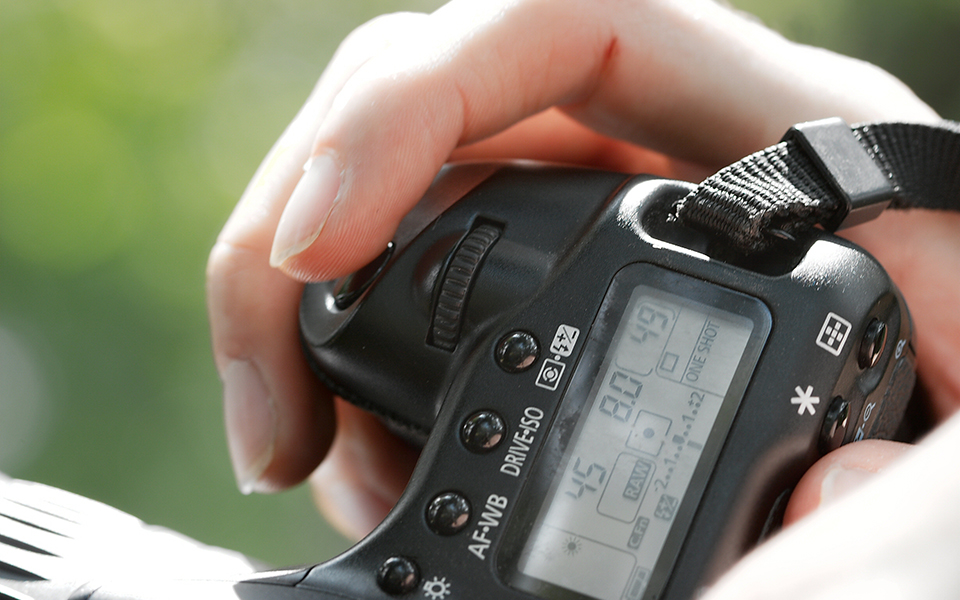
2. Camera Settings: ISO, Shutter Speed, and Aperture
Whichever camera you choose, take some time to previsualize the types of pictures you hope to come away with, and adjust your camera settings to suit your vision and address environmental requirements.
Your first setting to consider is ISO, or the camera’s sensitivity to light. Boosting the camera’s ISO is one way to reduce exposure times in low-light situations, but keep in mind that the higher the ISO value, the greater the potential that unwanted noise will affect your image quality. Newer cameras and those with larger sensor sizes tend to perform better in difficult lighting than small sensor compacts or phones but, regardless of the camera, it is still good practice to keep your ISO as low as possible for the cleanest image quality.
There’s a direct relationship between shutter speed and aperture, which is often expressed through the two priorities of automatic exposure settings. When photographing people in limited light, shutter speed should be your most crucial consideration, to avoid motion blur. Another thing to think about when setting your camera’s shutter speed is how it relates to the focal length of your lens. A common adage on how to avoid blurred results from camera shake: make sure your shutter speed is equal to or faster than the focal length. For example, if you’re shooting with a standard 50mm lens, you’ll want to shoot at 1/60-second or faster.
In terms of aperture settings, the lower your f/stop number (i.e. f/2.8) the wider the aperture, allowing more light to enter the lens. The resulting effect on your picture is more limited depth of field, with fewer elements in the background and foreground appearing in sharp focus. This can make for a very attractive effect in individual portraits, where the focus is on your subject’s face, while the surrounding environment falls away in softness.
Alternatively, if you’re shooting with a high f/stop number (i.e. f/16), the aperture is smaller, allowing less light into the lens. This will yield images with a much longer depth of field, ideal if you want everything in your picture to be in focus. The caveat, however, is that this picture will require a lot more light, or more time via a slower shutter speed. When photographing people and handholding the camera, this could result in both motion blur (from your subjects’ impatience) and camera shake (which is a very possible outcome when shooting at slower shutter speeds).
3. Lenses and Angle of View
Let’s take a look at how lenses affect your pictures. It’s likely that many people own at least one zoom lens, since this is an included element in most camera kit purchases. These types of lenses cover a variable focal-length range, which makes them extremely practical for covering a wide variety of situations. The downside to some zoom lenses is that they tend to be slower than a bright f/1.4 or f/1.8 prime, with many popular zooms having a maximum aperture range of f/3.5-5.6. This limits your ability to shoot in low-light conditions, as well as achieve dramatic selective focus effects. These points are not to dissuade you from bringing along your favorite zoom lens, but to encourage you to consider packing an additional fixed lens in your bag if you have one.
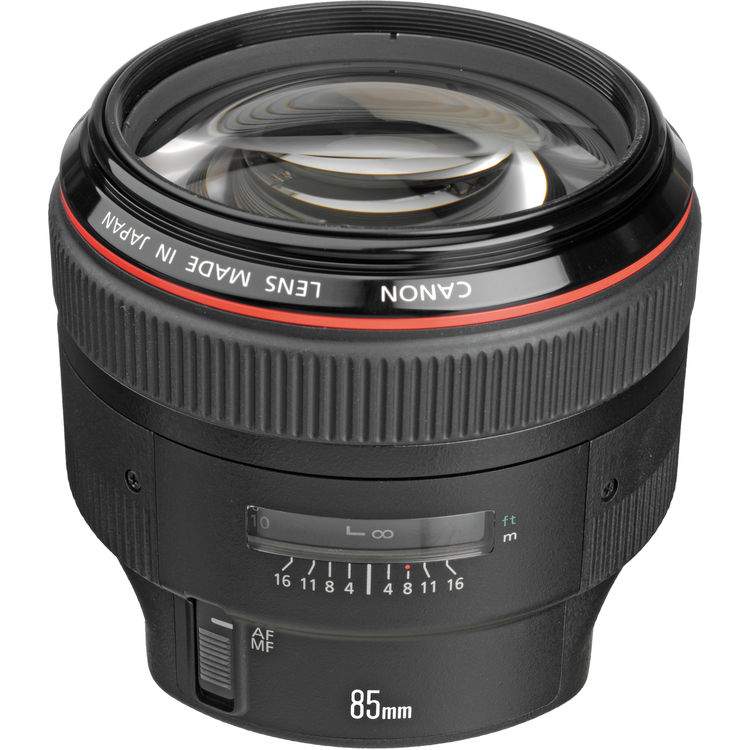
The classic prime lens for portraiture is the 85mm on a full-frame sensor (or about a 50mm for APS-C models). This is an ideal option for iconic posed headshots, yet it could be extremely limiting for group pictures in an indoor environment. If group shots and overviews are your primary goal, you’d be well advised to lean towards wide to normal focal lengths in order to get a broader view of the scene. Generally speaking, you don’t want to use a lens so wide as to distort people’s features, except for comedic or dramatic effect.
Turning back for a second to zoom lenses, unless your family gathering is on a football field, you’ll probably want to pass on your telephoto zoom in favor of a wide-to-portrait-length zoom, such as the classic 24-70mm.
4. Lighting: Natural, Artificial Light, Mixed Lighting, Flash, and More
Light is ever elusive, so a cardinal rule for successful results is to not only trust the view that pops up on your LCD, but to dig deeper and use the histogram as your gauge to exposure and lighting. This can generally be viewed on your LCD screen, in tandem with your image or as a separate graphic. Yet, various camera manufacturers have different access methods, so it’s best to consult your owner’s manual in advance and memorize the path. Ideally, you should be able to see data curving and spiking across the entire breadth of the graph from deepest shadows to highlights, but not running over the edges. This is a complex subject, and covered at length in a past Explora article on How to Read Your Camera's Histogram.
It’s hard to beat natural light for flattering portraits of people you care about, but with daylight in limited supply during winter months, it’s useful to consider all your options. If you do have the benefit of photographing in a natural-light setting, pay close attention to the effects of the sun. Contrary to popular belief, a sunny day with bright blue skies is not always the best bet for portraits, since bright sunlight can result in squints and scowls on the face of your subjects. The harsh contrast of bright sunlight also makes for untenable dynamic range, especially at midday, yielding deep shadows and blown out highlights.

Overcast or cloudy weather can make an excellent setting for people pictures, with soft shadows that are more flattering to the face. Flat lighting also tends to make colors pop, so family members in colorful clothing can add the needed spark to a drab winter environment.
Both outdoors and in, your first consideration should be to position your subjects so they are facing (or at a slight angle) to the primary light source, in a pose that avoids unseemly shadows across the face. If you’re photographing more than one subject, look for any dark shadows cast between them or because of their interaction.
Strobe lighting, either via an on-camera flash or a separate lighting unit, can be extremely helpful for people pictures. In bright sunlight, adding a flash is often referred to as a fill, which can effectively limit harsh contrast and lighten up shadows on the subjects while keeping the ambient brightness of the background. Indoors, not only does the flash of a strobe cut the potential for motion blur in limited light, it also counteracts the often conflicting color temperatures of artificial lighting, which might otherwise yield pictures with unattractive yellow, orange, or green color casts.

To avoid blasting your subjects with too much light when using a flash, you need to be aware of the flash-to-subject distance. Without entering into the complex territory of guide numbers and such, one easy solution for minimizing the effect of your flash is to bounce it from the ceiling or a wall, or cover it with one of these flash modifiers. And to reduce the power of a small on-camera flash, covering it with a sheet or two of tissue paper often does the trick.
5. Consider Your Subjects: From Candids to Limited-Focus Details to Posed Portraits
Besides choosing the best gear for a given situation, one of the key elements to getting great shots is the ability to connect with your subjects. To that end, it’s essential to become a participant in the process. Don’t hide behind your camera; take some time at the outset to be social and warm up to people and the environment. Introduce your camera gear slowly and allow people to accustom themselves to the idea that you’ll be taking pictures.
You might choose to ease into image-making by positioning your camera on a countertop or the edge of a chair and shoot from that perspective, or otherwise make some pictures from the hip instead of with your eye to the viewfinder. A wide-angle lens is the best choice for candid situations like this, when you’ve got little to no control over the edges of the frame. Positioning a foreground element—such as a festive decoration or drink, or a detail from the person next to you in the room—out of focus at the side of the frame, can be an effective way to enhance the narrative and set up this type of scene.

As people realize you’re making pictures, they invariably start to pose. If you prefer natural-looking candids to grip-and-grin headshots but have a hard time getting your subjects to relax and ignore your lens, try waiting them out. If you keep your camera glued to your eye or otherwise at the ready for long enough, the novelty of your picture-making will wear off and your intended subjects will turn their focus away from you or drop their guard. While you’re waiting, tweak your camera settings, composition, and focus so that, when it happens, you’re able to fully capitalize on this magic moment for a photo opp.
If you’re using a flash and any of your subjects suffer from the tendency to blink for pictures, consider the following tips to coax their eyes to open during your shots. Ask them to turn their head to the side and, at the count of three, to steadily rotate back toward the camera. This motion will generally override an unconscious tendency to blink, while also having the added benefit of making them look fresh and alert. Asking your subject to relax with closed eyes and blinking them open on command is another effective variation on this theme.

6. Location, Location, Location: Figure and Ground and Other Environmental Factors
Let’s pull the focus back from your subjects a bit to consider the setting for your pictures. Since we’ve already covered outdoor locations, let’s now discuss making family pictures inside.

We’re all familiar with quaint Hallmark-style family pictures, but how do you make this happen with your rambunctious relatives in a lived-in setting? To start, think in basic terms of light and shape, and how your subjects might best fit into this framework. Figure and ground relationships are essential considerations here, and one way to get a quick read of this is with a squint. While it’s far from photogenic, narrowing your eyes and furrowing your brow will help you to better identify the lighting and basic compositional elements of a potential shot, and, just as importantly, this can help you identify what to leave out.

When setting up a shot, be on the lookout for bright lights, either immediately next to or directly behind your subjects. Not only might these be distracting in an image, the color temperature from an artificial light source could also create an unsightly color cast if you’re not using a flash.
If you are shooting with flash, be aware of any glass, mirrors or otherwise shiny surfaces within your frame that are also parallel to your lens. While you won’t notice this effect with your naked eye, the flash can reflect from these surfaces, ending up as unsightly glare in your photos. This can be a particularly challenging issue if your subjects wear eyeglasses.
To eliminate glare or minimize issues with stray light overpowering your pictures, position yourself and your camera at an oblique angle to the problematic light source or reflective surface. This will have the added benefit of side-lighting your subject, which tends to increase contrast and boost surface detail.

Perhaps the most important tip for memorable family pictures in an environmental setting is to move around. Don’t be a couch potato, expecting your zoom do all the work. Change your position in the room and see how things look from different perspectives. When doing this, make sure to work all the angles, from capturing the kiddies eye-to-eye on the floor, to composing an overview from a sturdy piece of furniture or nearby staircase.
7. Formal Family Groups
Making everyone look their best in a group portrait is a tall order, and the dynamics of photographing family members together can further complicate this process. With this in mind, give some advance thought to the best way to pose the group, based on both the number of people and family dynamics.
Before you jump into action and corral the family just anywhere for a picture, take some time to survey the entire scene and perhaps do some arranging. A few minutes of scouting on arrival at your given location can help you identify photogenic areas for a group portrait.

When you’re ready for people to take their places, it’s important for you to take charge and communicate what you want, yet remain relaxed. If you convey the sense that you’re relaxed and having fun, the rest of the group will likely follow suit.
To ensure that everyone remains in sharp focus, position the group parallel to the camera, as tight to the same plane as possible. Now is the time for family members to get cozy and snuggle close together, to convey the feeling of a family unit. The aforementioned tip about having your subjects blink their eyes open on command can also be a handy way to keep everyone on task in a group setting.
A tripod is also a sound investment in this instance, and affords you the benefit to step back from the viewfinder to better communicate with your subjects, as well as achieve a more formal composition and, of course, avoid camera shake. This can be particularly useful if your group contains young children, who could be confused or frightened by you hiding behind the gear. We recently covered tripods at length in this dedicated buying guide on 10 Recommended Tripods for Photography.
In these situations, another invaluable addition to your tool kit is a remote shutter release. These are available in both wired and wireless versions and are generally tailored to specific cameras or manufacturers, so make sure you select the model that’s compatible with your gear. This accessory gives you much freer rein to move around and interact with your subjects or work with supplemental lights or reflectors. And if you want to be part of the picture yourself, the remote makes it easy to work from both sides of the lens.

After you have the standard group pictures in the bag, if the conditions permit, consider tightening up your composition and trying a variation of the group from a slightly higher angle than your subjects, with everyone’s face looking up toward you. You’ll probably need the help of a ladder or chair for this vantage point, but the double benefit of highlighting faces and camouflaging the dreaded double chin might earn you bonus points.
Finally, a bit of advance direction on wardrobe can go a long way in trying to get everyone on the same wavelength. A few days before the gathering, consider making a gentle suggestion that your subjects favor solid colors over prints, plaids and otherwise complicated outfits; or perhaps even request a particular color scheme to further reinforce familial bonds.

But most important of all, make sure you’re prepared with sufficient power, either external batteries or a dedicated power charger, and storage capacity in terms of memory cards (or even film) to keep your camera going and to make as many memorable photos as you can!
