How to Create Optimized Color-to-B&W Conversions in Photoshop

7Share

There's an adage among artists that goes, "If you can't make it good, make it big. And if you can't make it big, make it red." There's an awful lot of truth behind that statement, which I won't get into right now, but whenever I see photographs with big eye-grabbing pops of color, that pearl of wisdom always comes to mind.

The same cannot be said about black-and-white photography. Color elements do not exist in B&W photographs. In their place are infinite shades of gray, book-ended by whatever measures of pure black and pure white exist within the scene. Red is reduced to a shade of gray in a black-and-white photograph. It no longer screams out at you as its former color self once did. If you want to lighten or darken the tonality of the red channel of the image, you can filter it, and this is where converting color images to B&W starts getting interesting.

Photographs © Allan Weitz 2020

This photograph is an absolute celebration of color. Even if you don't stop in for an ice cream cone, the playfulness of the scene is enough to make one smile as you walk by. Despite the prominence of color in this photograph, removing the color from the scene doesn't necessarily diminish the photograph. The trick is to filter the individual color channels in a way that causes the tonality of each of the formally bold colors to continue to play off one another, but in this case as shades of gray.

What makes B&W photography so interesting—at least to me—is that not having color as a background chorus off of which to play, the challenge is to take a photograph in which the image's composition and the way the varying gray forms within the photograph play off one another and make the picture work visually. The image is either powerful enough to engage the viewer for more than a few moments, or it's not. Speaking for myself—the photographs I most often come back to are black-and-white photographs. And this holds true for my own photographs, as well as photographs taken by others.

There are many ways to convert color photographs to B&W in Photoshop, but I'll cover two: the easy way and the more hands-on way, or as I refer to them: Automatic and Stick Shift. The Automatic method of converting color image files to B&W in Photoshop is easy-peasy. Simply open a color file and go IMAGE > ADJUSTMENTS > BLACK & WHITE. Boom—your picture instantly converts to a generally pleasing black-and-white photograph. A new sub-menu featuring sliders for the RYGCBM color channels also comes into view. We're going to come back to these sliders in a few moments but, for now, let's talk about the top dropdown menu—the one labeled "Presets."

The Quick & Easy Way to Convert Color Image Files to B&W in Photoshop

In Photoshop, B&W conversions from color are as simple as two clicks away.

When you click on the Preset field (the top dropdown) you get a menu that offers a dozen filters commonly used when taking conventional B&W photographs. Included among them are red, green, yellow, blue, ND, and IR filters. When you click on a filter, your photograph transforms into an emulation of how the original color scene would appear if captured with a similarly filtered film camera.

When you click on the Preset dropdown, the color image automatically converts to monochrome. You also you get a new sub-menu containing a dozen digital filters that emulate the look of traditional red, orange, yellow, green, and other filters commonly used for black-and-white photography. When you click on a filter, the tonality of the image shifts to emulate the look of the image as if filtered traditionally with a film camera. Depending on the color palette of the image, the image takes on a totally different feel with each filter. Some work, some don't, but each affects the look, feel, and mood of the image.

If the photograph features a blue sky with white clouds, a red filter will darken the blue, which in turn causes the clouds to seemingly pop out of the frame lines. Orange and yellow filters produce the same effects to a progressively lesser degree, depending on your personal preferences. When photographing foliage, green filters lighten the tonality of green leaves and grasses. Which filters work best or create the most dramatic effects? That all depends on the color palette of the image and your choice of filtration.

If you open an image file and click on IMAGE > ADJUSTMENTS > BLACK & WHITE, you get a black-and-white conversion similar to the one above. To see how black-and-white conversion filters affect the tonality of the photograph, see below.
"Summer Sweets Ice Cream Shop" filtered with a Green filter in Presets, which brings out detail in the shrubbery behind the Coke machine.
"Summer Sweets Ice Cream Shop" filtered with a Blue filter in Presets, which among other things, lightens the sky and darkens the tables.
"Summer Sweets Ice Cream Shop" filtered with a Red filter in Presets, which greatly darkens the sky and makes the side of the Coke machine nearly unreadable.
"Summer Sweets Ice Cream Shop" filtered with an IR filter in Presets turns the sky black and the tables glaringly bright.

The Advanced, More Detailed Way to Convert Color Image Files to B&W in Photoshop

Applying filters via the IMAGE > ADJUSTMENTS > BLACK & WHITE drop-down menu is a quick, easy, and quasi-traditional way of filtering black-and-white photographs. A more interesting set of tools for converting color photographs to monochrome can be found in the same BLACK & WHITE dropdown menu we used for the previous exercise. Just below the Presets we previously accessed are six color sliders followed by two additional Hue and Saturation sliders.

If you prefer driving stick over an automatic transmission, you're particularly going to enjoy this process.

These sliders enable you to adjust the tonal response of both additive and subtractive color channel systems of the original color image. Tweaking the color channels in this manner and collectively combining the results into a single, optimized black-and-white photograph has long been my go-to method of creating black-and-white conversions in Photoshop. The Hue and Saturation sliders should also be incorporated into your grayscale adjustment workflow in each color channel.

A straight, unfiltered version of the "Summer Sweets Ice Cream Shop"

"Summer Sweets Ice Cream Shop" filtered -40 Blue

"Summer Sweets Ice Cream Shop" filtered +30Yellow

"Summer Sweets Ice Cream Shop" filtered at 0 Red

"Summer Sweets Ice Cream Shop" filtered -100 Magenta

"Summer Sweets Ice Cream Shop" filtered +300 Green

Combining all of the optimized color channels creates a single monochromatic version of the original color photograph containing a comparably wide dynamic range, albeit in shades of gray.

There are a few things to keep in mind when converting color image files to black-and-white. If you have experience filtering film images, you know every film reacts slightly differently to filtration. The electronic filter emulations created in Photoshop are similar in that the results you get from the PS filters may not be exactly as you remember them to be, but they're pretty darn close.

I also encourage you to go back and forth between sliders when optimizing an image because one filter adjustment can easily counter or change the effects of earlier adjustments. Like many things, it's a matter of striking the right balance between the channels. The Hue and Saturation sliders should also be used when adjusting each of the color channels.

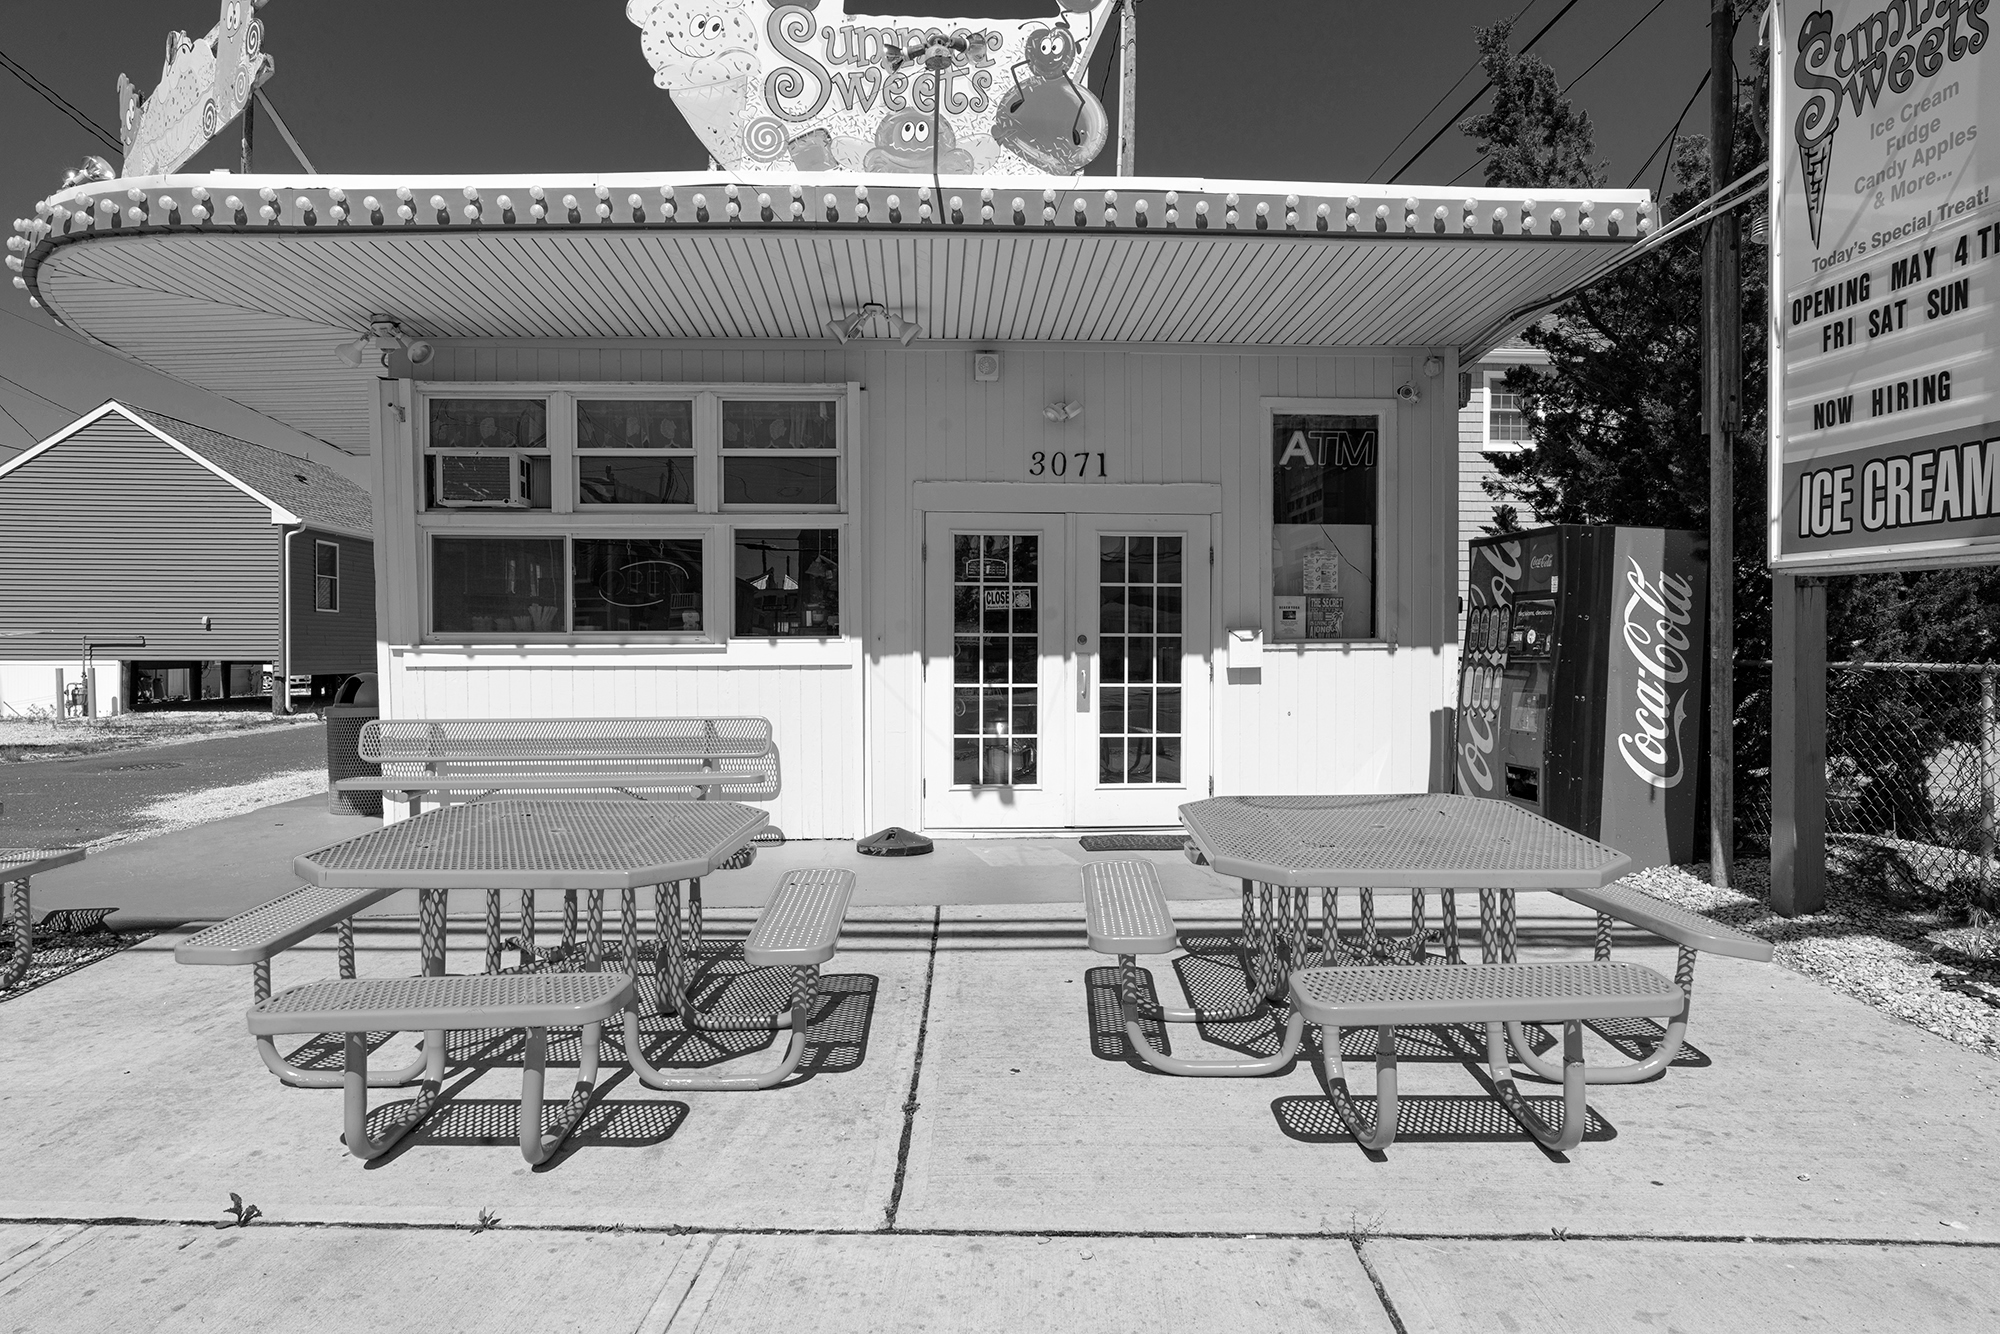
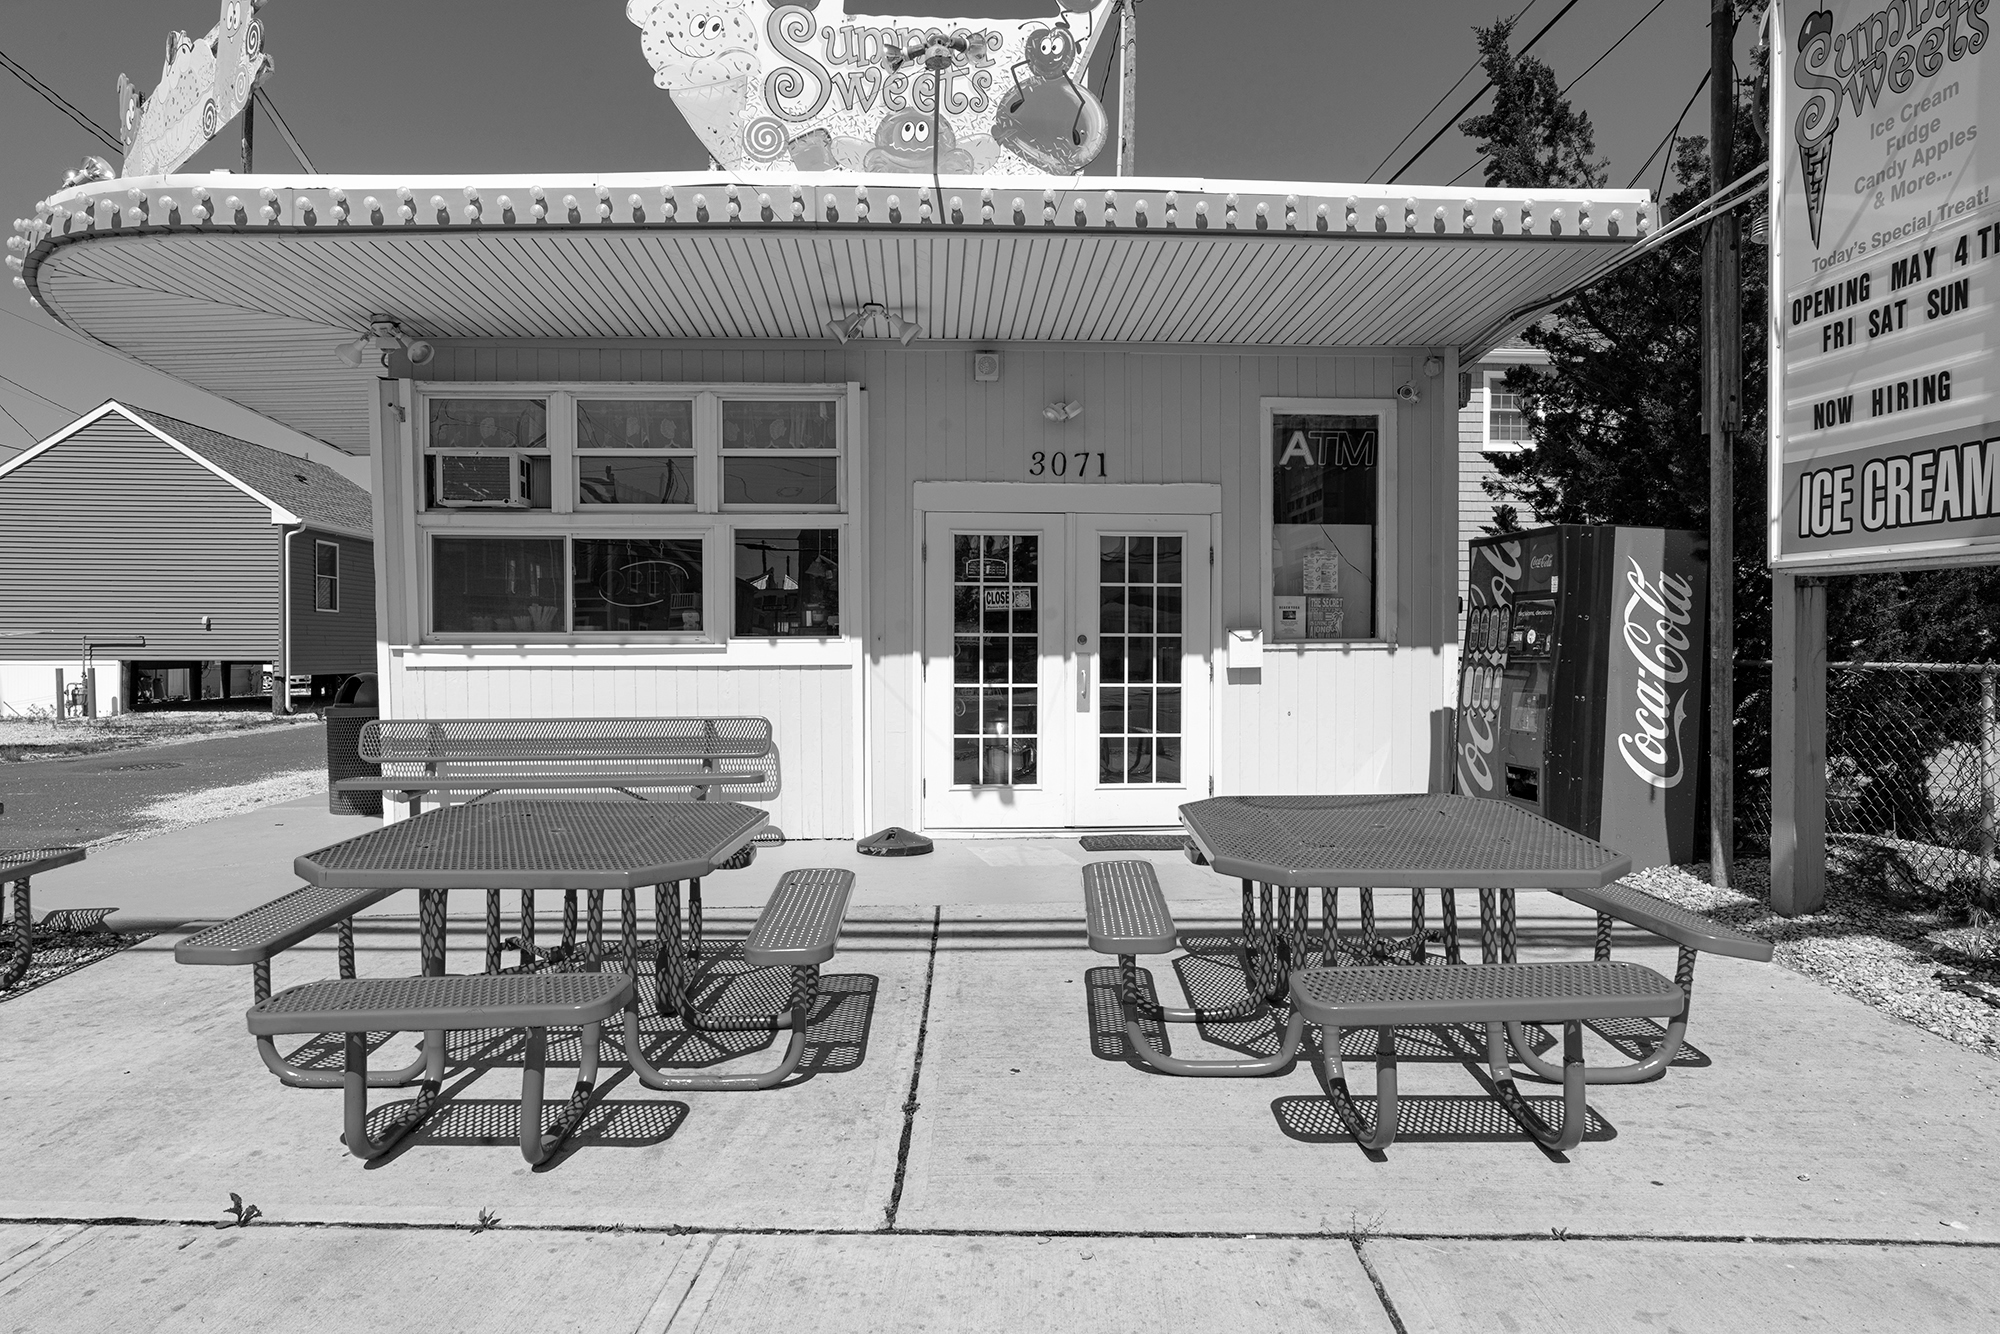
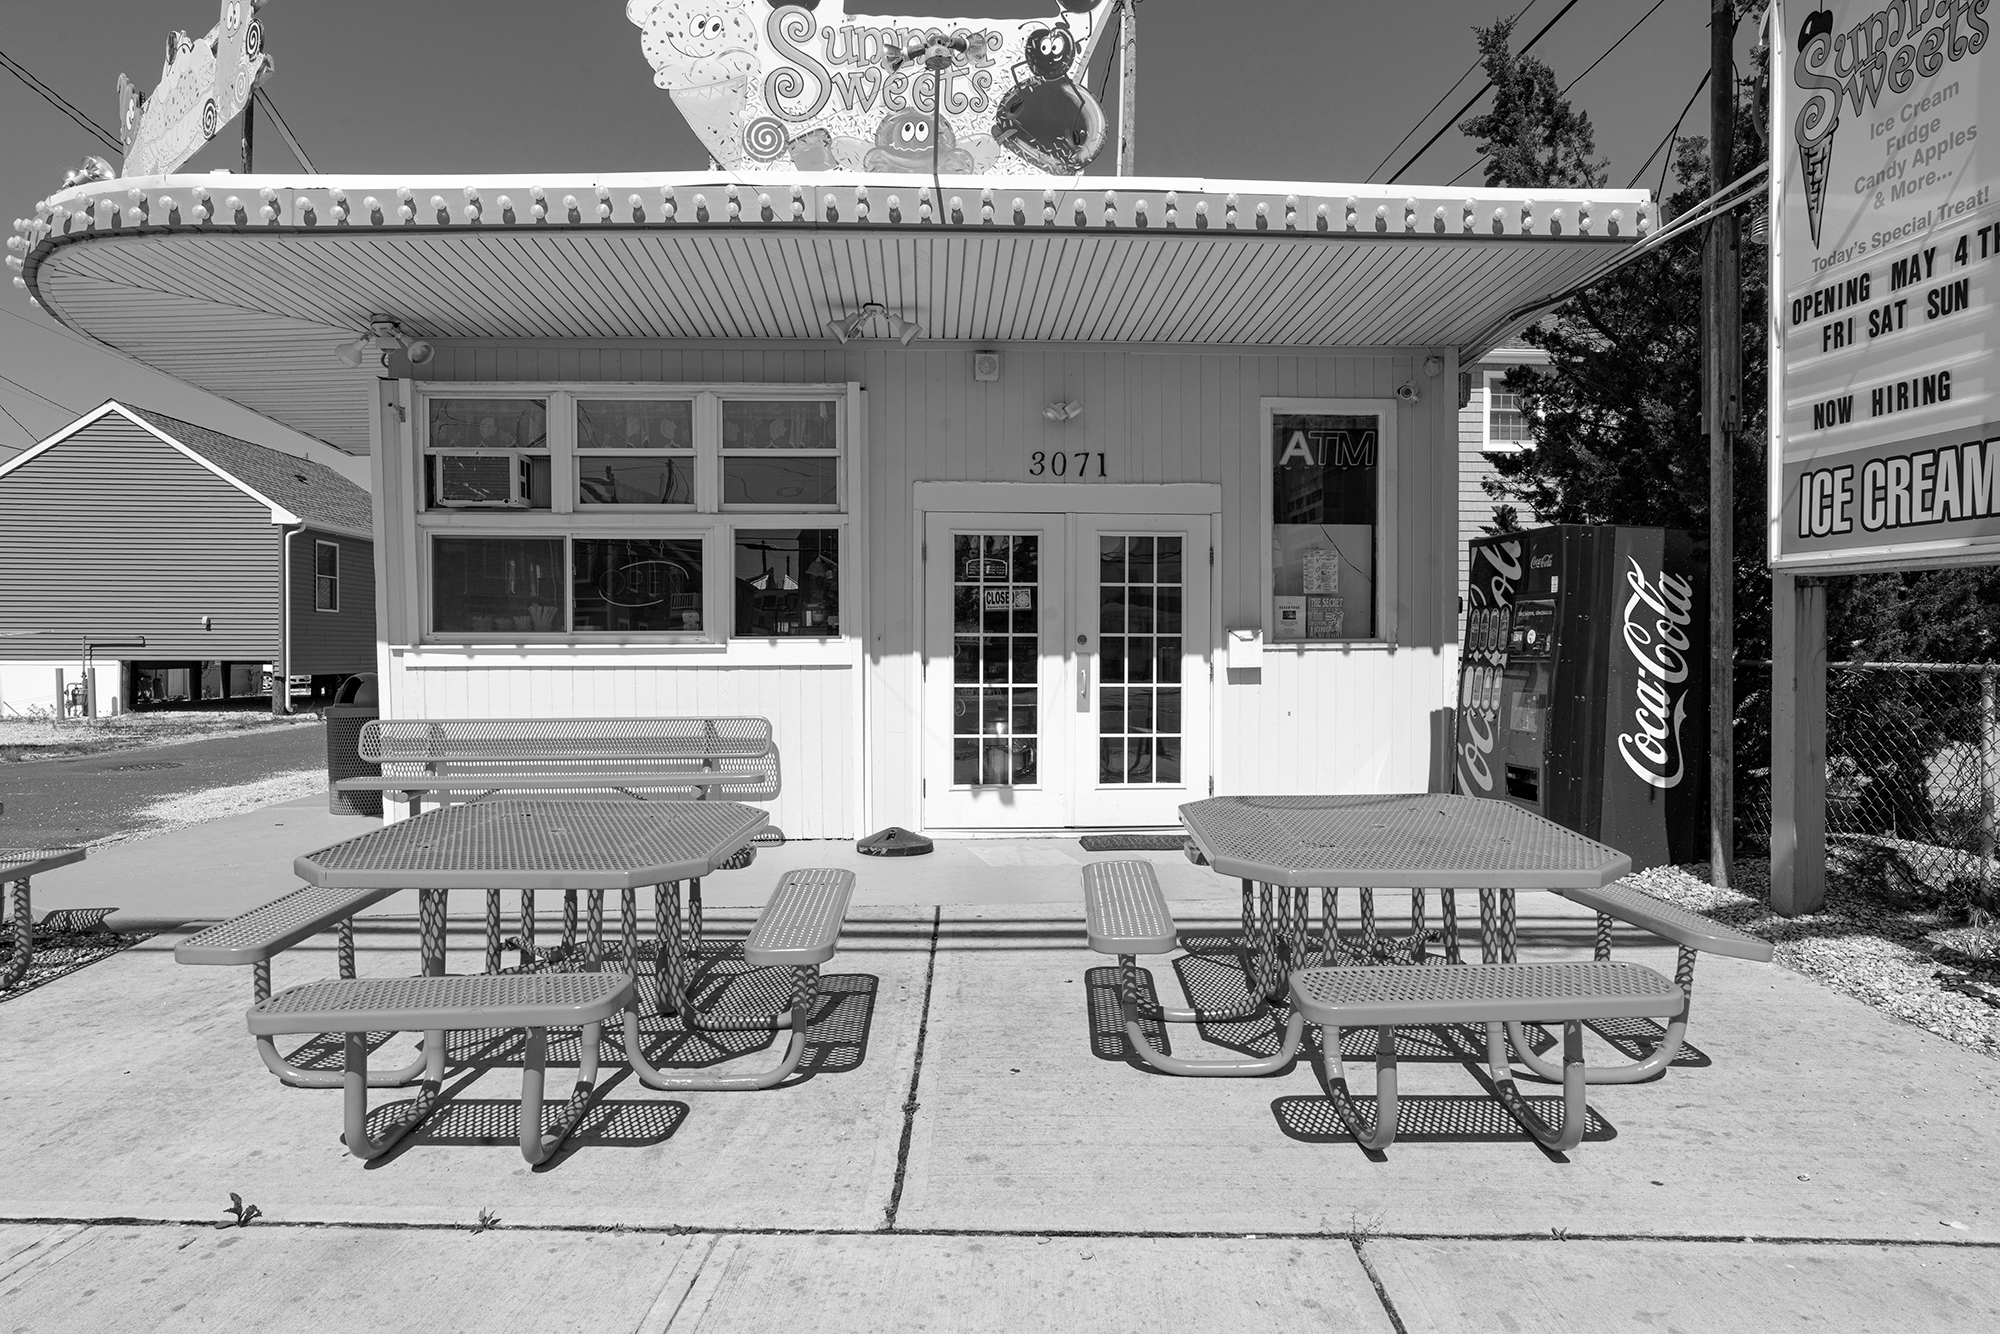
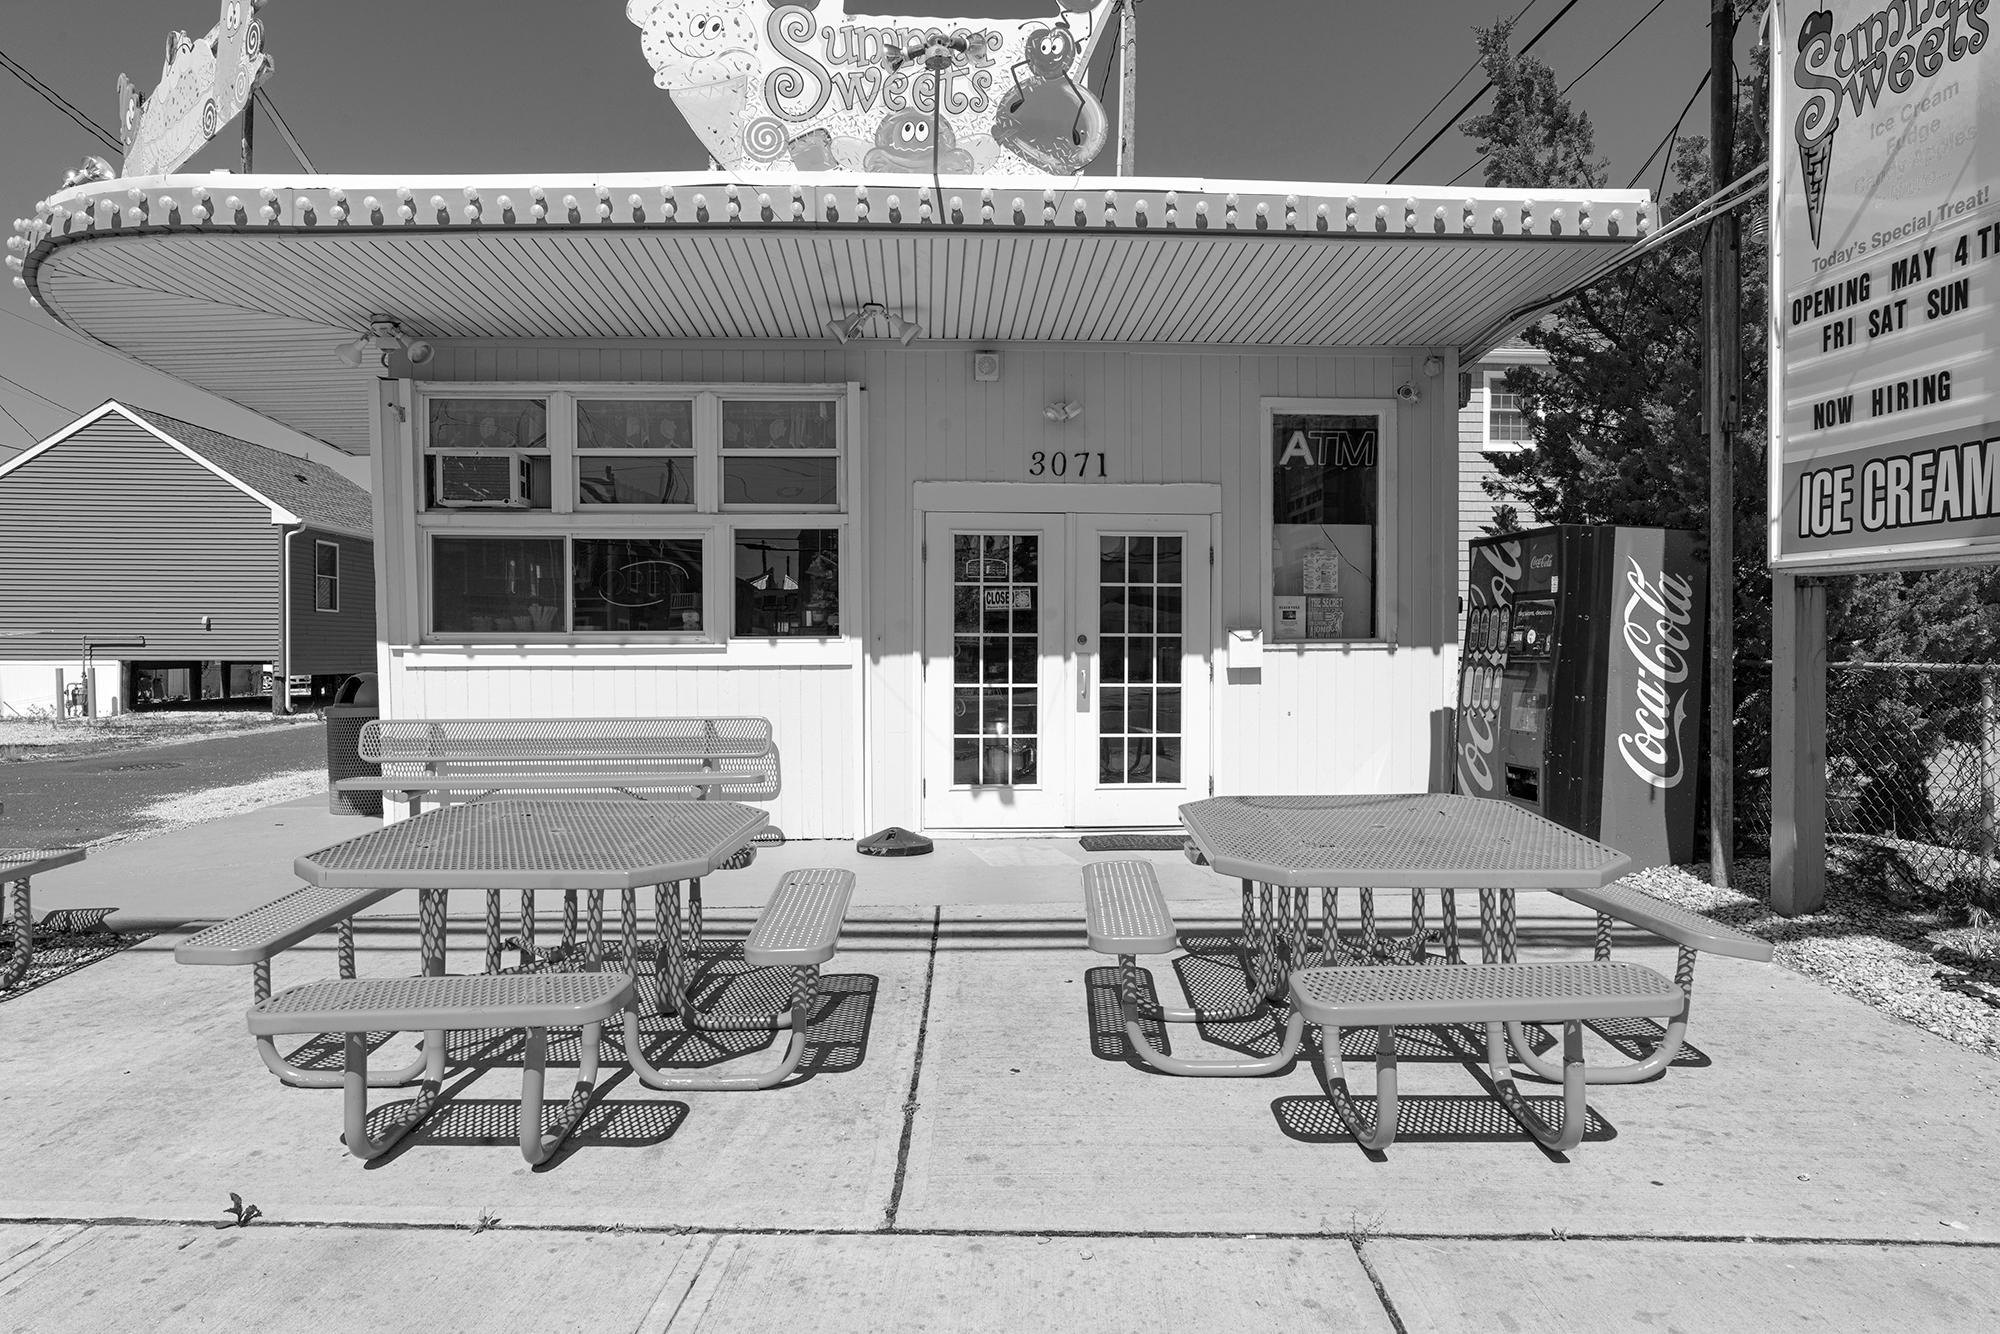
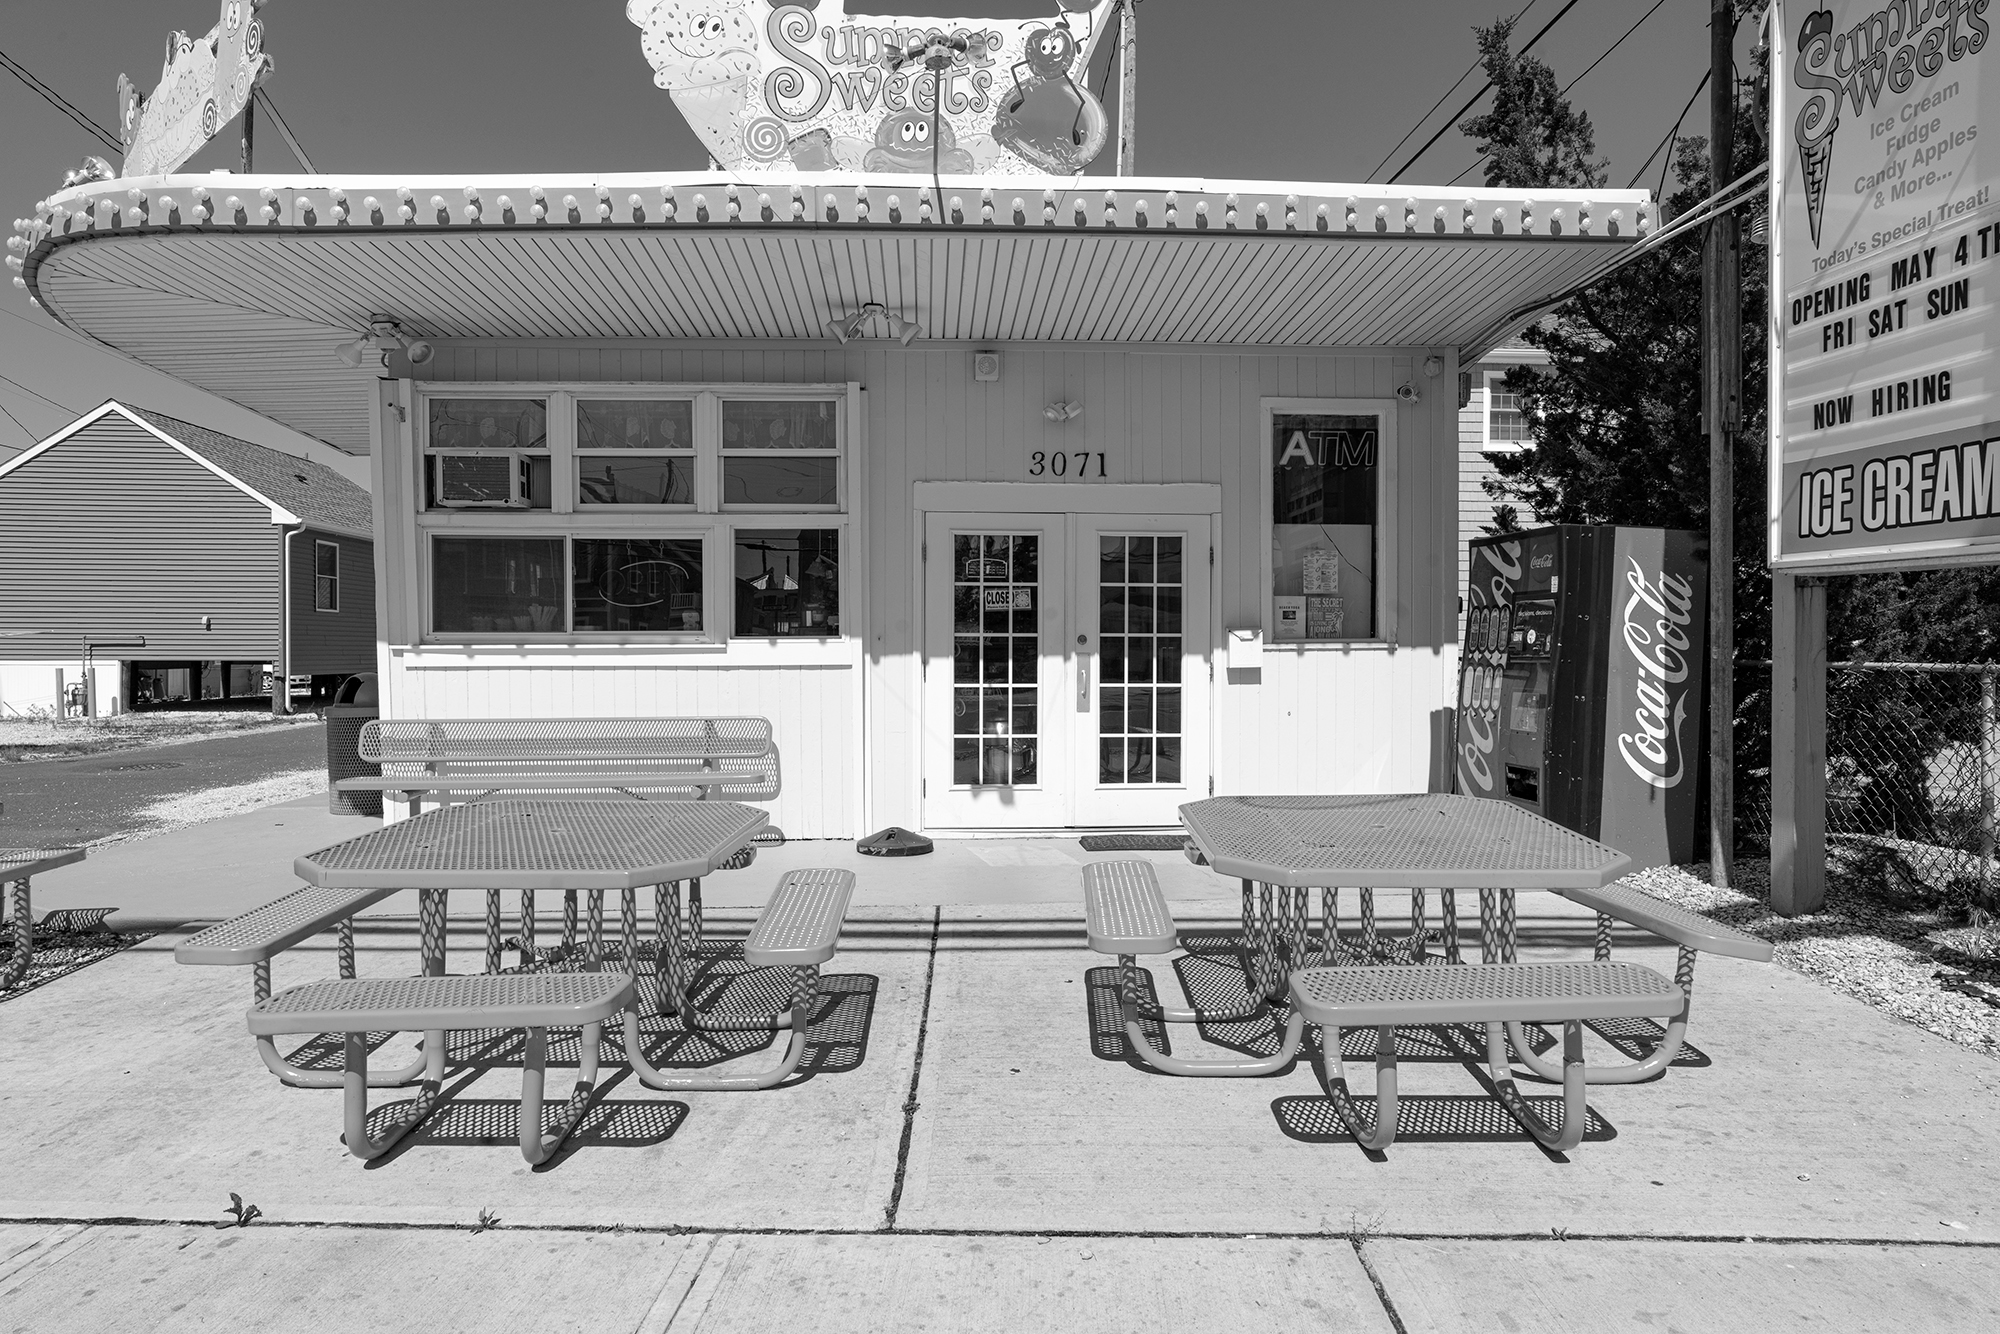
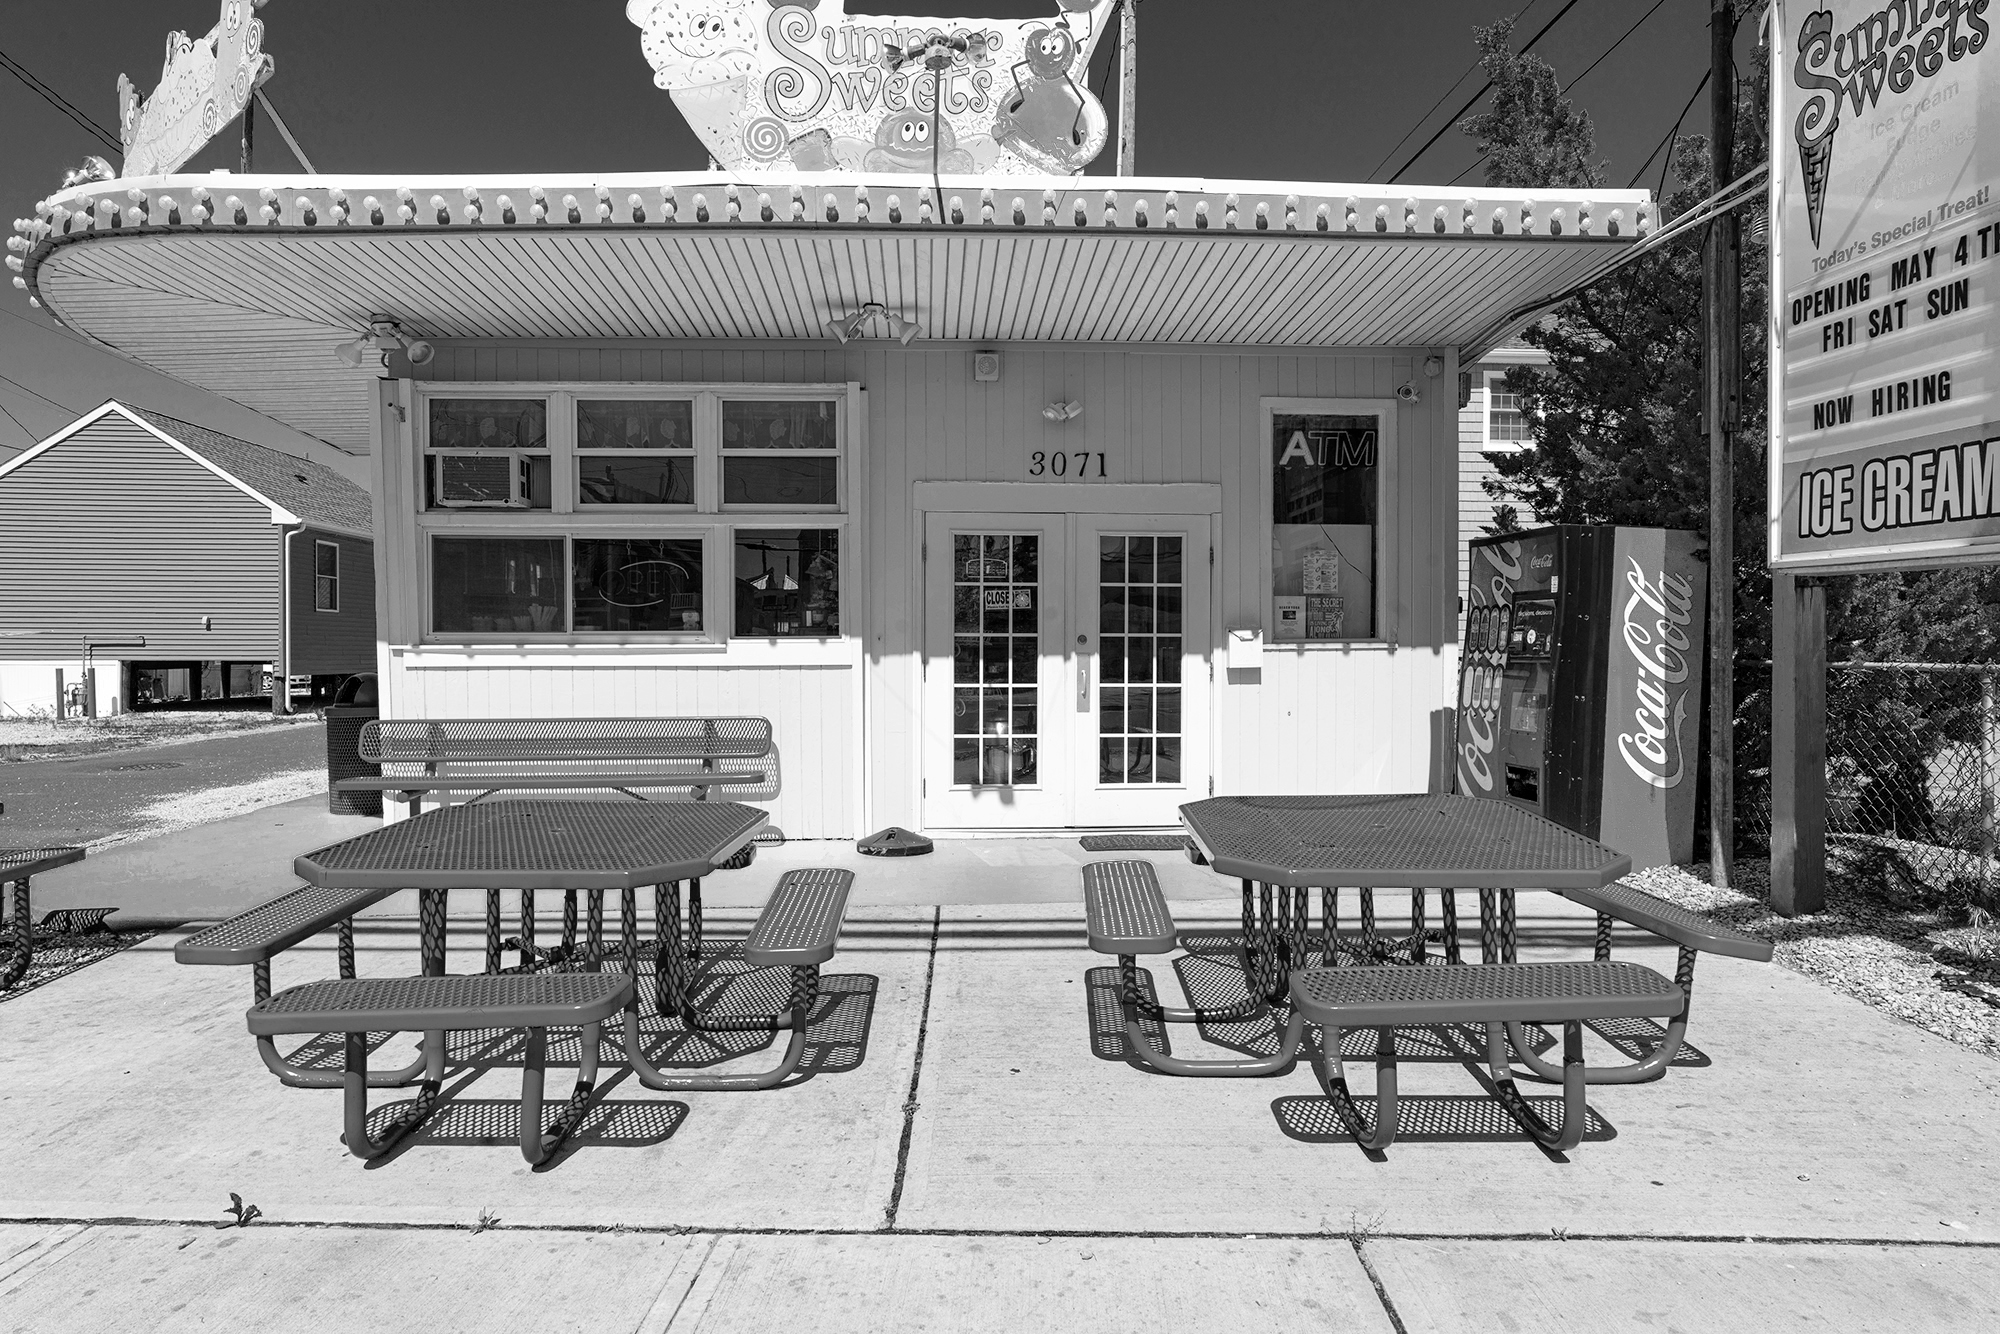
The following is a selection of color-to-monochrome image files converted to black-and-white using the more advanced method of adjusting the individual color channels.

In the original conversion, the blue wall translated to a muddied gray tone that required separation from the yellow chairs and painted baskets of fruits and vegetables behind them. By adjusting the Blue and Cyan channels, I was able to lighten the wall while bringing out the full tonality of the other design elements in the image.

An interesting aside is that in the process of converting many color photographs to black-and-white over the years, I've learned to appreciate—and in many cases actually prefer—the black-and-white renditions of many of the photographs I've converted from color.

Have you tried converting color images to black-and-white? If so, how do you go about converting your image files? Know any good tricks? If so, we'd love to hear about them in the Comments field, below.

7 Comments

Thinking B&W is something I hadn't noticed I had unlearned, when - many years ago, during a trip through Ireland, I stumbled over a small ledge and "rolled." I spent half a day with my travel set of mini screwdrivers trying to fix the two camera bodies and the two zoom lenses that I had hanging from my neck during the "procedure." Then I went to visit the photo shop in nearby Kinsale and arranged for them to process a roll of b/w film that I would shoot to test my gear. I had thought that I had taken some neat pictures, but each one of them showed the lack of the colour I had composed into it. So, back home I went and practiced a bit. First I tried to take some colour negatives and print b&w pictures from them, trying to find the b&w motives in those pictures. Let me tell you, without a good deal of filtering my results were invariably complete disasters.

Later, when my darkroom was all digital (and anything but dark, thankfully) I tried again - just "click on gray scale" - right? (I am using a very dated PSP7) No. Just like what you describe, I got rather bland results. Then I discovered the colour extractions. PSP has a "split channels" function that offers RGB,HSL and CMYK channels. Some of those will look like negatives, some like masks. Ignore the masks for now and invert the negatives. Then study the results. If - like I would - you use something with skin tones the results are particularly impressive - I find. Both in the good and in the bad. And then, of course, you can combine the extracts like layers and get even more interesting choices.

If you are the adventurous type you might enjoy playing with the histogram adjustment function. This is where you could take Anselm Adams' zone system through its paces without wasting even a drop developer in the process. I wonder how the old man would have enjoyed playing with that ...

Here you can determine the point your gray scale that you want to be black and the one for white and the rest will neatly arrange itself along a straight line between the two. Then, if you want, you can play with your gamma, bending the straight line into all kinds of curves, all the while watching the result of every move you make.

My old T90 had a function a bit like this, where you spot measured your blackest and whitest point - and a few in between if you wished - and thus could tell the camera exactly how to expose for these results - of course the camera couldn't mix the developer for you according to Adams' recipe. (I am sure my newer digital cameras can also do this sort of thing, but somehow I haven't bothered to search for this feature yet.)

But - and this is at the core of my contribution here, and Allan's article, I am sure - there are possibly many more photos in your material than you would expect. And quite a few of them are likely stunning black and white images. I found that, in particular, portraiture and some landscape photography can amaze you when you dig around.

And there is always the option of creating an image that has colour applied only in one (or a few) strategic spot(s).

Or maybe you have one where the light and natural colour are all wrong - a colour bias or lack of contrast or both - that will come to life like the swan from the ugly duckling when you use the right colour extract and polish up the contrast a bit.

All good points. What I find interesting is that there seem to be so many more options in monochrome compared to color. When you place a color filter in front of your lens when shooting color there's no big surprise as to the results. not so B&W - you never quite know what to expect.

Thanks for sharing!

Very helpful - thanks!  I was aware of the color channel sliders and have tried to use them without fully grasping what each would do.   I've used Nik Silver Efex with some success, but what you've described in Photoshop offers much control. And one can start with a present and then work the sliders from there.  I wasn't even aware of the presets, which is why Silver Efex seemed so useful.  

The IR filter looks like it would be interesting to play with.  

They're all potentially interesting - the trick is to play until you find what works!


Hi Allan,

Prior to the year 2010, I made a decision to photography the year exclusively in B&W. It was easy with a Canon A-1; just load up with B&W film stock. It was a year of experimentation using the different B&W contrast filters. It took me about three months before I could visualize a photograph in B&W. I rediscovered the classic look of B&W when I bought a three-pack of Kodak BW400CN to photograph the final Space Shuttle landing. Since it was a predawn landing, I figured that color would be a waste. I thought about Kodak TMAX 3200 next day delivery, but it was close to Saturday when I got the invitation. I did use Kodak Ektar 100 for the launch, which turned out to be a scavenger hunt locally.

After all that I sure hope the pix came out the way you anticipated. No?

I use layers In combination with the color-to-B&W conversion sliders to get a different conversion for sky, foreground and other parts of the image that are best converted differently from each other. I can also use the layers with a curves edit for each layer to further change the contrast of different parts of the image.