Close-up or macro photography is an incredible way to capture the tiny world around us on a super-detailed level. While the dedicated macro lens is still one of the best tools for exploring the world on a miniature scale, there are some very inexpensive ways to jump into macro photography with the lens or lenses you already own—no need for a specialized close-up macro lens. In this article, we will take a closer look (no pun intended) at close-up filters.
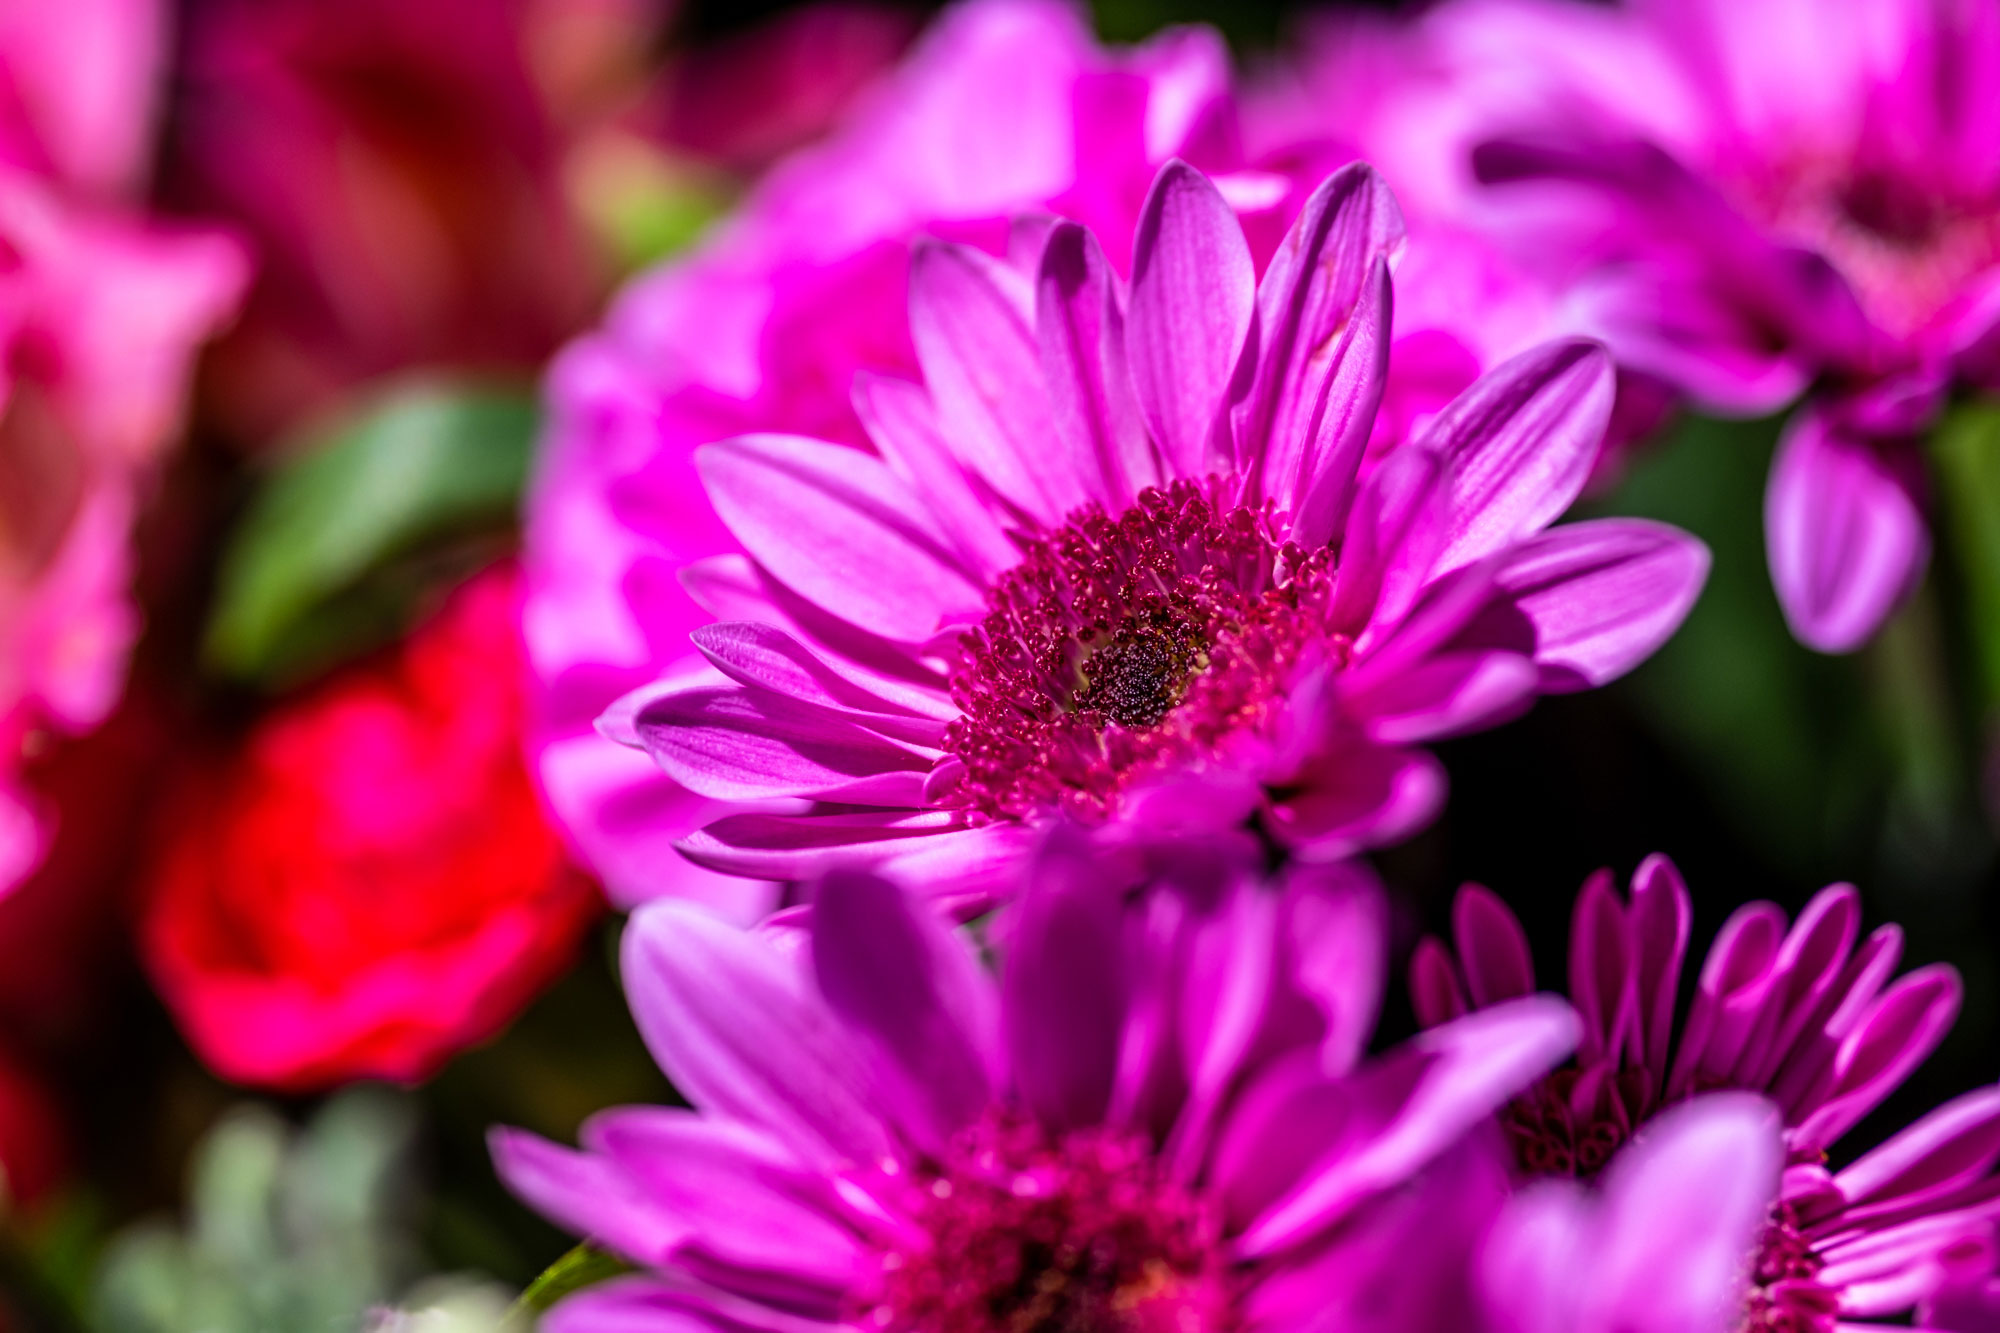
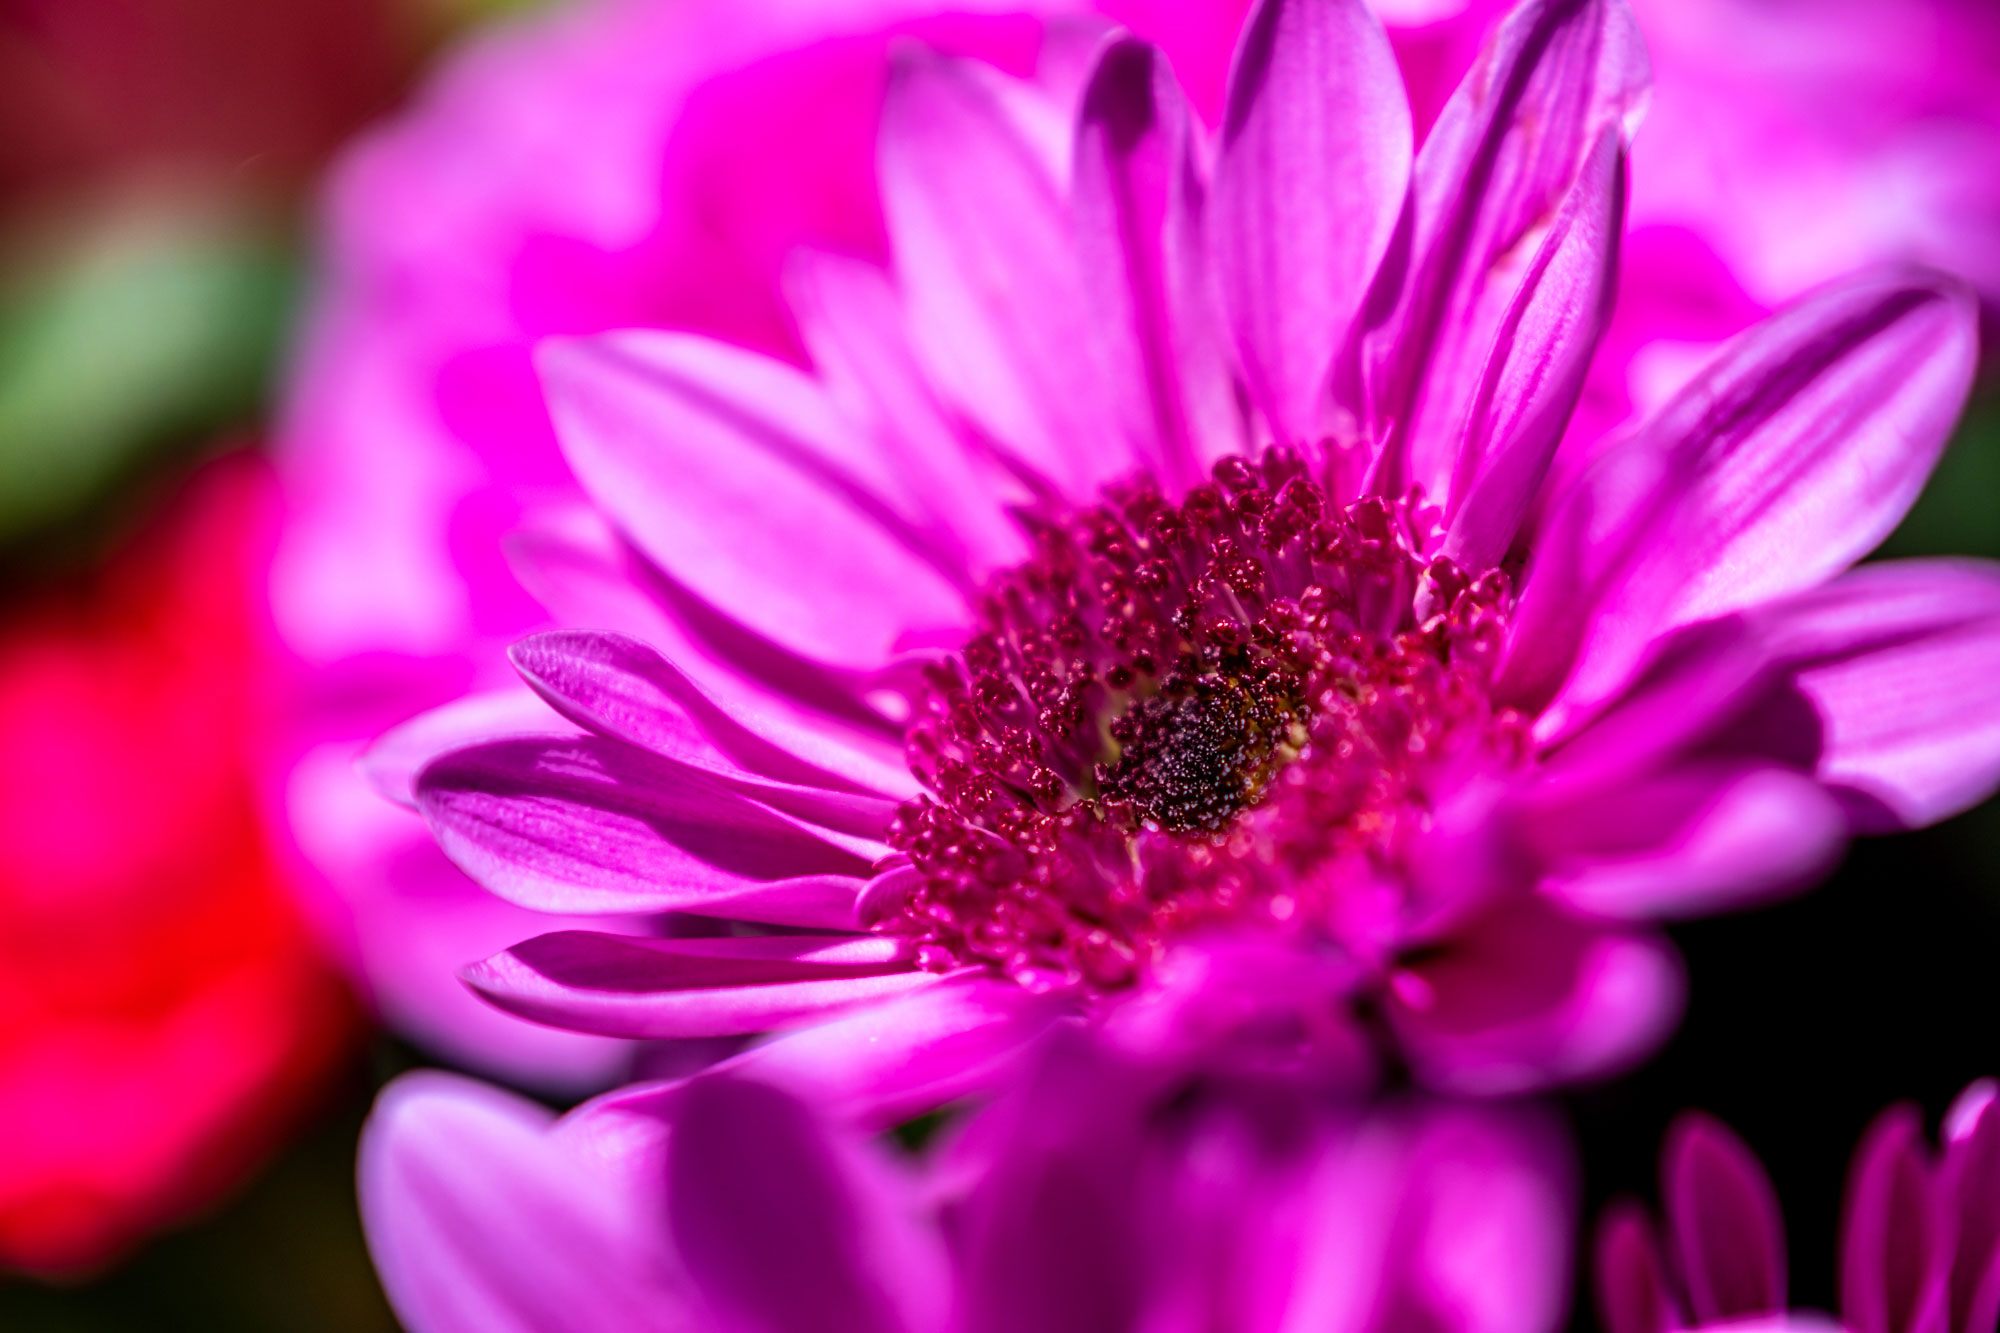
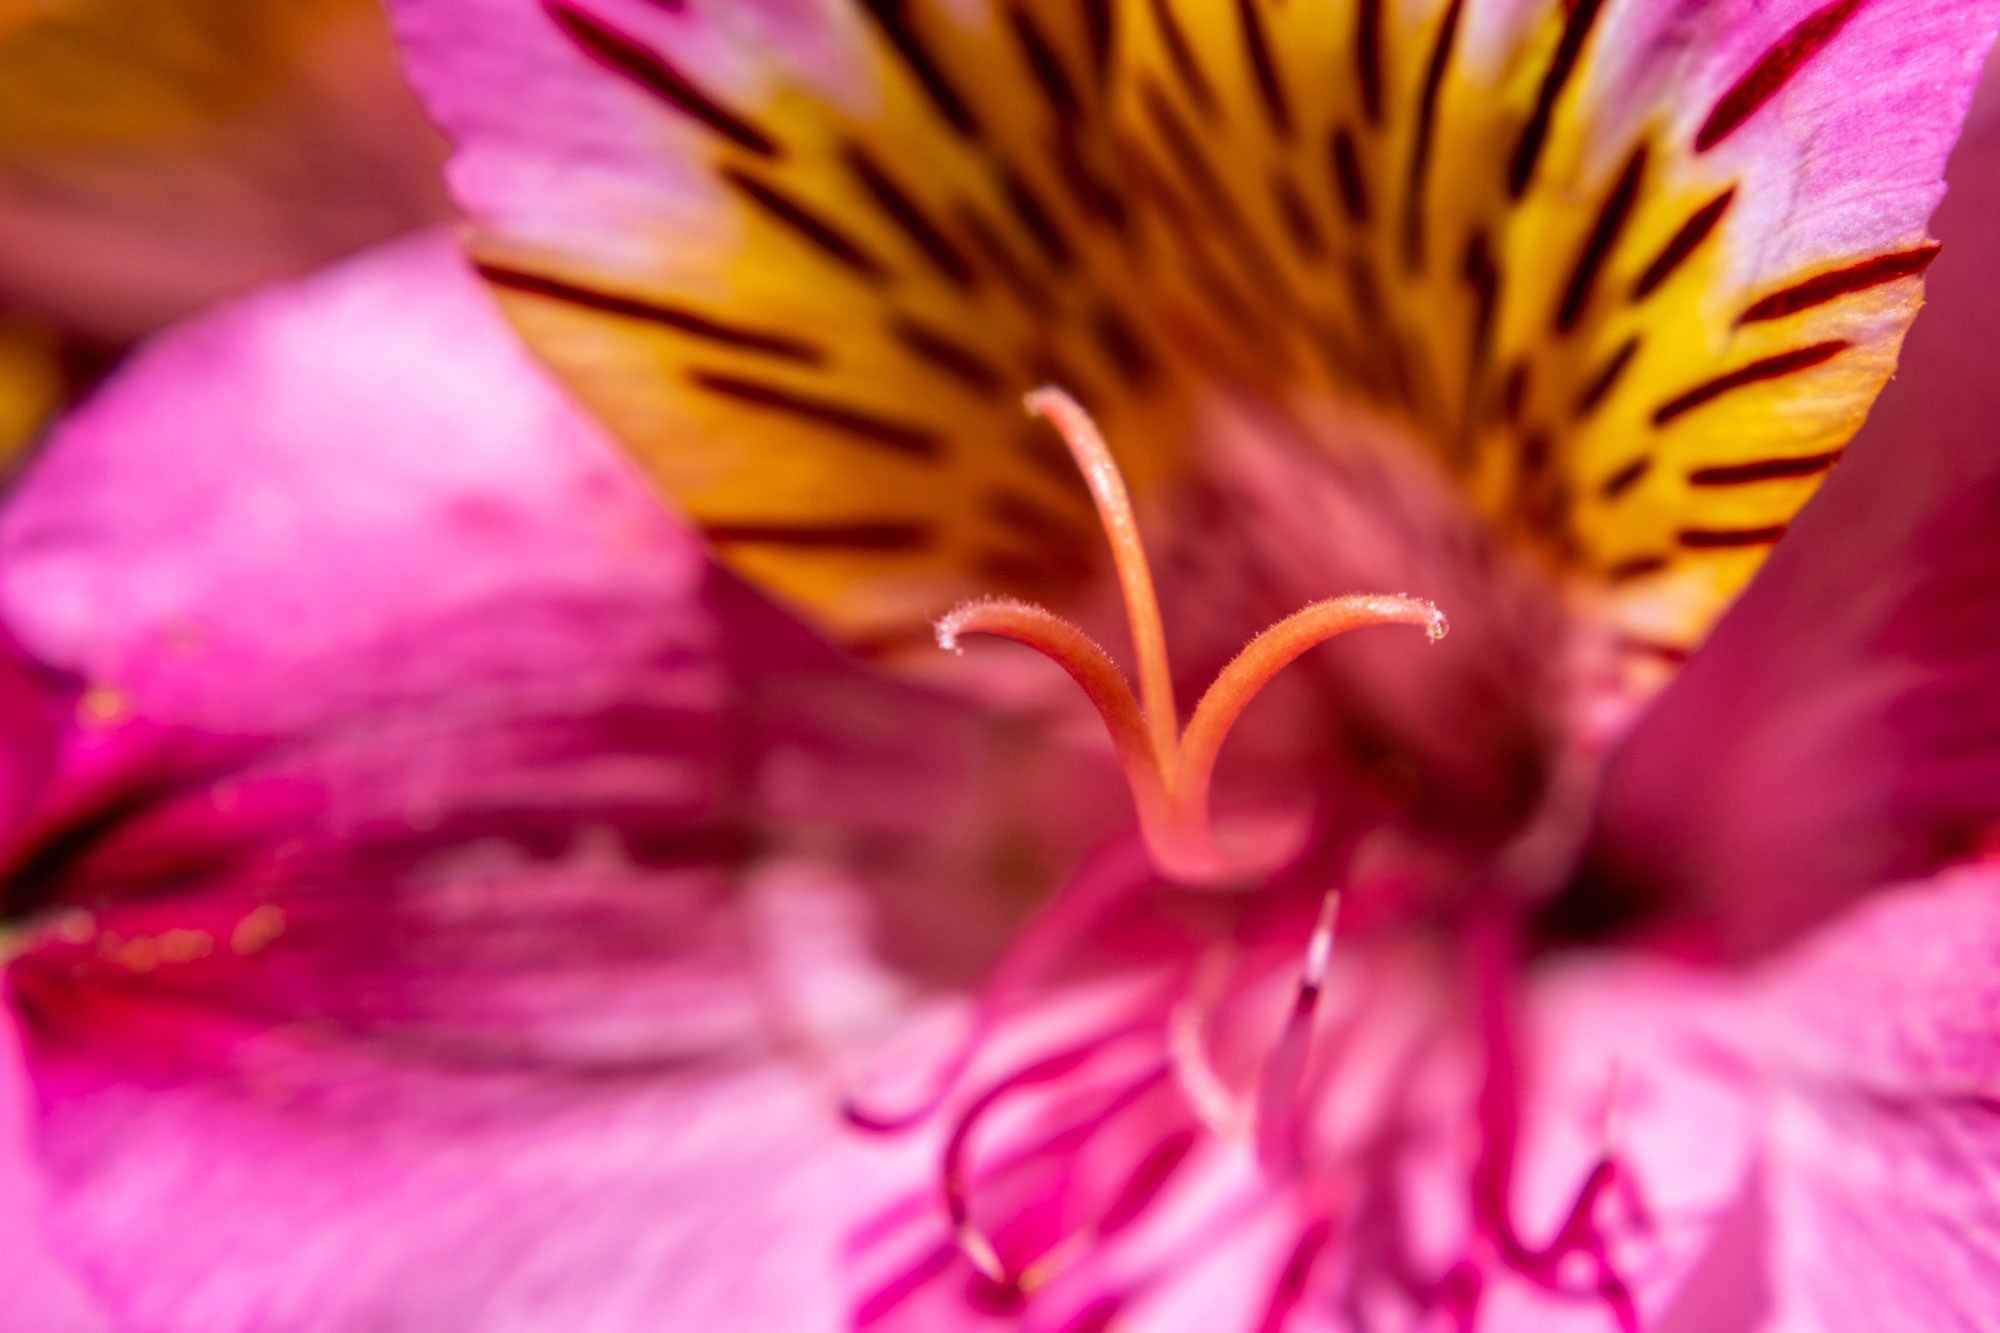
Non-product photos © Todd Vorenkamp
All photos taken with FUJIFILM XF 90mm f/2 R LM WR lens and Hoya HMC Close-Up Filter Set II
What Are Close-Up Filters?
Close-up or close-focusing filters are the photographic equivalent of corrective lenses for your eyes. In fact, for those familiar with prescription eyeglasses or contact lenses, you will notice that the strength of close-up photographic filters is labeled the same way—with diopters. “Filter” in this case is a bit of a misnomer because the filter is not doing any filtration of the image; it is simply allowing the lens to have a shorter minimum focus distance (MFD) and, therefore, larger magnification of the subject.
Close-up filters are called “filters” because they attach to your lens by the same method that most photographic filters do—by screwing into the threads at the front of your lens.
Like extension tubes, these filters allow you to achieve closer focus for close-up photographs using your “regular” lenses—no special dedicated macro lenses need to be used. And, yes, you can also use these filters to boost magnification on macro lenses, too!
What Are the Benefits of Close-Up Filters?
Cost and portability are the primary benefits of close-up filters. Because they are like other photo filters, they can be easily transported in your camera bag, backpack, handbag, or even in your pocket. You can venture out on an expedition with only a single lens, come across a tiny photographic detail out in the wild, reach into your pocket, screw the filter on, and get up close and personal with your subject. Remove the filter and press on!
Although there are exceptions, depending on brands, most close-up filters are relatively inexpensive—especially when compared to the cost of a macro lens.
While extension tubes physically change the subject-to-lens distance, effectively reducing the amount of light getting to the sensor, close-up filters do not have the same darkening effect. Their light reduction is negligible—important for handheld macro shooting when fast shutter speeds are needed to prevent subject motion blur or camera shake blur.
What Are the Possible Drawbacks of Close-Up Filters?
Adding more layers of glass between your lens and your subject always degrades the image in some way, and close-up filters are one of these additional surfaces that will exist between the camera and subject. Even the highest quality optics degrade an image in some way, and this fact extends to close-up filters. So, if you are looking for ultimate sharpness and resolution, close-up filters are not for you. Stacking close-up filters for more magnification is something you can do, but remember, you are adding even more glass for light to pass through.
However, my recent experience with close-up filters (see the photos of the nickels, below) saw some really good performance in terms of sharpness with the filters. Also, a lot of macro photography places an emphasis on center sharpness, and having the outer areas of the image fade to a soft blur is often a great aesthetic for many close-up subjects.
One other downside to close-up filters, as with extension tubes, is that you cannot do “regular” photography with them. You put them on when needed and remove them when you are done, meaning you can’t immediately switch between taking close-up shots and distant shots without removing the close-up filters.
Magnification
Close-up filters are measured in diopters, which is a measure of optical power. The higher the number, the more magnification (and the closer you can get to your subject).
If you are into mathematical formulas, feel free to take a deeper dive on the Internet to find the formulas that allow you to calculate the change in minimum focus distance for each diopter. If you are like me, just slap a filter (or filters) on your lens, focus, and make an image!
The simple math we can all take onboard here is that, if you stack a +2-diopter filter with a +4-diopter filter, you get a +6-diopter magnification.
Filter Sizes
As you shop for close-up filters, you will notice that they are available in different sizes. You can get the size appropriate for your specific lens, or, if you want additional compatibility, you can get a larger diameter close-up lens filter or filters and use step-down rings to fit lenses with smaller filter diameters.
The filter size of your lens is usually marked on the lens (or on your UV filter) and is also available in the specifications section of your lens’s page on the B&H Photo site.
Tips for Use
Using a close-up lens filter is quite simple. However, there are some things to keep in mind to help you get the best images possible.
Focus: Your lens’s autofocus might work just fine with close-up filters attached, so don’t be afraid to try it. If you want maximum magnification, you can always focus manually to your minimum focus distance and adjust your subject-to-lens distance. Sometimes, adding focusing gear can help.
Depth of Field: As you increase a lens’s magnification, you shorten its depth of field for a given aperture and focal length. This can be an artistic boon or a detriment to your photograph, depending on your visual goals. This article discusses how do deal with depth of field with close-up photography.
Shutter Speeds: Another side effect of increased magnification is an increased chance of blurring from camera shake. Boost your lighting, shoot in daylight, or adjust your aperture and ISO to keep your shutter speeds fast enough to avoid blur.
Get Some Glasses for Your Lens
Like the extension tube, the close-up filter is a fantastic way to get into macro and close-up photography. There are so many amazing things to see and photograph when you can see the world at a tiny level. Bugs, flowers, sand, and everyday objects all can make compelling close-up subjects for your camera and lens.
In the other articles in this series—Macro on a Budget—we look at additions for your lens, or lenses, that allow you to explore the world up-close: extension tubes, reversing rings, and macro couplers.
Do you have questions about close-up filters? Or have you used them in the past and have some tips to share from your experiences? Let us know in the Comments section, below.
14 Comments
Very convenient and inexpensive solution to enjoy macro photography. Thank you.
I come back to this series and learn something new each time. How do achromatic or apohromatic close-up filters fit in, here? These seem to offer much better image quality on the edges of the frame, but they cost more money and they weigh more.
I bought a NiSi close-up filter from B&H (I can't post links, but it's BH #NIRCLOSEUP58). Beautiful, solid piece of equipment. I wish I'd bought it years ago. This thing costs plenty more than a typical set of +1 +2 +5 macro filters, and it weighs almost as much as my plastic 50mm f/1.8! It delivers excellent magnification and image quality, but I do worry a bit: is this thing bad for my focusing motors?
Some of my Pentax lenses are internal-focusing, and none of them rotate the filter ring when focusing (heaven forbid!). Still, most of my lenses do lengthen or shorten during focus, and this NiSi achromatic weighs far more than any UV filter or lens hood. So the focusing motor is pushing and pulling more mass. Maybe I should just be doing manual focus anyway?
Hi Artie,
Welcome back!
Great question and I am glad the NiSi is working out well for you!
The short answer is: I don't know if you will wear out your AF motors faster with a heavy filter on the front.
Maybe? But, my hypothesis is that those motors are fairly robust and, knowing Pentax, maybe even over-engineered.
Most macro work is done in manual focus anyway, so if you are losing sleep over the wear and tear on the motors, just switch to MF when you mount the filter and get good rest!
As always, thanks for reading!
Best,
Todd
This is a very strong set of articles. And splitting it up so each type of macro technology gets a chance to shine is both a good way to do justice to each technique and a good way to avoid overwhelming the beginner.
The series cries out for a closing article, though. What happens if you compare studio shots of a doll (or coin) taken with a close-up filter, an extension tube, a reversed nifty-fifty classic lens, and a mid-budget 1:1 macro? How close can you get, and what does each method deliver for clarity, field curvature, and so on?
Also, a lot of photographers know about the "tripod ladder," in which a photographer buys $30, $80, and $150 tripods before settling on a $300 tripod that really meets their needs. Something like that exists with macro gear. I blew HEAPS of $$ before I saved up $250 for a splendid 35mm 1:1 macro from BH used!
Hi Artie,
Thanks for the kind words!
I (kind of) have a couple of articles speaking to your comparison, but, honestly, not as comprehensive as what you just mentioned.
https://www.bhphotovideo.com/explora/photography/buying-guide/macro-photography-gear-lenses-extension-tubes-and-filters
https://www.bhphotovideo.com/explora/photography/tips-and-solutions/tips-for-extreme-macro-photography
[We have a lot of macro content on Explora!]
I like how you share the "ladder" experience. We have all been there! And, its a solid concept with tripods. But, when it comes to macro, yes, the dedicated macro lens is the top of the pyramid, but for those looking to dabble in macro, or get unique (not perfectly clean) close-up pics, I think that the tubes, filters, and rings options are pretty cool. If you are wanting to be serious about macro, its probably best to start with a true macro lens, however.
Thanks for reading and taking the time to comment!
Best,
Todd
Back around 2015, I didn't have anything like $250 for a 1:1 macro (or $300 for a "forever tripod," for that matter). So I bought what I could afford and made it work. The upside to the "macro ladder" is that, now that I'm lucky enough to own a (used) macro lens, many of the macro accessories I acquired along the way still help out. I can stack my $9 +2 diopter close-up filter and my $30 +5 achromatic lens on my macro lens and get to 1.5:1. That's larger than life-sized!
Conversely, stacking cheap tripods on top of premium tripods seldom works out well. :D
Hi Artie,
You are correct. If you commit partly into macro you can use those tools (extension tubes, close-up filters, and reversing rings) with a macro lens when you go "all-in!"
And, yes, stacking tripods never works. But, if you have to, put the bigger one on the bottom. :)
Best,
Todd
Supplementary lenses have another advantage not mentioned: the camera's sensor is not exposed to dust/pollen/etc when attaching/removing them. This is more important than it may seem, because macro photographers have a tendency to work in "heavy pollen" areas, i.e. they habitually put their camera very close to flowers :-) Also, macro enthusiasts may wish to investigate the supplementary lenses made by Raynox. These are somewhat more expensive but are multi-element (less optical problems) and have an interesting clip-on, clip-off mode of attachment that allows them to be used without step-rings on a lot of different lenses.
Hi Matthew,
Thanks for chiming in. Great tip regarding keeping your sensor clean!
Feel free to share some more of your thoughts on the Raynox lenses.
https://www.bhphotovideo.com/c/buy/Shop-by-Brand-Raynox/ci/4/phd/4291258764/N/4294255798
Thanks for reading!
Best,
Todd
Hm...what else to say? A somewhat more complete description of the Raynox supplementary lenses can be found on Raynox's website. Some are 3-element, some 5-element, and they have a range of diopters to consider. They work best (my experience) with a true macro lens (for the flat field of focus) to extend its magnification range beyond 1:1 but this must be done with some caution for a number of reasons. The depth of field becomes ridiculously shallow as the magnification goes up. Focus can become a nightmare because just a millimeter or two of movement of the camera can cause you to wander in and out of the depth of field. And the exposure compensation required ("More light! More light!! My kingdom for more light!" :-) starts becoming a problem, too. Suffice it to say that attempting to go over 1:1 is difficult and takes the patience of a monk, plus almost certainly making many exposures to (hopefully) catch just the right focus as you wobble that tiny bit aiming at a water flea or something else tiny...oh, yes, and sometimes it's hard to even find the subject when stuff gets that small, especially if it's alive and moves. Helps to be myopic :-) It is possible to get (I can, anyway, on occasion) some decent shots at up to 3:1 handheld (using flash to boost the light), but the hit rate of truly sharp shots gets low. Such work is probably best done in a studio type environment with a tripod.
Hi Matthew,
Thank you for circling back! It sounds like the Raynox adds some magnification and a lot of challenges to the macro shot—all part of the fun of close-up photography!
Thanks again for sharing this information. Have a great holiday!
Best,
Todd
My Panasonic FZ80 (bought here at B&H!) has a 1-second 4K burst mode that I've used with some success - during the burst there's a fair chance that at least one frame will be reasonably in focus. The individual 8MP frames are stored in an MP4 file, and can be extracted on or off camera. One drawback, however, is that the flash is (naturally) not active in burst mode :( )
There is also an extended burst mode (start/stop), but the effort of sorting through the large number of frames in a more-than-1-second burst is daunting.
Due to financial constraints, I haven't been able to afford a Raynox lens yet - I'm sending my Santa request though :)
I'm currently using a lens of about 3.5 diopters that was scavenged from a dead overhead projector.
I created a push-on mount for the projector lens from duct tape (of course!) and some DWV plastic pipe plus odds and ends. It's ugly as heck, but it's quick-on, quick-off, and reasonably stable while it's on.
Hey Malcolm,
Good stuff! I hope Santa pulls through for you!
My guess is that there are more than a few homemade (and ugly) macro adaptations that have created some amazing results over the years!
Thanks for reading!
Best,
Todd