
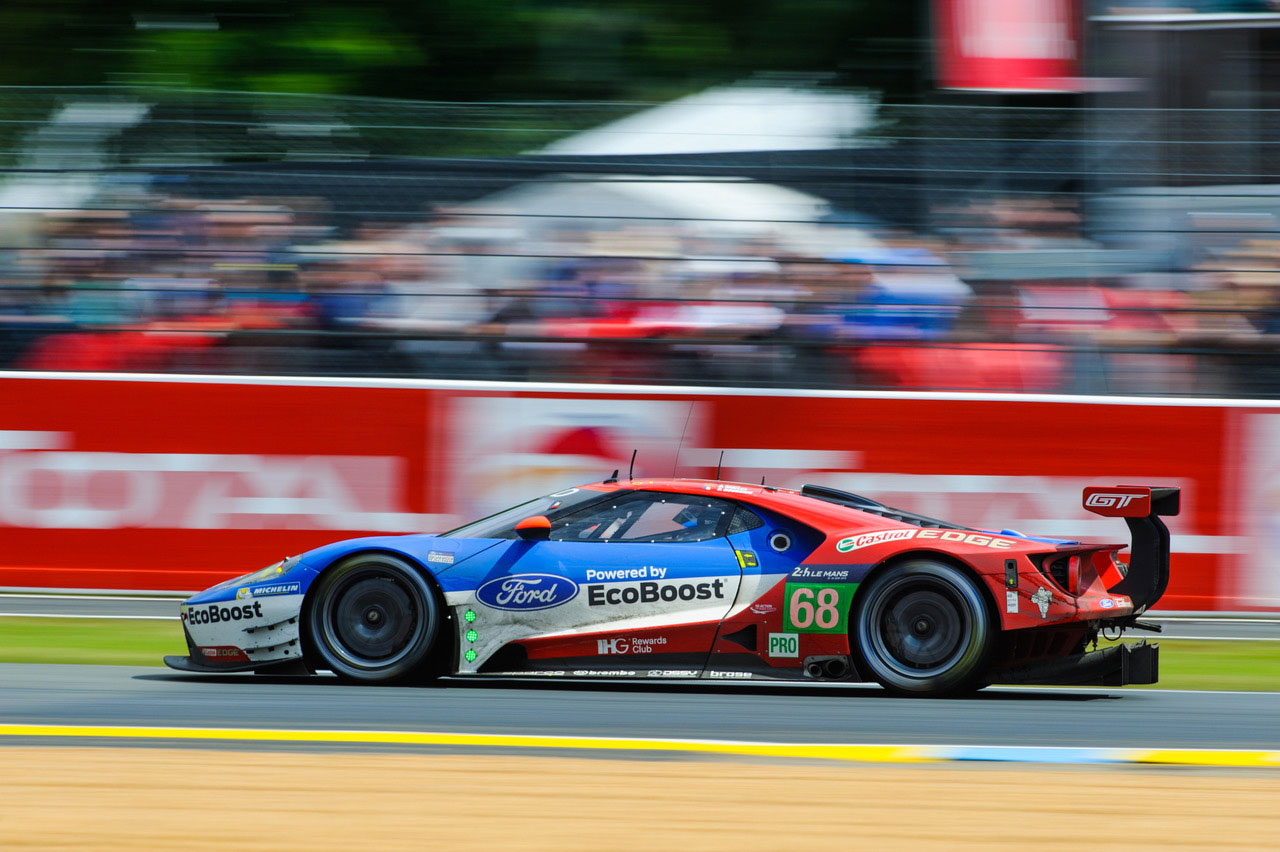
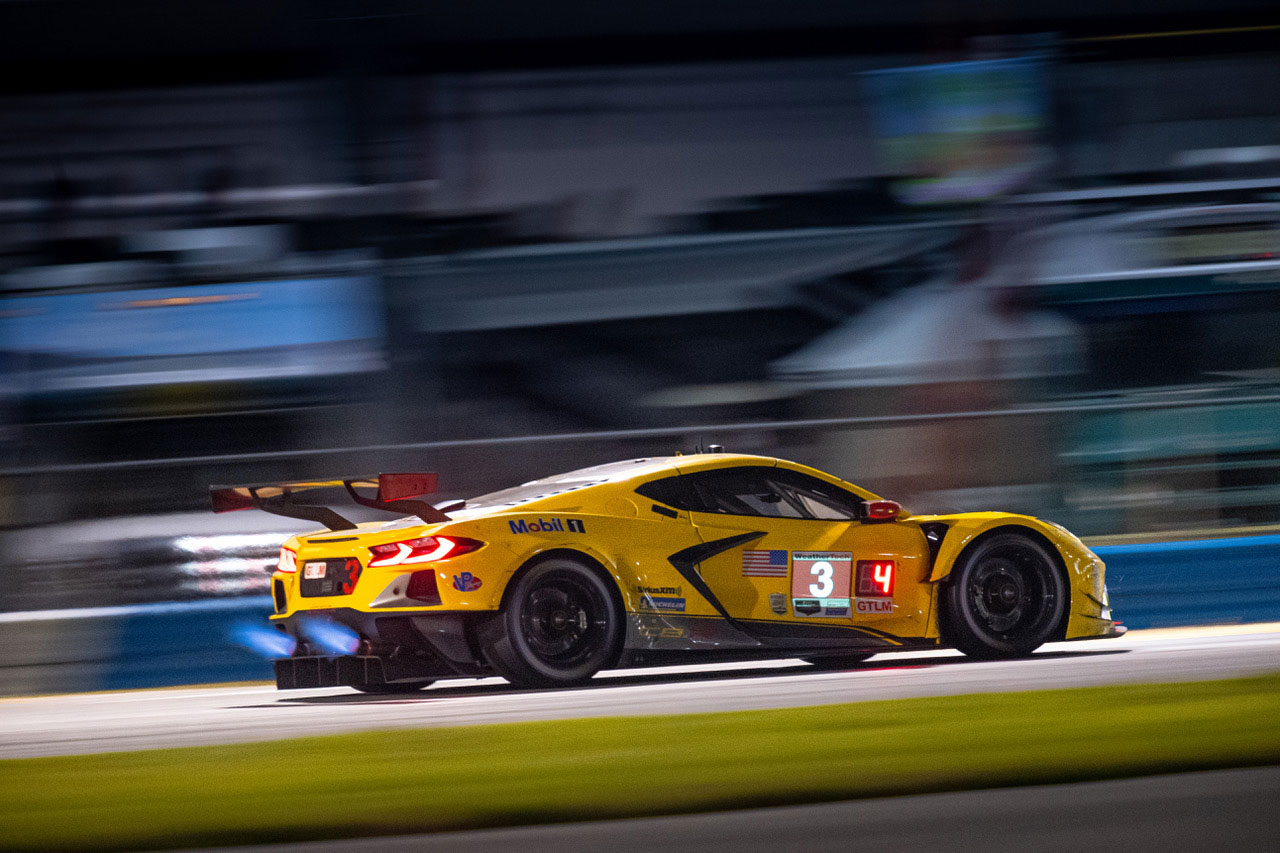
We have probably all seen images in which the photographer has panned with the action—photos where the subject is in fairly sharp focus and the background is blurred due to the motion of the camera. The subjects you might have seen in action panning photos include cars, trucks, airplanes, runners, motorcycles, bicycles, etc. Done well, action panning photographs are a pleasure to look at and, believe it or not, action panning is not the most difficult technique to learn with your camera. However, getting great results can be a bit of a challenge. Let's dive into the technique and grab some tips on how you can start to become a master of action panning photographs!
Photographs © Todd Vorenkamp

The Goal of Action Panning
The goal of action panning photography is to create an image in which a subject in motion looks relatively sharp and clear while the background appears streaky and blurry. The key to a successful action panning image is having something acceptably sharp in the frame. You do not want everything in an action panning image to be very blurry, but some blur can be expected. (The examples in this article show various degrees of success with eliminating blur while panning.)

What Is Action Panning?
In order to create an action panning photograph, you just need to put together two ingredients: 1) something in the photograph needs to be in motion and; 2) you, as the photographer, need to follow the motion of that subject with your camera while you take the photo.
For clarity, a panning shot with a static subject is called "camera blur." A static shot with a moving subject that blurs is called "motion blur." And, a static shot of a moving object with a very fast shutter speed is called "freezing motion."


The Science and Math
Like all things photographic, you can apply mathematics to the challenge of action panning. Thankfully, my math skills are horrid, so this article will not touch on that in any sort of depth.
There are a few things to keep in mind that might be obvious, but bear mentioning here.
1. The faster the object in motion, the faster you need to pan.
2. The closer you are to the object in motion, the faster it will pass through your field of view. For example: Stand perpendicular to a highway two miles away from the side of the road. A car driving at 65 mph at that distance will look much slower than one driving by, also at 65 mph, a few feet in front of you.

Camera Settings for Action Panning
1. Shooting Mode: Set your camera to shutter priority mode. You want to be in control of the camera's shutter speed. If you are new to panning, do not worry about setting your aperture or ISO—let the camera do that heavy lifting. As you get more proficient with the technique, you may, by all means, adjust those variables.
2. Shutter Speed: It is important to know that there is no magical formula for action panning shutter speeds. If you need a starting point, then use 1/60th of a second. In reality, the shutter speed will depend on the following factors.
-
Speed of the object(s) in motion.
-
Your panning speed.
-
The distance to the object(s) in motion.
-
The amount of blur you are trying to achieve.
So, start at 1/60th and check your results and adjust accordingly.
3. Focus: I personally find that manual focus is the way to go for panning shots. Autofocus can work, and it has for many photographers when action panning, but you are likely doing an extreme performance test of your AF system, and results can vary. Depending on the scene/scenario, if it is feasible, I will select manual focus and "pre-focus" at the distance where I know my subject will be. This will allow me to focus on the panning and I will not have to worry about the autofocus trying to lock onto a rapidly moving subject.
4. Drive Mode: You can certainly pan using single-shot mode or "motor drive" continuous shooting modes. What you choose is dependent on the scene and the image you are trying to capture and how long you will be panning.

Extras
1. Tripod or Monopod: Yes, you may use a tripod or monopod for an action panning image. However, if you're just learning the technique, it might be best to do it handheld to maximize your flexibility as far as camera positioning goes.
2. Neutral Density Filter: On a bright, sunny day, a shutter speed of 1/60th of a second will bring in a lot of light, even with a tiny aperture. Using a neutral density filter can help reduce the amount of light coming into the camera so that your action panning shots are not completely overexposed.

Technique
Action panning is relatively simple.
You set up your camera (see the settings above) and, as a subject in motion comes past you, you rotate your body and the camera with the subject and release the shutter. When the shutter closes, keep panning with your subject to ensure that you haven't stopped panning prematurely.

Reality
Even though the technique is simple, getting good results can be difficult. Action panning is just one more segment of photographic technique where practice makes… almost perfect. I won't say "practice makes perfect" because I do not think there is such a thing as a "perfect" action panning photograph—there are only poor, average, good, and exceptional action panning photographs.

Practice, Practice, Practice
What is the best way to practice? First, you don't want to make the neighbor's kid log hundreds of miles on their bicycle, riding past you and your camera, so that you can practice panning. Instead, just go out to a relatively busy road near where you live and start panning with passing cars. If you live in a crowded city, you can have literally thousands of passing subjects. In a small rural town, you will get less traffic, but cars are generally around. Absent cars, it's time to pay someone to get some mileage on their bicycle or running shoes!
If possible, practice during the dimmer daylight of dusk or dawn so that you can have a bit more flexibility with your shutter speeds. The mid-day bright sun might keep you from effectively slowing your shutter down far enough that you aren't getting overexposed images.
As you are practicing, check your results on the camera's LCD and think about whether you need to adjust the shutter speed or, maybe, be faster or slower at your own panning. Do NOT worry about finding a magical shutter speed or aperture, because the next time you are doing an action panning shot, the conditions will have changed, and those settings will be invalid.
Practice, practice, practice. That is the only way you will get better at action panning.

Camden Thrasher is a motorsport and aviation photographer based in Washington, and he produces some of the best action panning images in the business. We asked him if he had any tips to share on action panning.
“Obviously, being smooth/steady is one of the major keys. That starts from the very basics of having a solid stance so that you’re not going to be off-balance while having a good range of motion with your hips and legs. Seated, kneeling, or uneven terrain can make the motion awkward (though obviously I spend a lot of time in those conditions, anyway). Holding and supporting the camera/lens firmly is important, as well. The weight of the lens can be supported with the left hand and you can tuck your left elbow in to your chest to give a more solid platform for the lens and camera to rest on. Tucking the left elbow can help reduce some vertical shake, but it can also make (heavy) breathing an issue, plus it’s also not really feasible if the subject has any sort of significant vertical movement (airplane). There is no need to have a death grip on the camera as that can also introduce shake. Semi-related, if you’re wildly mashing the shutter button, that can be a problem as well—a gentle press is all that’s necessary.
“I generally use a focus point (doesn’t have to be one I’m actively using) or the intersection of my viewfinder grid lines as a visual reference for subject tracking and try to keep that point aligned with a point I pick on the subject (front wing of a car, for example, or driver helmet). I try not to make too big of corrections if I’m slow or fast with my panning speed and wait until I feel ‘synced’ to press the shutter release. I usually have better or more consistent results when I have a clear view of the subject approaching and can track for a bit before I actually want to take the image. Having that extra time to judge the speed is a large benefit. Being blind and having something come into frame at the last second is a tough challenge (again something I deal with a lot). Something to keep in mind is that, depending on the distance and angles between the camera and subject, the speed you need to pan the camera to keep a lock on the subject can change drastically—your panning speed increases as the subject gets closer and then slows as the subject passes. The more you can keep this in mind and preempt these changes instead of reacting to them, the better. This is an even more important thing to consider with subjects that are constantly changing speed and direction like race cars.


“It’s kind of hard to quantify a technique like this that basically just comes from doing it over and over a million times, but I guess that’s one of the points to make: repetition... practice, practice, practice. Trial and error, with a lot of error. It’s something that will become muscle memory after enough time. It’s obviously going to depend greatly on distance, lens choice, and of course the subject motion, but for people starting out with a race car, for example, shutter speed in the 1/200-250 sec range can give a decent blurred background effect. Also, that’s not an overly tricky shutter speed to hold a camera steady for. Start with higher shutter speeds and decrease to get the desired effect as your comfort grows.” —Camden Thrasher
Do you have any questions about how to do action panning images? Let us know in the Comments section, below!
