Coming at you fast and furiously, we’ve got eight quick tips for cleaning dialogues in a short film context—although, really, these tips could apply to any length film; from 30-second spots to feature-length films. If a project with dialogue has fallen into your professional lap, you’re going to want a cheat sheet for how to clean up that dialogue before you go about EQ’ing, compressing, and more.
Well, my friends, here is that cheat sheet. Follow these eight steps, and you’ll be ready to start mixing the dialogue of your audio/visual project.
Organize Your Session Judiciously
Usually, the editor has already sync’d up all the audio takes that correspond to shots used in the film. So, thankfully, you don’t have to worry about that! The editor then exports an AAF or OMF file for you to open in your DAW.
But that’s all the editor owes you—and often your resulting session will come in looking messed up. Audio organization might not be of concern to the editor, and rightfully so, because that person has a difficult job without having to worry about what you’re going to do.
So, when you get the audio, lay out each scene carefully. Organize the scene by character, by mic applied to each character (more on that later), by room tone tracks and SFX tracks. Color-coordinate the tracks in your DAW, too. It helps you move faster later to put some time into the organization of your session.

Isolate Regions and Implement Fades
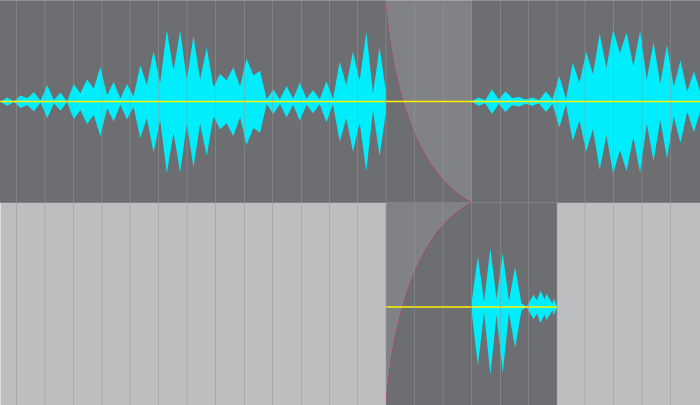
When editing dialogue takes, you’ll want to frame each region so it only contains the necessary audio. That way, no unwanted audio crops into the scene. Do remember to slap fades at the beginning and end of each region, and generally use a crossfade when stitching two regions together.
Neat editing lets you identify, with more efficiency, where you are at any giving moment. It also helps you track down potential trouble-makers more quickly, since you don’t have to worry about sudden pops of noise coming from audio you’ve forgotten to extirpate.
Sometimes, regions left fade-less can cause sudden clicks/pops when the play head reaches them, leading to horrible noise issues. This occurrence depends on the position of the edit, the performance capabilities of your computer, and how CPU-intensive your session might be. In any case, implementing fades throughout the mix helps gel sections together without causing unwanted noise.
Choose the Take that Sounds the Best
This is what usually goes down on set: The recordist puts lapel mics (AKA “lavs”) on the actors and holds a boom up to cover the whole scene. You’re usually offered both boom and lav takes, so you have a choice for each character.
Go through the scene and audition the mics. Pick the one that sounds consistently better. Perhaps one character sounds rich through the boom, while another sounds more present with the lav. Maybe others sound better with the lav at certain moments, and then, after walking around, they sound better on the boom. It’s up to you to make the call—but make the call you should! Rarely should you use boom and lav simultaneously, because the phase relationship between the two is often hairy.
Use Noise Reduction Software like RX 7 or Audionamix
Your DAW’s EQ, compressor, and IR reverb generator are more than sufficient to handle the job of mixing a film. But when it comes to noise reduction, don’t expect to rely on stock plug-ins. You may need to go with a trusted name in the business—something like RX 7 (Elements, if you’re on a budget) or Audionamix IDC (also a fine choice). Both are inline processes that can greatly help you remove unwanted room tone from a take.
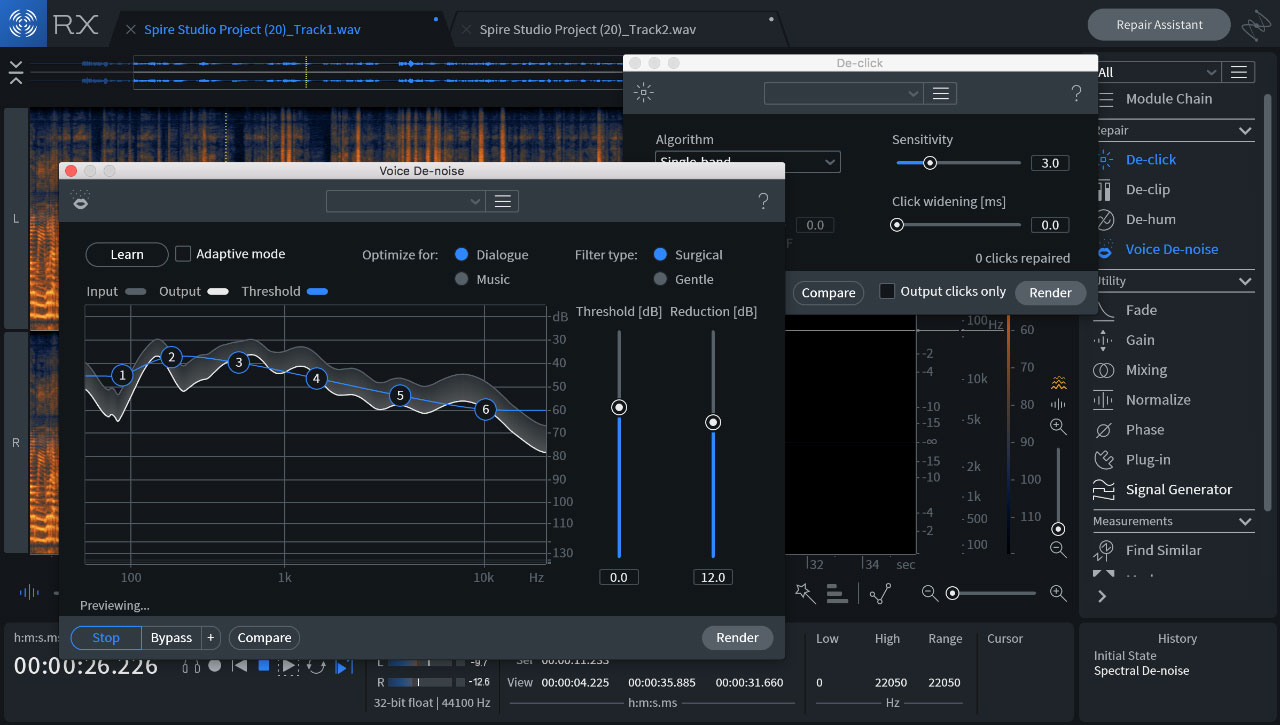
However, do not over-denoise. This will cause artifacts and ghoulish whooshes of noise we call “space monkeys.” Space monkeys belong in space, not in your film.
Unless your film is in space. And there are monkeys…
Anyway, on to our next tip.
Use Room Tone so You Don’t Have to Over-Denoise
To keep you from over-denoising, make sure you have an appropriate room tone in the track, or suitable outside ambiance. Level-balance it against the dialogue before you begin the de-noising process. Not only will the room tone add realism to the scene, but it will mask some of the noise around a dialogue track and, thus, keep you from over-denoising. If you do this first, you might save time later in cutting down on de-noising time.
You can even get creative in this endeavor: If the scene takes place in an air-conditioned room, and there’s a random bit of unremovable noise at the tail-end of a given phrase, try automating a blast of air conditioning into the scene, as though the air-con suddenly woke from economy mode. It’s a diegetic move, and it will mask the noise.
Use Forensic Tools Over Destructive Editing Techniques
The old way to remove a horrible plosive or click from a line of dialogue involved locating the offender in the wave form, excising it, and merging the word’s regions back together—which sounded natural enough, but could cause problems when it came to sync: if you’re moving dialogue around, you’re disrupting the relationship between the aural and the visual, which looks bad. So you’d have to be very careful in this process.
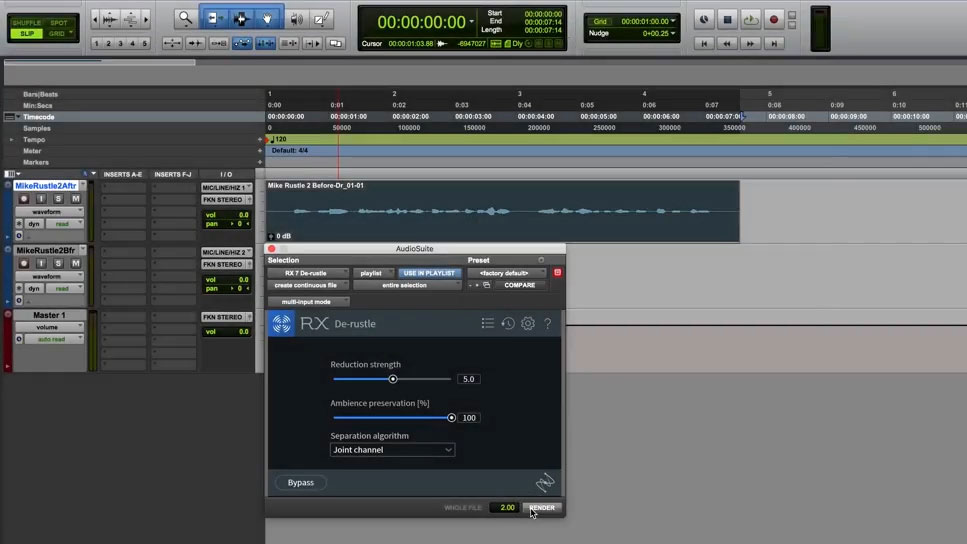
These days, forensic tools like RX 7 have tools to handle plosives, clicks, lavalier rustle, and more. Use them, and you won’t have problems with sync later down the line.
Use EQ-Matching Tools for Consistency
Anomalies on a given phrase can occur for any number of reasons. Perhaps, between shots, the editor selected drastically different takes for the scene, and the actor’s lav had shifted for that specific shot. Maybe they were farther from the boom you’re using for that one bit of dialogue. Maybe it’s a looped line on a different mic.
Before you apply any processing to an entire dialogue track, make sure that any tonal outliers are roughly in the same ballpark as the rest of the regions.
Most of the time, you can massage these outliers into shape with EQ matching software. EQ match analyzes the frequency signature of one phrase and applies it to the one in question. Some DAWs, such as Logic Pro X, have EQ-matching plug-ins already. Some third-party plug-ins, like Fabfilter Pro-Q 2, Ozone 8, and RX 7 Advanced, offer sophisticated EQ matching indeed. Run the outlying tonal phrase through some EQ match now, in the editing phase, and when it comes time to treat the whole track, you might not have to break the phrase out into its own channel.

Of course, you can also use your own ears to do this job, and AudioSuite/bounce-in-place the results into the original track. In fact, you probably should do this. But sometimes you don’t have the time.
Before Applying Processing, Edit for Consistency in Level and Ambiance
This is like the last tip, but goes beyond tonality, addressing level and ambiance. Your inline processing—such as EQ, compression, and reverberation—will work a whole heck of a lot better if you’re feeding the chain a consistent piece of audio.
Use clip-gaining to make sure drastically different lines are exactly as loud as you need them to be before you reach for that compressor. Likewise, if a line of dialogue has a different ambiance around it, use something like RX 7’s Ambiance Match to make it feel congruent.

This especially applies to ADR—an actor’s line that’s been dubbed into the scene in post. Sometimes the actor doesn’t repeat these lines into the same microphone/chain as the one used on set; level matching, EQ matching, and ambiance matching can help make everything gel before you process your dialogue, so that the mixing process is relatively easy and streamlined.
Conclusion
That about does it for tips to employ before you sit down and process your dialogue tracks. We hope we’ve left you with a clean cheat sheet for cleaning up your lines. Feel like I’m leaving something out? Don’t hesitate to let us know in the Comments section!
