
Considering the amount of video content now consumed daily by most people, it’s becoming harder and harder for photographers to isolate themselves fully from video. It’s an asset, and practically every DSLR and mirrorless camera made in the past five years not only has video recording but has near-cinema-quality video.

Whether you are learning video for work, want to use your best camera for family videos, or perhaps just want to gain a following online, there are some good tools you should acquire.
For Better Audio: Microphone
One thing photographers have never had to deal with is audio. It just isn’t a part of snapping stills. You’ll quickly learn it is just as important as the imagery. A video with terrible sound is just as painful to watch as a video that is completely out of focus. Luckily, good technique and a new microphone can alleviate many of these basic concerns without much expense or effort.
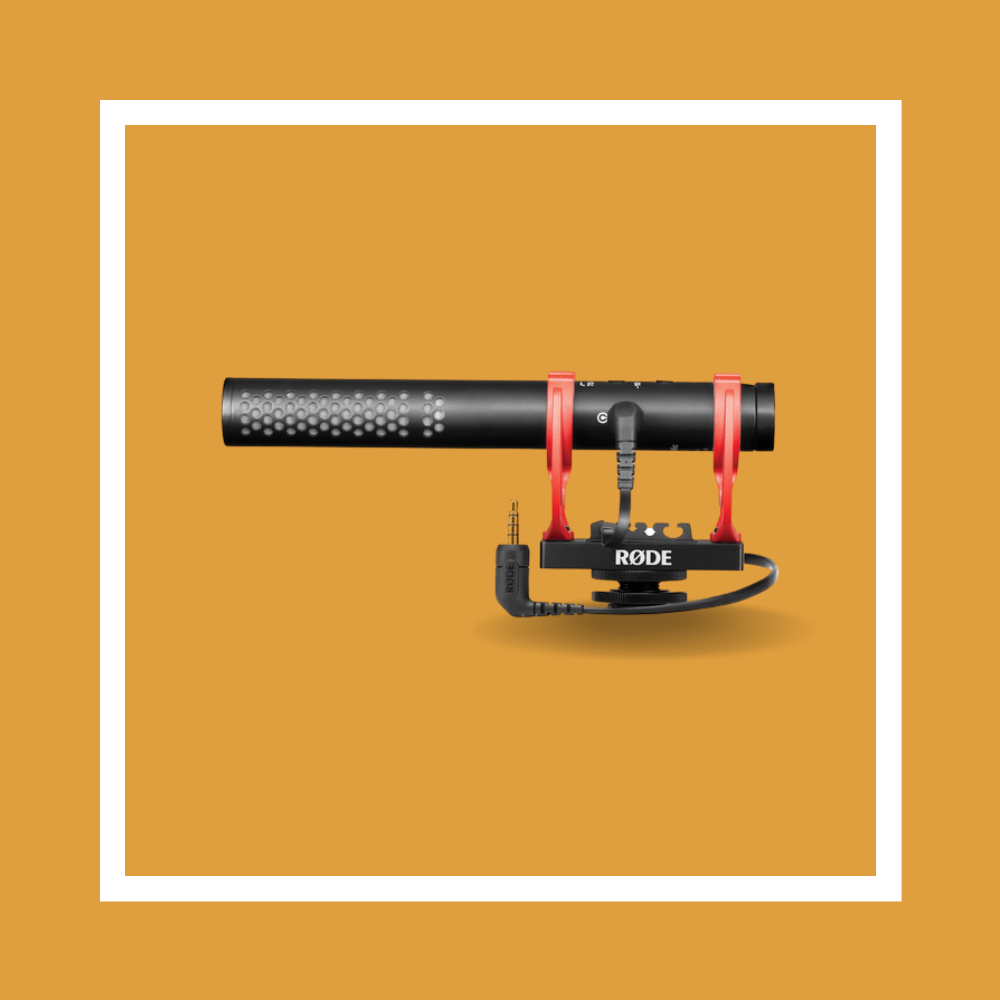
A compact, camera-mounted shotgun mic will perform infinitely better than the microphones built into your camera. Perhaps the standard is from RØDE, and one of its best is the VideoMic NTG. It slips into a DSLR or mirrorless camera’s hot shoe, plugs into a 3.5mm input, and basically you are ready to go. Being a shotgun mic means it’s more directional than in-camera mics, helping to minimize off-axis sound and focus in on whatever is in front of the camera.
For the Cinema Look: Variable ND Filter
The days of film running through cameras at 24 fps with a mechanical shutter that produced a distinct amount of motion blur was something we all became accustomed to, even if we didn’t realize it. How it worked was a mechanical shutter spun around in front of the film, exposing each frame for half the amount of time it was in position. Shooting at 24 fps meant that each frame was exposed for 1/48th second. This is called the 180-degree rule and it’s a good rule to follow if you want your footage to look “normal.”
As photographers, you may realize that having a set shutter speed fixed at ~1/48th second when shooting 24p can introduce exposure problems: It eliminates an entire third of the exposure triangle! Considering ISO has a bottom end and you don’t always want to be forced to close down the aperture, you’ll need a solution. This is where a variable ND filter is useful.
Variable ND filters simply cut the amount of light without introducing (much) color cast. They also are adjustable on the fly and make it easier to adjust exposure when shooting video without giving up all creative control. Also, we recommend picking up one for your lens with the largest filter thread and then getting some step-up rings to use it on your other lenses.
Want a recommendation? The PolarPro Peter McKinnon Edition Variable ND Filter is popular and has reviewers pointing to its relative neutrality and sharpness.
")
For Better Video: On-Camera Monitor
Video is a bigger challenge than stills. You need to constantly be on alert for whether the image is in focus, if the exposure is changing because a cloud moved, and if the color is accurate. Stills camera files generally have more latitude for editing and don’t take up as much space as high-quality video. Also, high-quality compressed video isn’t close to the same quality as raw stills. If you want to make sure what you are recording looks the best possible, you’ll want a bigger and better display than the screen stuck on the back of your camera.
An on-camera monitor is physically larger, brighter, and sharper than a DSLR or mirrorless camera’s screen. They also have features like zoom in during recording, waveforms, LUTs, overlays, audio meters, frame markers, and more. Those are all useful for checking focus, exposure, color, framing, audio levels, and planning for post. It’s a huge benefit and, once you see it, you’ll never want to shoot without one. For a standard monitor, a good pick is the SmallHD FOCUS 7, which has a 7" screen with Full HD resolution and is bright enough to be used in daylight with ease.

There is a part two to this section, since there is the monitor/recorder option, as well. This has all the benefits of a regular monitor plus the ability to record the feed from the camera. In many cases, especially for DSLRs and mirrorless, the best image quality is output via the camera’s HDMI port. It’s much better than in-camera options. You can record this footage right to edit-ready formats such as ProRes and DNxHR or even raw video with compatible systems. As for a recommendation here, the Atomos Ninja V is one of the best on the market.
You can find more information in our guide Choosing an On-Camera Monitor.
For Better Rigging: Camera Cage
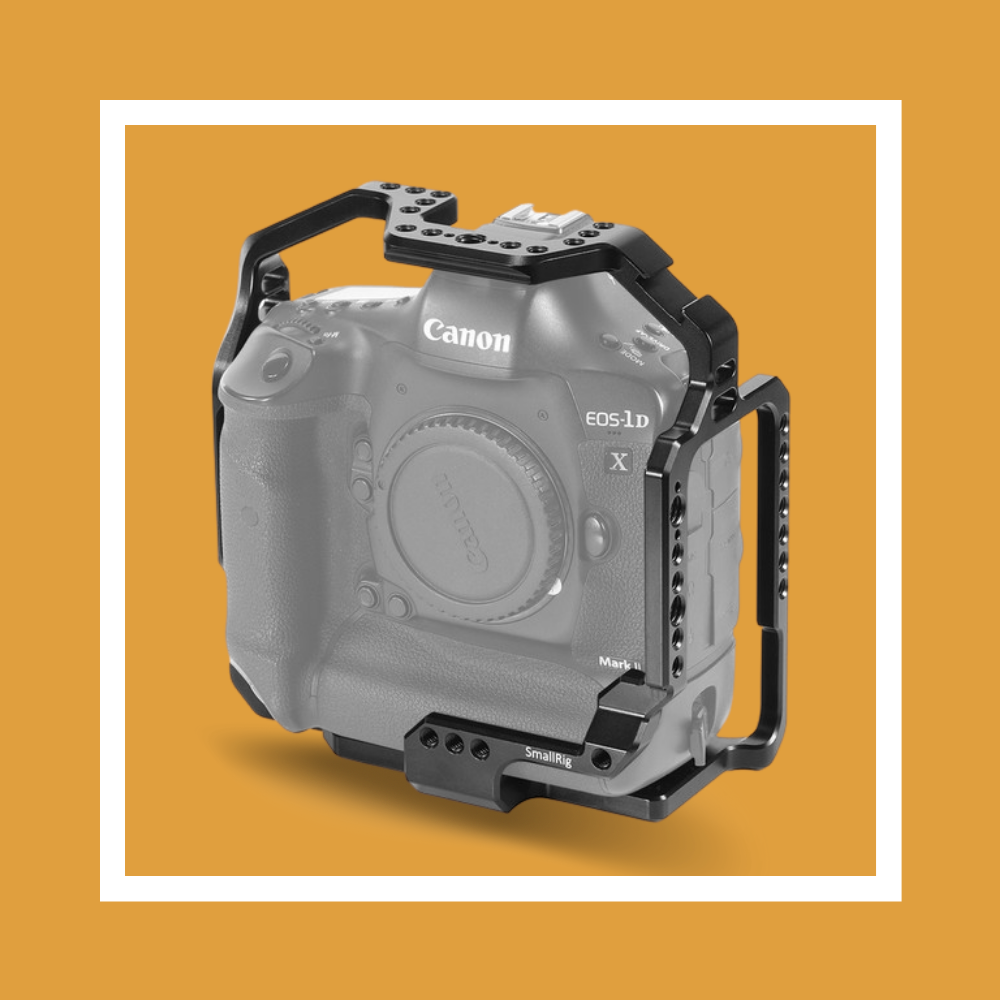
You might have realized by now that you have more accessories than you can comfortably attach to your camera. Well, to fix that you should pick up a cage for your camera. It’s a very simple idea: It’s form fitting around your camera and adds various threads and mounting points for all your accessories. Good cages will be especially form fitting and still allow full access to all of your camera’s controls and ports.
Stills cameras simply don’t have all the mounting points traditional cinema cameras have, so we have to add them on ourselves. You’ll probably find after using one that having all the extra points to mount your lights and mics and everything, you won’t want to work without one.
For Smoother Footage: Tripods and Gimbals
Video is about movement. It not only captures movement but uses it as another tool to move the story along. This has positive and negative consequences, because video will also pick up every time you tap the camera by accident or when a tripod isn’t steady enough to handle a quick pan. Whereas a flimsier tripod might get the job done in many cases for stills, for video you really need the stability and smoothness a dedicated video tripod offers.
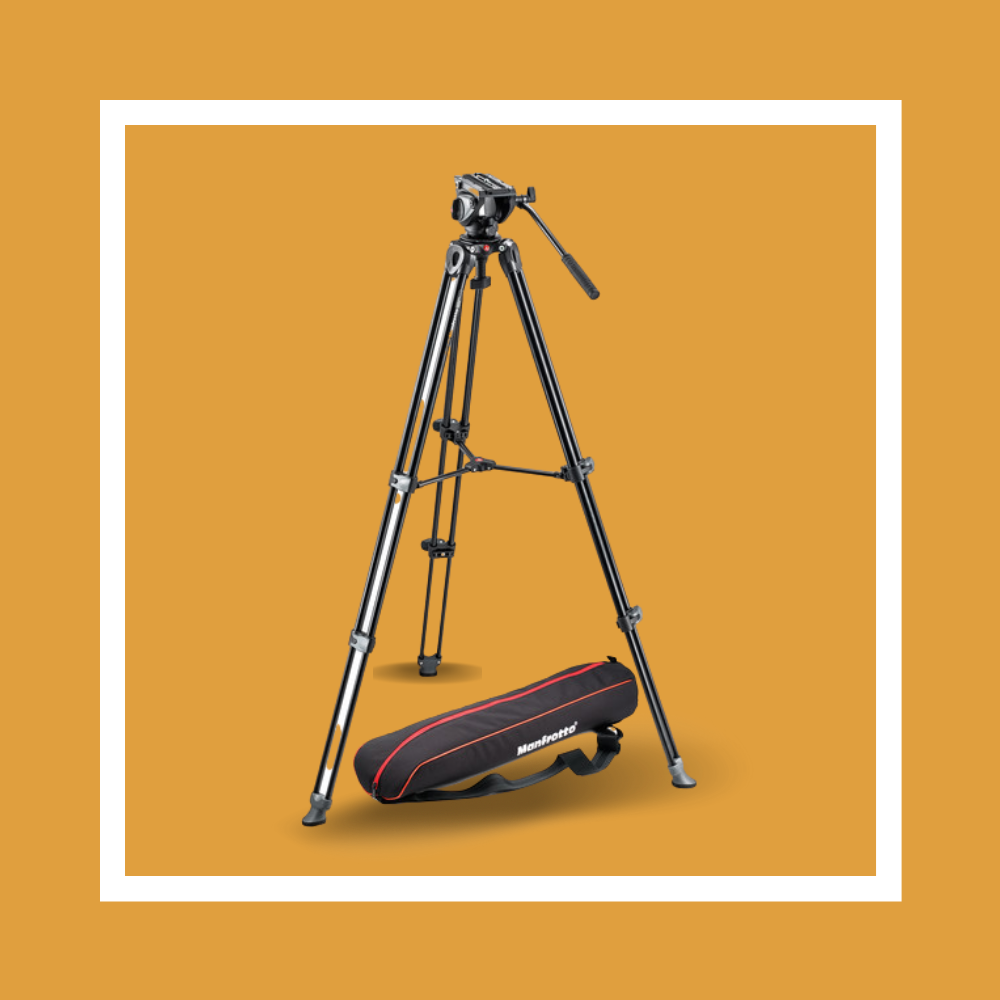
Among the main reasons for a video tripod is the head. Video tripods use fluid heads that damp movement, making your pans and tilts nice and smooth. They also have bars that make it easier to move, and proper configurations on a video tripod allow you to level them easily without fiddling with the legs. The other reason to get a video tripod is that you might need a higher load capacity than for your everyday photo gear. Take your camera and lens and add on all the gear we listed above and below, and you’ll find you will come close to or exceed the limit on entry-level photo tripods. You’ll want more support.
Don’t worry, there are some good options that are quite affordable, such as the Manfrotto MVH500A Fluid Head with MVT502AM Tripod.
Sure, a tripod is great, but what about handheld shooting? In photography you might just use a faster shutter speed to compensate for camera shake, but with video that doesn’t work. Luckily, gimbal stabilizers have gotten very good, more affordable, and smaller in the past few years. These are handheld tools that use smooth electronic motors to counteract any movement of the camera system, providing extremely smooth-looking footage even when you're moving around.
For a gimbal, assuming you have an average mirrorless or DSLR camera with a standard lens, you can’t go wrong with the Feiyu AK2000S 3-Axis Handheld Stabilizer.

For Better Lighting: Continuous LEDs
Drop your strobes and speedlights—they won’t work for video. With stills, you only need to expose for a fraction of a second. Video needs a consistent and constant view and lights need to run continuously, with level power and good brightness, and LEDs have come out as the clear winner. They run quite cool, offer good color rendering, and can run on batteries. What’s not to like?
There are also tons of lights available in many shapes and sizes. If you are coming from a photo background, you might even be in luck: The Profoto B10, for example, has a great LED modeling light with color temperature control, making it a great dual-purpose light for stills and video. Or, you can pick up the Aputure Light Storm LS C120D II LED Light, which takes standard Bowens S-mount accessories you may already have for your monolights.
Another common option is the panel, which creates a soft wall of light on your subject. You can’t go wrong with a couple of these on set to illuminate your main subject. They are simple, they work, and they come in a variety of sizes, including compact versions for on-camera lighting when you need to be ultra-mobile.

For Longer Shooting Times: Bigger Batteries
You can’t escape the extra power draw of video shooting and all the extra accessories. Beyond simply picking up a few extra battery packs for your camera, you can opt for a larger battery that has outputs for powering your other devices. Many companies even sell dummy battery adapters that allow you to run your mirrorless camera or DSLR with these massive batteries.
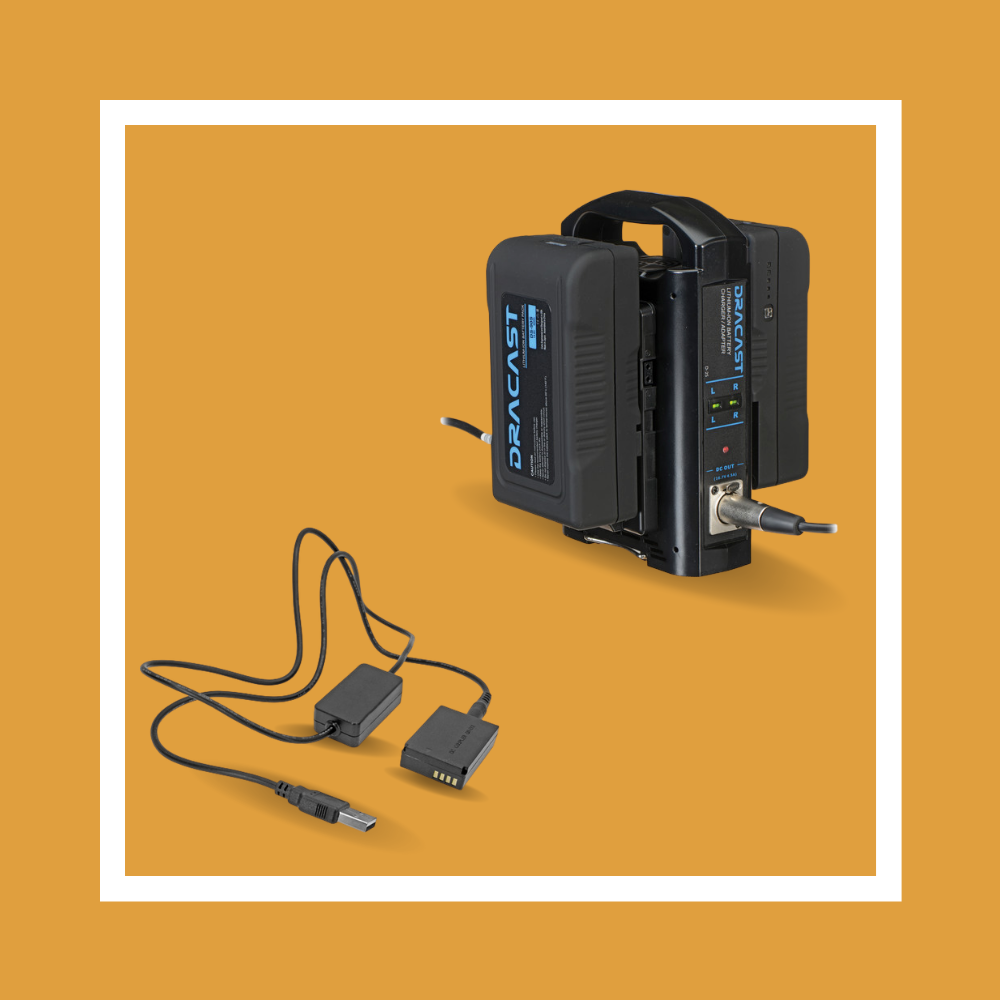
When you start building a serious rig and have some more mounting points, you’ll find that having a single large battery to power everything is a lot more manageable than keeping track of multiple smaller packs. You’ll also find you get longer shooting times, which is always helpful.
This is far from everything you might want or need if you continue your video journey, but it should help you figure out what you might want to pick up first. Prioritize based on your needs and budget; for some, getting a new tripod will be more important than a cage. And for others, extended shooting times provided by bigger batteries may be the only way to shoot video as needed.
Which of these accessories will you make part of your kit? Have we missed anything? Let us know in the Comments section, below!
