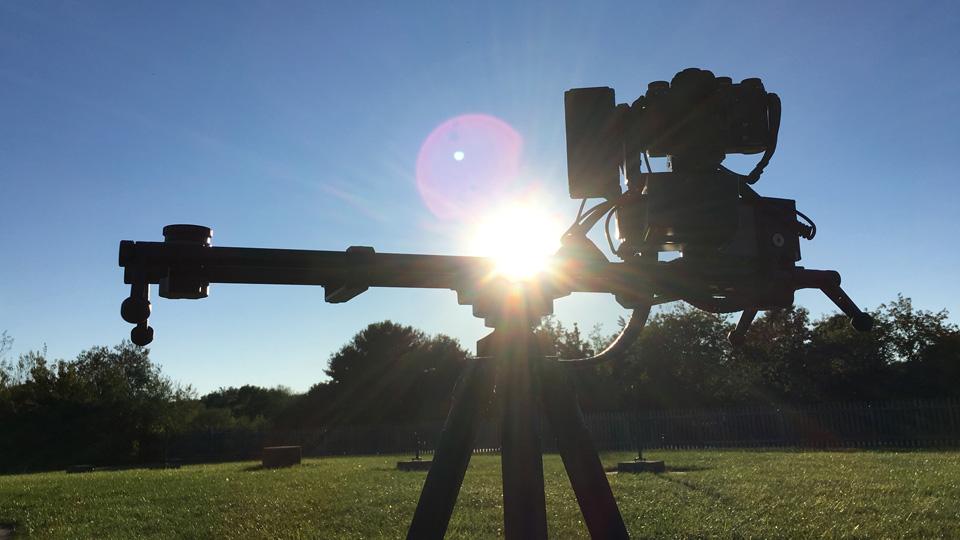
Jealous of the epic time-lapse photography that has been populating the Interweb for the last several years? Me too! I am especially jealous of those time-lapse videos that feature camera motion where the scene pans and tilts as dramatic clouds pass over a scenic landscape. Luckily, I have the brand-new Cinetics Lynx 3-Axis Motorized Slider at my disposal, to try my hand at motion time-lapse photography.
Time-lapse photography is not new. It has been around for a long time. But, digital photography has made it much more accessible to the masses—high-capacity memory cards and digital post-processing have replaced the incredibly time-consuming analog methods of the past.
I have done time-lapse photography before and was happy with the results. I found that my favorite time-lapse videos were produced when there was motion involved as I captured the imagery from ships at sea or moving vehicles, like the New York City’s C-train (the older R32 “Brightliner” cars are the only trains left in the NYC subway system with a front window through passengers can see what’s ahead). But, there is a way that photographers can now “artificially” add motion to their time-lapse images: sliders.
Photographs and videos © Todd Vorenkamp

The Cinetics Lynx 3-Axis Motorized slider is a great example of a product category that is revolutionizing the way we create and view time-lapse images. The Lynx consists of a carbon-fiber rail system with a motorized pod that controls lateral movement (side-to-side), yaw (rotation), and vertical pitch (tilt). The slider motor can handle an 11 lb load, while the pan and tilt motor pod can load up to 5 lb. The Cinetics controller can plug directly into your camera via remote release cable and tell the camera when to fire images. You can also program the motors via a Bluetooth-connected app from your smartphone or tablet.
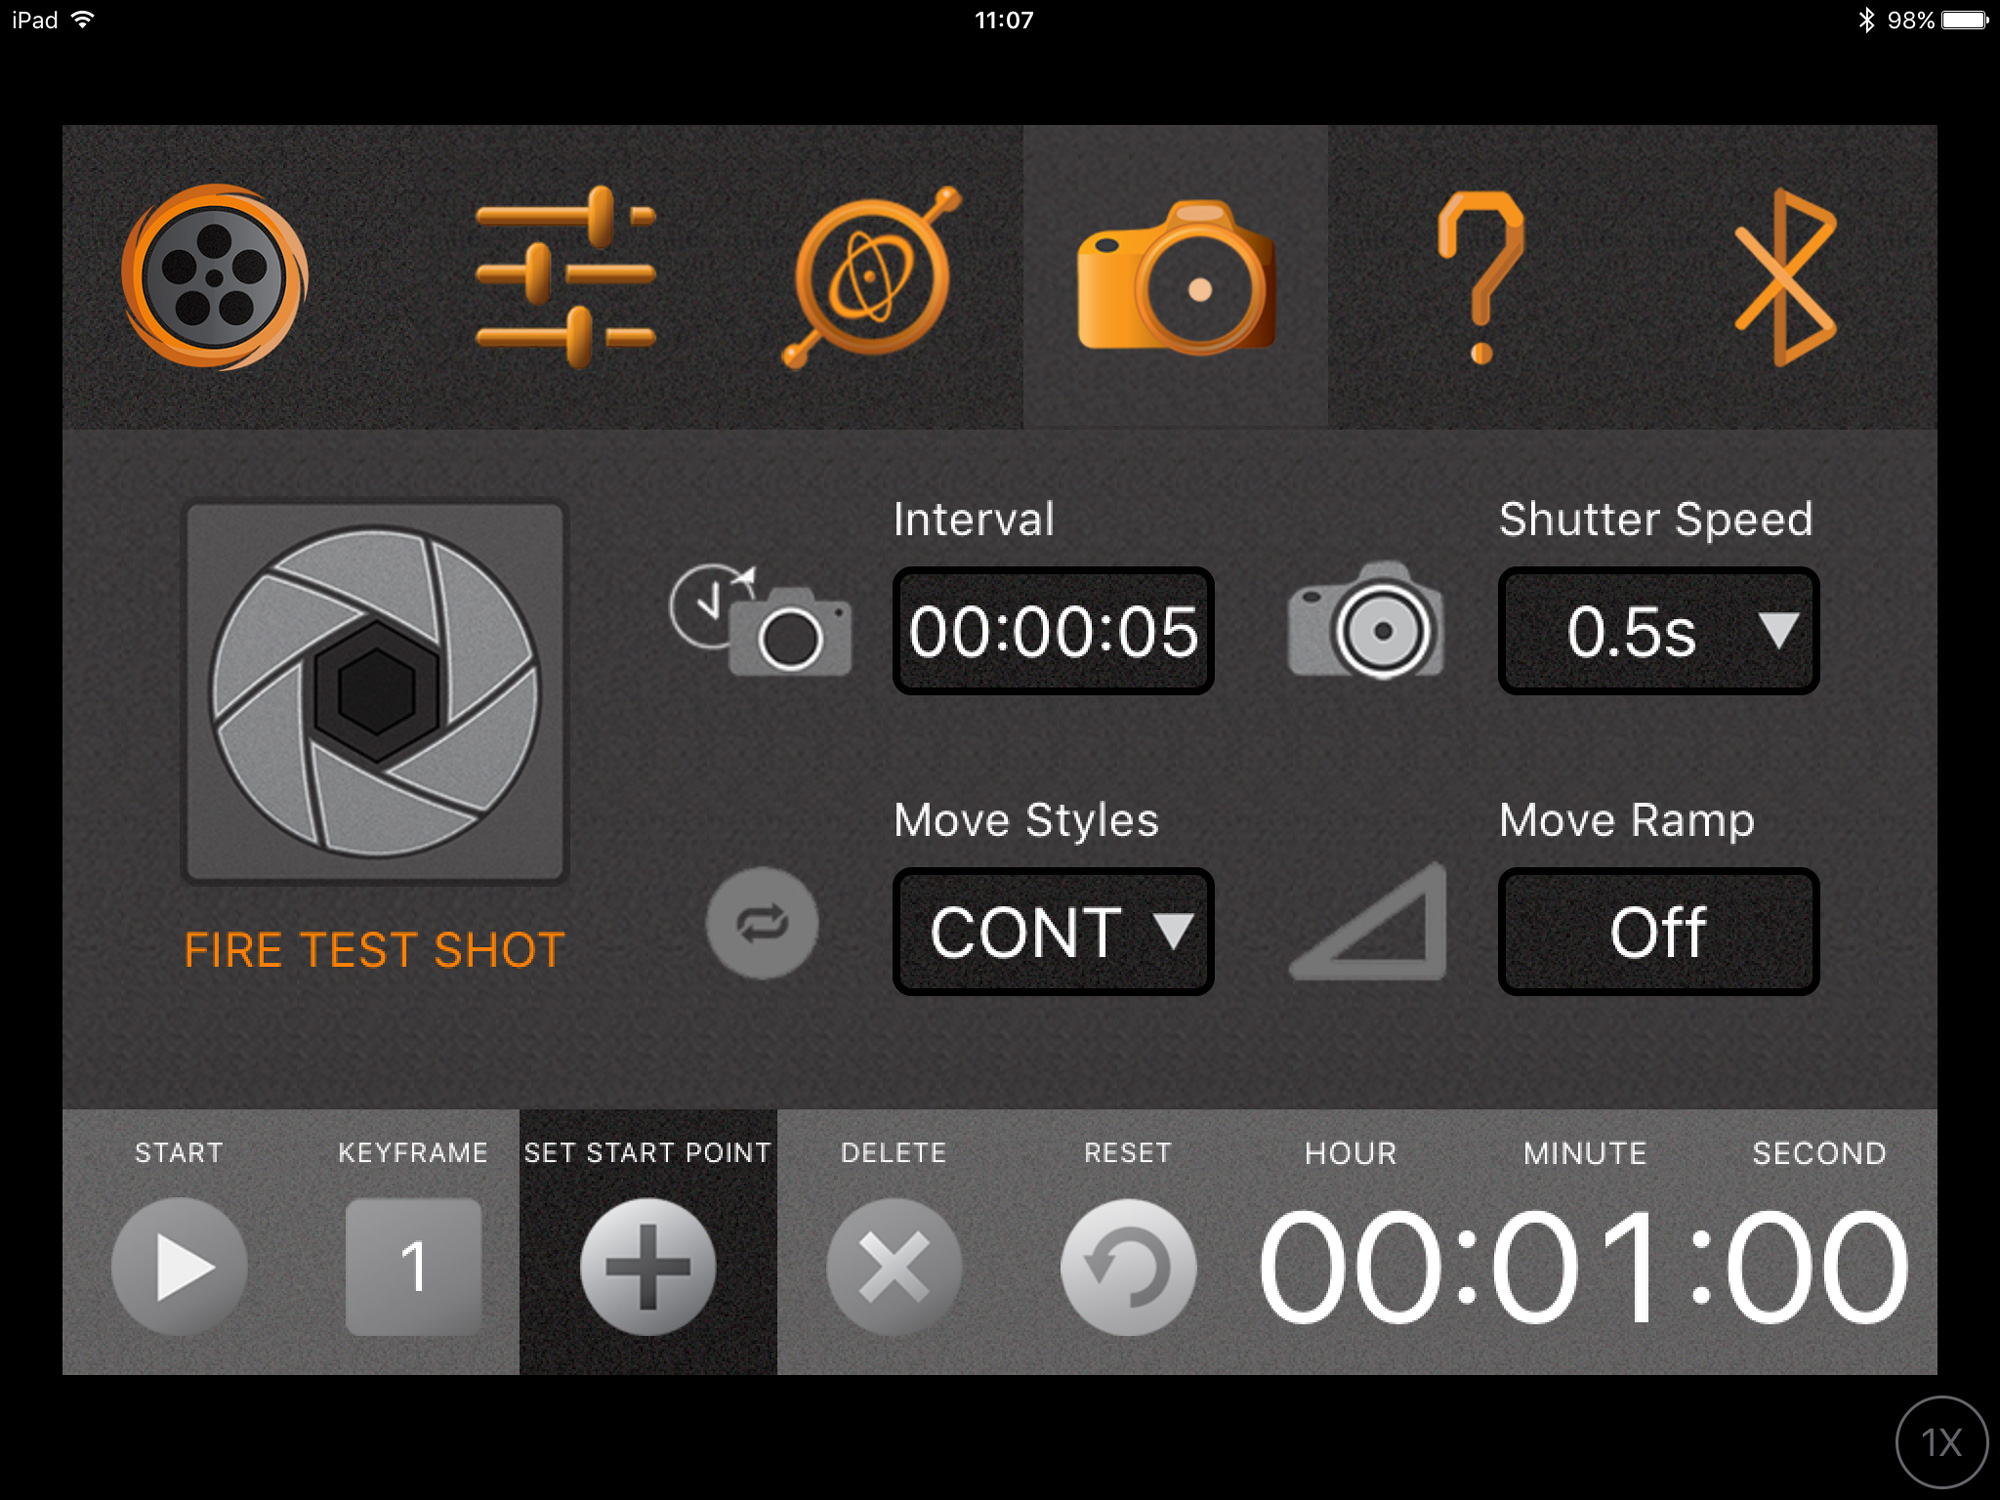
The Cinetics manual (available online) is well written, but does not contain set-up information. The set-up demonstration is shown in a YouTube video. Programming the Cinetics Lynx was not difficult, but there is a learning curve. The app makes programming easier, but I had connection issues that I am not sure were errors on my end. My iPad connected much more easily than my iPhone, for some reason.

The Lynx’s movements are smooth and quiet. When you are shooting time lapse, the rig shouldn’t be moving while exposing, so smooth movements aren’t much of a factor. But, the Lynx can handle 3-axis video panning as well, and that is where having smooth and quiet action will help keep your video action smooth and quiet. There are also stop-motion and panoramic modes as well.
Being new to motion (slider) time-lapse, I learned on the go. Here are some tips that should help you prepare for your own epic time-lapse movies.
Time
The first word in time-lapse is “time.” Right?
Time is something you need when you do a time lapse and you need more than a few minutes. As a nighttime photographer, I am accustomed to long exposures and long nights of photography, but things are different when you are assembling a motion time-lapse that covers several hours.
Before digital technology, we all seemed to have longer attention spans, but it is this same technology that makes time-lapse relatively easy these days. When it is time to fire up a long time-lapse with the Lynx, you need to have some other things handy to keep you busy while the Lynx and your camera do all the work. Make sure your phone has a full charge (and maybe even a cellular signal!), bring a stack of magazines or a good book, or maybe even a conversational friend.
I cannot emphasize this information enough. When you watch a one or two-minute time-lapse on your computer, rarely do you think of how much time really went into the capture of the video. Those hours were likely spent virtually babysitting the camera and rig and playing with your fidget spinner or smart phone.

Setup
Setup for a time-lapse is easy if you are not using a slider system. If you are new to a slider system, plan on spending a few minutes getting the rig set up and programmed. My first trip out with the Lynx was immediately after a storm broke and the sun was setting. I had only set up the Lynx once previously, and when the clouds opened up, the gear was packed away in full-on travel mode. Had I had done some preliminary rigging, or been more familiar with the setup, I could have captured another 30 minutes of time-lapse action.
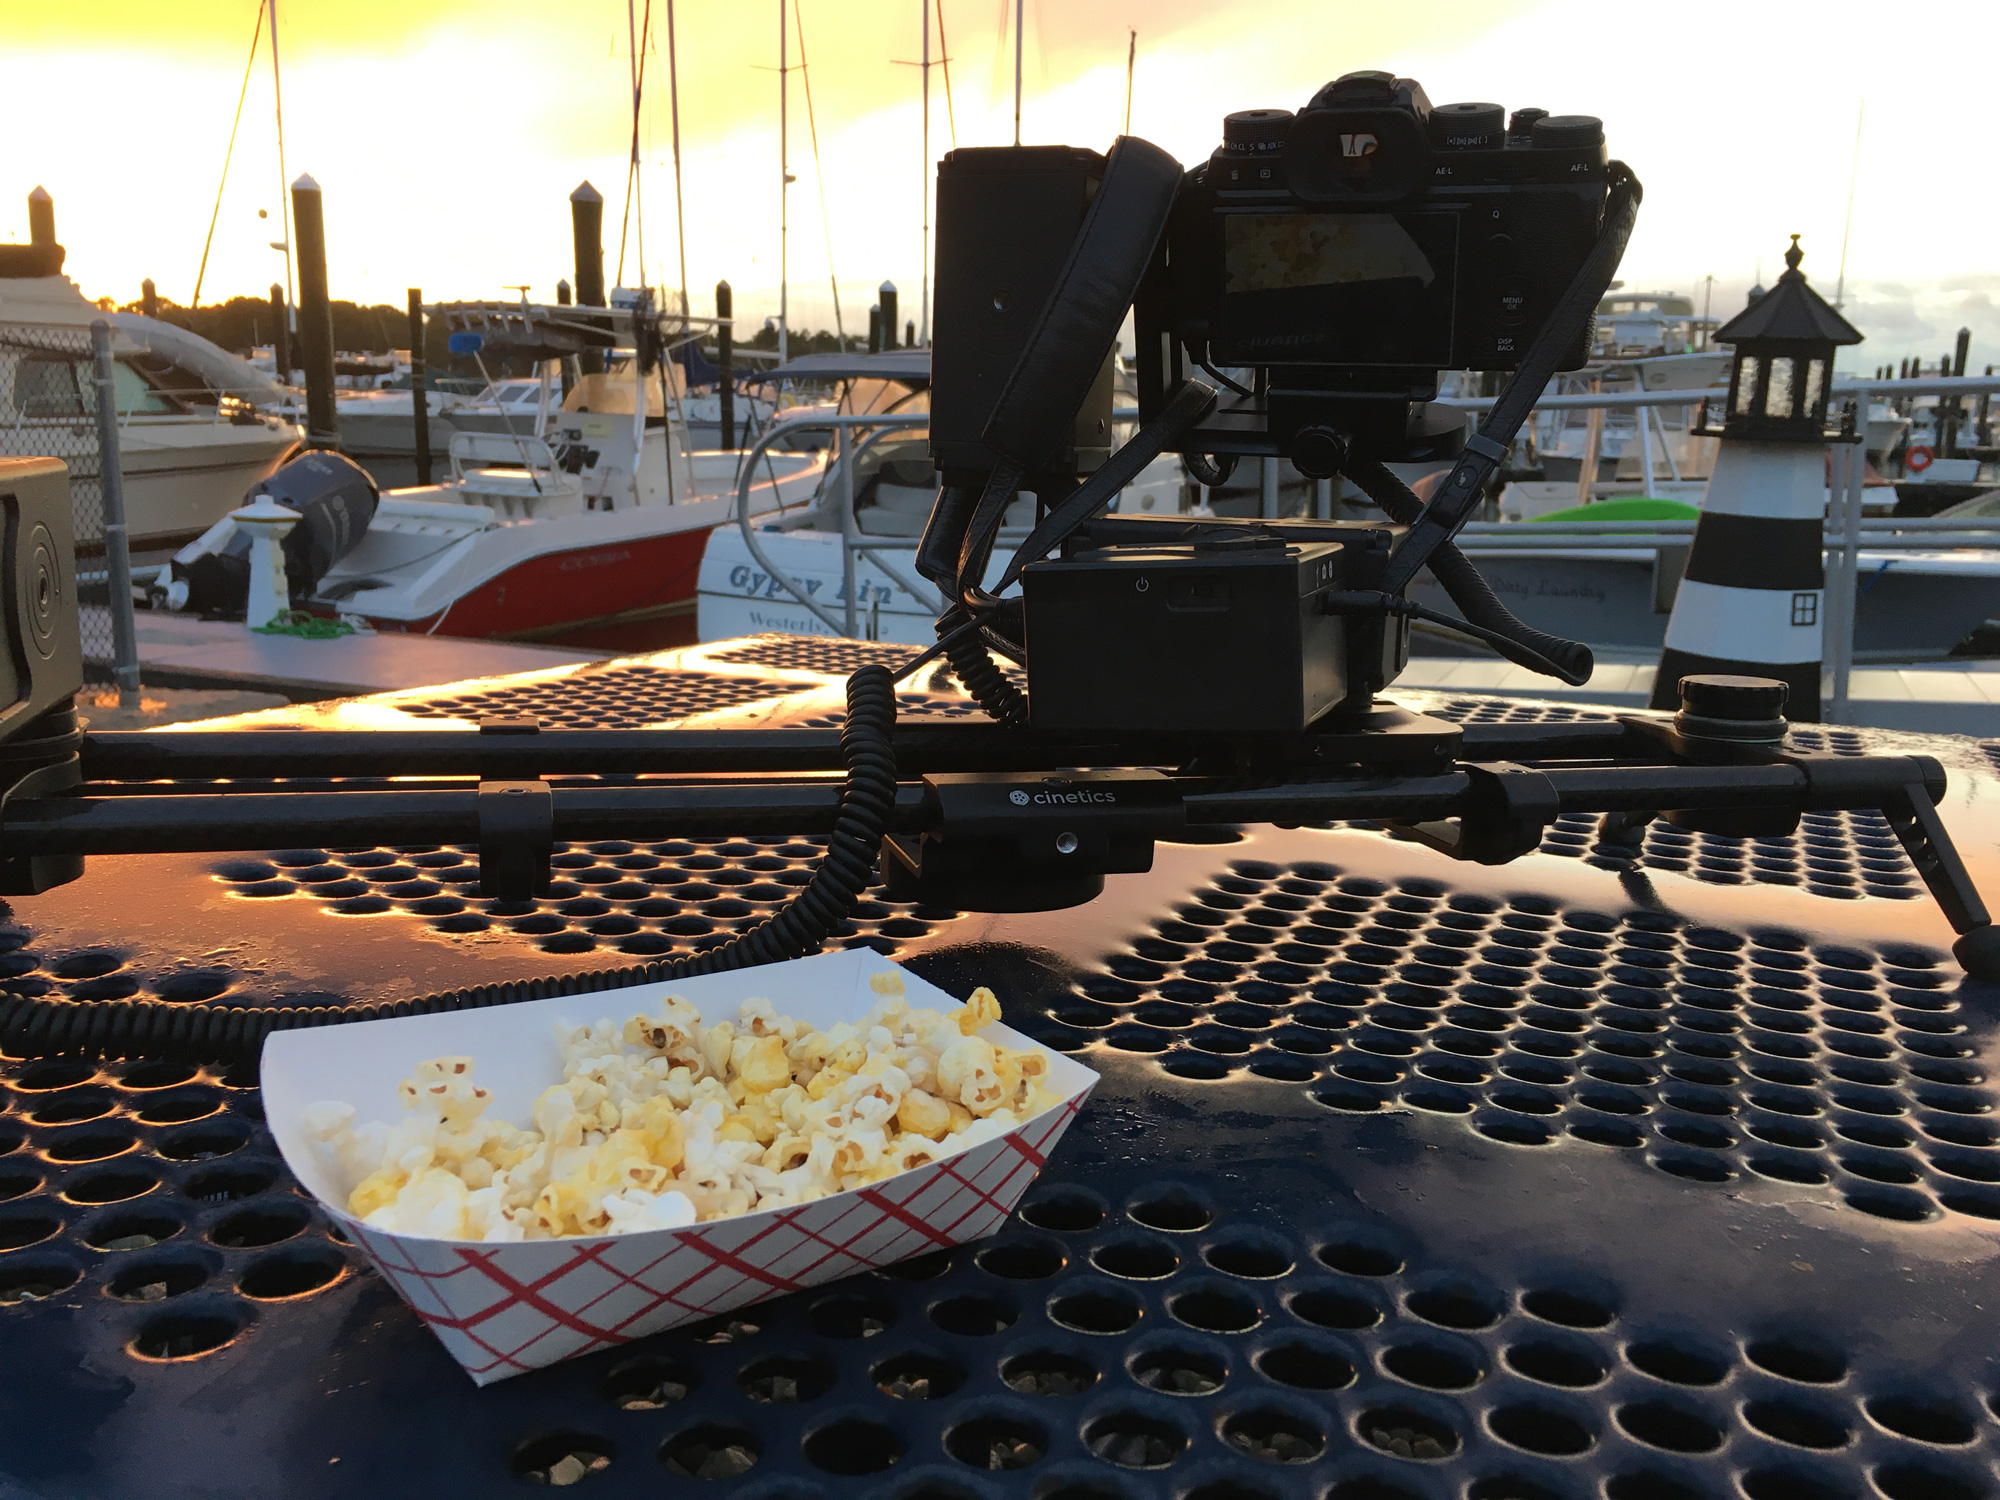
Speaking of setup, the Lynx travels pretty well. The slider rods themselves are fairly light as they are made of carbon fiber. The pan and tilt motor is a bit heavier. Almost every Lynx component has its own pouch, and those pouches can fit into the included carry bag with the slider with the exception of the heavier pan and tilt motor assembly. If you are just sliding, the rig is as portable as a normal tripod—the additional pan and tilt motor will take up room in your bag or backpack.
So, practice setting up your slider when time is not of the essence and have it as close to ready-to-go as you can before you head out.
Exposure
When you shoot time lapse, there are several rules (or guidelines) regarding shutter speed versus interval between shots. This gets more complicated when using a slider because the slider motors will change camera position in between shots.
In my sunset-to-night time-lapse, I programmed for a 30-second interval. As the sky got darker, my shutter speeds started to exceed the interval and the Lynx was smart enough not to reposition while I was shooting. The downside was that by having the shutter speed exceed the interval, the Lynx, through no fault of its own, started taking images at 1-minute intervals.
When I rendered the video after the shoot, things slowed down noticeably when it jumped from the 30-second to 1-minute breaks. To counter this, I went back and deleted every other shot taken during the 30-second interval. The lesson here is that this could have all been avoided with better planning.
Battery
On a cool and crisp night, my Fujifilm X-T2 battery (not fully charged at the start) didn’t have a chance of surviving shooting 120 images per hour for 3.5 hours. The cut-jump seen in the video is when I had to remove the camera from the Arca-compatible plate to swap batteries.
The DSLR and its large batteries might be better suited than the notoriously short-on-life mirrorless camera power sources for this type of work. Bring plenty of power and try to keep the camera in the same position if you have to dismount it for a battery change.
Image Quality
Depending on how long your time-lapse is, how big your memory cards are, and how much computing power you have at home, I wouldn’t fault anyone for shooting large-sized JPEG files instead of raw images. Of course, you might find a magical moment in one of several hundred time-lapse shots that you want to print large or blow up on the screen to pixel peep, but most of us, when we shoot time-lapse, are thinking more about the final product than the individual images.
If you do shoot JPEG, be sure to set the white balance manually, for the sake of consistency across the frames. Raw shooters can adjust this better in post processing.

Mental Prep
Time-lapse photography, like cruising on a sailboat, might make for a great retirement job. Unfortunately, when it comes to creating time-lapse art (and sailing), I do have a day job (and some part-time gigs, as well).
If I wanted to do a perfect motion time-lapse with the Cinetics Lynx slider, I would scout the location a day or two before and figure out my exposure times throughout the planned exposure. I would mark the tripod’s position and plan the motion of the Lynx while figuring out the interval of shooting as well as the camera’s settings. Then, I would hope for a dramatic clouds or a perfectly clear sky the next evening!
Also, I would love to set up the Lynx around New York City and let it run for hours. Would anyone out there volunteer to babysit the rig for me? Leaving an expensive setup shooting unattended in the big city while I head to the office would inevitably lead to an insurance claim for loss of equipment.
Are you a motion time-lapse expert? Share your tips with us below. Or, if you are a rookie like me, feel free to send your questions my way and maybe we can learn how to do this better together!
