
Time-lapse videos have invaded nearly every form of media in recent years, even breaking into our social media apps with the recent development of the hyper-lapse. These types of videos can be quite difficult to make, especially with the time requirements inherent in capturing and transforming a lengthy event into a few seconds of footage. They can also be some of the most stunning and interesting videos to watch. To capture even better photos and videos for time-lapses, here are some tips that will help elevate your imagery.
Work in Manual Mode with a Tripod
A first step for high-quality time-lapse video is to shoot in manual mode. By doing this, you not only gain control over how the final image looks, but also avoid issues with things like flicker, which appears when the camera adjusts the exposure in the middle of the shoot. One other helpful tip here involves the shutter speed: while time-lapse videos don’t necessarily need to follow the 180° shutter rule of standard filmmaking, it is still a good rule to follow, if you can. It will help smooth out motion by keeping the exposure time to at least half of your interval time. There are always exceptions to the rule here, and if you prefer sharper more staccato movement or want to show even more motion blur, then feel free to ignore it. A great example would be starscapes—if you want to capture trails, you will need to leave the shutter open longer, or if you want to see the points of light crossing the sky, you may need to shorten the exposure.

Next, you are going to need a tripod, and a sturdy one at that. Time-lapses involve leaving your camera set up for lengthy periods of time, and you won’t be able to handhold these (unless it’s a hyper-lapse, but we will talk about that later). Along with this, some Neutral Density filters are almost necessary for achieving the look you want. If you are shooting during the day and want to hit a longer shutter speed, the ND filters will cut down on light. They will also give you more control and, if you pick up some Graduated ND filters, you can reduce light from certain parts of the scene to create a more balanced image.
 Peak Design Travel Tripod
Take Control and Add Some Motion
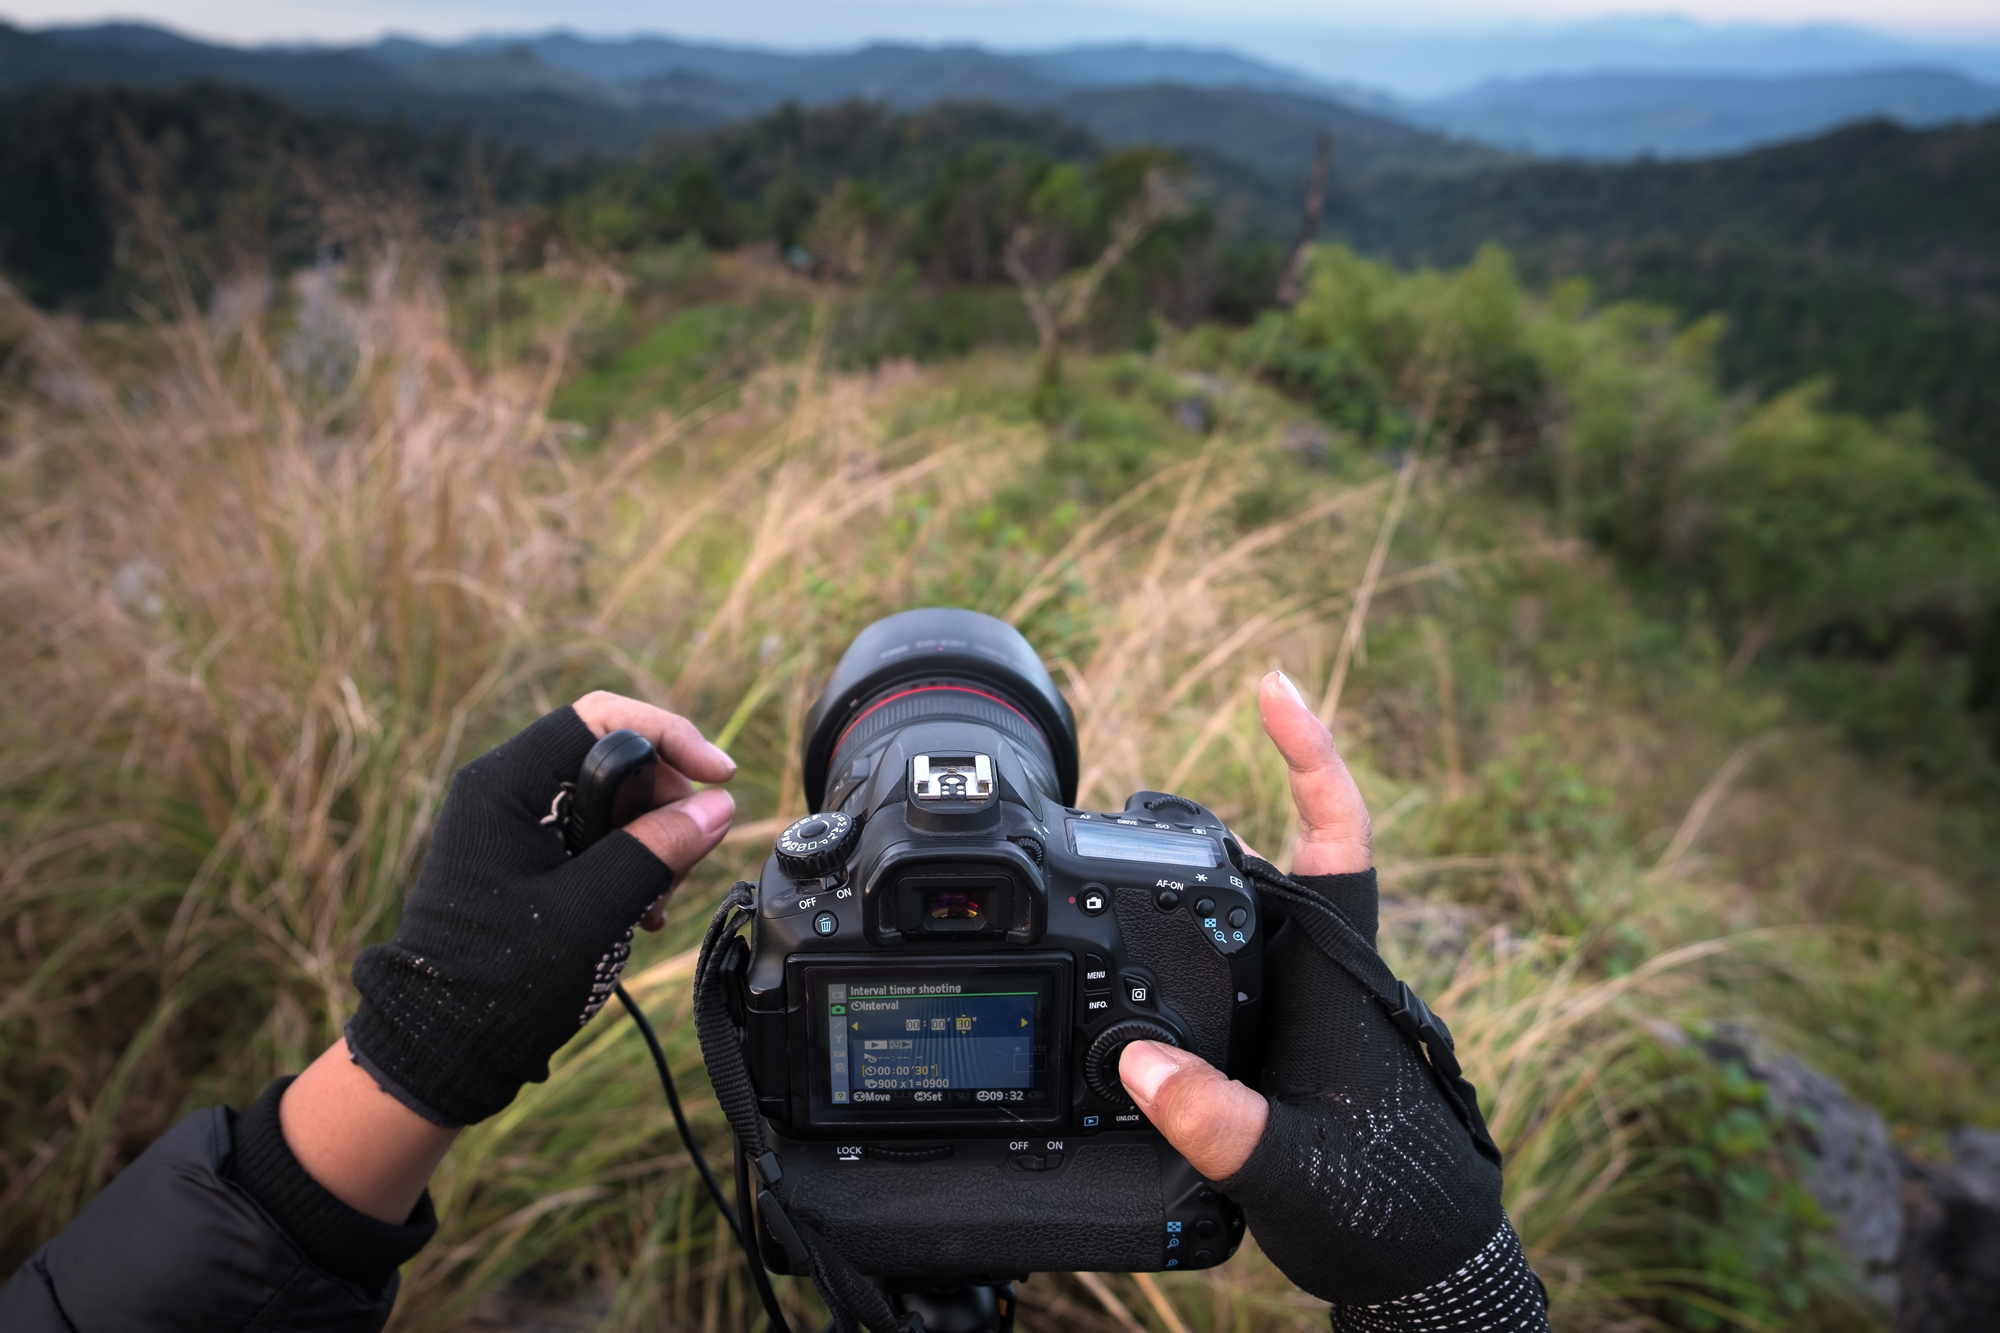
Videos are effectively image sequences, so if you want to create a time-lapse video, it comes down to hitting the shutter with a set interval between shots. It is possible to just tap the shutter manually every couple of seconds but, for consistency and your finger’s sake, a controller is the best bet. If you are lucky, your camera will have an interval or time-lapse setting built in, though sometimes it only offers limited control. So, if you don’t have that in your camera or you just want more control, a dedicated controller is required. These generally plug into your camera’s data interface (usually USB) and then send a signal to trigger your camera based on how you programmed it.

All the photos you just got ready to capture are destined to be video, and will most certainly incorporate some motion in the frame, but if you really want to take your time-lapses to the beyond, you should incorporate some camera movement. It is possible to fake this in post if your images are of a sufficiently high resolution, which is not uncommon nowadays, but the best practice is to use automated sliders and pan/tilt devices to create incredible videos. These are very similar, if not the same, tools to those you will find on many film and video shoots, which makes sense, considering that time-lapse photography and filmmaking result in the same product of a video.
The simplest move you can perform is the pan. Luckily, there are a number of tools that are specifically designed for this purpose, available right here, including simple battery-free options up to highly programmable electronic devices. For true motion control, however, I would recommend a motorized slider that can also trigger your camera. Some can provide you with multiple axes of control and will even stop the motion of the slider for each shot, providing the best possible image quality.

Moving to Basic Camera Settings
Now that you can get everything set up and running, it might be helpful to know some basic settings for your camera to make sure you get the best picture. For the most part, you will just choose the settings that are best for the scene as if you were taking a photograph, and you could be good. However, there are many variables you will need to consider. A video will use about 24 frames each second, so if you don’t want your time-lapse to be woefully short, you will want to make sure you are capturing enough frames over time to make at least 10-12 seconds, especially if you want room to play with when you are editing multiple shots together. This makes the primary variable your interval. If you are only shooting for an hour, an interval of five minutes doesn’t really make any sense; likewise, if you are letting the camera sit overnight then a one-second interval won’t be fun to work with later.
One of the easiest ways to choose an interval is with simple math. If you want to capture some clouds moving over a mountain for three hours, and know you want a 15-second final video of the event, then you can calculate it this way: First find out how many frames you will need (24 x 15 = 360 frames). Then calculate the number of minutes you will be shooting (3 x 60 = 180 minutes) and divide the minutes by the number of frames you need (360/180 = 0.5 minutes = 30 seconds). This means you set your interval to be 30 seconds.
However, you do have to take into consideration your subject matter; if you are photographing a busy city street with people walking by, a couple of seconds is about where you should stay—longer, and you end up with completely blurred people (if that is what you are going for, then that is fine, too). And on the other end of things, if you are shooting slow-moving clouds above a field, then a longer interval of 30 seconds is going to be better to condense the slow movement into something more thrilling to watch. If you shoot this way, then you can work the math backwards to find out how long you will be shooting to get the desired effect. Be careful here, though; you don’t want your shutter speed to equal your interval. Many cameras have a limited buffer and if the shutter speed and interval are the same you might hit this buffer and ruin the shot.
The next settings to decide will be the ISO, aperture, and shutter speed. For the most part, you can just follow your usual judgement for the scene, but you will want your shutter speed to be at least half the length of the interval and with some room for the shot to finish before the next image needs to be taken. Aperture can be anything you would like, and ISO should be as low as possible, but you will also just need to follow the scene to decide on these factors. One thing I will note is that you should keep everything in manual and locked down, unless you are creating day-to-night transitions or other highly technical time-lapses—this way, you avoid flicker in your final product and avoid needing to fix it in post. For moments where you need auto to help, I would recommend going with aperture priority to keep the look of the image the same throughout, though you may need a controller to perform ramping of the shutter speed to get a smooth transition without needing to edit it later. One basic principle that still works in time-lapse is the 180° shutter rule if you need somewhere to start. Basically, your shutter speed should be half of your shooting interval, so a 10-second interval results in a five second shutter speed, and so on. This will give just enough blur for smooth footage.
This is a quite short introduction to the topic of time-lapse photography so stay tuned for more information coming soon. If you have any questions or some of your own tips to share, please leave a comment, below!
To read about nighttime time-lapse photography, click here.
