
Portraiture: It’s one of the most popular and prevalent forms of photography. Although it may seem simple on paper, it comes with its own unique obstacles. Of course, you’ll want to be familiar with your gear. This is essential to all working photographers, but it allows you to focus your efforts on the genre-specific challenges you’ll face.
When photographing people, you’ll find that some folks are photogenic, while others are not. Your job as a photographer is to break down the barriers set by your clients and to put them in the most comfortable, complimentary position to be photographed. This is no easy feat, but with a little practice, you can exude confidence and easily take control of any portrait shoot.
In this guide, we’re going to help you get there. We’ll be looking at 10 tips that’ll help you forge your path into the world of portrait photography.
1. Connect with Your Subject
Let’s be honest, portraits can be awkward. Not everyone exudes confidence and feels photogenic right off the bat, so it’s up to you, as the photographer, to ease your client’s tension and help them put their guard down. This can occur in a number of ways. If this is a paid or organized gig, plan to meet your client beforehand to discuss what you’re both looking for. This can be done in person or virtually but should be face to face. This is a great opportunity to break the ice and get to know a little about each other. If you meet for the first time at the shoot, spark a conversation and have fun with it. Make them smile, make them laugh, and the photos will practically take themselves. This trick works both in a controlled shoot or in a more spur of the moment situation.

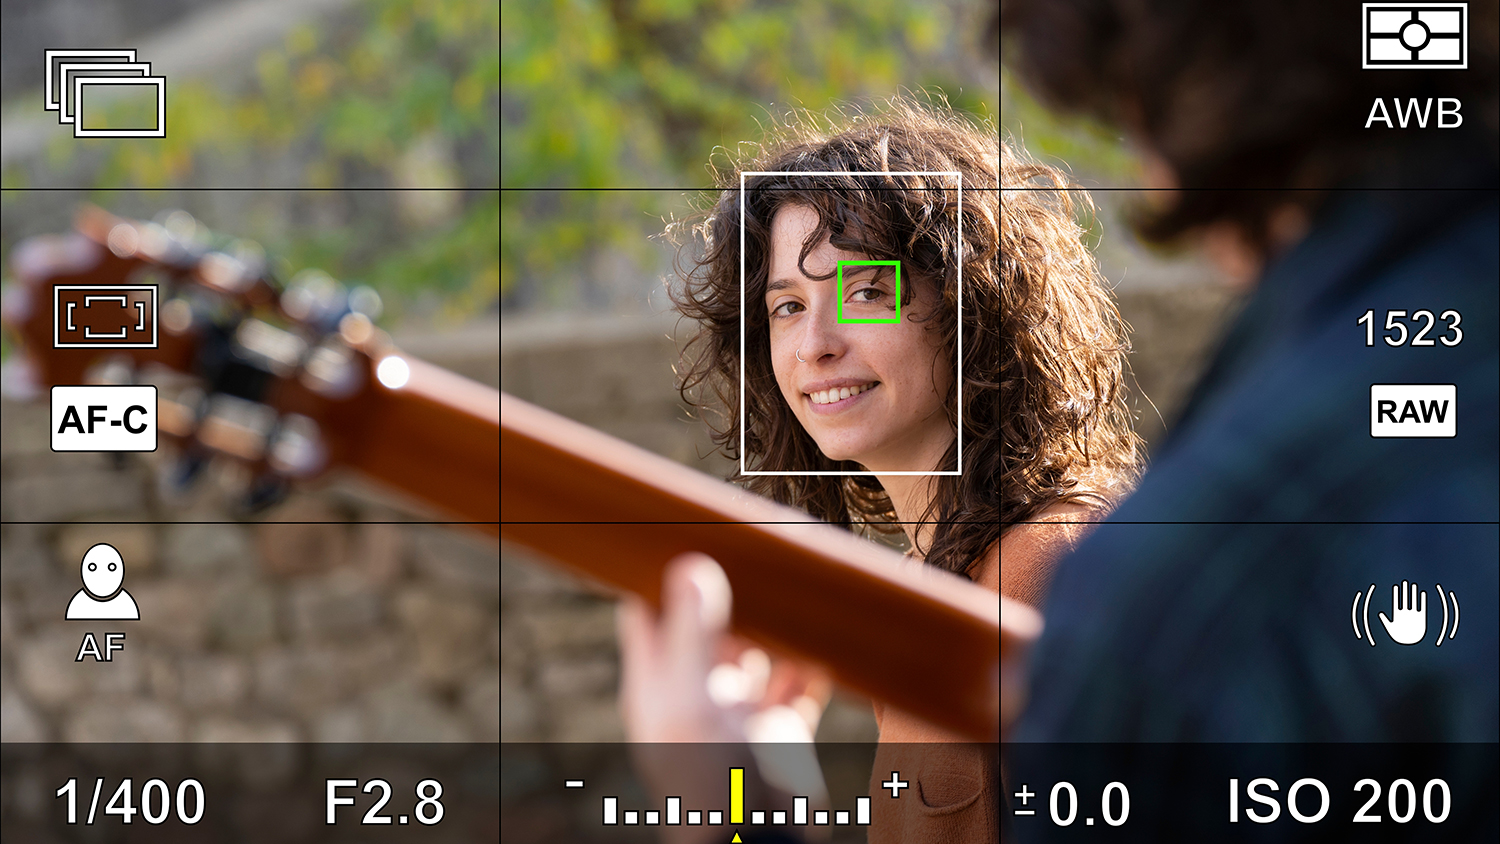
2. Emphasize the Eyes
The eyes are the “windows to the soul.” No matter the composition, in almost all cases, you want to place emphasis on the eyes. Depending on the type of image you’re looking to capture, you may be close up or farther away from your subject. No matter what the case, the eyes should always be where you set your focus point. Luckily, most mirrorless cameras available today have a nifty feature called subject detection, where the autofocus system can identify and immediately begin focusing on a person, pet, vehicle, or bird. Once locked on, this allows you to easily track focus right on your subject’s eyes. Another important detail to notice is the catchlight. Catchlight is a specular patch of light reflected in your subject’s eyes. It adds life and a bit of sparkle to an image. If a natural catchlight doesn’t exist, add one.
3. It’s All About Lighting
Natural light can be beautiful, but it’s more challenging due to harsh shadows or washed-out colors. Even when shooting in the much sought after golden hour of light, a flash or “speedlight” can highlight your subject and make them pop against their surroundings. Artificial lighting via a flash or constant LED light can fill shadows and add a pop of vibrance to your image. There are a number of different approaches to lighting portraits, with some involving upwards of five or six individual flash units. To better shape light, modifiers can be used. Umbrellas and soft boxes diffuse and spread light to cover a great area and cast softer shadows. Modifiers with a round shape cast a more visually pleasing catch light as well. Check out this in-depth session with photographer Sarah Edmunds, where she reveals the lighting setups, she used to create some of her most captivating portraits.

4. Focus on Focal Length
Understanding focal length, depth of field, and distortion is key to selecting the right lens for a job. Focal length is a common way in which we describe and categorize lenses. It refers to a measure of how strongly an optical system converges or diverges light. It’s also, and more commonly used, to describe the reach or magnification of a lens. The smaller the focal length, the wider the field of view. 14mm is a wide-angle lens, while 50mm is “normal” because it closely matches our natural field of view. 85mm and above are considered long focal lengths or “telephoto.” In that range, there’s a sweet spot of focal lengths known as portrait lenses. 85mm, 105mm, and 135mm are popular portrait lenses, though there’s no rule as to which lenses you choose.

A lens like the NIKKOR Z 135mm f/1.8 S Plena takes advantage of a fast f/1.8 aperture and medium telephoto focal length to deliver beautiful backgrounds.
Focal length does not just magnify an image; it also distorts and compresses it. Wide-angle lenses make objects closer to the center of the frame look closer while the frame edges bend and warp, looking significantly farther away. The results are heavily distorted images that are unflattering to the subject. Longer focal lengths compress a scene and make distant objects look closer while also narrowing a lenses area of apparent focus, delivering blurrier backgrounds and flattening facial features. This is why many portrait shooters opt for longer lenses over wider ones. Though someone shooting a large group can work with a wider lens as the distortion appears less drastic the farther away from the subject the lens is.

5. Pose Properly
Posing can make or break an image. Most people don’t know how to properly pose for a photograph and that’s OK. It’s your job as a photographer to guide your subject for the look you want. The basics are quite simple. Unless you’re trying to achieve a specific subject in their environment type of shot, have your subject face the camera and keep their back straight. From there, the exact positioning used will depend on the features you and the subject wish to accentuate. A flattering pose is key to a visually engaging composition. It can hide features your client is insecure about as well. Lindsay Adler wrote an excellent book on the topic of posing that is a great resource to refer to as you learn the ropes.

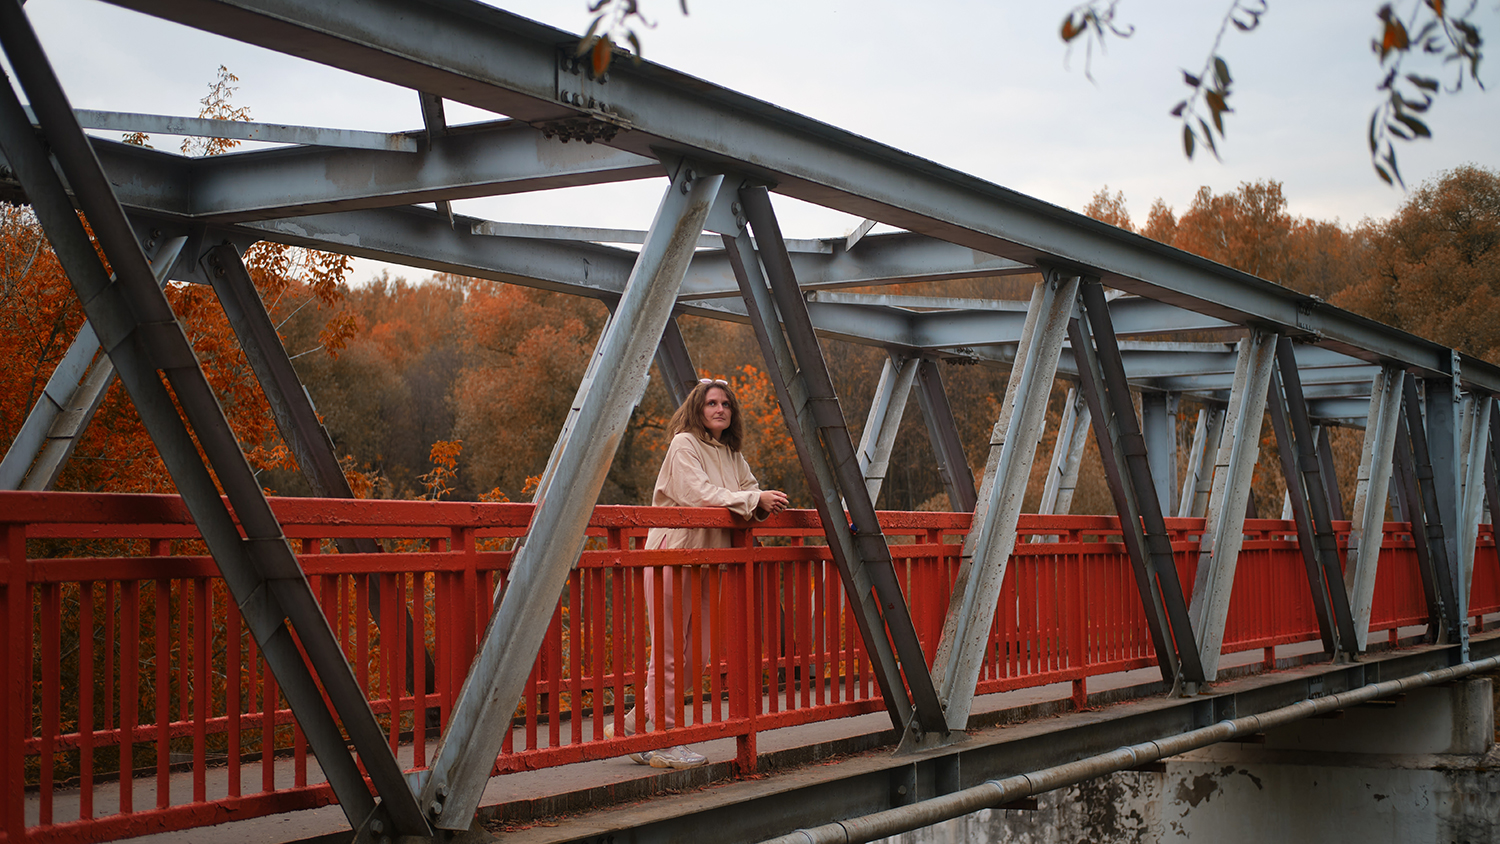
6. Watch Your Backgrounds
A clean, complimentary background can enhance an image, while a busy one with clashing colors can distract. Another challenge presented by busy backgrounds is intersecting lines. No one wants to see a light post growing out of their head. Selecting a shooting location with consistent colors like a distant tree line or brick wall is key. Remember, longer portrait lenses can blur backgrounds and isolate your subject in the frame. It also pays to plan ahead. When choosing a location, take this into consideration and find suitable backgrounds beforehand. This way, you’re not wasting time on the day of your shoot. Always expect the unexpected and be prepared to pivot when opportunities knock. A bland blue sky is boring, but a rainbow is pure bliss.
7. Shoot Eye Level
If you clients are sitting on the ground, sit on the ground. If they’re up in a tree, you better be up in that tree with them—or at least on a ladder. OK, that was a joke, but the concept is sound. The angles and perspectives used when photographing a person can each tell a different story, and it’s important to choose the right angle for the story you’re trying to tell. A shot taken from above may look imposing. While that may serve a creative purpose for a filmmaker or even themed photo shoot, it’s not suitable for standard portraiture. Get to your subject’s level and focus on the eye. Seeing eye to eye will make your portraits more engaging by promoting a more genuine connection between your audience and subject.

8. Master Exposure and White Balance
Understanding exposure and white balance is important to photography in general, but it’s important to correctly capture the tonality and appearance of your subject’s skin tones. First things first, get your camera out of auto or program modes. These are great when you’re getting started and easing your way into the world of photography, but don’t allow you to take full control of your exposure. Additionally, auto modes can make mistakes; they can be tricked by environmental factors such as bright or dark clothing and color cast from surrounding foliage. The same can be said about white balance.
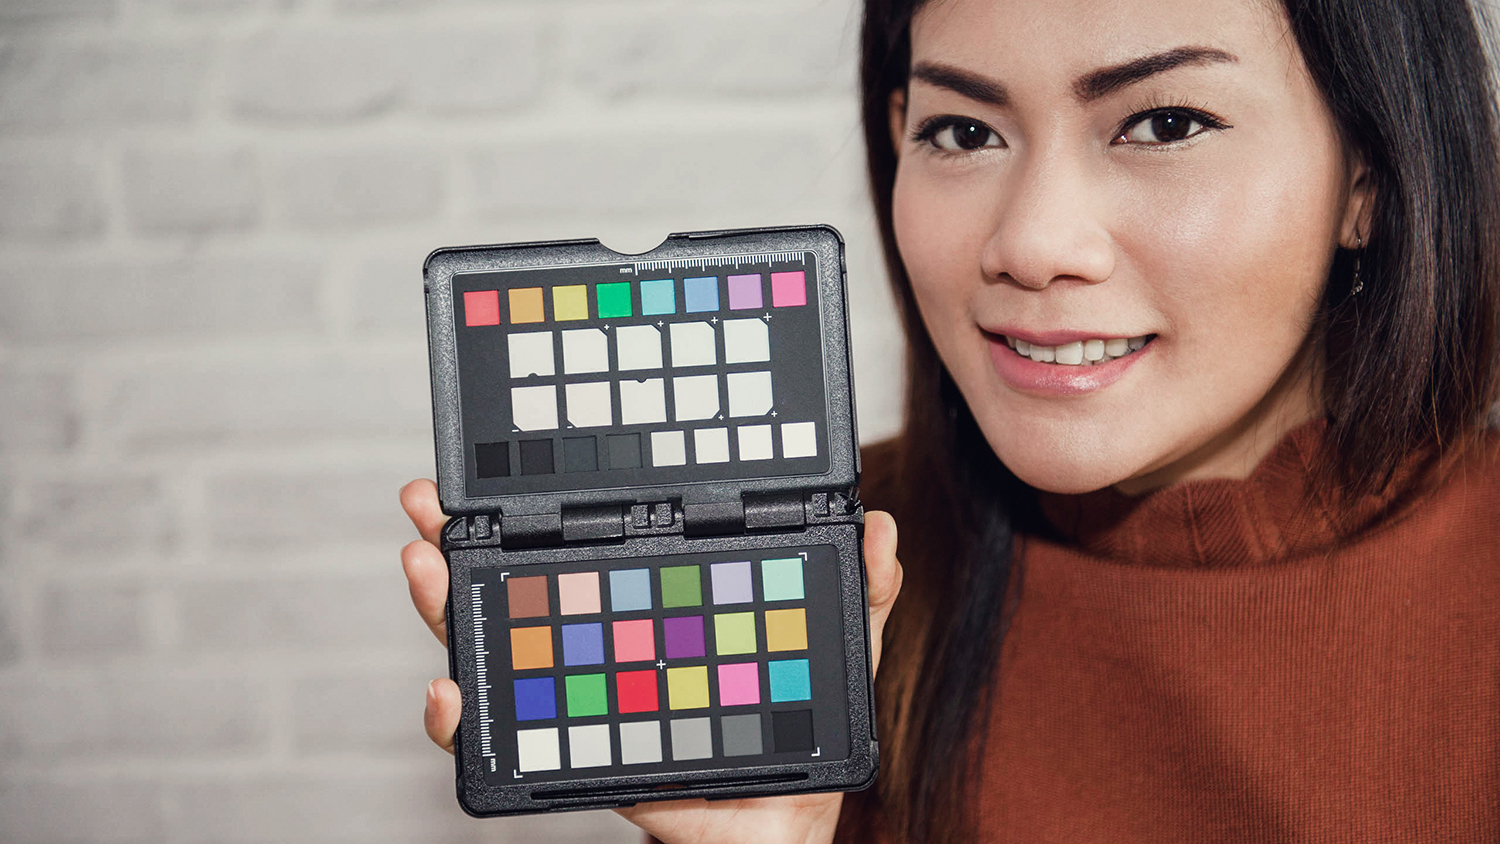
White balance refers to how warm or cool the colors in your image appear. Cameras are pretty good at accurately reproducing colors as they have the ability to analyze a scene and compensate for warm or cool tones that exist in an image. For most uses, auto white balance is perfectly capable. However, like auto exposure, auto white balance can make mistakes. When this happens, or for those who prefer to nail their exposures in camera, a tool like a gray or white balance card can be used to manually dial in a custom white balance. If shooting in RAW format, can be easily corrected in post, though this can be a headache for bulks shoots where you’re editing hundreds of images.
9. Shoot in RAW
RAW file formats deliver the maximum amount of detail a camera is capable of producing. They offer greater versatility in post with the ability to adjust exposure, white balance, and color intensity in a less destructive manner than when working with JPEGs. If your favorite shot of the session is a tad under or overexposed, you can fix that! It is worth noting that RAW files are larger than JPEGs as they contain more information. This is loose information which cannot be posted on social media or texted to a friend. They require post processing software to process and convert them into something like a JPEG or TIF file. This gives you greater control over the final image but takes a little extra time. If you have the memory cards and computational processing power to work through these beefy files, it’s well worth it.

10. Find Your Own Style
Similar to wedding photography, there are a number of styles you can subscribe to in the world of portraiture. While candid and portrait photography are often separated into two separate genres, they share many traits You may prefer a candid, documentarian approach where your subject or subjects interact with each other and/or their environment in a natural way. Perhaps the standard, heavily posed and manicured. As you get started, it’s important to experiment with each approach and find what feels natural to you and of course, your clients. It’s also common to mix and match aspects of each to form a personal style and shot list that you can rely on and master.
If you’re getting started or considering dabbling in portrait photography, put the points above into practice. While you may not be ready to jump into a RAW workflow just yet, proper composition, lighting, and posing can bring your work up a notch. If you want to learn more about portraiture, check out our other articles and videos on the topic at the B&H Explora page!
