
Congratulations! Your project includes a scene using chroma key and you've just recorded your green screen footage. Or did you use blue screen? Or maybe even a white background? Your next challenge is finding the right software tools to edit your footage in post-production so your final scene doesn't look like the weatherperson on public access TV. The basic process is to import your green screen footage into software with chroma key tools, to apply a key (remove the green) to the background, leaving your subject completely free of the green color, and then to replace that background with the footage of your choice, creating a final composite by placing your subject into a new scene.
Top shot courtesy of FXHOME PhotoKey 8 Pro Software
One of the great things about chroma key is that you don't have to use a green background—the majority of chroma key software uses the full color spectrum so you can remove any color you'd like. Your subject may have had blonde hair or wore green pants like when Brick's legs disappeared in Anchorman 2, so you used a blue background. If you had blue and green elements in your subject, maybe you even used a bright pink background. If green or blue screen didn't quite work for your subject, you may have used a white background, like those classic white screen commercials—using a luma key (brightness) might be your best bet for a clean composite.
The State of Your Footage
It's important first to evaluate the state of your footage to determine whether you can do some basic keying or if you require a more advanced level of complexity. Should you use a stand-alone tool, a professional NLE (Non-Linear Editor), or a plug-in for your existing editor? There are several factors to consider.

In what media format did you shoot? Was it compressed, MOV or MP4, AVI or MPG? Your operating system may determine what software you can use, depending on the format. If you are using an iOS or Android smartphone, you can preview your footage before post-production. You can either use the app that comes with your camera or download another editing app with chroma key tools to make sure you’ve got your lighting right while still on set, or maybe just to share a quick clip with a remote producer.
In what resolution did you shoot: 720p, 1080p, 4K? Not every chroma key tool supports 4K footage, especially free or trial versions, so you may need to down-convert your footage or upgrade to software that supports 4K.
What is the quality of your footage? Do you have a clean, evenly lit green background with a clear subject in the foreground? If so, you can probably use a simple key without much tweaking of your image. But if you have some camera movement, hot spots, wrinkles, or shadows in your green screen, or maybe fly-away hair or other parts of your subject that show green reflection (spill), you may need some more advanced luma and chroma features to clean it up.

What kind of background footage have you chosen, still image or video? Make sure it matches the resolution, quality, and lighting of your image. If it’s high-resolution or raw footage, you may need to down-res (make it smaller) or cross-convert (convert to a new format) to match your editing timeline. It should match the basic lighting to suit your keyed image, and then you can fine-tune them together once you’ve applied your chroma key.
Opting for the Cheap, Quick, and Easy
If quick, cheap, and easy is your goal and your footage is fairly clean without too many shadows or spill, there are several cheap or free apps into which you can import a clip, apply a chroma key, and export without much editing or any advanced features required.
VSDC is a free Windows-based editing app that provides basic editing tools, supports most common video formats, and has a handy tool that removes green screen and composites your background with your footage. It has a simple interface that allows you to choose colors and brightness and allows fine-tuning the edges around your subject. Apple's iMovie comes free with Mac computers and features basic video editing with a simple, drag-and-drop interface for basic editing. It also allows you to import MP4 and MOV files to a timeline and simply drag and drop green screen clips over your desired background; the green screen removal is done by selecting from a simple dropdown. But beware, there is little adjustment that can be done, so make sure your green screen footage is fairly clean.
iMovie is also available for iOS if you are out in the field and need to take a look at your footage to see if your green screen shot is working. There's also a really basic app called Do Ink that can create simple composites if all you're looking for is a cute family home video, putting your kids against a fun background. Kinemaster is Android's answer to iOS iMovie and is a free trial download, and low cost to use as time goes on. It features all the basic editing functions and its green screen app has a wealth of functions to make sure your composite works well. Other free basic apps like HitFilm Express, OBS Studio, Openshot, and ZS4 are other Mac and Windows compatible options with varying levels of chroma key, luma key, and compositing features.
Somewhere in the Middle
More advanced tools may be needed if your footage needs some extra care. If your clip has inconsistent lighting or quality issues, you may need tools that allow you to apply more than one chroma key to match the different shades of green or color correction tools that can fix your footage. Your subject’s outline may have artifacts, or spill, that makes their edges look slightly green. Additional spill suppression and alpha channel tools can help key out fine aberrations.
Filmora for Windows and Mac has a tool called "overlays" with green screen features such as edge feathering tools and a single key color selection, but the features are limited. DebugMode's Wax is a Windows-based tool that supports a wide variety of video and image formats, but don't expect it to support high-res MP4 or MOV files. The interface is based on Sony's Vegas editor, but much more simplified for those just looking to do a simple green screen removal and replace. It also supports separate compositing plug-ins for more advanced work.
Apple's Final Cut Pro X for Mac is Apple's full-featured editor that goes many steps beyond iMovie, and while it starts out with the familiar drag-and drop of clips, it offers more advanced chroma key features such as spill suppression, edge wrap, and other matte tools to perfect your chroma key. MAGIX Entertainment's VEGAS is a similarly priced NLE to FCPX that offers green screen and compositing tools for Windows users. Lightworks and Blackmagic Design's DaVinci Resolve are professional-level NLEs that include powerful compositing and green screen tools, they both support 4K footage, and are free to download for Mac, Windows, and Linux. DaVinci Resolve allows you to import and export between professional NLE apps such as Premiere Pro, Avid Media ComposerFinal Cut Pro, while Lightworks also supports 4K proxy workflows, which can help speed up the editing process for large files.

Though most of these applications aren't highly complex, they have a higher learning curve than the cheap and easy apps, so take some time to get to know their capabilities before jumping in.
More Advanced Features for a Price
For even more advanced features, you will have to spend a little cash and education time, but the result will likely be worth it. More advanced chroma key tools are usually used within full-featured NLE's via built-in tools or professional plug-ins with additional handy features such as advanced color correction, noise reduction, HDR (High Dynamic Range) color support, motion and keyframing, additional file format and high-resolution support, and multi-camera editing.
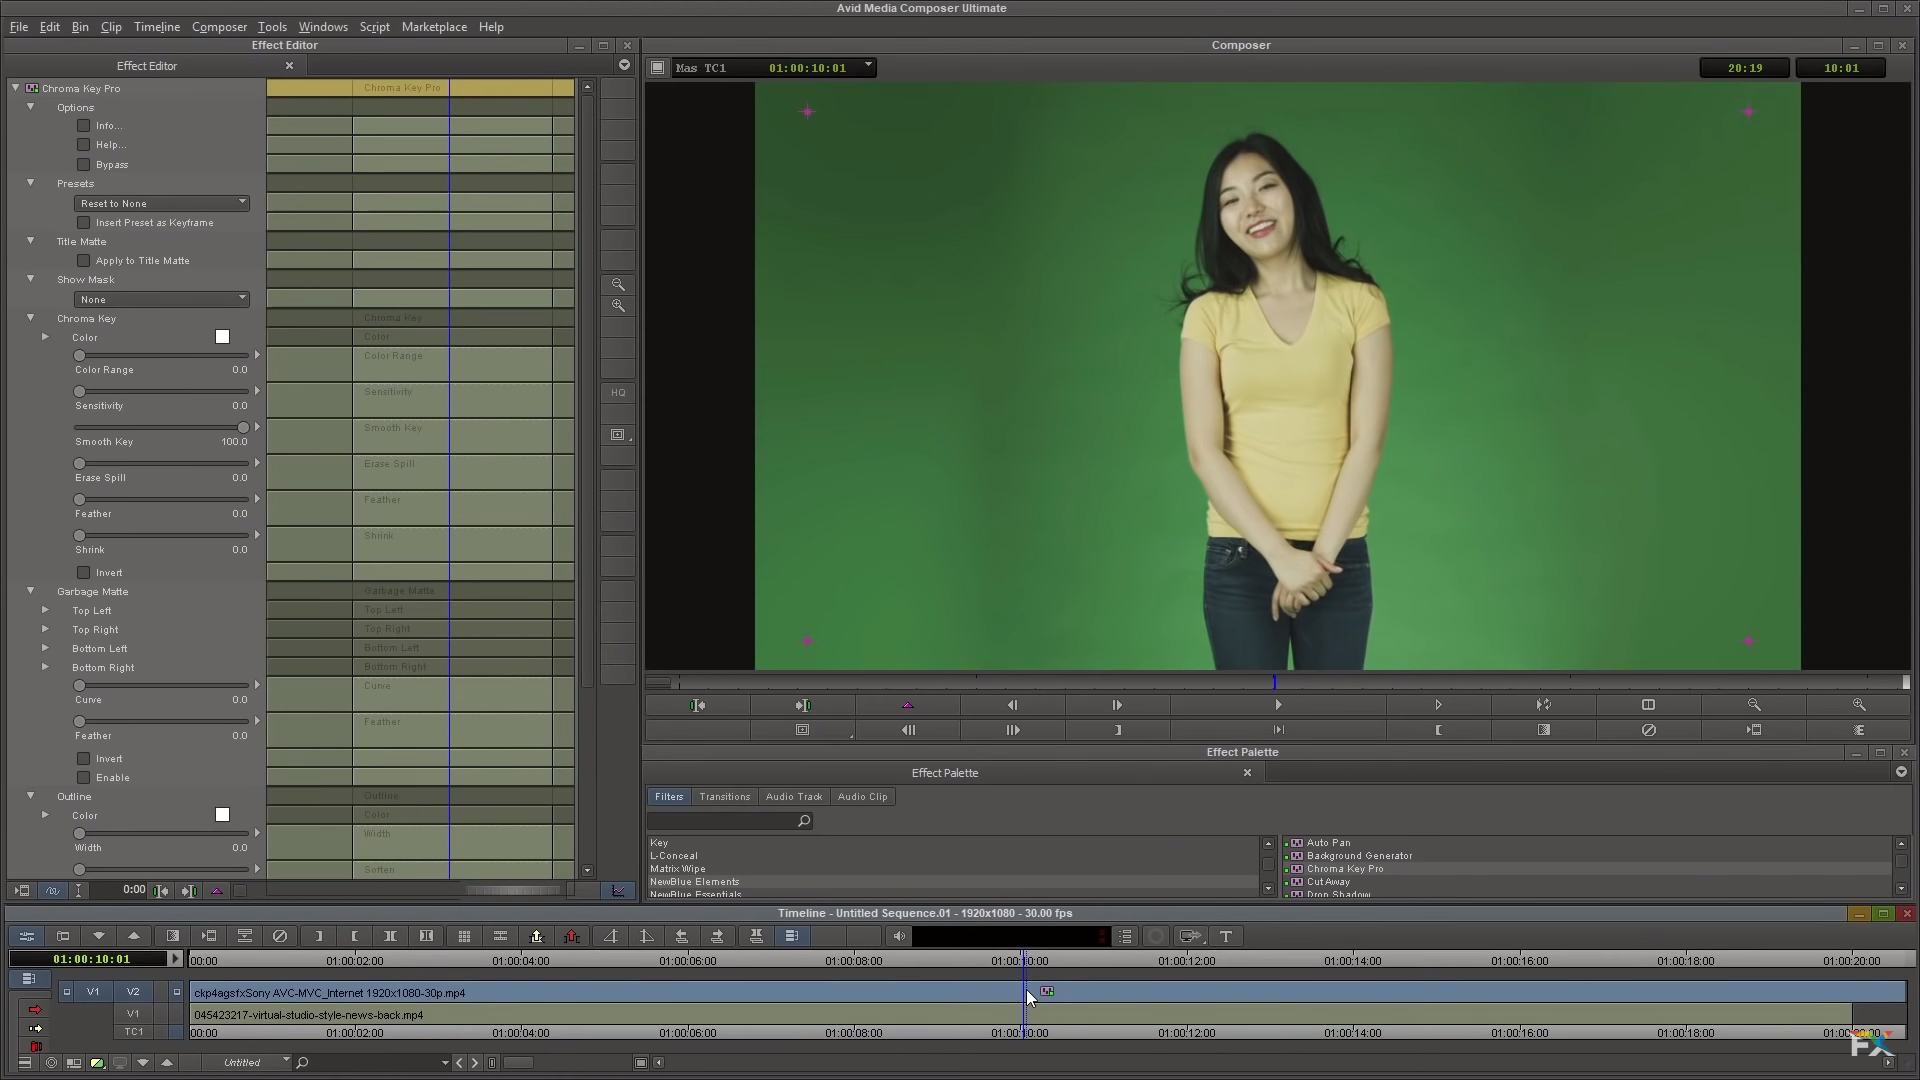
Avid Media Composer, Adobe Premiere Pro CC, and Adobe After Effects CC are all compatible with Mac and Windows platforms and feature compositing tools, as well as pro-level NLE functionality. They are compatible with numerous advanced plug-ins such as Red Giant's Primatte Keyer and Boris FX's Chroma Key Studio that feature powerful chroma key tools. Blackmagic Design's DaVinci Resolve Studio (free only with BMD's high-end cine cameras) has more features than the free version, such as support for resolutions higher than 4K, HDR color-grading support, which will help greatly with accuracy keying high-resolution green screen productions, as well as additional effects and plug-in support.

Just a Bit of Extra Spill
It's important to consider that you may need to pre-process your footage to make your chroma key work. It’s best not to edit heavily compressed footage, since compression can leave artifacts or pixelation. It’s best to use a "lossless" or raw/uncompressed format or to convert your compressed files into a native lossless format such as ProRes or CinemaDNG. File space can be a problem with uncompressed footage, so lossless compression is a fine compromise. Poor lighting may also leave some noise or grain, so you may need to fix a few imperfections before you key—but try not to overdo it or you’ll lose quality. If your green screen is unevenly lit, you might want to even it out, remove any spill with specialized tools, or whittle down problem areas using a garbage matte—removing large, unwanted regions of your image—before you apply a key. Also, chroma key works best using progressive footage (e.g. 1080p) rather than interlaced footage (e.g. 1080i); you'll get a sharper result and the tools will perform with greater color and pixel accuracy.

New software is continually improving with more automatic chroma key tools than ever, which offer everything from one-step fixes to advanced, complex tools. Be sure to visit our other articles for more information on the Green Screen Dos and Don'ts and our Green Screen Beginner’s Buying Guide for tips about shooting with green screen and what products and style match your budget. Stop by the B&H Photo SuperStore to look at some of our green screen products in person and explore our wide selection on the B&H Photo website
