
Achieving a standard of production value is an essential component of establishing a brand and growing a following. For part-time, burgeoning, and mid-level creators, it can feel like bridging that gap is less a matter of learned skill and more about the equipment you can afford.

In most cases, the problem isn’t budget at all. Acquiring the specific know-how can give your content professional sheen with little to no financial outlay.
Lighting design is arguably the most immediately visible production component—and the one most capable of making or breaking your content. How your scene is lit, whether it is a simple front-facing video or a more multilayer hybrid production, telegraphs your level of technical savvy to the audience.
Below are five easily actionable lighting strategies that will allow creators to improve the production quality of their content. These solutions range from completely free adjustments to minor equipment investments, with the expectation that the return will far outweigh the time, labor, or cost involved in implementing them.
1. Turn a Window into a Soft Light
The world’s original light source can still be your best option, even when you’re indoors. The soft, indirect sunlight entering through a window can be extraordinarily flattering, provided it is managed correctly.
Using a window follows many of the same principles that govern any other light source: its proximity to the subject, apparent size relative to the subject, and the direction from which its light falls. All these qualities can be controlled easily, at little to no additional cost. Simple modifiers such as reflectors, bounce cards, or even carefully positioned mirrors can provide further control over the direction and intensity of the light.
The number one rule when using window light as your primary—or key—light is to position the subject so that their face is either directly or mostly facing the window. If the subject sits with the window directly behind them, you introduce a significant discrepancy between the bright background and the comparatively small amount of light falling on their face. Correcting that imbalance will most likely require a second light source.

The subject’s position relative to the light is consequential to the final result. Turning slightly away from the window can create more depth and dimensionality, while facing it directly will generally produce flatter, more even illumination. If the shoot takes place over several hours, you may need to adjust the subject’s position as the direction and intensity of the incoming sunlight change.
Bringing the subject closer to the window demonstrates a principle we will return to later: moving a light source closer makes it both brighter and, because it appears larger relative to the subject, softer. The result is a smoother transition between highlights and shadows, with less severe shadow edges.
If direct sunlight is entering through the window rather than indirect light, you can diffuse it by covering the window with a translucent material. A sheer curtain, white sheet, or dedicated diffusion fabric can spread the light across a larger area, effectively increasing the apparent size of the source.
Diffusion will reduce the total quantity of light reaching the subject, but it will also soften hard-edged shadows and create more even, flattering illumination. In general, indirect window light will produce the softest look and the most consistent results.

For the cleanest color and most flattering facial lighting, turn off overhead fixtures that may introduce harsh downward shadows or conflicting color temperatures. An overhead tungsten or warm-white bulb, for example, may cast a noticeably different color than the daylight entering through the window.
That does not mean every other light in the room must be switched off. A table lamp or other ambient fixture can add texture, depth, and visual interest to the background. Just keep in mind that the light illuminating the subject and the practical lights visible within the room may differ in color. That contrast can either enrich the scene or make it look inconsistent, depending on how it is managed.
2. Bounce Light to Fill in Shadows
Featured in countless paintings and photographs throughout history, images made with a single, unmodified light source often contain a high degree of contrast between their brightest and darkest areas. In many cases, the transition from light to shadow happens quickly, creating the dramatic effect known as chiaroscuro, an Italian term meaning “light-dark.”

While chiaroscuro can produce striking imagery, it can also leave important details of the subject enveloped in shadow. Higher-budget productions often address this by introducing second, third, or even more additional lights to precisely sculpt the illumination around the subject. You may not have access to a full lighting crew, but you can still reduce excessive contrast using a simple modifier that redirects some of the existing light back into the shadows.
This technique is known as fill, and it does not require another powered light. By bouncing part of the key light back toward the subject, you can restore detail to darker areas without eliminating the contrast and dimensionality created by the original source.

The technique applies not only to scenes illuminated by window light, but to virtually any setup built around a single strong source, including flash and continuous LED lighting.
The same directionality that creates the original shadows allows a modifier to fill them. When light strikes a reflective surface, it is redirected according to the angle and material of that surface. A mirror produces a concentrated, specular reflection, while a matte white surface scatters the light more broadly.
Reflectors, bounce cards, and mirrors can all be used to create fill. The specific properties of each vary considerably, affecting the quality and intensity of the light they return.
In most setups, the modifier should be positioned on the side of the subject opposite the key light. Placing it directly across from the primary source generally produces the greatest amount of fill, although changing the angle allows you to control precisely where that reflected light falls.

Distance also affects the result. Moving the reflector closer to the subject strengthens the fill, while moving it farther away makes the effect more subtle. As with any light source, the reflector’s apparent size relative to the subject also influences softness. A large reflector positioned close to the subject will generally produce a broader, softer fill than a small reflector placed farther away.
Different reflector materials produce distinctly different results.
White Bounce Surfaces
A matte white surface is generally the best choice for soft, neutral fill. It reflects less light than a silver reflector or mirror, but spreads that light over a wider area, making it easier to produce a natural-looking result.
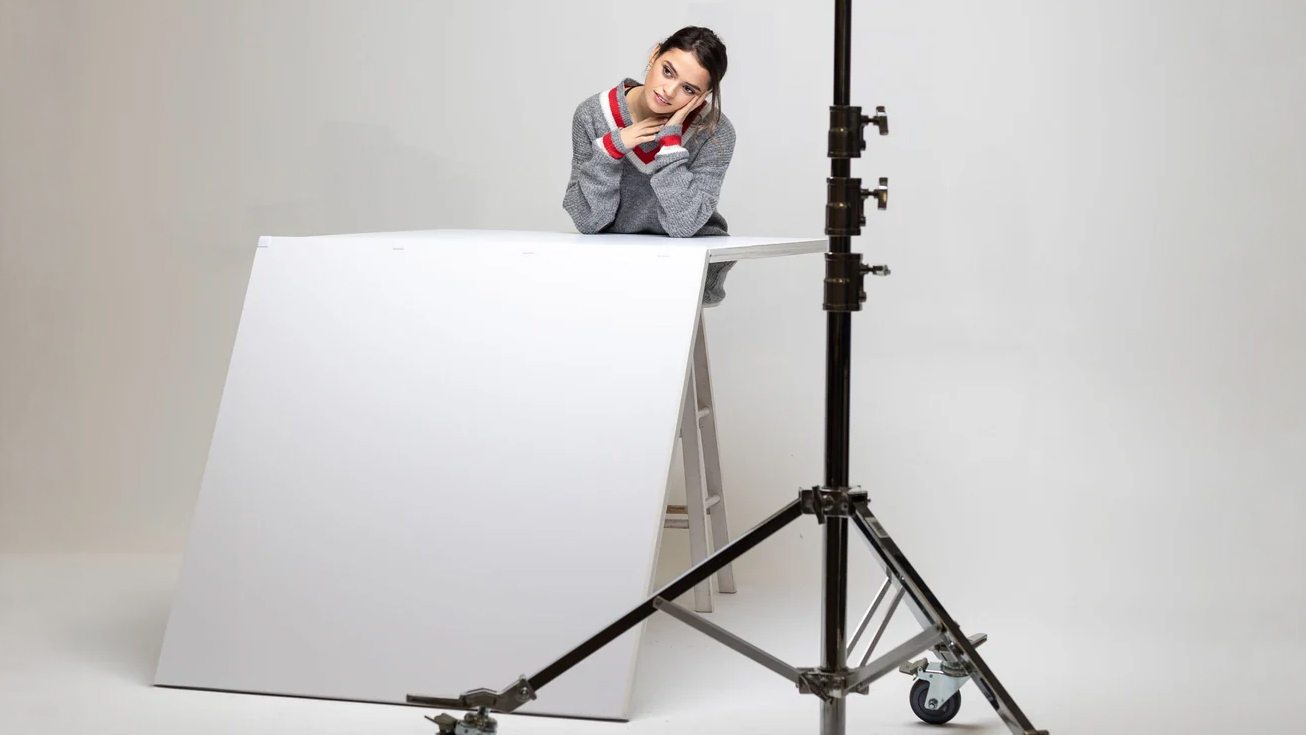
A dedicated white bounce card works well, but so can white foam board, poster board, a nearby wall, or, in a pinch, a large sheet of white paper. These inexpensive surfaces make it possible to lift the shadows without calling attention to the fill itself.
Silver and Colored Reflectors
Silver reflectors occupy a middle ground between a white bounce card and a mirror. They return more light than a matte white surface and generally create a brighter, more directional fill.
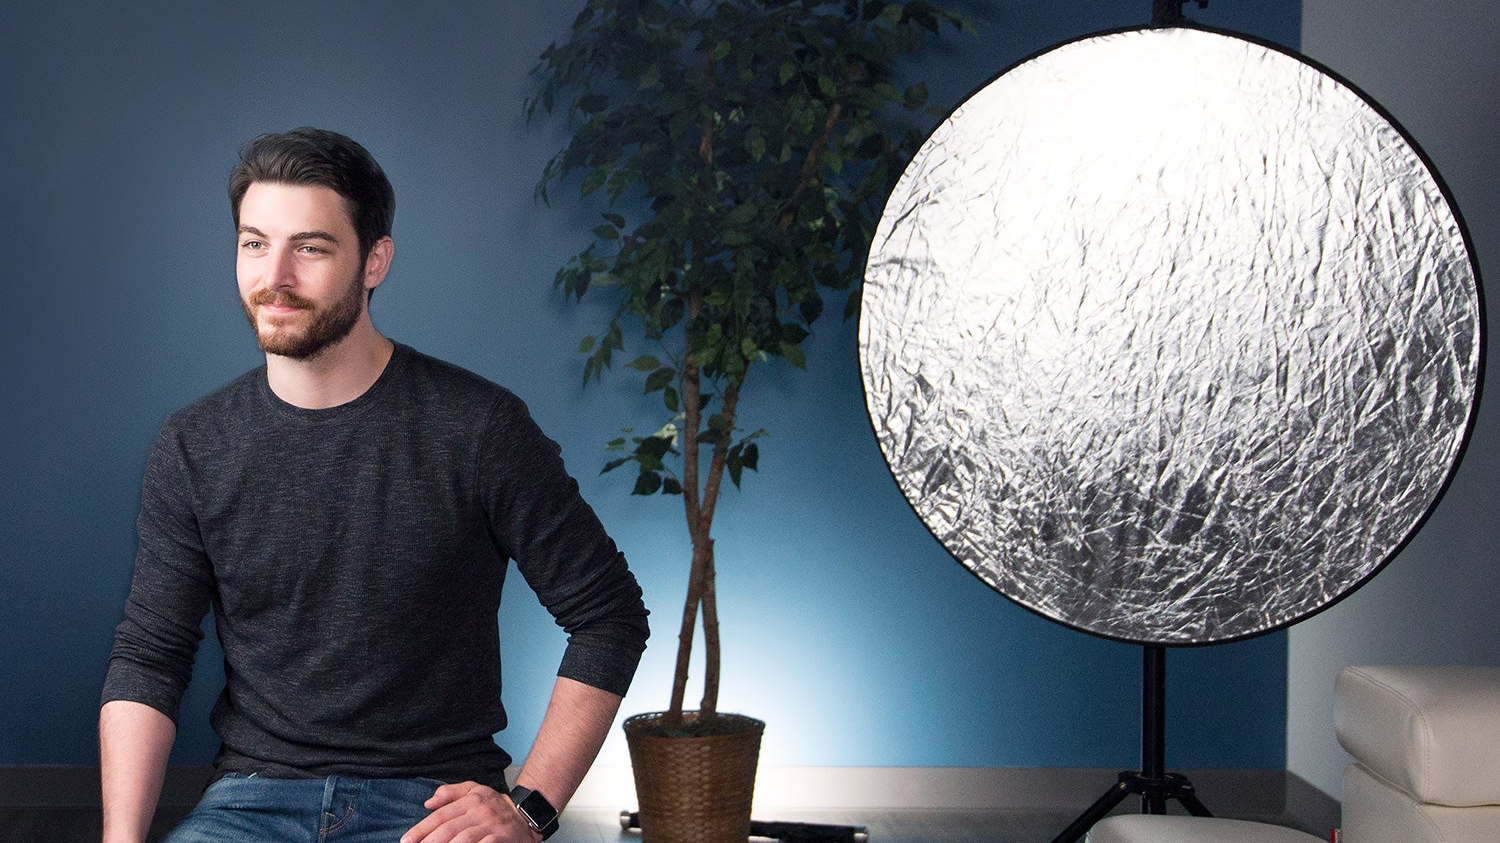
Gold and other colored reflectors operate similarly, but they also alter the color of the reflected light. A gold reflector, for example, introduces warmth into the filled side of the subject. This can be flattering in some situations, but it can also create an obvious color imbalance when used too aggressively.
Mirrors
A mirror returns the strongest and most concentrated reflection, while making relatively little change to the character of the original light. If direct sunlight is illuminating the subject, reflecting that sunlight with a mirror can create a second source that is nearly as hard and intense as the first. The result can feel less like gentle fill and more like having two suns aimed at the subject.
Mirrors can be useful when a great deal of light needs to be redirected, but they must be positioned carefully to avoid glare, blown highlights, and harsh secondary shadows.
Negative Fill
Not every scene needs brighter shadows. Sometimes the surrounding room is already reflecting so much light that the subject appears flat and lacks definition.
In that case, you can use negative fill: a black board, flag, or piece of dark fabric positioned where you might otherwise place a reflector. Rather than returning light to the subject, the dark surface absorbs it, deepening the shadows and increasing contrast.


Negative fill is especially useful in small rooms with white walls, where ambient reflections can weaken the shape created by the key light. As with a conventional reflector, moving the negative fill closer to the subject strengthens the effect, while moving it farther away makes the change more subtle.
Contrast control requires either the addition or subtraction of light. Instead of immediately turning to the introduction of another fixture, a deliberately positioned reflective modifier can prove less costly and more effective.
3. Move Your Light Before Buying a Brighter One
As alluded to earlier, the distance between your subject and the light source changes both the quantity and the quality of the light falling upon them.
The most intuitive effect is brightness: the closer the light is to the subject, the brighter the subject will appear. Conversely, moving the light farther away reduces the amount of illumination reaching them. One of the simplest ways to brighten your subject, therefore, is not to purchase a more powerful fixture, but simply to move your existing light closer—or move the subject closer to the light.
Distance also affects the apparent size of the source and, in turn, the softness of the illumination. In a way that may initially seem counterintuitive, bringing a light closer to the subject generally makes its light softer.
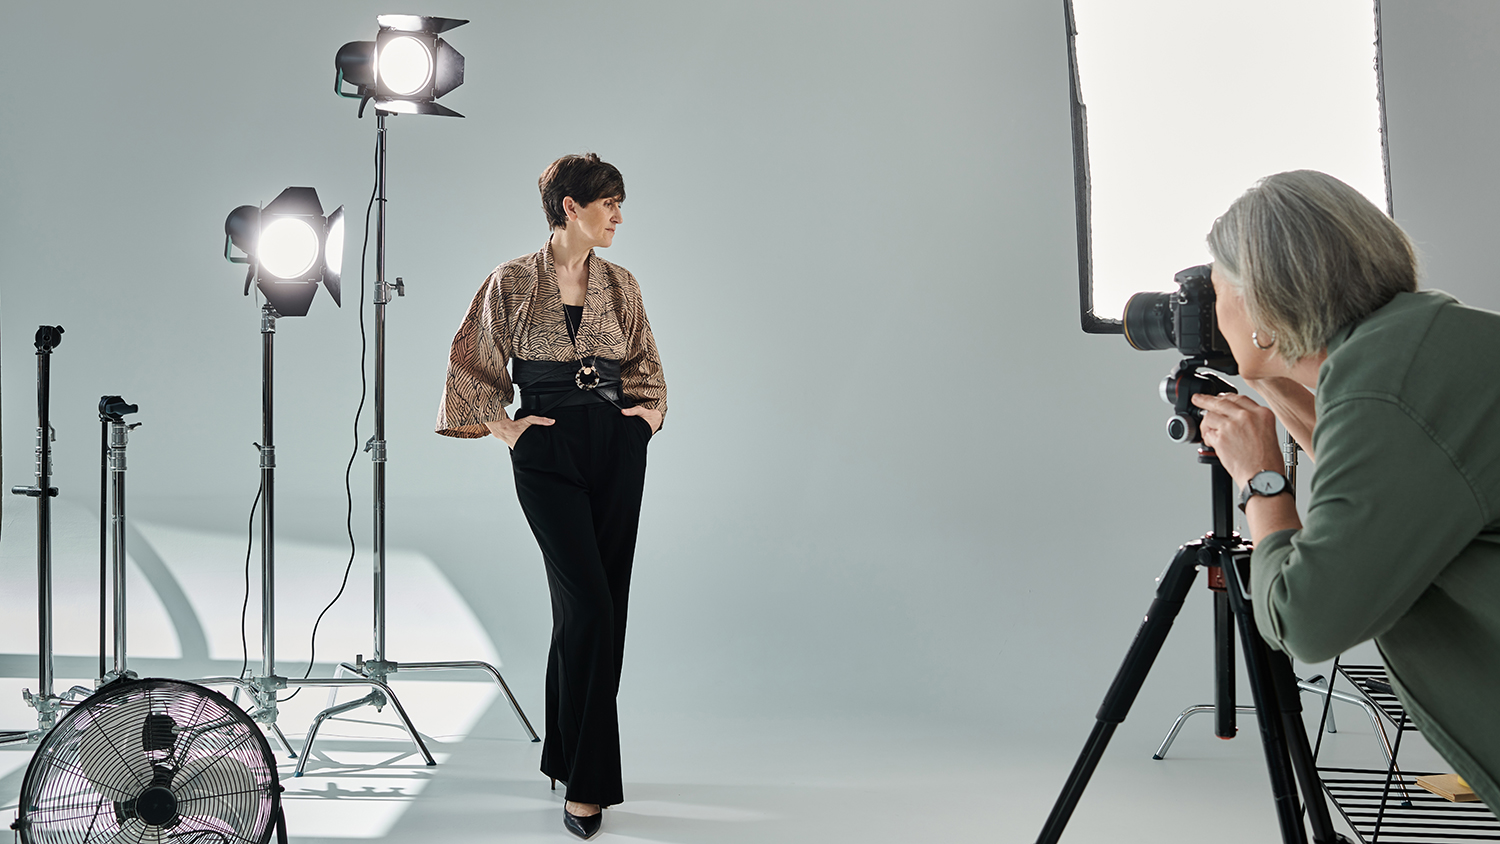
The physical dimensions of the fixture have not changed, but its size relative to the subject has. A light positioned nearby occupies a larger portion of the subject’s field of view than the same light placed across the room. The larger the source appears relative to the subject, the more broadly its light can wrap around facial features and other contours.
This produces softer-edged shadows and a more gradual transition from highlights into darker areas. Move that same source farther away and it becomes smaller relative to the subject, producing harder shadows with more sharply defined edges.
You can observe a related effect outdoors by looking at the shadow you cast on a wall. Stand close to the wall and the outline of the shadow will appear comparatively sharp. Move farther away and its edges become increasingly diffuse. In both cases, the softness of the shadow is governed by the geometric relationship among the source, the subject, and the surface receiving the shadow.
This means that the first solution to an underpowered or overly harsh light may simply be a change in position. Before replacing the fixture, bring it closer and examine what happens to the exposure and the quality of the shadows.
Of course, distance is only one aspect of placement. For natural-looking facial illumination, position the light slightly above eye level and approximately 30 to 45 degrees to one side of the camera. This creates shape and dimension without producing excessively dramatic shadows.
Unless a deliberately flat look is desired, avoid placing every light directly beside the camera. A fully frontal source can minimize shadows, but it may also remove much of the form and texture that give the subject a three-dimensional appearance.
Keep an eye out for reflections in eyeglasses and other reflective surfaces. Raising the light, moving it farther to one side, or changing its angle slightly can often shift an unwanted reflection out of the camera’s view without meaningfully changing the overall look.
If your artificial light offers adjustable output, you can lower its power after moving it closer. This prevents overexposure while preserving the softer quality created by the larger apparent source.
In other words, brightness and softness do not always require more wattage. Sometimes the most effective lighting upgrade is simply moving the equipment you already own.
4. Soften a Bare Light with a Softbox or Diffusion
Much as hanging a sheer sheet over a window changes the size and quality of the sunlight entering a room, introducing a softbox or diffusion material changes the character of the light produced by an artificial fixture.
There are cases in life where bigger is indeed better. While not an inviolable law of “good imagery,” conventional, flattering light demands a large source. Here, the most budget-friendly solution is to modify a smaller light source instead of purchasing a large one.
For example, the pinpoint nature of a bare bulb or compact LED panel makes it difficult to achieve that softness through distance alone. You can move a small bare light close to your subject, but its light-emitting surface may still be too small to create the broad, gentle illumination you are looking for.
This is where softboxes, umbrellas, diffusion panels, and similar modifiers become useful. By spreading the output of a relatively small fixture across a much larger surface, they increase the apparent size of the source relative to the subject. The result is softer shadow edges, smoother transitions between light and dark, and a more gradual, pleasing falloff across the face or object being rendered.
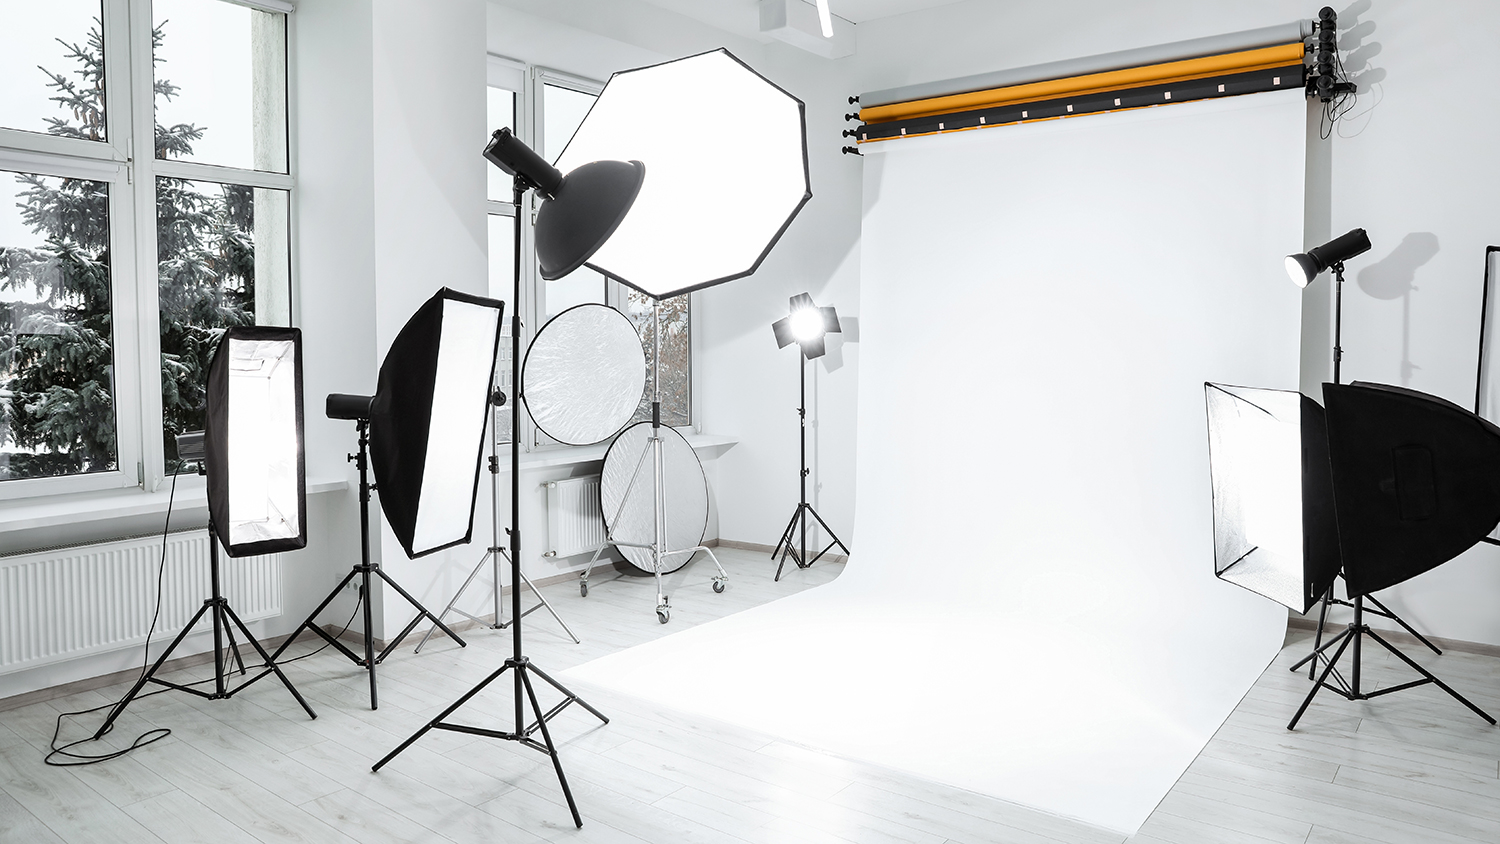
As a rule, use the largest modifier that your space and fixture can reasonably accommodate.
Softboxes
A softbox functions as both a container and a director of light. Its reflective interior redirects output that would otherwise escape in several directions, while one or more layers of front diffusion spread that light across a broad, relatively uniform surface.
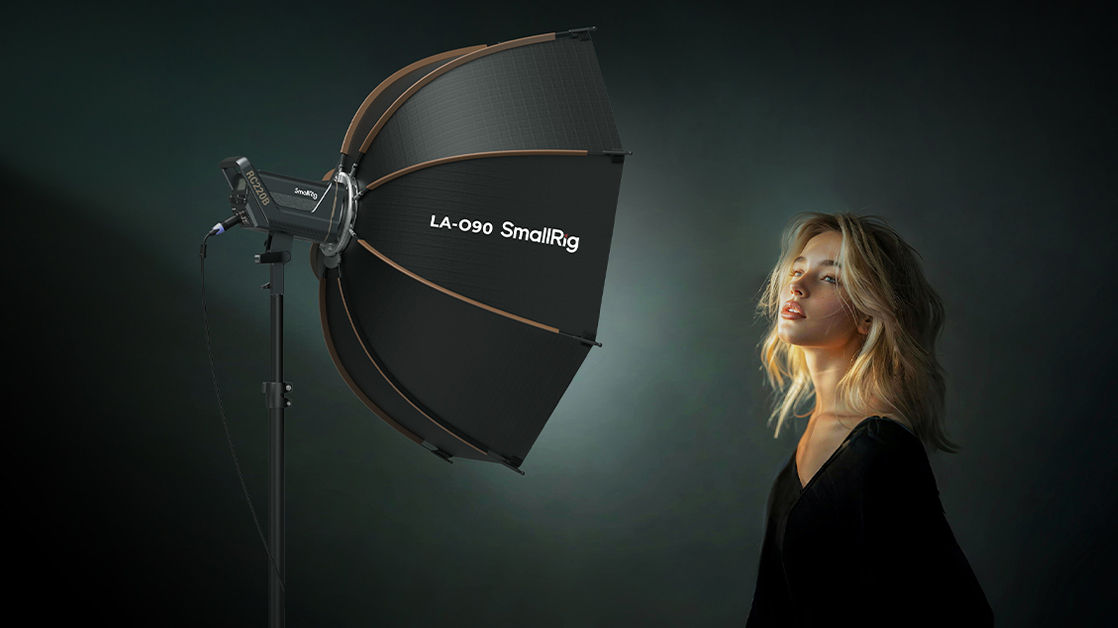
From the subject’s perspective, the illuminated front face of the softbox effectively becomes the new light source.
Softboxes come in a variety of shapes, including squares, rectangles, octagons, strips, and deep parabolic designs. Each provides a somewhat different pattern of coverage and reflection.
Rectangular and square softboxes are versatile options for portraits, interviews, products, and general creator work. Octagonal softboxes produce a rounded source that can create natural-looking catchlights and broad, wrapping illumination. Strip softboxes produce a narrow band of light well suited to full-length subjects, edge lighting, and controlling highlights on reflective products.
Deep or parabolic-style softboxes are designed to produce a more directional beam while retaining a relatively large, soft source. Their precise behavior varies with their shape, depth, interior, diffusion, and the placement of the lamp within the modifier.
Grids and Spill Control
Increasing the size of a source also tends to increase the area across which its light spreads. This can cause illumination to reach the background, nearby walls, or other parts of the scene where it is not wanted. Lighting technicians commonly refer to this unwanted light as spill.
A fabric grid attached to the front of a softbox limits the angles at which light can leave the modifier. It does not make the light dramatically harder, but it does channel the output forward, helping prevent the key light from washing across the entire room.
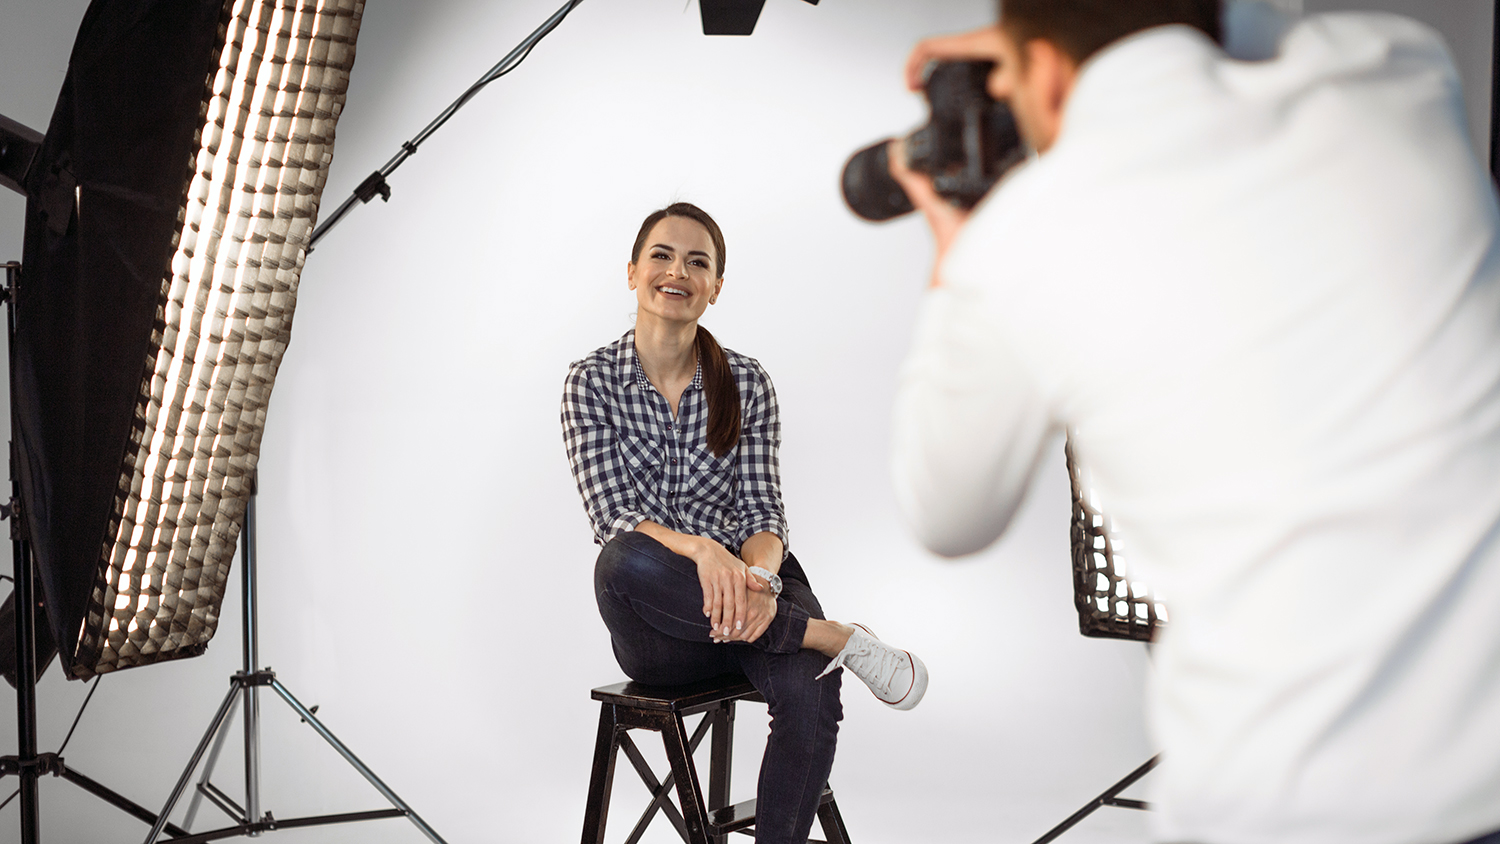
This is useful when you want soft illumination on the subject while maintaining independent control over the brightness and color of the background.
Umbrellas
Lighting umbrellas are among the simplest and most affordable ways to enlarge a source.
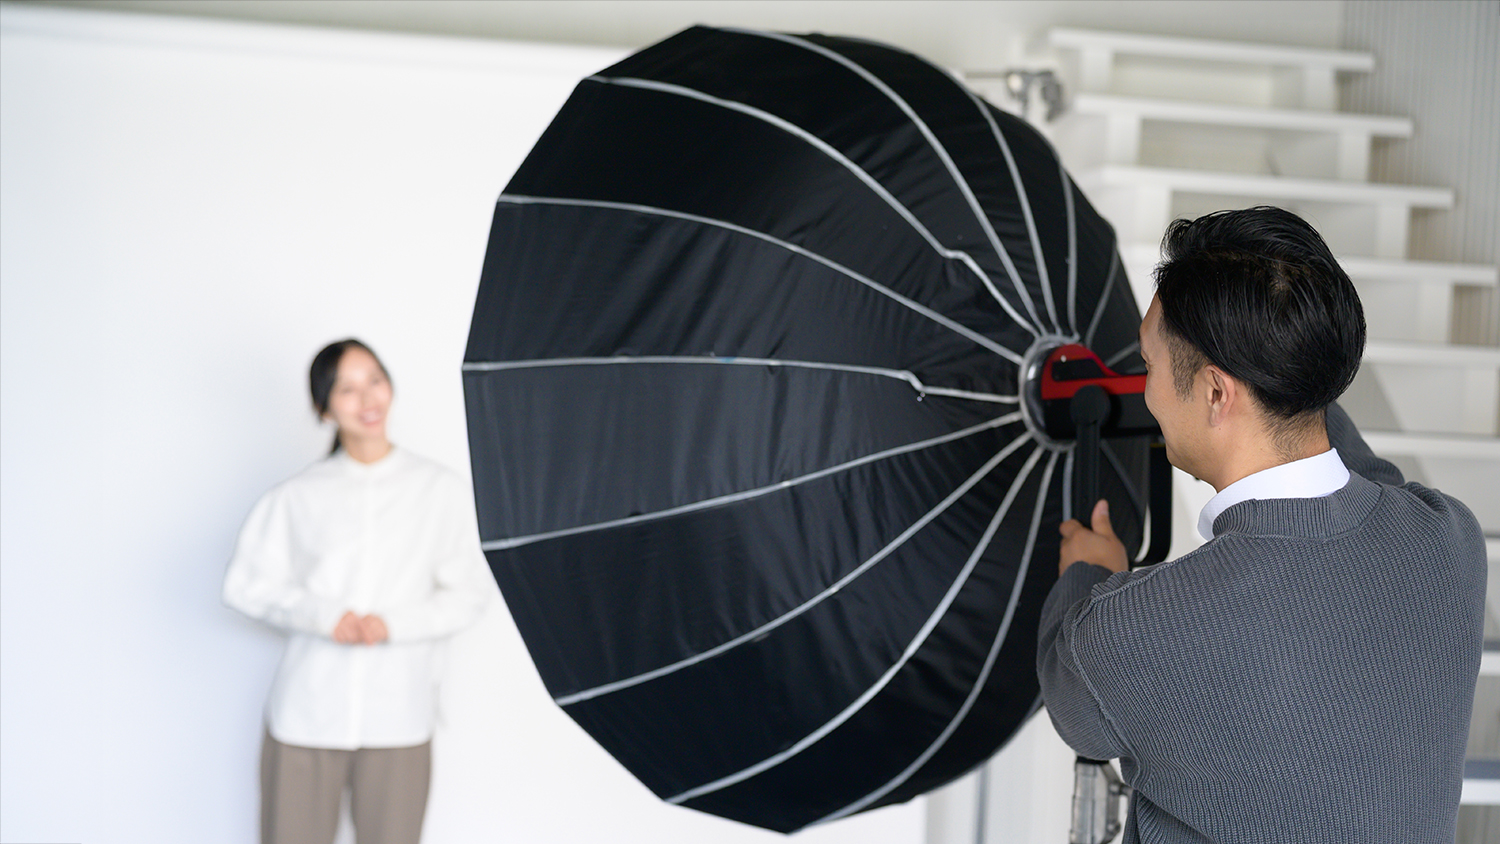
A shoot-through umbrella places translucent fabric between the light and the subject, spreading the output across a wider area. A reflective umbrella points the fixture away from the subject and bounces the light back from its interior surface.
Umbrellas can produce broad, flattering light and are generally faster to assemble than softboxes. Their principal limitation is control. Because they disperse light widely, they tend to produce more spill and may illuminate much of the surrounding room. They can also be less efficient than an enclosed softbox, depending on their design and how they are positioned.
For creators working in a small space who do not need precise background control, however, an umbrella can be an inexpensive and highly effective option.
Diffusion Panels and Scrims
A diffusion panel places a translucent surface between the original fixture and the subject. Once the light passes through and spreads across that material, the illuminated panel effectively becomes the source as far as the subject is concerned.
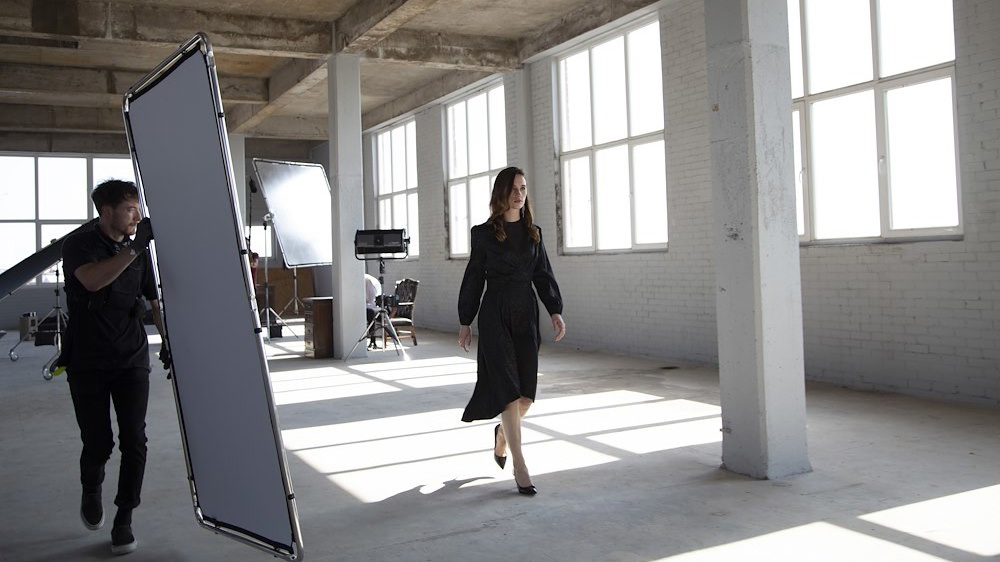
The larger the illuminated area of the panel, the softer the resulting light can become.
Diffusion frames are especially useful with LED panels, multiple fixtures, unusual household sources, or any situation in which a conventional softbox cannot be attached. They also provide flexibility because the distance between the fixture, diffusion material, and subject can be adjusted independently.
However, freestanding diffusion generally loses more light than a well-designed softbox because much of the fixture’s output may miss the panel or scatter away from the subject. Moving the light closer to the material can illuminate a smaller, brighter area, while moving it farther back can spread the beam more evenly across the panel—provided the fixture is powerful enough to compensate.
It is worth distinguishing diffusion from other light-control tools. A solid gobo, short for “go-between,” blocks or shapes light rather than softening it. A net or traditional production scrim may reduce intensity without necessarily increasing the apparent size of the source. For genuinely softer light, the material must diffuse the output across a larger illuminated area.
DIY Diffusion
Diffusion can also be improvised with materials you may already have. A translucent white shower curtain, sheer white fabric, or thin white sheet can all function as a large diffusion surface.
The material ideally should be neutral in color, free of visible patterns, and large enough to be illuminated evenly. A material with an unwanted tint can change skin tones and introduce a color cast that may be difficult to correct.
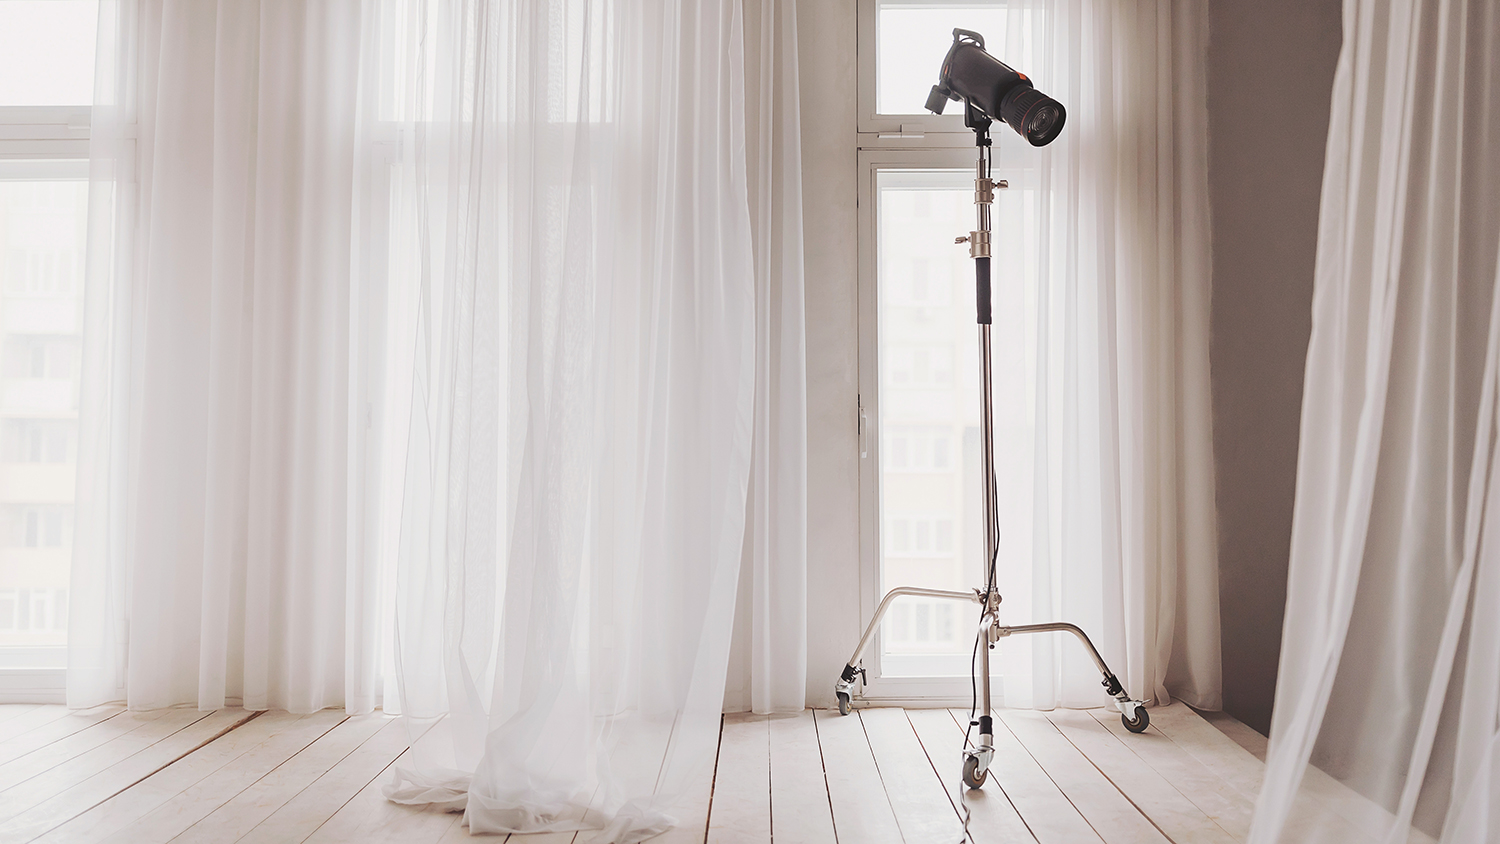
Exercise caution with any improvised modifier. Fabric, paper, plastic, and similar materials should be used only with cool-running LED fixtures and kept well away from the lamp or any other component that produces heat. Never attach household material directly to a hot bulb or tungsten fixture.
Regardless of which modifier you choose, diffusion always costs some amount of output. You may need to compensate by increasing the fixture’s power, moving the modified source closer to the subject, opening the lens’s aperture, raising the camera’s ISO, or reducing the shutter speed when the subject and format permit it.
That reduction in raw brightness is the tradeoff. In return, a small and comparatively harsh fixture can become a broad, gentle source capable of producing more polished and flattering illumination.
5. Choose the Right Light for the Job
Yes, you need light. We know this. Unless you are determined to rely exclusively on the world’s one source, you may need to purchase a fixture.
Before doing so, it helps to have a clear idea of the look you are trying to produce. As discussed in the previous section, nearly any fixture can be modified to create a particular quality of light. Nevertheless, certain types of lights are designed to be better suited than others for specific applications.
Ring Lights
We will begin with the fixture that has become most synonymous with content creation: the ring light.
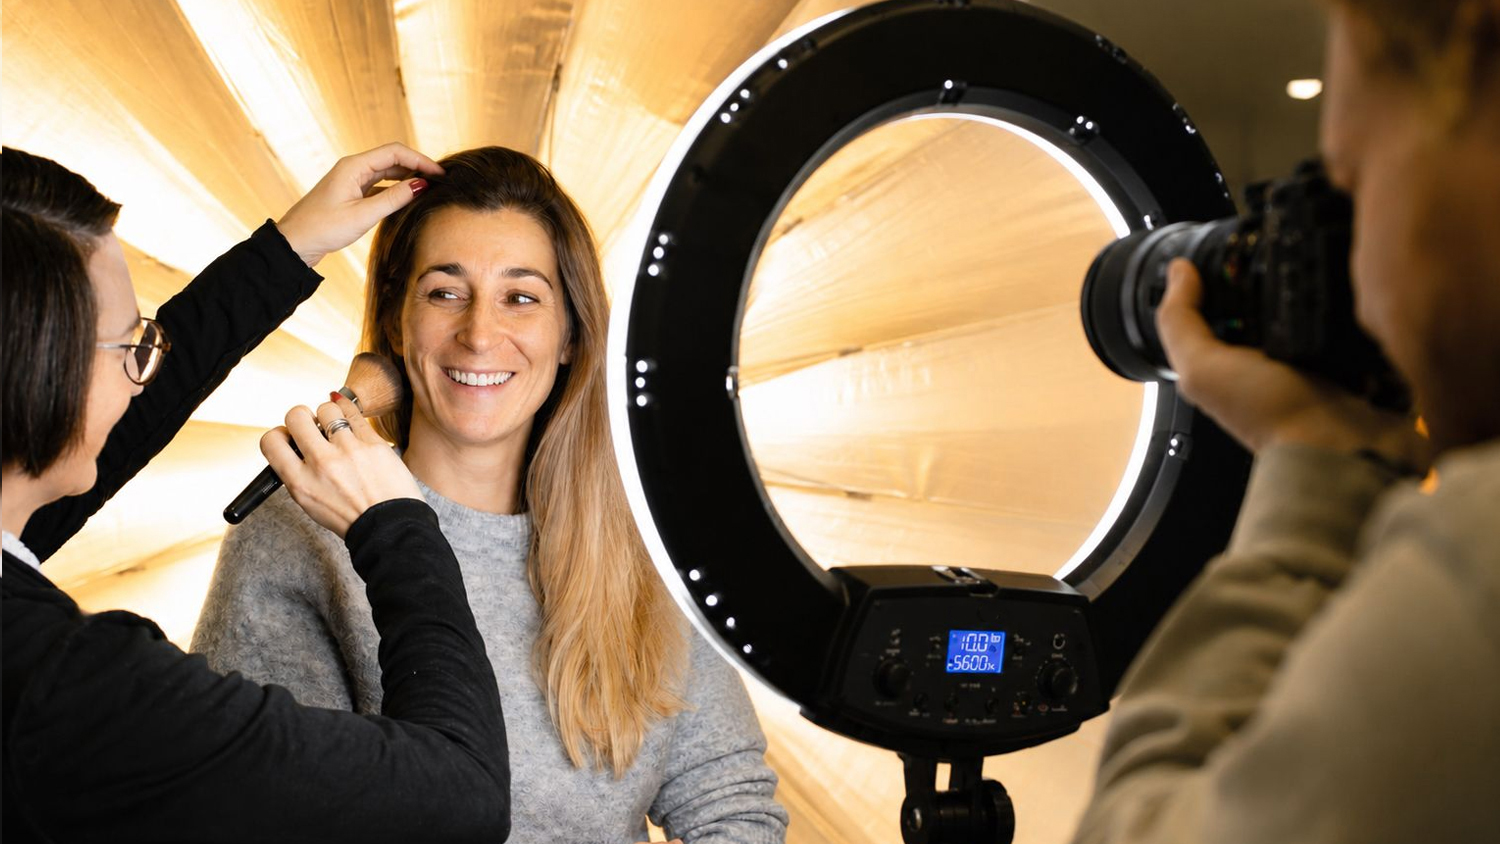
Its popularity comes from its ability to produce quick, even facial illumination in many common creator scenarios, including beauty and makeup tutorials, livestreaming, video calls, and other phone-based content. Ring-shaped fixtures are also commonly used for certain close-up and macro applications.
Most creator-oriented ring lights are designed to hold a phone or position a camera near the center of the ring. There are also smaller ring lights and ring flashes designed to attach around a camera lens, although these are generally intended for macro photography and specialized close-up work rather than conventional talking-head videos.
Positioning the camera near the center of the ring produces the traditional low-shadow look. Because the light surrounds the lens, it reaches the subject from nearly the same direction as the camera, minimizing visible shadows and creating smooth, even facial illumination.
That evenness is also the ring light’s principal limitation. The result can appear flat because the light reveals relatively little contour or dimension in the face. Raising the ring light slightly above eye level or moving it a little off-axis can introduce more shape while retaining much of its flattering character.
Ring lights also create recognizable circular reflections in eyes, glasses, and other reflective surfaces. These catchlights may be desirable for beauty content, but they can become distracting when reflected prominently in eyeglasses or reflective surfaces.
Compact LED Panels
Compact LED panels are another popular creator option, particularly for desktop setups, small rooms, travel, and mounting directly to a camera or mobile rig. They can serve as primary lights in close-range applications or as secondary fixtures used to illuminate backgrounds, provide fill, or create accents.
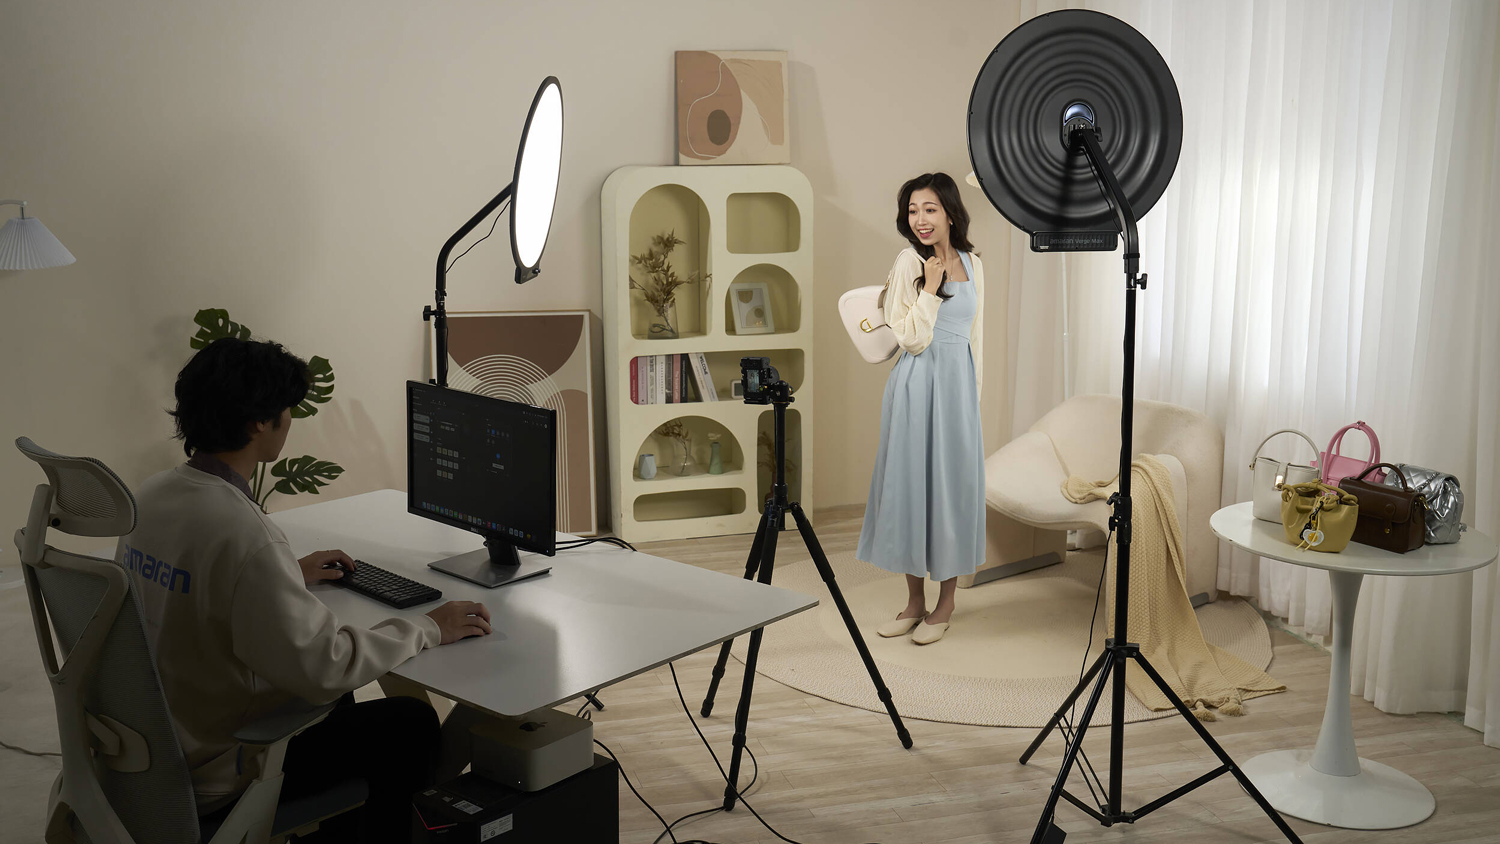
Because an LED panel is generally rectangular and illuminates the subject from one direction, it will not naturally reproduce the nearly shadowless appearance of a ring light. Achieving similarly even illumination may require placing the panel close to the camera, adding diffusion, or using more than one fixture.
What the panel offers instead is directionality. Moving it away from the camera axis makes it possible to create shadows, reveal facial structure, and produce greater dimensionality than a typical centered ring-light setup.
Small LED panels are especially useful when portability and minimal setup time are priorities. Many can be mounted to a camera’s accessory shoe, attached to a desktop arm, or powered by compact batteries. Their relatively small emitting area, however, can produce hard light unless the panel is positioned close to the subject or paired with diffusion.
COB LED Fixtures
When you want a more powerful, directional, and extensively modifiable source, a COB LED fixture is often the logical next step.
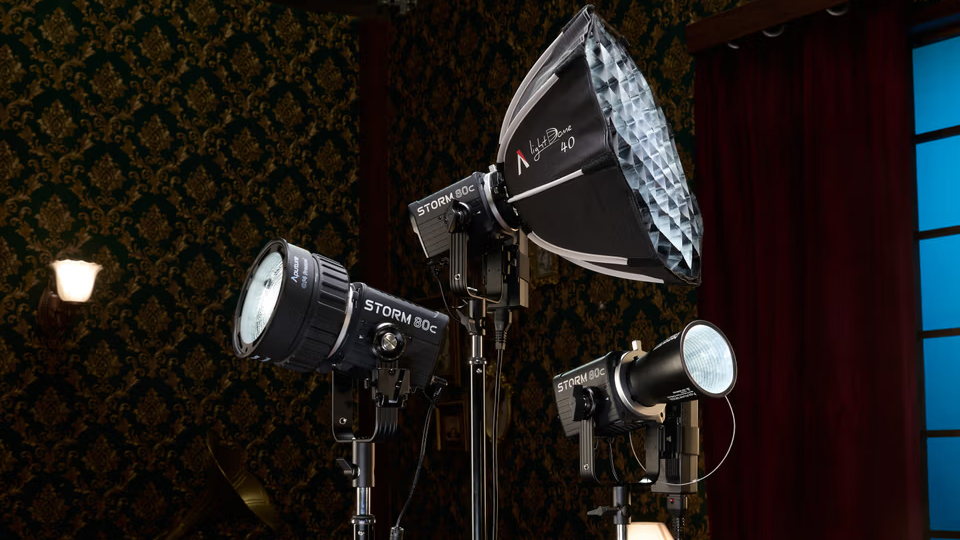
COB, or chip on board, refers to an LED design that combines many small diodes into a concentrated emitting area. These fixtures are designed to be used with attachments such as softboxes, reflectors, umbrellas, projection accessories, and other modifiers.
COB lights are particularly well suited to talking-head videos, interviews, product demonstrations, and more elaborate productions. They are often used off-camera and incorporated into multi-light arrangements, providing considerably more control over the direction, softness, and spread of the illumination.
Unlike a small ring light or on-camera panel, a COB fixture generally requires a separate light stand and takes up more space. That added complexity is the price of greater output and creative control.
Daylight, Bi-Color, and RGB Fixtures
Continuous LED lights are commonly available in daylight-balanced, bi-color, and RGB variants.
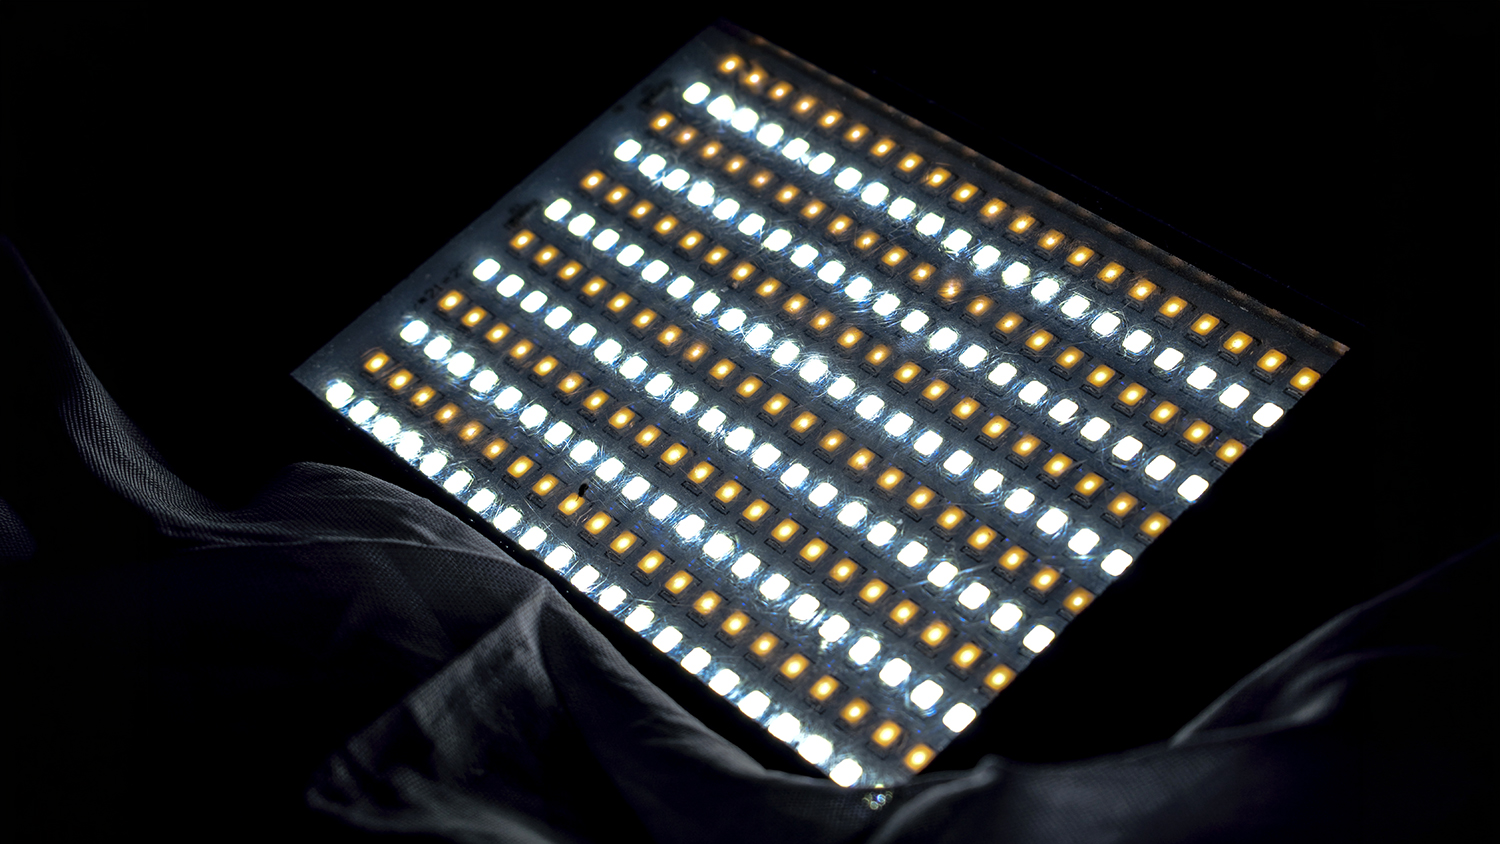
A daylight-balanced fixture is designed to produce light near the color temperature of daylight, typically around 5600K. Because it is optimized for a narrower color range, it will often provide greater output for the price than a more versatile fixture.
A bi-color light combines warm and cool LEDs, allowing its color temperature to be adjusted across a range—often from approximately tungsten-balanced indoor light to daylight. This makes it useful for matching changing window light, household fixtures, or other sources within the scene.
The term bi-color does not necessarily mean the light operates at only two fixed color temperatures. In most cases, it can be adjusted continuously between its warmest and coolest settings.
RGB fixtures add color LEDs capable of producing a broad spectrum of hues. Many modern versions incorporate additional white LEDs and may be described as RGBW, RGBWW, or by similar designations.
These fixtures offer considerably more creative freedom. They can cast colored light onto walls, create background separation, produce effects, or establish a particular atmosphere without requiring colored gels.
RGB lights can also produce usable white light, although a similarly priced daylight or bi-color fixture may provide greater brightness when used strictly for neutral illumination. For that reason, RGB fixtures are often used as background, accent, or effects lights, while a daylight or bi-color source handles the primary illumination of skin.
Color accuracy is not guaranteed by the fixture type alone. A high-quality RGB light may reproduce skin tones more accurately than an inexpensive bi-color model. When evaluating any fixture, look for measurements such as CRI and TLCI, while recognizing that these scores do not communicate every aspect of color performance.
Match the Fixture to the Setup
A ring light is the fastest route to even, frontal facial illumination. A compact LED panel provides portability and greater directionality. A COB fixture paired with a modifier offers the most control over source size, placement, spill, and overall lighting design.
Ring lights and small panels can often be mounted directly to a phone, camera, or desktop support, creating a compact setup in which the light remains close to the lens. Moving into larger COB fixtures generally means moving the light off-camera and placing it on a dedicated stand.
That transition requires more equipment and floor space, but it also opens the door to far greater creative control. Instead of merely making the subject visible, you can begin deliberately shaping the direction, texture, contrast, and atmosphere of the scene.
The best light is therefore not necessarily the brightest, most expensive, or most technologically advanced option. It is the fixture whose design fits the content you intend to create and whose limitations you understand well enough to use effectively.
Effective lighting design can be both simple and affordable enough to achieve for creators of all levels. Adhering to these few principles can yield a qualitative leap in the production value of your content, a leap that can translate quantitatively as well: more followers, more business, and more clout. Even more satisfying than seeing the number go up, however, is the feeling of mastery that emerges from repeated success in producing high quality content.
And when time comes for an equipment upgrade, you can find what you need here at B&H. For more information about lighting and lighting design, check out our other articles here at B&H Explora.
