
For a beginner, few things seem more intimidating than photographing a wedding. A sense of anxiety is perfectly normal if you haven't yet spent much time in this field. It's important to remember that we all begin somewhere, and even the most experienced pros were also novices at one point. With practice and education, nerves begin to morph into confidence.
No two weddings are the same, but whether traditional or unconventional, the goal is to be properly equipped to document the key moments of the day. A personal style is what sets you apart from the competition, but there are some shots that you just can’t ignore. These are staples of the wedding genre, and while they can be redundant from the photographer’s perspective, they’re heirlooms to the client.

As you navigate the best way to nail these important shots, it’s possible that one slips by. That’s why it’s important to keep track of these must-have images. In time, it may become second nature, but as you learn, you’ll want to create a shot list. This list can be something you carry wedding to wedding, or something you carefully craft with the future bride and groom to truly capture their special day in a personalized way.
Creating a shot list is imperative to making sure no detail goes unnoticed, and that we’re delivering the product that our paying customers are expecting. Familiarize yourself with these important shots and the most efficient gear, and you will be more self-assured starting out in your career as a wedding professional. In this guide, we’re going to discuss the ever-important shot list and how you can make your own and build on it throughout your career as a photographer.
When You Arrive
It’s good practice to arrive at a venue early, as this provides ample time to get your gear situated, introduce yourself to key people of the day, and walk around the grounds to plan your shots. Not all weddings are the same, with some being held at one central locations and others moving from hotel to church, to reception hall. Take things as they come but have that list handy.
If you’re at a wedding venue, introduce yourself to the maître d’ as they’ll be overseeing the entire event. Go over the timeline to ensure everyone is on the same page. Check out the reception hall and get a feel for backgrounds. Where will they enter from? Where will the bride and groom sit? If there’s an outdoor area, take a walk and look for a good location for wedding party formals. You may find the spot and when the moment comes, realize that it’s a bit too tight when you try to get everyone in there. Pick a few spots as a plan A, B, and C.

Get Ready with the Bride and Groom
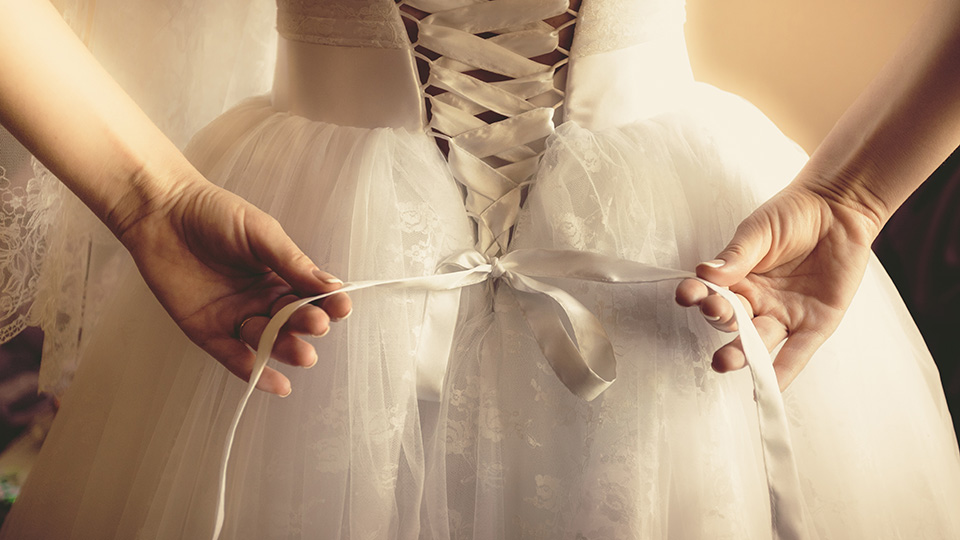
In the few short hours before the ceremony, everyone will begin to get ready. Preserve the details. Brides want to remember every little aspect of the day, so simple, elegant shots of her bouquet, the rings, her shoes and her gown hanging in the window are invaluable. Take photos as the bridal party laughs together, gets their hair and makeup done, and as the bride steps out in her dress. There will be onlookers who are catching a glimpse of her for the first time: siblings, grandparents, her father. Their expressions are something you can never recreate, so be ready to capture them as they happen.
Before the wedding day, it’s important to meet with the bride to discuss her style and expectations. While some may want a strictly traditional approach, others may expect you to flex your creative muscles, and knowing ahead of time will save you the guesswork as well as the risk of delivering a product that does not meet expectations. Some brides may want to have glamour-type portraits done as they’re getting ready or after they’re in their gown, and once again, it’s helpful to understand their personality and vision before you decide on an approach.
If you have access to the groomsmen as well, shoot their interactions as they joke and adjust their tuxedos. The best man pinning the groom’s boutonnière is always a wonderful image. Some grooms may have details of their own for you to photograph, such as a significant wristwatch or set of cufflinks they’re wearing for the special occasion. The shot list for both bride and groom may look something like the points below:
The bride:
- Wedding Day outfit/dress hanging on the wardrobe, over a chair, or window frame.
- The bride and her wedding party getting ready (hair, makeup)
- Lay-flat of shoes, jeweler, and other pertinent items
- Parent or guardian of the bride helping the to-be-wed with the veil, shoes, zipper, or other details
- Shot of bride looking in mirror
- Candid shots of bride with parents, other members of wedding party
- Interactions of bride with members of wedding party
The groom:
- Getting ready with parents and groomsmen. Tying tie is always a classic, as it putting on a wristwatch and so on.
- Lay-flat of important items like watch, cufflinks, etc.
- Interactions between the groom and his groomsmen
- Parent or best man pinning boutonniere on groom.
First Look
While some couples may prefer to save this moment for the ceremony itself, it’s quite common for most of the formal shots to occur beforehand, so the soon-to-be newlyweds and their guests can enjoy the evening free of disruptions. There are a number of significant shots one can capture in this moment, from the bride approaching from over the groom’s shoulder, to a tighter portrait of the bride herself. While these collectively pair together to tell a story, the most important shot to get is the groom’s reaction to seeing his bride. His expression and subsequent embrace will be one of the most important images of the day.
Wedding Party and Family Formals
Once everyone is ready, you can shift your focus to formal portraits. When you meet with the bride before the wedding, it’s advantageous to request a list of which friends and family members they’d like to be included in these shots. With a list, you can gather those people ahead of time and know the names to call in as needed. This will expedite the process and allow guests to return to the festivities sooner.
Ideally, the location for formals will be scouted earlier. This location will be dependent primarily on where the best light is. Many venues have elegant landscaping or architecture that provides a scenic backdrop, so use that prime spot you scouted out before the wedding day. While you’re arranging to shoot formals, keep an eye on the bride and groom. From time to time they’ll exchange a knowing smile, a moment of pure joy that makes for a beautiful photo. This is where a second camera slung over your shoulder can be helpful.

If the schedule demands it, the formal portraits can be delayed until after the ceremony. Post-ceremony, the initial jitters start to die down, and your subjects will be more relaxed and candid as their excitement takes over. It may be more challenging to gather everyone you need as the tones shift and they make their way to cocktail hour.
No matter when you sneak these in, it’s important to gather everyone you need. Employ the help of the bride and groom’s family members if you must and put on your public speaking voice. Using the list, you’ll call out names and get through the shots. There will be some variations depending on which family members are present, but let’s cover some of the most common examples.
Brides Side:
- Bride alone with bouquet in hand
- Bride with parents
- Bride with mom
- Bride with dad
- Bride and groom with bride’s parents
- Bride with bridal party
The Groom’s Side
- Groom with parents
- Groom with mom
- Groom with dad
- Groom and bride with groom’s parents
- Groom with groomsmen
Both Together
- Couple with both sets of parents
- Couple with the entire wedding party
- The couple together, eyes up
- The couple together, looking at each other
- The couple kissing/embracing
Now, we can’t forget our four-legged family members. Many weddings involve dogs and even cats, whether they’re present for the formals or possibly even the ceremony. At this stage, we need to employ some techniques learned from the world of pet portraiture. Namely, the art of trickery. This too is something that should be discussed prior to the day but assume that you’ll need a toy, treat, or some good imitation barking skills to get your furry subject’s attention, especially in group shots.
The bride and groom can help a bit, but this is their day and they’re the main subject in your images. Other members of the wedding party who are better acquainted with the pet can also be deputized, getting the pet’s attention while you focus on the shots. If you find yourself on your own, meet the pet before the shot. Introduce yourself and home in on how the family speaks to them. You’ll want to match the bride and groom’s tone to the best of your ability, especially with dogs, as they respond well to familiar sounds.

Note from the writer: Growing up, we unintentionally experimented with name recognition skill in our dog Willow. As many dog owners do, we generally put on a higher pitched, softer tone when calling her over. Turns out, you could call her Pillow or Brillo with identical results, so long as the tone matched how we normally called her over.
Ceremony
One of the photographer’s goals during the ceremony, more than any other time throughout the day, is to be as invisible as possible. Before the procession begins, take some time to photograph the environment. Document the altar, the flowers and décor, and the guests being ushered to their seats. When the ceremony starts, shoot the bridal-party members as they walk down the aisle. Before the bride makes her entry, turn to capture the groom’s face as he sees her. He will remember that moment for the rest of his life, and the shot will immortalize that moment.

At the altar, the bride will be given away. She and her groom will exchange vows and rings, and possibly be treated to a reading or two from speakers of their choice. Some couples present their parents with flowers as a token of their gratitude, and many solidify their new bond with customs such as the lighting of a unity candle or breaking of a wine glass. Each step of the ceremony is a piece of the story. Finally, you’ll arrive at the most important photo of the day: The Kiss. Some kisses linger, while others are quick. Make sure you are prepared for either.
Ceremony Shot List:
- Catch guests as they enter the ceremony space
- Close-up of the groom waiting for their bride to be
- Wedding party coming down the aisle
- Guests turned, watching the procession
- Flower girl or ring bearer coming down the aisle
- Wedding party waiting at alter
- Bride walking down the aisle
- Groom's reaction
- The soon to be newlyweds together a the alter
- Wide shot of entire venue from couples’ point of view
- Individual or small group shots of guests during ceremony
- Exchanging of the vows from each perspective
- Close-up of the couple’s hands as they exchange rings
- The first kiss
- The couple’s recession, with guests celebrating

Reception
At the reception, which may or may not be the same location as the wedding venue, the atmosphere shifts to one of celebration. As you've done with the ceremony, document the details. The cake and sweet table(s) may already be on display as a focal point in the room. Centerpieces, place settings and decorations are the result of months of meticulous planning. The bride will want to remember how beautiful the space looks. Agendas vary from wedding to wedding, but generally the bridal party will be announced as they make their entrance. Next come the stars of the show. The bride and groom will enter the hall last. At this point, the couple generally transitions directly into the first dance.
First Dance
The newlyweds’ first dance is as important as the kiss, as are the dances with their respective parents. What happens next varies from wedding to wedding, but guests may be called to the dance floor at this point, or they may begin to serve dinner right away. There may be speeches, toasts, and other heartfelt moments, and dinner will be served. As guests begin to finish their meals, they’ll take to the dance floor once again and remain here for most of the night. This is also where you will spend a good amount of your time as you capture candid images of guests and exciting dance moves. Guests laughing together at their tables and dancing out on the floor are every bit as much of the narrative as the milestone shots. You can also do additional, more casual family portraits at this time.

Cake Cutting and Dinner
Dinner is usually fairly uneventful. Typically, vendors eat when the guests eat as no one is dancing, and people don’t generally want to be photographed while eating. You may be asked to photograph the meals, in which case you’ll need to speedily snap some shots before guests dig in. The bride and groom are generally fairly accepting of you sneaking a quick shot of their plates, especially if they requested the shot. You may also have a plate yourself. It’s generally a good gesture for your clients to provide a meal for the photographer, but it’s not a guarantee.
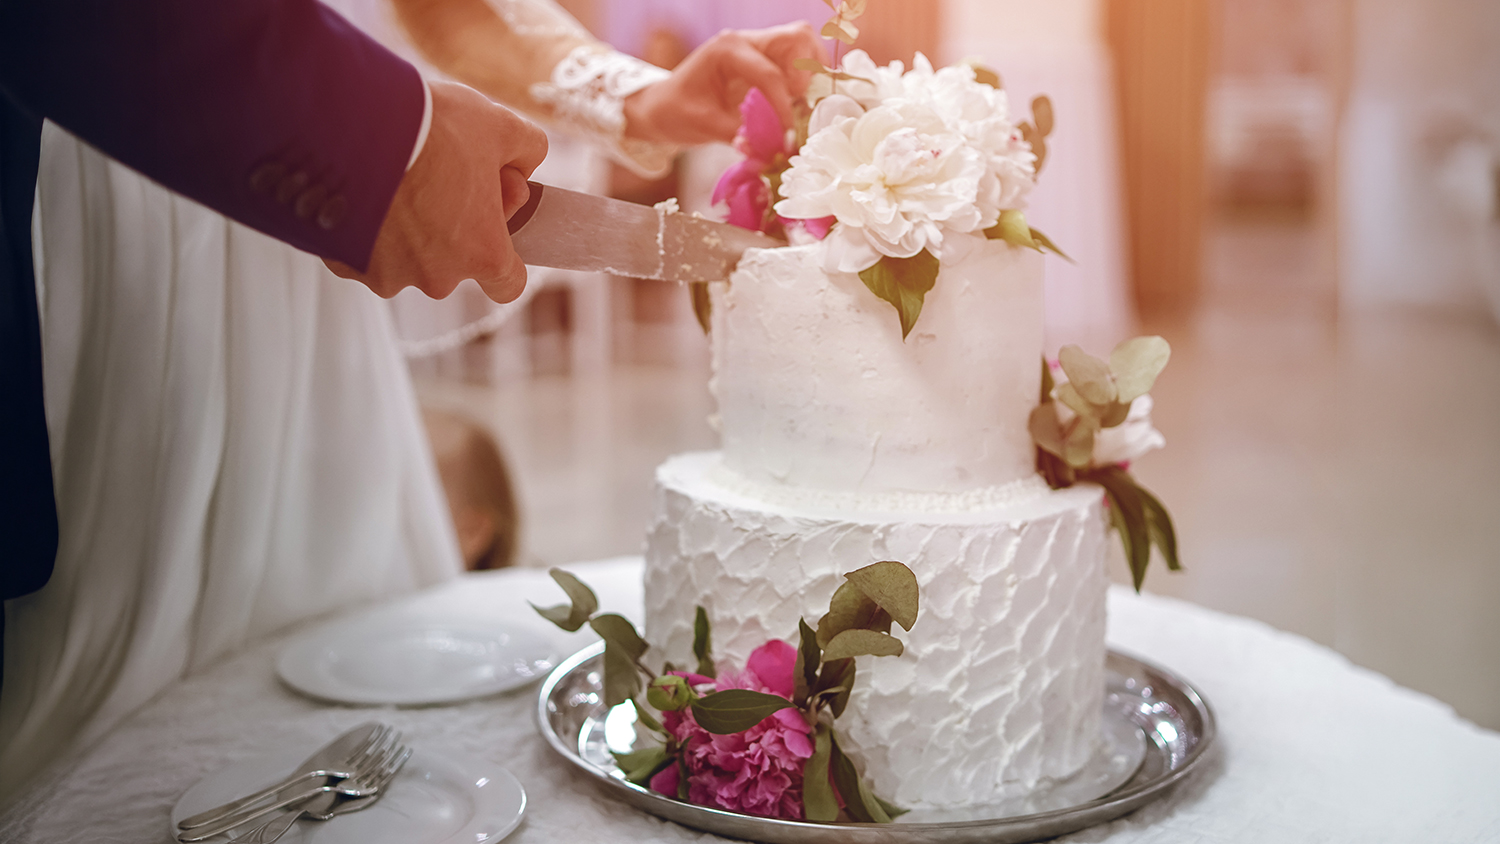
The real prize at this time is the cake cutting. Position yourself where you have a good look at both the bride and groom and make use of your flash. The light will be dim so you’ll need all the help you can get. As everyone is getting into place, take some more candid shots and then turn your attention to the bride and groom as they cut the cake and take their first bite.
In practice, these major moments are only a piece of the entire story. This is where you really want to keep your head on a swivel. Receptions are where the fun really begins, and you’ll be pulled in all directions. Have a plan but stay on your toes. A shot list for the reception may look something like the list below:
Reception Shot List:
- Shot of the reception venue before guests arrive (if possible or if not already done)
- Detail shots such as place settings, decorations, name cards, centerpieces, and champagne glasses
- Couple’s arrival and entrance
- Wedding party entrance
- Reaction shots of guests
- Couple on dance floor
- Candid shots of guests
- Couple at the head table
- First dance
- Parent dances (mother-son, father-daughter)
- Wedding party dancing
- Couple with guests, posed and candid
- Candid shots from the dance floor
- Wedding cake/dessert
- Cake cutting close-up
- The newlyweds feeding each other cake
Practice Makes Perfect
As with all things, the more we do something, the easier it becomes. With a wedding photography shot list, we have a rough guideline or to-do list for the day that will keep us on track. Always be ready for those unexpected moments, but follow the list, and you won’t worry about the essentials.
The shot list is an essential tool in the arsenal of the wedding photographer, but don’t be surprised when unexpected moments pop up. The best wedding photographers are ready for anything, no matter if it’s part of the plan or not. Keep your list handy, remember to leave some blank spaces.
If you’d like to learn more about wedding photography, check out our other guides and articles. We’ve been covering everything from gear to in-the-field techniques in our beginner’s guide to wedding photography series. To read other photography product guides, articles and reviews, visit the B&H Explora page.
