
Congratulations on upgrading your recording kit. In this guide, we’re going to cover the unboxing of your new SmallRig Vlog Kit, essential microphone and lighting functions, and setting up your mini studio for the best results.
Unboxing Your Kit
The Monitor and Remote: SmallRig Vlog Kit
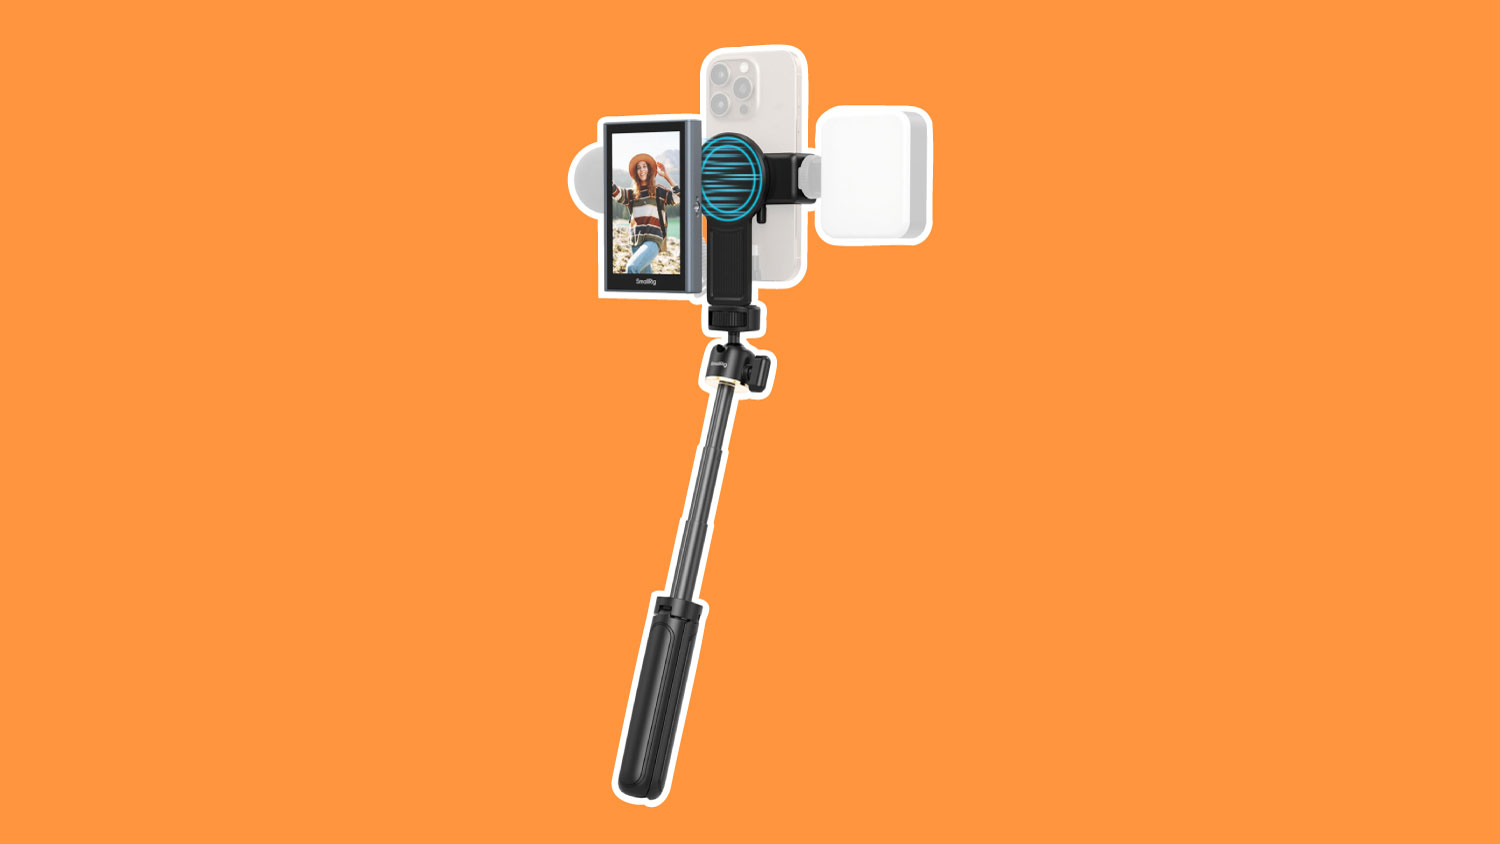
The SmallRig Vlog Kit is an easy way to use the high-quality back-facing camera on your smartphone while still being able to see your image and adjust the framing. It includes a small monitor that can magnetically attach to your phone and pair over Wi-Fi.

What’s Included:
- Monitor
- Phone Clamp
- Wireless Remote Control
- Charging Cable
- Mini-Tripod / Seflie Stick
Essential Controls
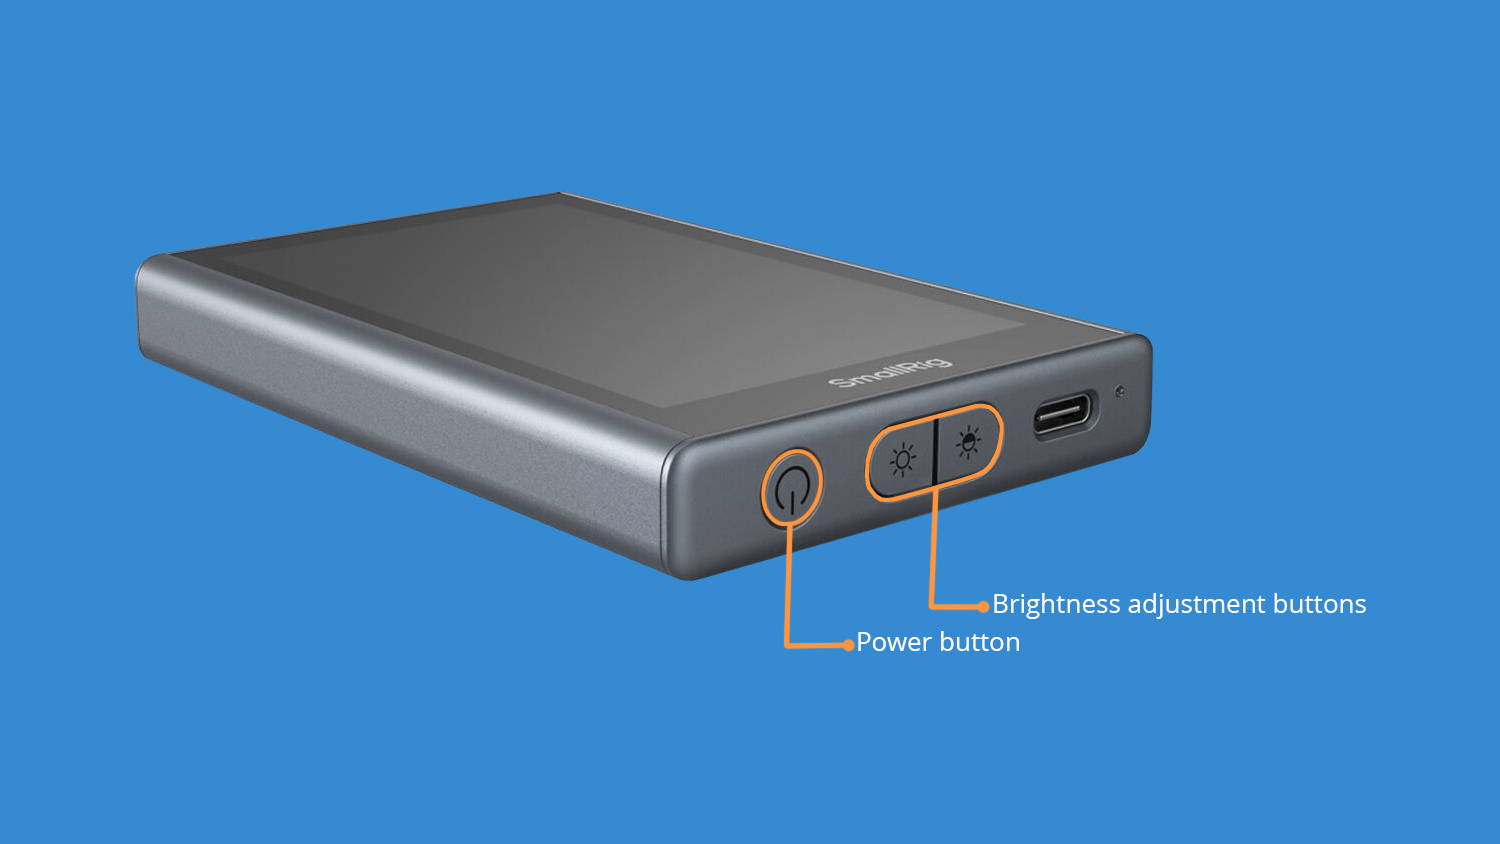
Power button. This is located on the bottom of the monitor. Double tap the power button and the image will flip around (aka “Mirror”).
The Brightness adjustment buttons are located between the power button and the USB-C charging port. There are three brightness levels.
Initial Setup
First off, charge the monitor’s battery via the included USB-C cable. Then hold the power button for three seconds to turn it on. If you’re using an iPhone, scan the QR code displayed on the monitor and select Connect (alternatively, enter the Wi-Fi menu, connect to “SmallRig Monitor” and use the password 12345678). If you’re using an Android, pull down your control center, enable Mirror Casting, and select SmallRig Monitor.
The monitor should now be displaying the image from your phone. The connection is wireless and will work up to 32 ft away. The battery should last up to three hours. The monitor can attach directly to an iPhone via MagSafe, or magnetically attach to the circular area on the included phone clamp. Always use the back/rear facing lenses on your phone, in tandem with the SmallRig monitor, to get the best quality video.
Other Included Accessories
Speaking of the phone clamp, there is a ¼-20” threaded hole on the bottom of it that is ideal for screwing in the included mini-tripod / selfie stick. There are three legs that extend outward if you want to place the phone on a flat surface, or you can extend the ball head outward to use it as a selfie stick.
Additionally, the included wireless remote controller can pair to your phone via Bluetooth and provide remote triggering for taking photos or starting and stopping recordings.
With the monitor charged and paired, we can change focus to setting up our other accessories.
The Microphone: DJI Mic Mini Compact Wireless Microphone
To better the quality of our audio, we’ll be using the DJI Mic Mini Compact Wireless Microphone system. This is a two-piece wireless system with a phone-mounted receiver and a lapel worn microphone, also known as a lavalier or lapel mic.

What’s Included:
- DJI Mic Mini Clip-On Transmitter
- Receiver
- Mobile Phone Adapter (USB-C)
- 3.5mm TRS Camera Audio Cable
- Windscreen (Black & Gray)
- Windscreen (Black)
- Magnet Clip
- USB-C Splitter Charging Cable
- Transmitter Charging Dock
- Compact Carrying Pouch
The microphone does need to be charged before use. To do so, use the included USB-C charging cable and any AC adapter (like the one used to charge a phone). Once charged, we can power both units on.
To connect the receiver to your phone, use the included USB-C mobile phone adapter, which plugs into the back of the receiver and the bottom of a phone. Then hold the power buttons on the sides of the microphone and the receiver for two seconds to turn them both on. The camera app on your phone should automatically connect to the DJI receiver.
The Lights: JOBY Beamo Studio Deluxe Lighting Kit
Lighting is an essential part of any streaming setup. It not only gives your content a professional look but makes for a more engaging image. The JOBY Beamo Studio Deluxe Lighting Kit delivers everything we need to capture pleasing lighting in a small space.
The bi-color adjustability of the larger key light means the color temperature can be changed to match existing light in the space you’re shooting in. The smaller background light has 12 RGB colors to choose from for greater creative control.

What’s Included:
- Beamo Studio Key LED Light
- Tabletop Stand
- Beamo Studio Background Light
- USB Power Cable
- Phone Mount
- Flexible Arm
Essential Controls

1: The key light has a small, wired remote as part of its power cable that can be used to turn it on and off, as well as adjust the intensity and color temperature.
2: The background light has controls built into the back of the light itself, with the same button layout - on/off, intensity up, intensity down, and color/mode.
3: The phone mount and flexible arm can be used to attach your phone directly to the key light, though those using the SmallRig Monitor may prefer the tabletop tripod included with that for greater freedom.
Setting up Our Studio
With our screen mounted to our phone, the microphone receiver plugged in, and lights powered on, we can begin situating our setup where we want it. Make sure you have the outlets required to plug everything in.
Consider shot composition. This simply refers to how we physically situate our camera in relation to where we’ll be sitting or standing. Good composition for streaming should prioritize proper height and head room, or the amount of space we have above our head in the frame.
If your head is cut off at the top of the frame, you have far too little headroom. If there’s more space above your head than below in the frame, you have too little. The general rule of thumb is to have half the length of your head above. Let’s look at an example.

Shot angle is important as a shot from above or below can be jarring to viewers and may convey a sense of inferiority or superiority over the viewer. This is done intentionally in the movies, but for speakers, this should remain head on as to imitate a natural conversation. With your new tripod, bring the phone to approximately eye level to achieve this look.
The Light
Your larger key light should be set up on either side of the camera and be angled toward the speaker at approximately 30 to 45-degrees. The background light should be shining onto a wall or surface behind the speaker to give the image a pop of color. Try to have the speaker at least a few feet away from this background surface to give the image depth.
The Microphone
As we mentioned earlier, a lavalier style microphone is to be mounted on the lapel or collar of a shirt, vest, or jacket. Be cautious of any obstruction or object that may hit or rub against the mic, as they can interfere in our audio and create scratchy, even muffled audio.

Now that we have the tools and a basic understanding of shot composition, we’re ready to begin using our newly set up studio. Simply turn everything on, sit back and hit record with your remote to get started.
Please refer to this guide as needed as you learn and enjoy your new kit!