
Congratulations on upgrading your recording space. In this guide, we’re going to cover the unboxing of your new Sony ZV-E10 II camera kit, essential camera functions, and setting up your mini studio for the best results.
Unboxing Your Kit
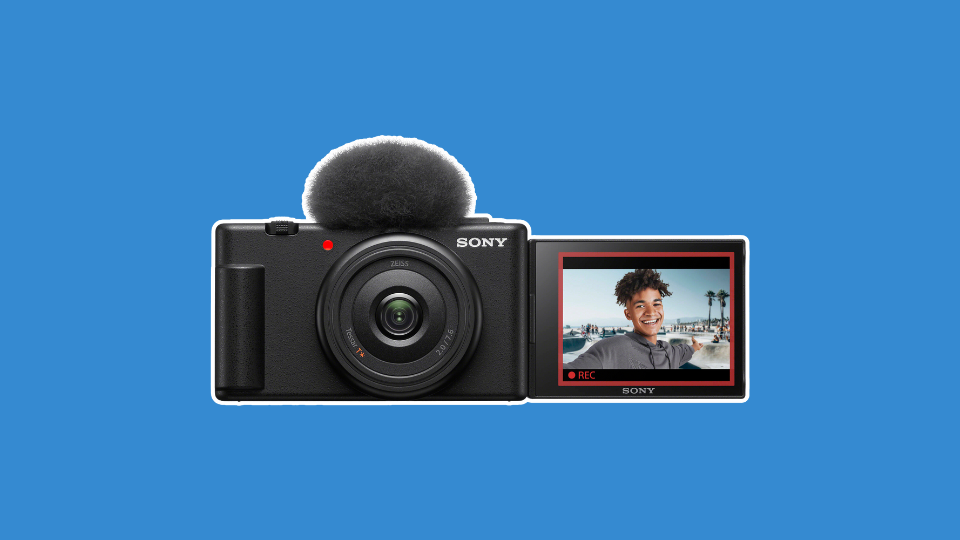
Camera: Sony ZV-E10 II
The Sony ZV-E10 II Mirrorless Camera is a compact video centric camera designed for streaming with ease of use in mind. It features a responsive, flip-out touchscreen and 4K recording in a user-friendly package.

What’s included:
- Sony ZV-E10 II Mirrorless Camera (Black)
- Sony ALC-B1EM Body Cap for E Mount Cameras
- Sony NP-FZ100 Battery
- Furry Windscreen
- Shoulder Strap
Essential Controls
1. On/off switch. This is located on the top of the camera. If you look down at the top of the unit, you’ll find the switch on the top right near the zoom toggle.
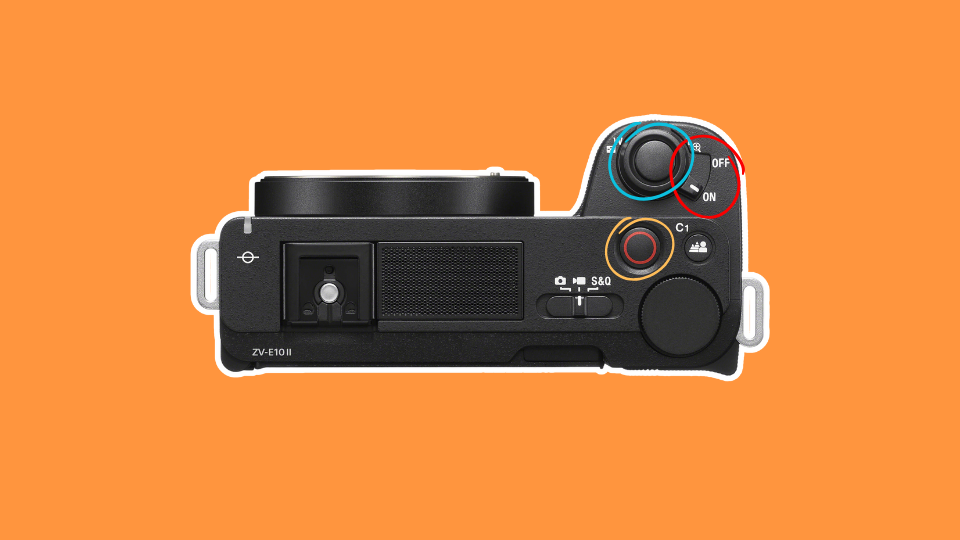
2. Next to the on/off switch is the zoom toggle/shutter button (circled in blue). These functions will NOT be needed in this setup. The zoom toggle is not compatible with the included lens.
3. The record button (circled in orange) is larger than the rest and highlighted with a red ring on it. Press this to begin recording and again to cease recording.
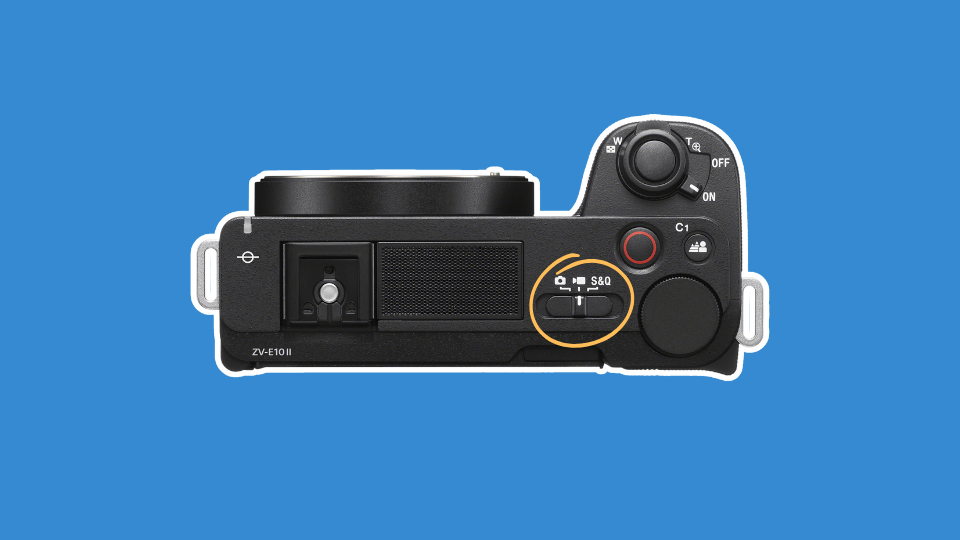
4. On the top of the camera, you’ll find a switch with three icons displayed on it. This is our mode switch (circled in orange) that dictates how the camera functions. Set this to the cinema camera icon located in the middle. The other modes are still image (left) and slow & quick mode (right), which offers features like slow motion and timelapse shooting.
Once our mode has been set, we can shift to the other accessories for our new camera. These will aid us in storing the media we record, capturing quality sound, and keeping our image still and stable throughout our stream.
Other Features
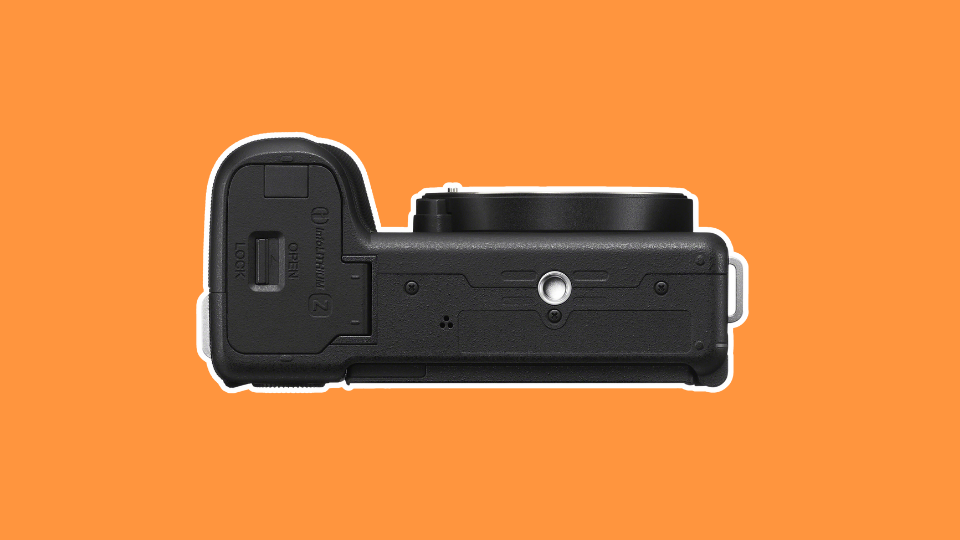
Next, we’re going to turn our attention to the bottom of the camera. Here, you’ll see a small thread for a screw. This is a 1/4-20” thread, designed to thread in tripod mounting plates and other accessories.
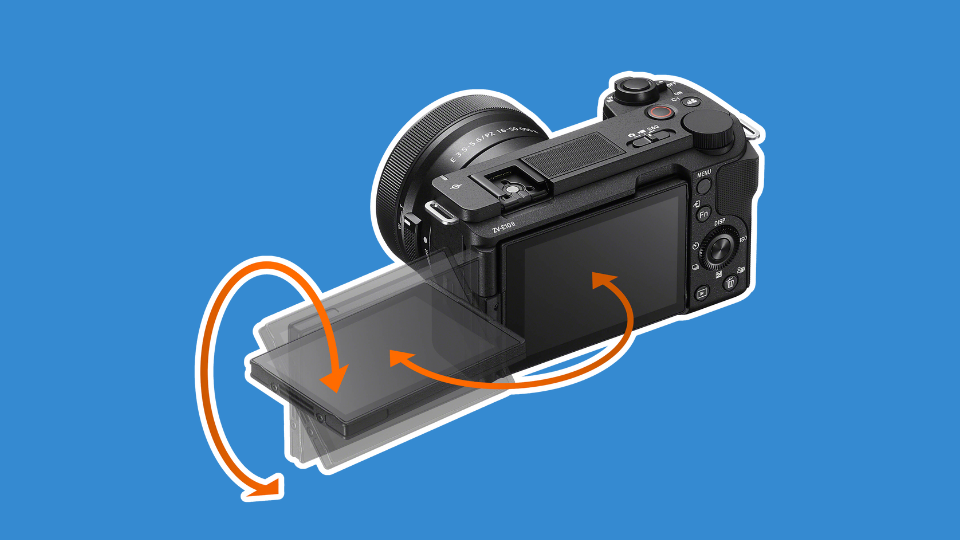
The articulated rear LCD touchscreen can be flipped out and around so the user can actively see what they’re recording. Additionally, the screen can be flipped around and closed to protect it when not in use.
Initial Setup
Before we set any controls, charge the batteries. Batteries arrive dead out of the box or with a very limited charge known as a surface charge. As a result, the initial charge may take longer than subsequent ones. Insert the batteries into the charger and wait for the charge indicator to fill. Once full, your batteries are charged and ready to be used.

Next, set up your camera. Once a battery is fully charged, insert it into the camera. The batteries’ unique shape means it can only be inserted into the camera one way. Line it up, and you’re ready to go.
When you first turn the camera on, you’ll be prompted to enter the time and date. Do so. In some cases, you may be prompted to use an app or to connect your smartphone or other smart device to the camera. Skip these settings for now.
With the batteries charged, our mode set to video and the time/date set, we can change focus to setting up our other accessories.
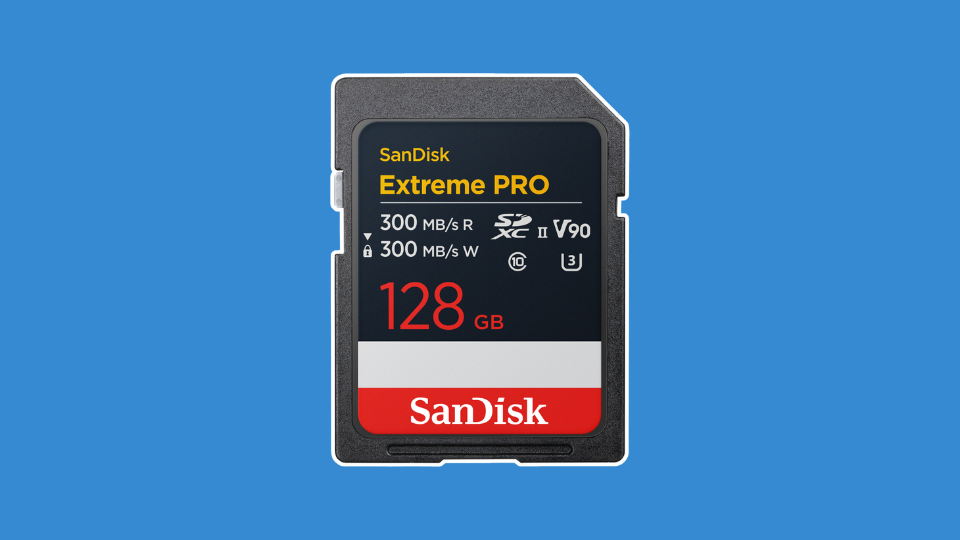
Memory Cards: SanDisk 128GB Extreme PRO UHS-II SDXC Memory Card
Memory cards serve as short term storage for data recorded by the camera. Even when streaming directly to an online source, a camera may require a memory card to be inserted into the camera. For video, the card must be able to handle the heavy flow of high-resolution data like HD or 4K video, so a fast card like the SanDisk 128GB Extreme PRO UHS-II SDXC Memory Card is essential.
Be sure to insert the memory card in the proper direction, as a backwards card can get stuck and damage the camera. If there’s any resistance, do not force it. Once the card has been inserted, we’ll want to format our card(s).
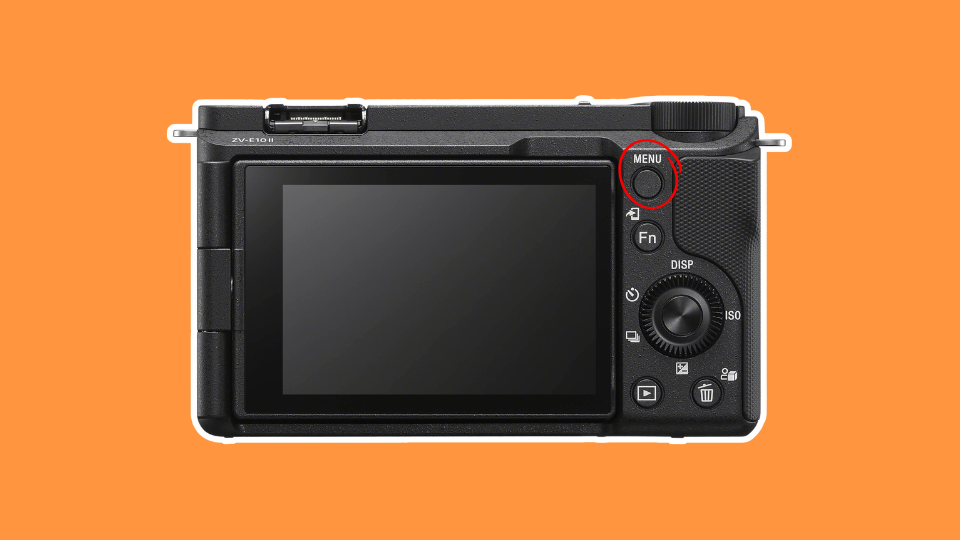
Step 1: Press the menu button (circled in red) on the back of the camera
Step 2: In the menu bank, go to the red camera icon
Step 3: Once there, scroll down to Media.
Step 4: When you select Media, you’ll see the Format option. Press format. You’ll be prompted to confirm this selection as formatting will erase data on the card. There is no data as this is a new card, so format away.
Your memory card is now formatted and ready for use. Formatting lessens the risk of losing data, corrupting data, and other common maladies of digital storage.
Remote Trigger: Sony RMT-P1BT Wireless Remote Commander
To start recording without the need for an extra set of hands, we have an included remote to trigger the camera from afar. This uses Bluetooth functionality to connect to the camera and control our recording seamlessly.
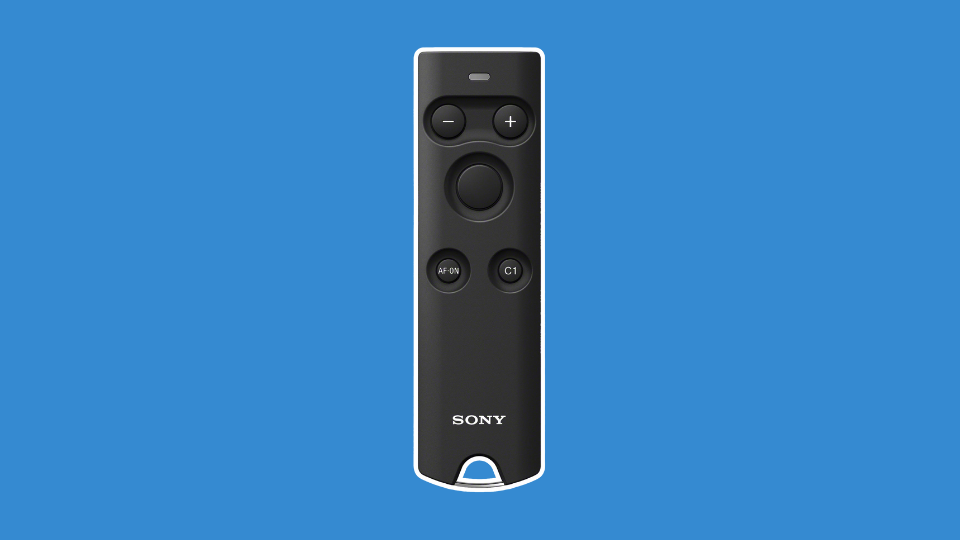
To sync the remote to the camera, we have to make some settings changes in our ZV-E10 II. Once connected, the remote can be used up to 16.4’ away. It offers not only a start/stop record button, but controls to adjust focus if need be. Luckily, the camera will be automatically focusing.
Step 1: Press Menu.
Step 2: Go to the network settings, identified by a green globe icon and within it, go to #5: Bluetooth.
Step 3: Scroll down to Bluetooth Function settings and turn it on.
Step 4: Scroll down to Bluetooth Rmt Ctrl and turn it on.
Step 5: Select to the Pairing option in the Bluetooth Settings camera menu, then press and hold the REC button and the + button on the remote for at least seven seconds. A confirmation message should appear on the camera.
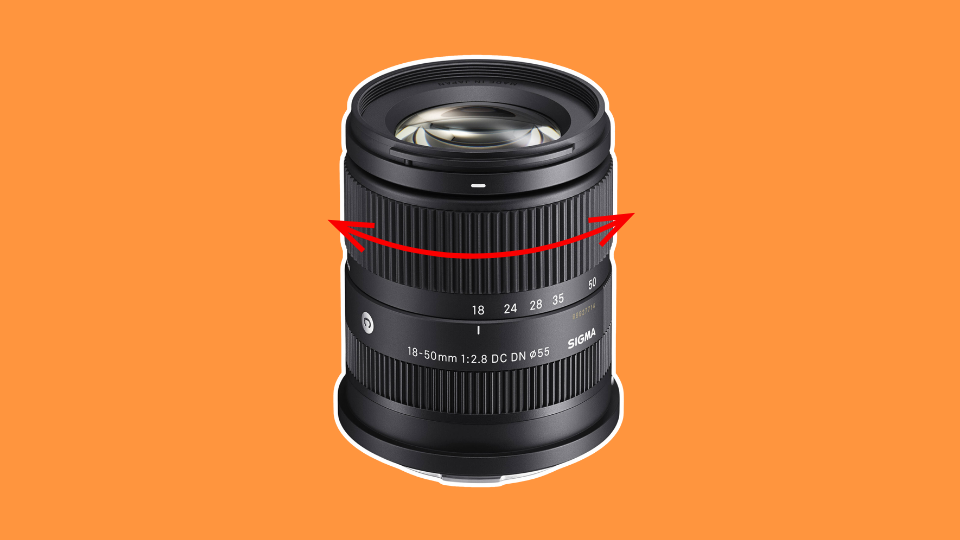
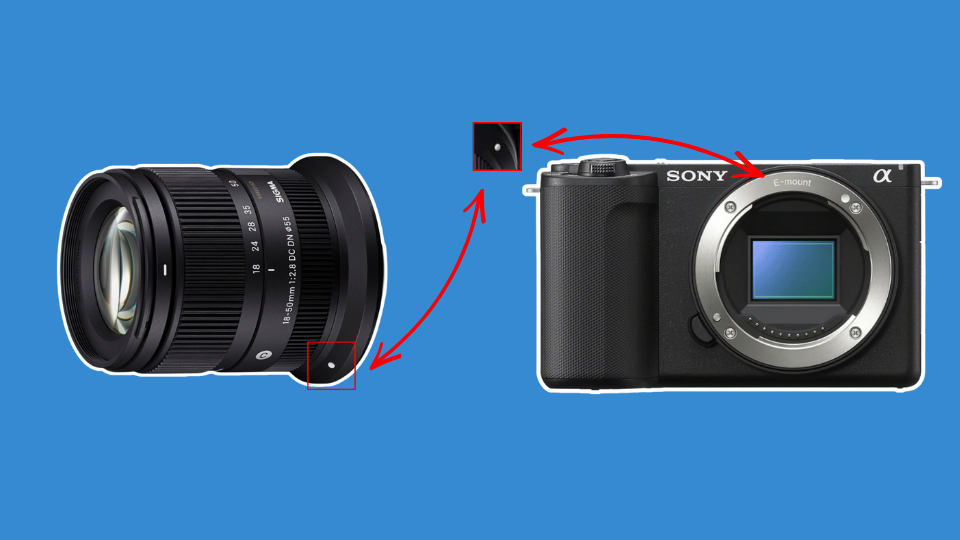
Lens: Sigma 18-50mm f/2.8 DC DN C
The lens included in this kit is the Sigma 18-50mm f/2.8 DC DN Contemporary Lens. This is a small zoom lens that we’ll need to mount to the camera. Zoom refers to the varied focal lengths or magnification of the lens. 18mm refers to the wider field of view captured when the lens is zoomed “out” and 50mm refers to the longer end. For our purposes, adjust the zoom so you appear large enough in the frame without cutting off the top of your head. More on this later.
To mount the lens to the camera, first remove the rear lens cap. Next, match the white dot on the rear mount of the lens to the one found on the lens mount on the camera. Once aligned, the lens should smoothly insert into the mount. Next, rotate the lens clockwise, away from the “Sony” logo until you hear and feel a click.
What’s included:
- Sigma 18-50mm f/2.8 DC DN Contemporary Lens
- Sigma LCF-55 III 55mm Lens Cap
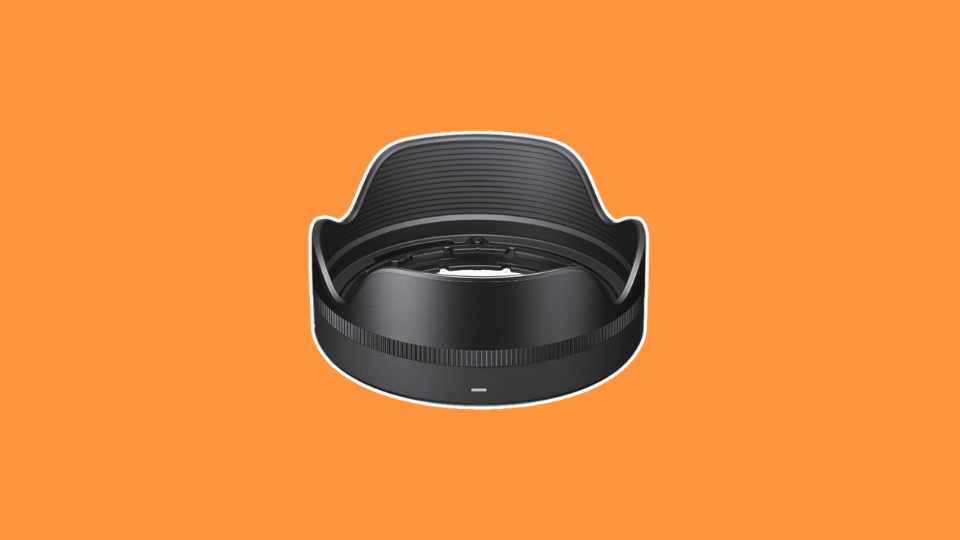
- Sigma Lens Hood for 18-50mm f/.28 DC DN Lens
- Sigma LCR II Rear Lens Cap
The included lens hood blocks stray light from hitting our lens and causing glare. It also has the added benefit of protecting the front of the lens from impacts, so it is recommended that you use this accessory.
Any unnecessary accessories for either the camera or lens, put these back in the box. Most cameras and lenses have a 1-year limited warranty, so keep boxes for at least this time frame just in case you have an issue and need to send your gear in.
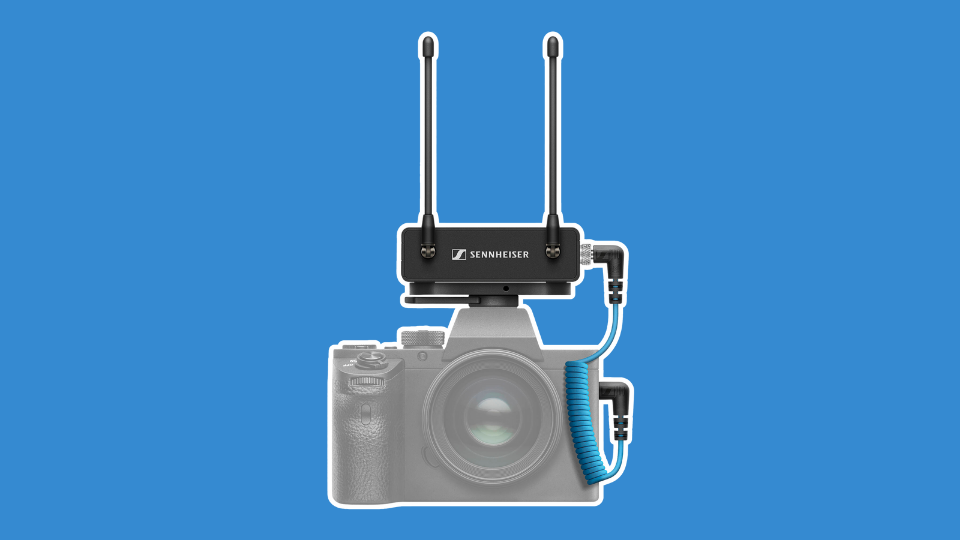
Microphone: Sennheiser EW-DP ME Wireless Omni Lavalier Mic
The Sennheiser EW-DP ME system comes with two primary components, a microphone/transmitter and a receiver. The receiver connects to your camera via an included 3.5mm wire (blue) and receives the audio data wirelessly as long as the microphone is powered on.
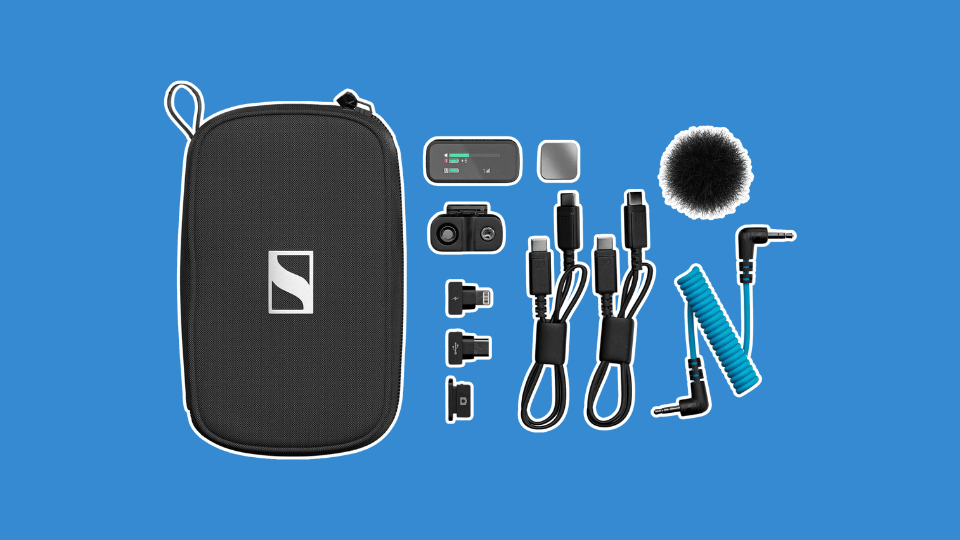
What’s included:
- Sennheiser EW-DP EK Camera-Mount Digital Wireless Receiver
- Sennheiser EW-D SK Digital Wireless Bodypack Transmitter
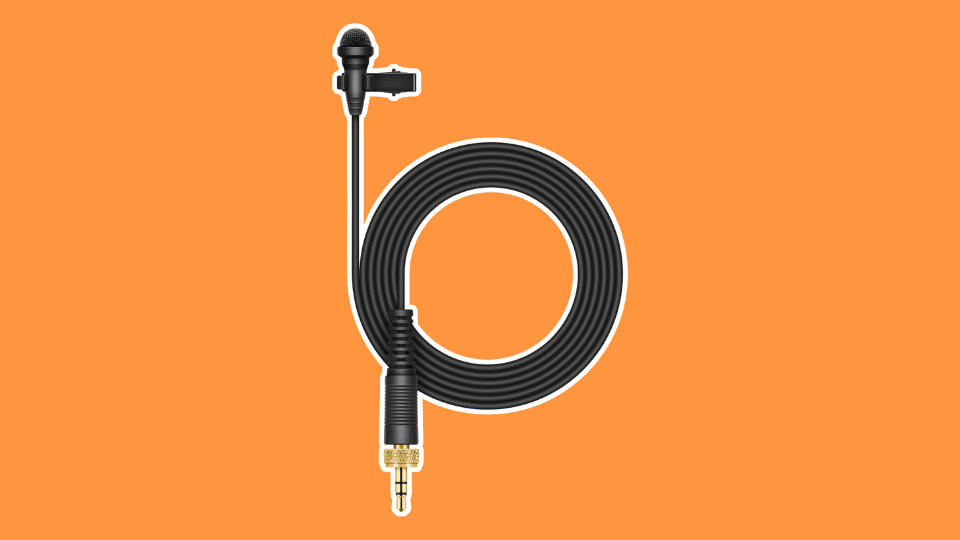
- Sennheiser ME 2 Omnidirectional Lavalier Microphone with Locking 3.5mm Connector
- Sennheiser CL 35 TRS Locking 3.5mm TRS to 3.5mm TRS Coiled Cable
- Sennheiser CL 35-XLR Right-Angle Locking 3.5mm TRS to XLR Male Coiled Output Cable
- USB-C Charging Cable
- Sennheiser BA 70 Rechargeable Battery Pack for EW-D Bodypack and Handheld Transmitters
- 2 x AA Battery
- Mounting Kit (Cheeseplate, Cold Shoe, Belt clip, Screws)
Essential Controls
There are a few buttons on the mic set, but we are only concerned with the power and sync buttons, as all other functions, such as recording, will be dictated by the camera itself.
EW-DP EK Receiver
1. The power buttons can be seen below (circled in red). Once the unit is charged, this is the only control on the microphone itself that we need to know. Simply press the button to power the units on and press them again to turn them off.
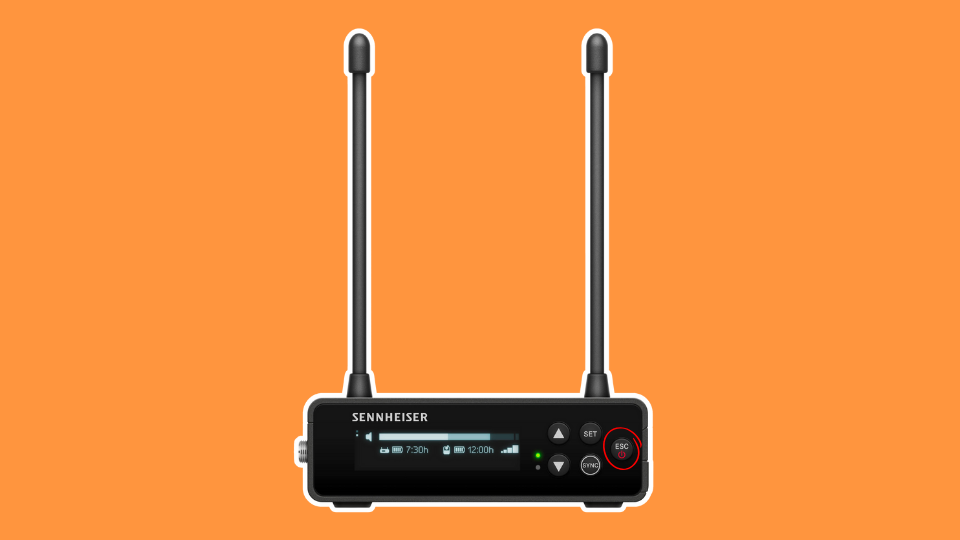
2. The Sync button is used to link the transmitter and the receiver to each other.
EW-D SK Transmitter/Microphone
1. The power button is located in the battery compartment to avoid accidental power downs.

2. The sync button on the transmitter can be found atop the unit next to the antenna.
Initial Setup
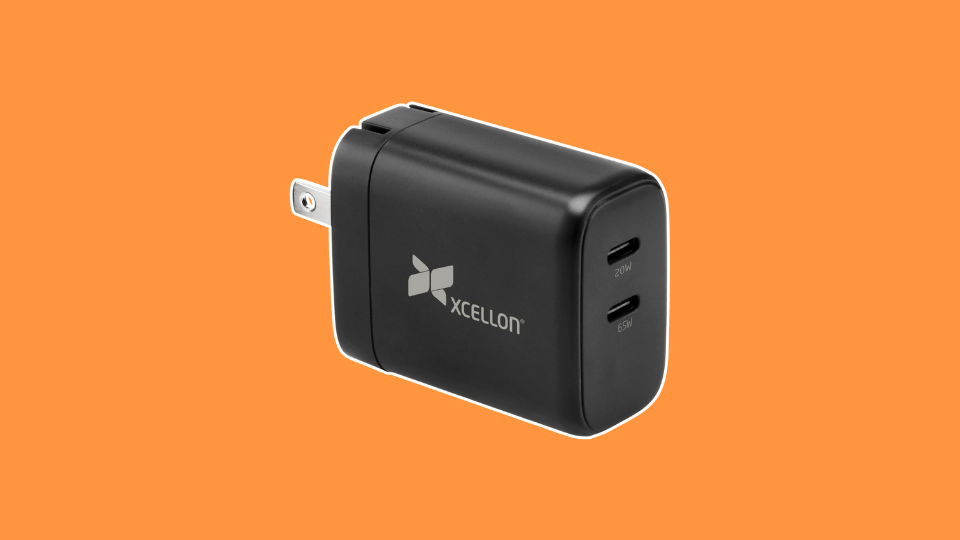
Both the microphone and camera mounted receiver can be powered by an included rechargeable battery or AA batteries. For the rechargeable unit, the battery will need to be charged. This can be done with the included USB-C Charging cable and the Xcellon PDG-265 2-Port GaN USB-C charger included in this kit.
Once charged, we can get the units prepped for use. First, the receiver. Attach the included Cold-Shoe Mount into the bottom of the receiver (RX) via its screw and locking pins. This allows us to mount the unit into the slot or “shoe” on the top of the camera. From there, electronically connect the receiver to the camera using the included 3.5mm jack cable (coiled blue cable).
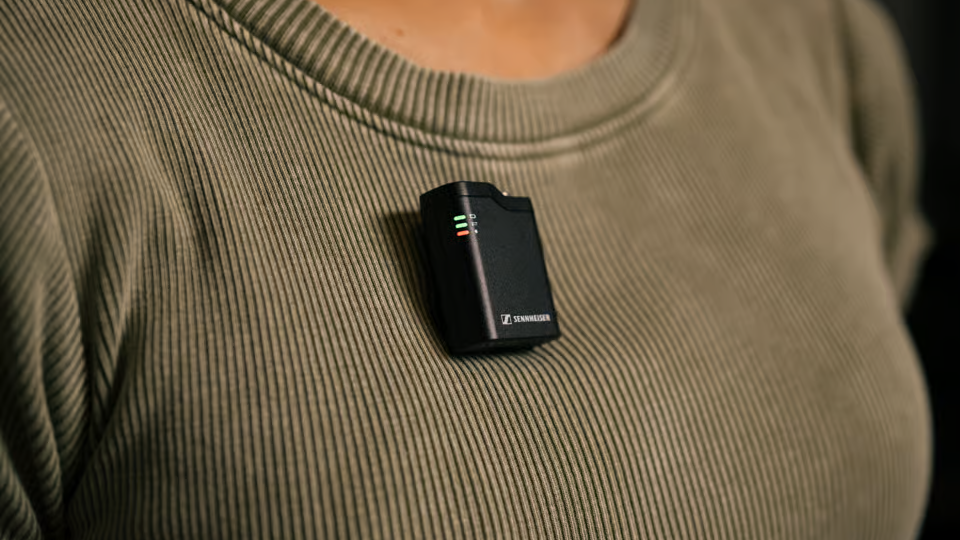
The EW-D SK Wireless bodypack transmitter will be paired with the Sennheiser ME 2 Omnidirectional Lavalier Microphone. This plugs directly into the transmitter via the threaded 3.5mm jack atop the unit. Press the plug into the port atop the transmitter, then tighten the thread to secure the connection. Run the lavalier microphone under your shirt or jacket to hide the wire, then clip it to your collar or lapel.
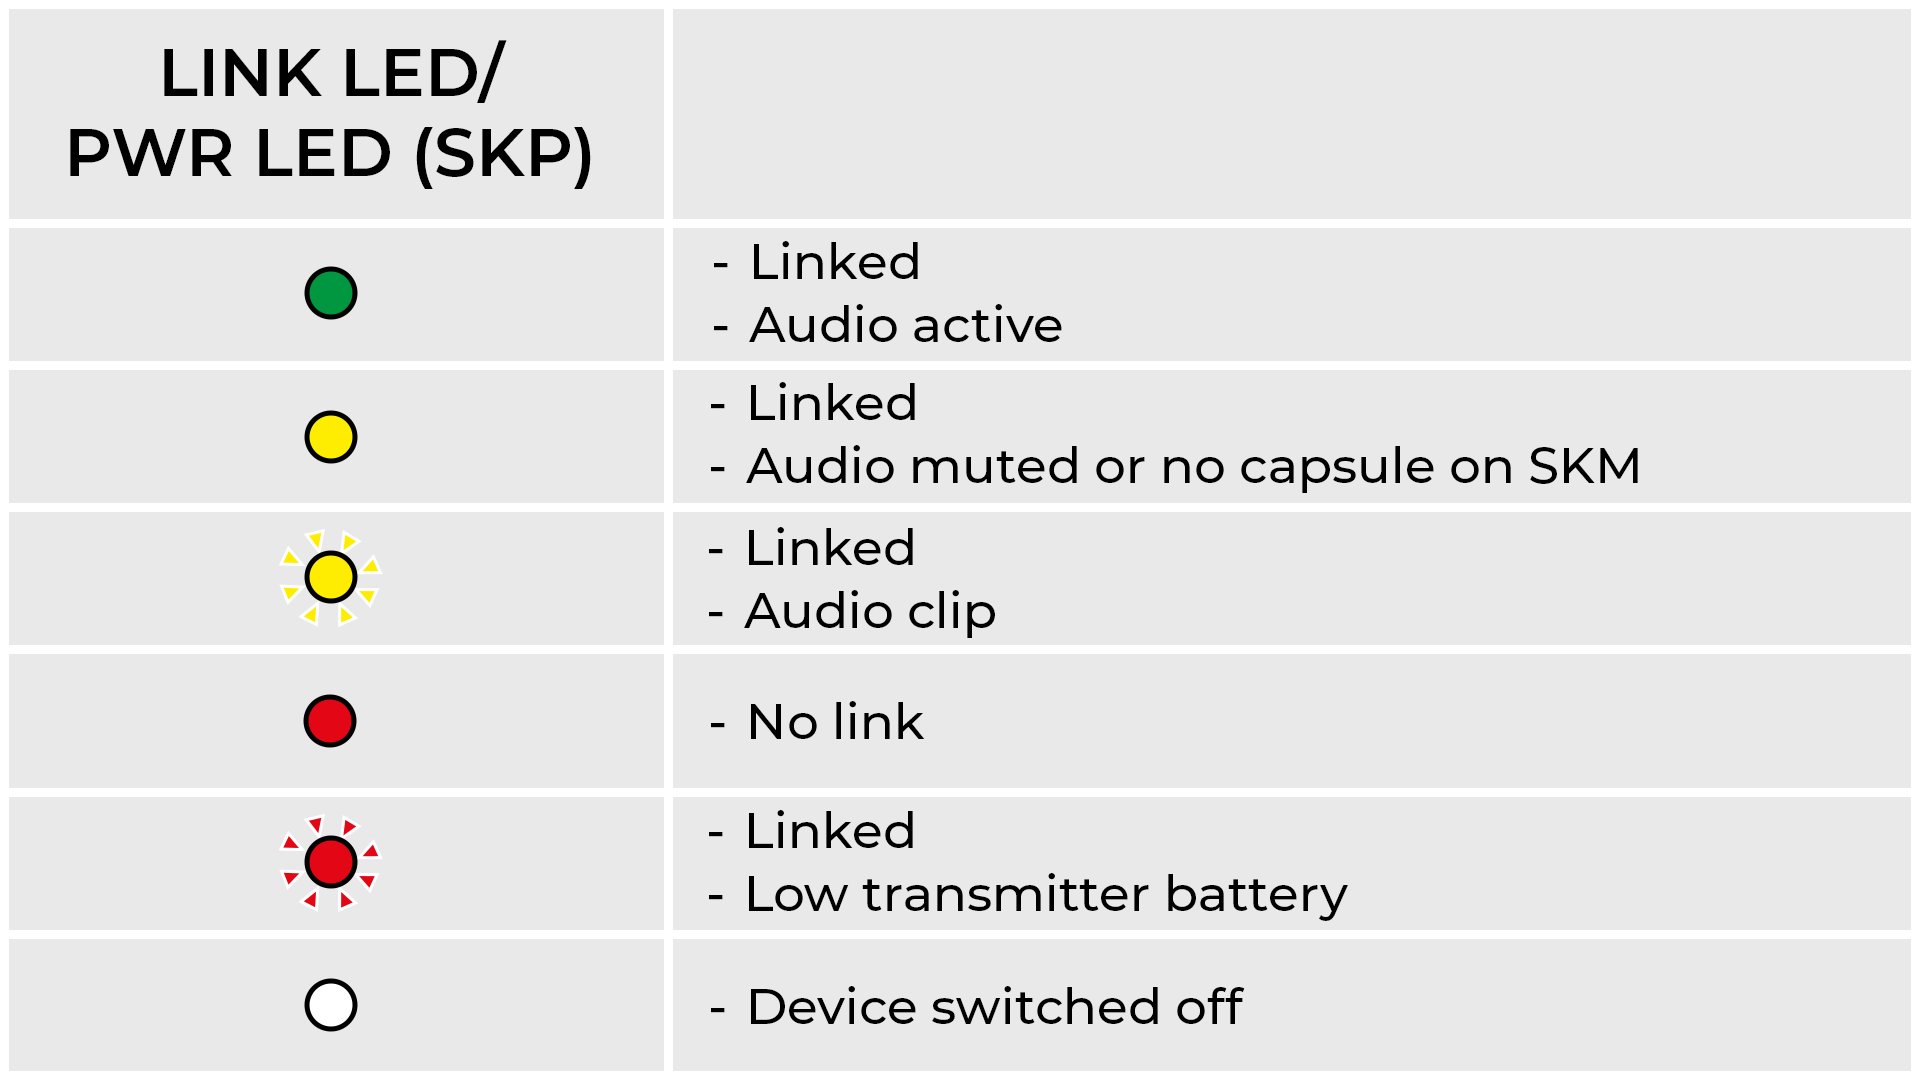
Syncing the units requires both sync buttons to be short pressed. Don’t press and hold them. Once linked, the link light found atop the transmitter will be illuminated in a green color. If the light is yellow, it means the mic is muted. If red, there is no connection.
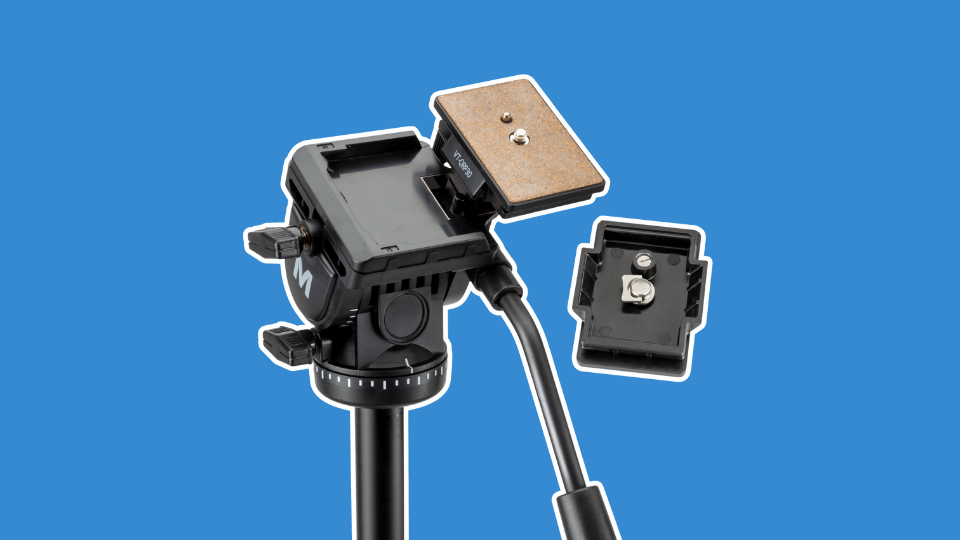
Tripod: Magnus VT-350 Video Tripod with Fluid Head
In order to keep our camera upright and supported, we’ll need to use a tripod. Tripods can be adjusted via height and in the case of the Magnus VT-350 Video Tripod, they can have a video centric fluid head. “Fluid” refers to the smooth, fluid like movement range the head.
To attach your camera to the tripod unit, you’ll need to use the included quick release plate. Now we get to use that 1/4-20” thread we found on our camera earlier. Simply line up the plate with the thread and tighten the screw. Be sure to line up the plate so the fluid head handle is behind the camera.
The Magnus VT-350 Video Tripod with Fluid Head is 72” tall with the legs extended, making it well-suited for both seated and standing speakers. The tripod features a center column as well, which can be raised, providing a maximum height of 82”.
What’s included:
- Magnus VT-350 Video Tripod with Fluid Head
- Magnus VT-QRP30 Quick Release Place for VT-300,350, & 400
- Carry Case with Shoulder Strap
Step 1: Securely attached the quick release plate to our camera. Tighten the 1/4”-20 screw, keeping the plate straight as you do so.
Step 2: Now, mount the camera to the tripod by lining up the plate with the tripod head and pressing it firmly down until you hear and feel it click into place. While still holding the camera firmly, give it a quick shake to make sure it’s securely attached.
Lights: Godox Litemons LP400Bi Bi-Color LED Light Panel Kit
Lighting is an essential part of any streaming setup. It not only gives your content a professional look but makes for a more engaging image. For this kit, the Godox Litemons LP400Bi Bi-Color LED Light Panel 2-Light Kit delivers everything we need to capture pleasing lighting in a small space.
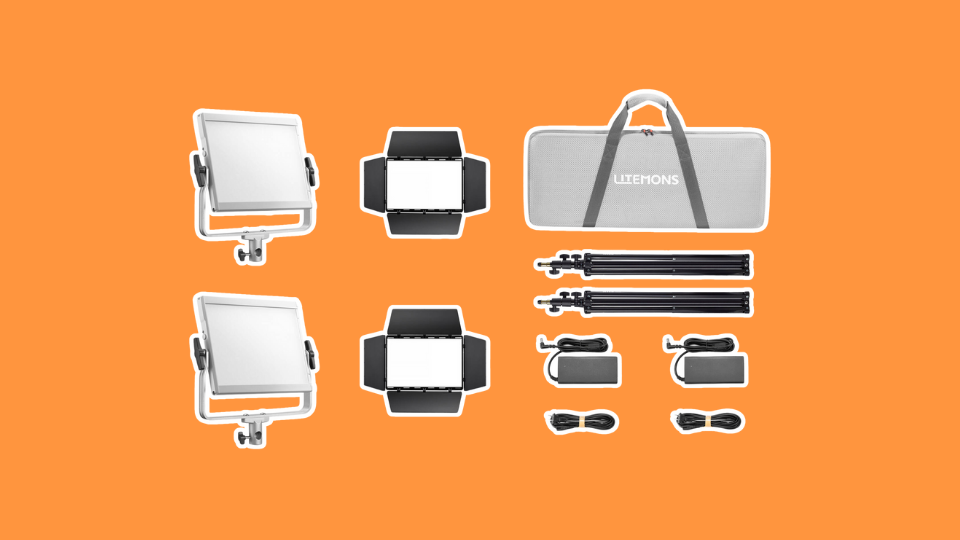
The Bi-Color adjustability means the color temperature can be adjusted to match ambient lighting, or the existing light in the space you’re shooting in. Color temperature varies from warmer to cooler, and all lights fall into this spectrum whether you notice it or not. To dial this in, we’ll use the simple control system on the side of our lights.
What’s included:
- Godox Litemons LP400Bi Bi-Color LED Light Panel (x2)
- Yoke (x2)
- Power Adapter (x2)
- Power Cord (x2)
- Four-Way Barndoors 9x2)
- Light Stand (x2)
- Carry Bag
Essential Controls
1. To power your lights on, plug them in with the included power cords and adapters. The power switch (circled in blue) can be located on the rear of the panel under the right battery slot. You’ll see a battery icon, the word “off”, and a wall plug icon. The switch itself in under these icons. If plugged into the wall as we’ll be doing here, switch it to that icon.

2. The black dial located on the back of the light (circled in red) will adjust brightness by default. To adjust color temperature, press the dial inward until it clicks. Then, rotate it to CCT (correlated color temperature) and press it inward again. Now, you can adjust temperature via the dial.
Light Modifiers: Godox Softbox with Grid for LP400Bi Light Panels
A soft box softens the lights’ output. The included grid eliminates stray or spill light, creating a narrower beam of light. This works almost like a spotlight, so the speaker is illuminated more than their surroundings.
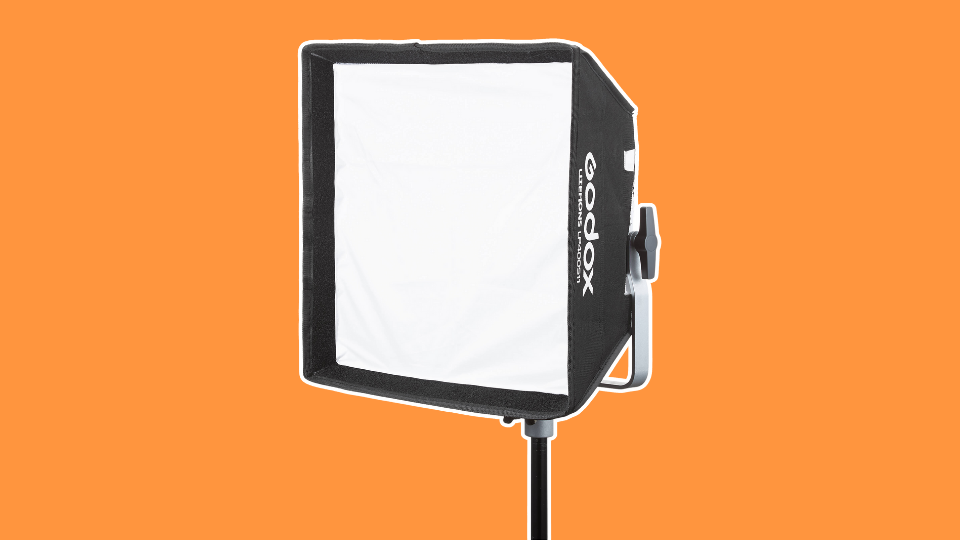
Attaching the soft box to the Litemons LP400Bi requires no brackets or accessories, it simply mounts directly to the light panel with interlocking straps. Once attached, the unit is ready to use. Refer to the light set up above for instructions.
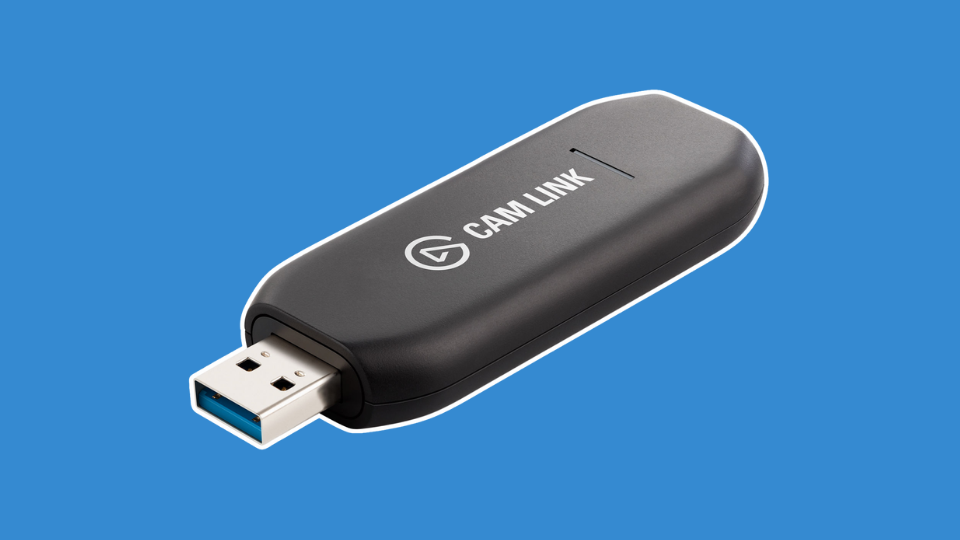
Connecting to Our Device: Elgato Cam Link 4K Standard
To connect our camera to our streaming device, we’ll need to use an HDMI cable. HDMI is a common video/audio cable capable of transmitting high resolution media. The Elgato Cam Link 4K HDMI to USB Capture Card for Live Streaming allows you to connect the camera via HDMI to a computer via USB-A without the need for additional software.
Once plugged in, your camera will appear as a webcam in all of your favorite apps.
Note that the Sony ZV-E10 II is equipped with an HDMI micro port, which is smaller than the standard HDMI port. As a result, we’ll be using a Micro-HDMI to HDMI cable included in the kit to complete the connection. With this cable, the smaller end will be plugged into the camera itself, while the larger end is plugged into the Elgato Capture Card seen above.
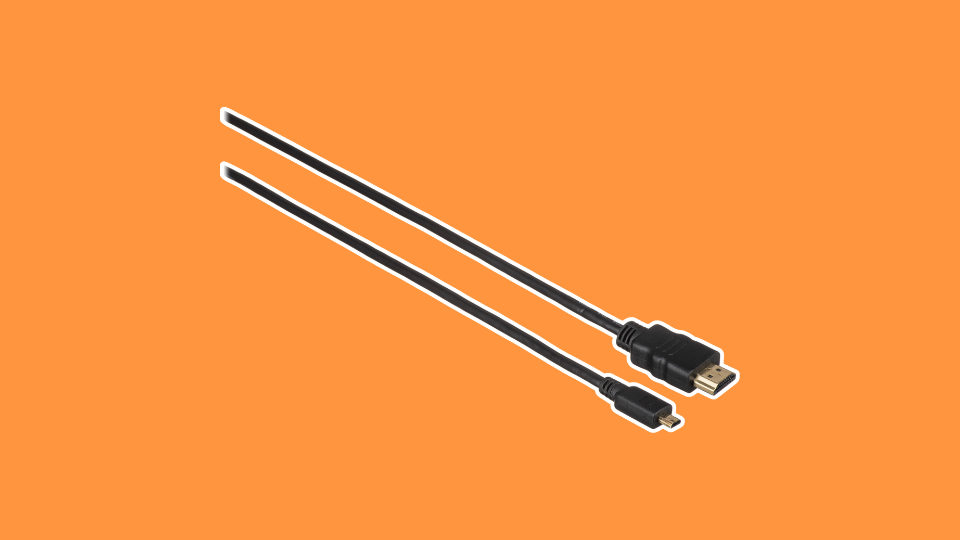
Before connecting the HDMI cable, flip out and rotate the rear LCD to face forward. If you don’t, the cable will prevent the screen from rotating freely. This is important, as you’ll want to be able to see the screen so as to situate yourself properly in the frame. More on this below.
Power: Sony NP-FZ100 Li-Ion Battery + Xcellon PDG-265 2-Port GaN USB-C Charger
Although the camera comes packaged with a battery, we’ve included a second to aid in longer recording sessions. With the aforementioned dual charger, you can charge both batteries simultaneously. Both batteries can be fully charged in approximately 155 minutes.
This charger only works with the necessary power supply. The aforementioned Xcellon PDG-265 2-Port GaN USB-C Charger delivers the necessary power output to keep not only the camera batteries charged, but the microphone’s rechargeable batteries powered as well.
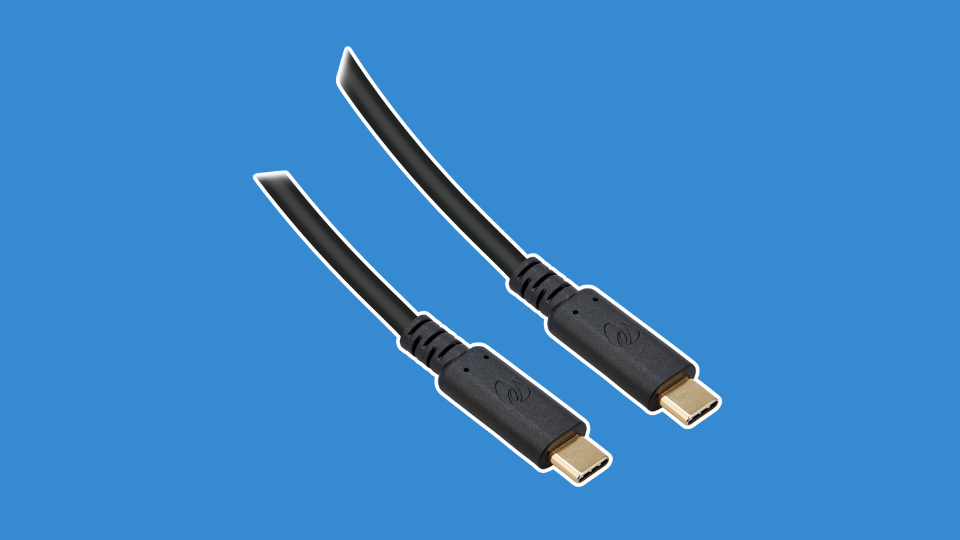
To deliver constant power to the charger, we’ll use the included USB-C to USB-C cable. These are not created equally, which is why we’ve chosen the Pearstone USB-C 3.2 Gen 2 Charge and Sync Cable. Simply put, this cable is able to support up to 100W of USB power delivery, well above what we need for our Sony batteries.
Setting Up Our Studio
With our camera mounted to the tripod, the microphone receiver plugged in, and lights on their stands, we can begin situating our setup where we want it. Make sure you have the outlets required to plug everything in. There will be three items requiring power.
Camera
Once set-up, remove your front lens cap and keep it somewhere safe. When not actively recording, keep the lens cap on the camera.
Once the lens cap is removed, consider shot composition. This simply refers to how we physically situate our camera in relation to where we’ll be sitting or standing. Good composition for streaming should prioritize proper height and head room, or the amount of space we have above our head in the frame.
If your head is cut off at the top of the frame, you have far too little headroom. If there’s more space above your head than below in the frame, you have too little. The general rule of thumb is to have half the length of your head above. Let’s look at an example.

Shot angle is important as a shot from above or below can be jarring to viewers and may convey a sense of inferiority or superiority over the viewer. This is done intentionally in the movies, but for speakers, this should remain head on as to imitate a natural conversation. With your new tripod, bring the camera to approximately eye level to achieve this look.
Lights
Your Lights should be set up on either side of the camera and be angled toward the speaker at approximately 45-degrees. For a professional look, keep one light at full power and the other at half power. The full power light will be the primary light source, also known as a “key” light.
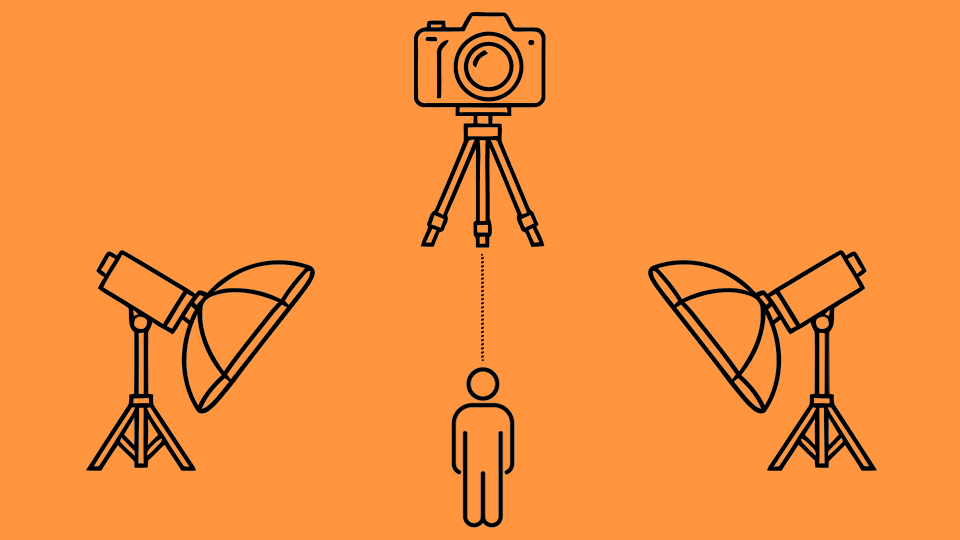
The second light is simply there to fill in the shadow. Hence, why it’s known as the “fill” light. Why we underpower one light is simple. Fill light gives our footage a more natural look. With the added soft boxes, the resulting light will be more diffuse, meaning the light will appear less intense and there will be fewer harsh shadows.
Microphone
We mentioned earlier that a lavalier style microphone is to be mounted on the lapel or collar of a shirt, vest, or jacket. Be cautious of any obstruction or object that may hit or rub against the mic, as they can interfere in our audio and create scratchy, even muffled audio.
Storage
When not in use or if traveling, safe storage is a must. The included Ruggard Journey 44 Shoulder bag will fit the essentials such as the camera, lens, microphone and small accessories, while the tripod and lights will rely on their own included cases.
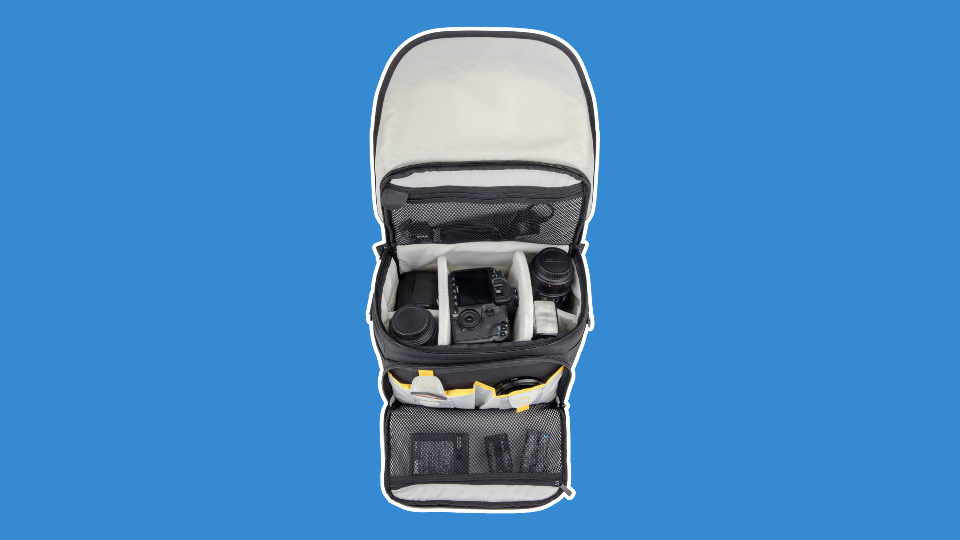
Be sure to store your gear in a dry place like a closet or cabinet when not in use. Avoid attics, garages, or any damp spaces, as moisture and camera gear don’t mix.
Now that we have the tools and a basic understanding of shot composition, we’re ready to begin using our newly set up studio. Simply turn everything on, sit back and hit record with your remote to get started.
Please refer to this guide as needed as you learn and enjoy your new camera kit!