
Typically, discussions centered around introducing people to stargazing focus on children and adolescents, but I think that is too limiting. The reality is that there are as many and varied people who are interested in, and excited about, learning astronomy but are either confused about where to start or are unaware of the progress technology and manufacturing processes have made in recent years that make stargazing as simple as it is fascinating and rewarding. In this piece, we’ll look at different age groups and people with specific interests, and share some advice on where to start their (or your) stargazing journey into the splendors of the solar system and beyond.
The Basics
Before we dive into the main part of this article, I should touch on some points that will be relevant to the rest of this discussion. I don't want to go into too many details because I’ve already written a very thorough Telescope Buying Guide, but for the scope of this piece, what follows are some things to keep in mind.
Your choice of eyepiece is important. Make sure the outside diameter is the industry standard of 1.25"—NOT the smaller 0.965" found on low-end scopes. The 1.25" diameter eyepieces will fit most other telescopes out there and will offer a virtually limitless number of options and accessories for you. When it comes to power, the smaller the focal length of the eyepiece, the higher the magnification potential, so stay with something in the 20-25mm range for a low power and keep it to a high of around 10mm. If you’re focusing your attention on the moon, anything above 10mm on just about any telescope will pretty much make you lose the forest for the trees (or the crater for the surface) and ruin your ability to maintain perspective on what you’re seeing. High magnifications will also amplify even the slightest vibrations from wind or even passing cars, which will interfere with the viewing experience. Save investing in those high-magnification eyepieces for later, after you've gotten some observation hours under your belt and you're ready to upgrade—and you know exactly how your scope will perform.

An easy upgrade for those who are only satisfied with “more power” is a Barlow lens. This simple accessory fits between the focuser and the eyepiece, and doubles or triples the magnification of any eyepiece you put in it, adding to the usability without the associated cost of another eyepiece. An added benefit of using a Barlow versus smaller focal length eyepieces is that as the focal length decreases, the exit pupil and eye relief get smaller and shorter, respectively. A Barlow increases the magnification of the original lower-power eyepiece, yet maintains its wider exit pupil and longer eye relief, which makes it more comfortable to view through—especially for long periods of time.
Diagonals
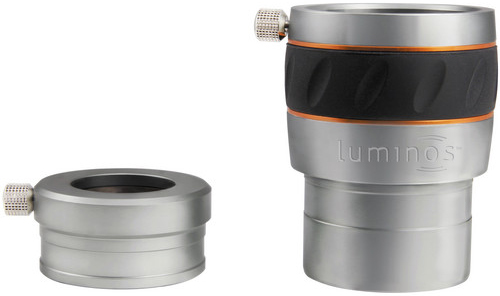
When you look through a telescope, because of the nature of the way the optical path bends and flips light, the images you see will be upside-down and backward. For astronomical viewing, what this boils down to is that when you’re tracking the moon to the right, you’ll have to move the telescope to the left. As for the images being upside-down, who cares if the moon isn’t right-side up? No one. But if you’re planning on using the scope for terrestrial viewing, having everything oriented wrong is a study in aggravation. This is where a diagonal comes into play. There are two kinds of diagonals: Star and Erect-image.
- A star diagonal is used principally to put the eyepiece in a more comfortable position for the user. With a refractor or Cassegrain-style telescope, when it’s pointed at or near the zenith (mostly or completely straight up), the eyepiece is pointed directly at the ground—not an ideal viewing position. The diagonal will fit into the focuser and move the eyepiece to a 90-degree angle (or possibly 45-degree) in relation to the telescope body. By its nature, it will correct the image vertically but not horizontally, meaning the images will be right-side up but remain reversed. If you plan on using it as a spotting scope for terrestrial viewing, you may want to go with an erect-image prism.
- The erect-image prism not only allows you to view at or near the zenith more comfortably, but it corrects the image on both axes, so it is more intuitive whether you’re tracking the moon or a boat on the water.
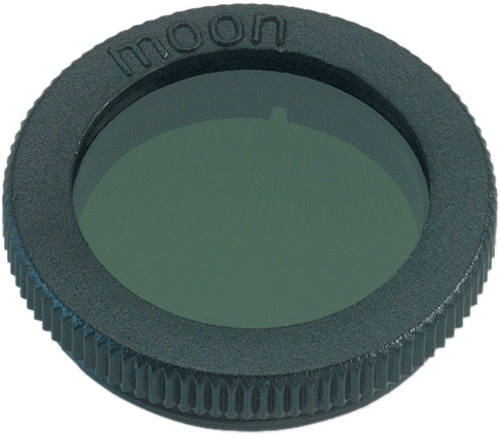
Moon filter
No matter what age the amateur astronomer is, their first inclination when they get a telescope is to look at the moon. It's almost an imperative. But what you must remember is that the moon is essentially a giant reflector for the sun. When the moon is full, the sun is shining directly onto the entire part of the surface facing us and reflecting it to the Earth. Anytime you can see the moon, you’re looking at a huge amount of light from the sun, and it’s for this reason that when the moon is at more than a quarter phase, you’ll need something to temper the bright light that the telescope is sending directly into your (or your child’s) eye. By reducing the amount of light, you’ll be able to see more detail and can observe for longer periods without hurting your eye.
So, here we are, asking and addressing the question of “who, exactly, are we introducing to stargazing?” This is a complicated question and it demands a somewhat nuanced answer. First, we need to look at who is taking up stargazing and what they are expecting to experience and see.
The Child
Let’s start at the most basic level. Cameron, my nephew, is eight years old. My wife and I took him to the American Museum of Natural History, in New York City, because he’s obsessed with dinosaurs and wanted to be a paleontologist. After visiting the dinosaur wing, we needed to fill in time before our train home, so we took him to the Hayden Planetarium for a quick thirty-minute show. He left the Rose Center wanting to be an astronaut. Why mention this anecdote (besides the fact that it’s about an adorable 8-year-old)? It’s to illustrate the point that kids are fickle. Their wants and dreams and desires can change on a dime. Who knows? Next week there could be a fire in the neighborhood and that paleontologist-turned-astronaut could decide he wants to be a firefighter. So, his parents (and uncle) are left with a dilemma: Is this fascination with the stars real, or just a passing fancy? It’s a good question… and an important question. So, let’s look at how to introduce my 8-year-old nephew to astronomy.

A simple search of the B&H website shows a dizzying number of options. But what’s right for a child? To answer this, we need to look at what we, as humans, can and should expect to see through a telescope. First, the moon is big, easy to find, and awesome. Second, everything else is significantly (in orders of magnitude) smaller, varying degrees of difficult to find, and equally as awesome. I know that Cam will be dumbstruck seeing the moon through a telescope. And I also know that he probably won’t appreciate Saturn, Mars, Venus, or a binary star system—simply because the concepts that he would need to grasp to appreciate those things are just beyond him. Also, he lives in the middle of Long Island, a location that’s brilliant with light pollution.
It’s for this reason that I would recommend a basic 60-90mm refractor telescope package. You’re going to look for something with around a 700-900mm focal length with a steady tripod. The focal length (essentially the length of the telescope) will determine what the magnification is with the different eyepieces you use with it. You’ll also want a couple of eyepieces with a low and medium magnification for options. A diagonal for terrestrial viewing probably wouldn’t be a bad idea, because you’re spending the money and should get as much usability out of it as possible. An essential piece of gear is going to be a moon filter and, probably, a light-pollution filter to help with all the street lights, houses, and malls. Very few manufacturers include filters, so read the “Included” listings, and if you don’t see any, make sure you order them when you check out so you can start observing as soon as those wonderful boxes from B&H show up on your doorstep.
Your ideal rig for a basic introduction to astronomy for a child up to around the ages of 10-12 would be a simple manual alt-azimuth mount with a sturdy tripod, and a 60-80mm refractor telescope. You need a moon filter, with optional accessories that include a light-pollution filter, Barlow lens, and a diagonal for terrestrial viewing. Be sure to check what comes with the scope you choose and grab some accessories to help catch their interest immediately.
For a range of options, consider Celestron’s ExploraScope line. Offered in 60mm, 70mm, and 80mm, each one comes with a manual alt-az mount and tripod, plus a high- and low-power eyepiece, a 3x Barlow, and an erect-image diagonal.

Another solid recommendation is this 60mm Meade Adventure Scope. It sports high- and low-magnification eyepieces and an erect-image diagonal. What I like about this one especially is that the tripod is a standard photo-style with a quick-release plate on which the telescope mounts. This makes setup and breakdown quick and easy—plus, you can use the tripod with your camera, if you’d like.
For those who want to make it much easier to view things, or think their child has more than a passing interest, you could get a motorized and computer-controlled model. This will add more cost to the system, but you'll be able to push the scope to its observational limits, allowing you to explore some planets and deep-sky objects if you're able to get away from light pollution. Again, choose your investment carefully. Don't expect a child to grasp concepts like galaxies and nebulae easily, or understand cosmic distances. I would only recommend a computer-controlled model if the adult using the scope with the child also has an interest in astronomy, and would enjoy the expanded usability of this feature.
The Adolescent
Now that we've covered the children, let's move into the adolescent range (13-17 years old). People in this age group will, by and large, have the capacity to grasp the higher concepts required to really appreciate the planets and deep sky objects, and the available options increase considerably.
Even if they have a long history of scientific or astronomical interests, if they haven’t had a lot of time at an eyepiece, the chances of an adolescent being sure that she or he has a specific interest in planetary versus deep-sky viewing are slim. It’s at this point that a little pre-purchase research on the Internet is in order.

Find an astronomy club in your area—you’ll be surprised how many there are. Attend a meeting or a star party. If there’s one thing amateur astronomers love to do, it’s share their gear. If they know that someone is interested in their hobby, you’ll have the opportunity to not only try out different scopes, from refractors to reflectors to catadioptrics, and different mounts, but you’ll also meet people with different interests. There will be the guy who knows everything about the moon, a woman who knows everything about Venus, or another person who is interested in deep-sky objects. In this way, your adolescent will be exposed to a diverse group of people who have many specific areas of expertise, which will help narrow his or her own area of interest.
Depending on the outcome of your star party experience, your choices will quickly narrow down to either a reflector or refractor. A refractor will give you excellent planetary observation, but with lenses being more expensive to produce than the reflector’s mirrors, you’ll get less aperture per dollar. In plain English, you’ll be sacrificing a larger objective for superior performance, which isn’t a bad thing. Spending more on a smaller objective will produce images with little to no distortion or aberrations, and true color transmission.
On the other side of the coin, if your adolescent is more inclined to observe outside of our solar system, then you’re going to want the larger apertures for more light-gathering ability that you’ll get with a reflector. Utilizing mirrors instead of lenses gives you more aperture per dollar, allowing you to maximize light-gathering ability so you can see and resolve the smaller and dimmer deep-sky objects. The downside to reflectors is that they require you to be a bit gentler when handling them, but if your teen has demonstrated a sustained interest, the chances are they’ll be able to show it the respect it deserves.
No matter what type of scope you’re leaning toward, you’re going to want to look at models with motorized mounts, preferably with computer controllers. This takes a lot of the guesswork out of astronomy and lets you get observing faster and more easily by utilizing alignment assistance, multiple tracking rates for planetary or deep-sky viewing, plus a catalog of thousands of objects with the option of guided tours.
For refractors, Celestron’s Astro Fi 90mm is an ideal choice. Easy to assemble and set up, it comes with a new Wi-Fi system that allows you to control the mount from a smartphone or tablet. Not only does this make it easier, but by eliminating a cord it gives you the power of the Internet in your hand, which expands not only the database of objects (to more than 120,000) but provides in-depth facts, photos, and images for many of those objects. Meade Instruments’ ETX80 Observer has the corded AutoStar controller, but where it has a slightly smaller database, the base and mount are a bit more solid, so there will be fewer vibrations.

Moving into reflectors for planetary and deep sky, Celestron offers a large 130mm reflector version of the Astro Fi, which offers the same interface as the one mentioned above. The change from refractor to reflector and its wider aperture allows it to reach deeper into space while staying affordable—and it can still be used as a very capable planetary scope. Meade makes another appearance here, with its StarNavigator. While the aperture is a bit smaller, at 114mm, its longer focal length gives it a higher magnification potential than the Celestron. The StarNavigator comes with an updated AudioStar wired controller, which is very like the previously mentioned AutoStar, but the AudioStar—as the name implies—has a built-in speaker that will give audio commentary during tours with deeper info on more than 500 objects. This allows you to focus (pun intended) on viewing instead of having to look down at a screen.
Striking a middle ground between aperture inch per dollar and portability are some catadioptric, or compound, models. As far as computerized options are concerned, this category offers the largest number of options from a variety of manufacturers. You can spend anywhere from $350 to more than $20,000, and they’re offered in kits with accessories. As with any scope, the larger the aperture, the deeper into space you’ll be able to explore, and the greater detail you’ll see on planets and the moon.
As mentioned before, pick up a moon filter and a light-pollution filter if you need them. You’ll also want a filter set. Filter sets come packaged for different purposes, and you can get planetary or deep-space sets with filters specifically designed to accentuate different colors or wavelengths that enhance colors for an improved experience. This set of four filters is ideal for lunar and planetary viewing, while this one from Olivon comes with five filters for observation and imaging, plus a filter wheel. The wheel allows you to change filters quickly without having to remove your eyepiece—simply rotate the wheel to change to the next filter. Since the filters and wheel are designed for 1.25" focusers and eyepieces, you can pick up other filters and switch them out as your targets change from night to night. Filters are also sold separately, so when the young stargazer starts narrowing down their area of interest, they can build their own set, specific to their needs.
The Adult
When buying for an adult, whether for yourself, a partner, sibling, parent, or grandparent, the sky is the limit. This person will most likely have been harboring a desire to explore astronomy for years or decades but, for various reasons, might have always been too busy to indulge themselves. The best approach to take is to not surprise them. Let me say that again: do not surprise them. There are so many factors involved in this decision that it would be painfully easy to make a misstep and get the wrong rig.
If they (or you) have been thinking about taking the plunge for years, there’s a good chance that they already know what they want. If astronomy is a new endeavor—perhaps even an off-shoot of introducing a son or daughter to astronomy—then I suggest a tactic like that with the adolescent. Join a local astronomy society and attend a few star parties. In this way, your adult will be able to narrow down their areas of interest. If your budget is like that of the adolescent section above, the recommendations are the same. If you feel more comfortable giving your budget a bump up to the next level, you can go with the larger apertures that will raise the cost, but also the observational potential.
Generalities aside, there are a few subsets of adults who deserve some extra attention.

The Nerd
Yup. Nerds. I know... it's an ambiguous term that covers many different people. Take my brother and me: I'm a writer with a degree in History and English Literature, and he's an engineer who designs and programs machines that cook and package pudding. My brother and I are nerds in the exact same way that evolutionists and creationists agree on the platypus. We're both nerds, but in completely different ways; however, we do share a common denominator with all our nerd friends: we are obsessed with the way things work. So, when I first got interested in astronomy, I was immediately drawn to an equatorial mount, and when I looped my brother into my budding obsession, he was hooked on it, too.

The thing about a manual equatorial (or EQ) mount is that there are many moving parts and a steep learning curve to understand not only how to use it, but how to use it correctly. You need to understand how the Universe works, you need to learn celestial navigation, and you need to do a lot of research before you even set up your telescope for the first time. I can only recommend this for the die-hard nerd who is obsessed with mechanical things and is willing to invest a lot of time and energy to simply find something to look at.
So, for the right person, a manual mount will provide endless hours of enjoyment. For a sort of hybrid experience, feel free to add Right Ascension and/or Declination motors for easier tracking and slewing. (A side note: these are just motors and not true GoTo systems—the user is still required to align and find their subjects manually.) The motors can be offered as add-ons for some, or come included with others. As far as the telescope itself, as I've mentioned before, the size and type will depend on what they're interested in observing. From my experience, I find that the amateur who is interested in a manual EQ mount gets bored quickly with the moon and principle planets and will start to crave the power to explore deep-sky objects.

Generally, after they’ve moved out of their amateur phase, they've narrowed down their focus, and their first upgrade becomes their specialized scope. It's for this reason that I would invest in a Reflector—you can get more aperture for your buck, your nerd will be able to see the moon and planets and still be able to branch out to deep-sky objects—or a move into the larger catadioptrics. With a reflector, you'll sacrifice some color and clarity, but the tradeoff in versatility is well worth it until they narrow their focus and, with a catadioptric, you’ll gain the advantage of portability. Again, look at filter sets or filter wheels to enhance the experience, focusing on nebulae filters and a variety of wavelength filters for more observational options.
Depending on the level of interest and budget, you have the option of buying your rig à la carte—meaning choosing your mount, optical tube assembly, tripod, and accessories separately. If you go this route, take care to check the specifications to make sure the mount you choose can handle the weight of the OTA, and that the tripod can handle the combined weight of the mount and OTA. Also, the way the OTA connects to the mount is important, so make sure if it uses a dovetail, and that your mount and OTA both have the same type of dovetail and saddle—there are two industry standards: Losmandy and Vixen styles. Losmandy style is larger and made for big and heavy OTAs, Vixen is more common and reserved for small to mid-sized telescopes.
The Photographer
There is a major point to remember when using a scope for astrophotography: the problem of light pollution is how the human eye reacts to ambient light, so don’t waste time with light pollution filters and other accessories trying to block light. Colored or nebulae filters will be as useful as always, as will UV/IR filters. This last type of filter blocks ultraviolet and infrared wavelengths, which are invisible to the human eye but can cause halos, fringing, or blurriness in photos.
Regardless of the level of photographer we’re about to discuss, the mount they use are the same—and very important to discuss. If the shooter is planning on doing long-exposure astrophotography, they will want to stick with equatorial mounts versus alt-azimuth. This might not make much sense, since we’ll be discussing motorized and computer-controlled mounts, so it’s not like they’ll be manually tracking their subjects, but it is very important.
When an alt-az mount tracks an object, it describes an arc by making changes to both axes, very much like drawing an arc with an Etch-a-Sketch. Because of the physics involved with this kind of tracking, even though the object will stay in the center of the field of view, the surrounding star field will start to rotate. For short exposures, this won’t be noticeable—but when using long exposures, the star field will start to streak and the centered object will get blurry.
An equatorial mount, by its nature, tracks an arc along a single axis. This single-axis tracking not only keeps the object centered in the field of view, but won’t suffer from the field-rotation that alt-az mounts do. The price one pays for this though, is that the user is required to polar align the scope manually to make sure it is aligned with the Earth’s rotational axis for proper tracking. While not overly complicated, it does take a little bit of practice to get it right.

The Amateur
Those with point-and-shoot cameras, selfie sticks, and disposable cameras wouldn’t fall into this category (although there are adapters for that). I’m talking about the person you see walking around the city with a DSLR slung over their shoulder taking shots of the sights. They have a working knowledge of what their cameras are capable of and don’t mind spending their money on gear.
Regardless of what their interest is, you’re going to want to stick with a refractor or catadioptric with a computer-controlled equatorial mount. This is going to be crucial for capturing long-exposure images. A refractor will have the requisite optical performance, while a catadioptric will give you more aperture per dollar without the aberrations of a reflector. But the scope and mount are only part of the astrophotography equation. You’re going to need a T-ring adapter, T-rings, and remote shutter releases for their specific camera.
The way this works is that, in place of an eyepiece, an adapter is inserted into the eyepiece holder. The end of the adapter will have threads to screw on a camera-specific T-ring. The T-ring is made for the specific bayonet mount of the DSLR camera that is going to be used. Finally, the remote release is a critical part because you’ll need to hold the shutter open and limit the amount of contact you have with the rig, so as to minimize vibrations.

The More-than-Amateur
This person spends a lot on their gear and is looking for quality—not only in the rig but in the end product. For this reason, you’ll want to lean toward a dedicated astrograph optical tube assembly. Vixen makes an Astrograph refractor, while Celestron has a line of Rowe-Ackermann catadioptric Astrographs that are pretty amazing. An astrograph is specifically built with a fast focal ratio that requires shorter exposure times, versus “slower” telescopes. Everything about the OTA is optimized for imaging performance, and is the ideal platform for astrophotography. Just like the amateur discussed above, you’ll need the adapters and rings to mount a DSLR. Our old friend, Celestron, offers OTA-only and kit options for their astrographs, so for one-stop-shopping, you can look at these. If you plan on building an à la carte rig, this mount from iOptron is great for larger or heavier astrographs, or this one from Sky-Watcher is ideal for lighter ones.
The Geek
Before you scroll down to the comments and start an etymological argument about geek versus nerd, hear me out. Just as "nerd" is an ambiguous term, so is "geek." In my world, nerds tend to be more into the hardware, where geeks are into software (metaphorically speaking). So, where the nerd is fascinated by learning how to use a manual EQ mount to find something, the geek will find endless fascination in a slightly different way: creating the perfect image. Here's where we come into CCD imaging. If applying the same recommendations for The Photographer, but replace the photo gear with a CCD imager, you create an opportunity for someone who is interested in learning, experimenting, and applying a software suite to dozens, or hundreds, or thousands of images to manipulate, matte, filter, cut, crop, and stack them in virtually infinite ways to produce truly spectacular final images.

For imaging purposes, stick with a refractor or Cassegrain style. This will give you the aberration-free optics you'll require for sharp, detailed images. Celestron’s products range from a basic CCD imager—the NexImage—ideal for a beginner with just about any scope, all the way up to the Skyris, which offers amazing performance. Striking a comfortable middle ground is the iOptron iE5100 Planetarium color imager. Meade also makes an appearance with the LPI-series in monochrome and color.
The Wrap-Up
As you can see, introducing someone to astronomy takes a lot of thought and planning. Spending too little may stifle a genuine interest, but you run the risk of dropping hard-earned money on what might be a passing fancy. It’s best to have a legitimate conversation with the person about how interested they truly are. Research on the Internet, get a firm understanding of what they’re expecting to see and make sure it matches reality. And before you add anything to your shopping cart, join an astronomy club, go to a few star parties and talk to enthusiasts, and try out some of their gear; because the only real way to find out what interests them is for them to see for themselves.