
Many genres of photography benefit from planning your shots beforehand, whether that means sketching ideas in a studio, taking some casual smartphone photos beforehand, or creating a schedule and shot list for a shoot. For landscape photographers, planning is an essential part of the process, mainly because it will improve your efficiency and help you get the shot you need by being in the right place at the right time. For planning a specific shot, nothing beats having personal experience with a location to be familiar with where to go, and when, but a good alternative is to use Google Earth.
Google Earth, or specifically for the purposes of this article, Google Earth Pro, is sort of like the big brother to Google Maps—a tool you are likely familiar with for just getting around on a daily basis. Google Earth, on the other hand, is a downloadable app that takes mapping and satellite imagery to a more sophisticated level. Working along the same lines as Google Maps, though, you can easily find locations and how to get to them, but with Google Earth, you can more efficiently seek out vantage points and even change the time of day in the scene to help visualize lighting conditions. What this means for photographers is that you can easily scout locations and get an idea of the lighting at a certain time of day—before you visit.

An example of how this would be helpful: Say you’re planning a trip to a national park and are looking to make one loop through the park during the one day you’re there (because you have a busy schedule, of course). You only get one chance to be somewhere at sunset; is it better to be at one end of the park or the other? You can get this general information from other sources, sure, but beyond just getting a sense of the lighting, you can also seek out specific vantage points at a location to help you, further, get to where you need to be in the most efficient time. Maybe your dream sunset shot is a 25-minute hike from the parking lot, or only a five-minute walk from a different entrance point. Fill in the specifics as you see fit, but the point is that Google Earth Pro can help to increase efficiency when working in locations with which you’re not immensely familiar.
So, how do you use Google Earth Pro? Well, to begin, the desktop version is what you’re looking for, and it’s available for Mac, Windows, and Linux operating systems. Web and mobile versions are also available (of the non-Pro Google Earth), but they won’t have the same capabilities as the desktop version. Once installed, you’ll probably want to just start clicking around and searching for places to get the hang of it. You’ll notice it’s an intuitive application at first, but it might also look daunting due to the number of controls and additional tools that are available beyond what you’re used to with Google Maps.
One of the most useful features of Google Earth for photographers is the switching between Aerial and 3D Views; and 3D Views are more than just Street View, especially for landscape applications. Using topographic maps and satellite images, 3D renderings from ground level help you position yourself in spots well off the road. Aerial imaging is what you’re likely used to already and is great to just get coordinates and quickly take stock of what is around. It’s a faster method for seeing where a nearby hill might be, and then switch over to 3D mode to see what that view looks like from the top. Additionally, if you are working from the street or in a more urban environment, Google Earth Pro will still utilize the Street View imagery, so you’ll have photographic renderings of the scenery.

The next key section of Google Earth Pro to become acquainted with is the Layers panel. Most of the options here are fairly self-explanatory, and include options like Photos, Roads, 3D Buildings, Borders and Labels, Weather, and so on. All of these options will make sense with some tinkering, but one of the especially important options for photographers is Weather. This option can use forecast information to help to foresee any issues with cloud cover in regard to the subject you’re photographing. The Layers Panel also lets you quickly gain information on places you’re visiting, figure out where some local roads are that might help you get to the vantage point you’ve chosen, and help you determine if the subject you want to photograph is potentially obscured by a building or something else.
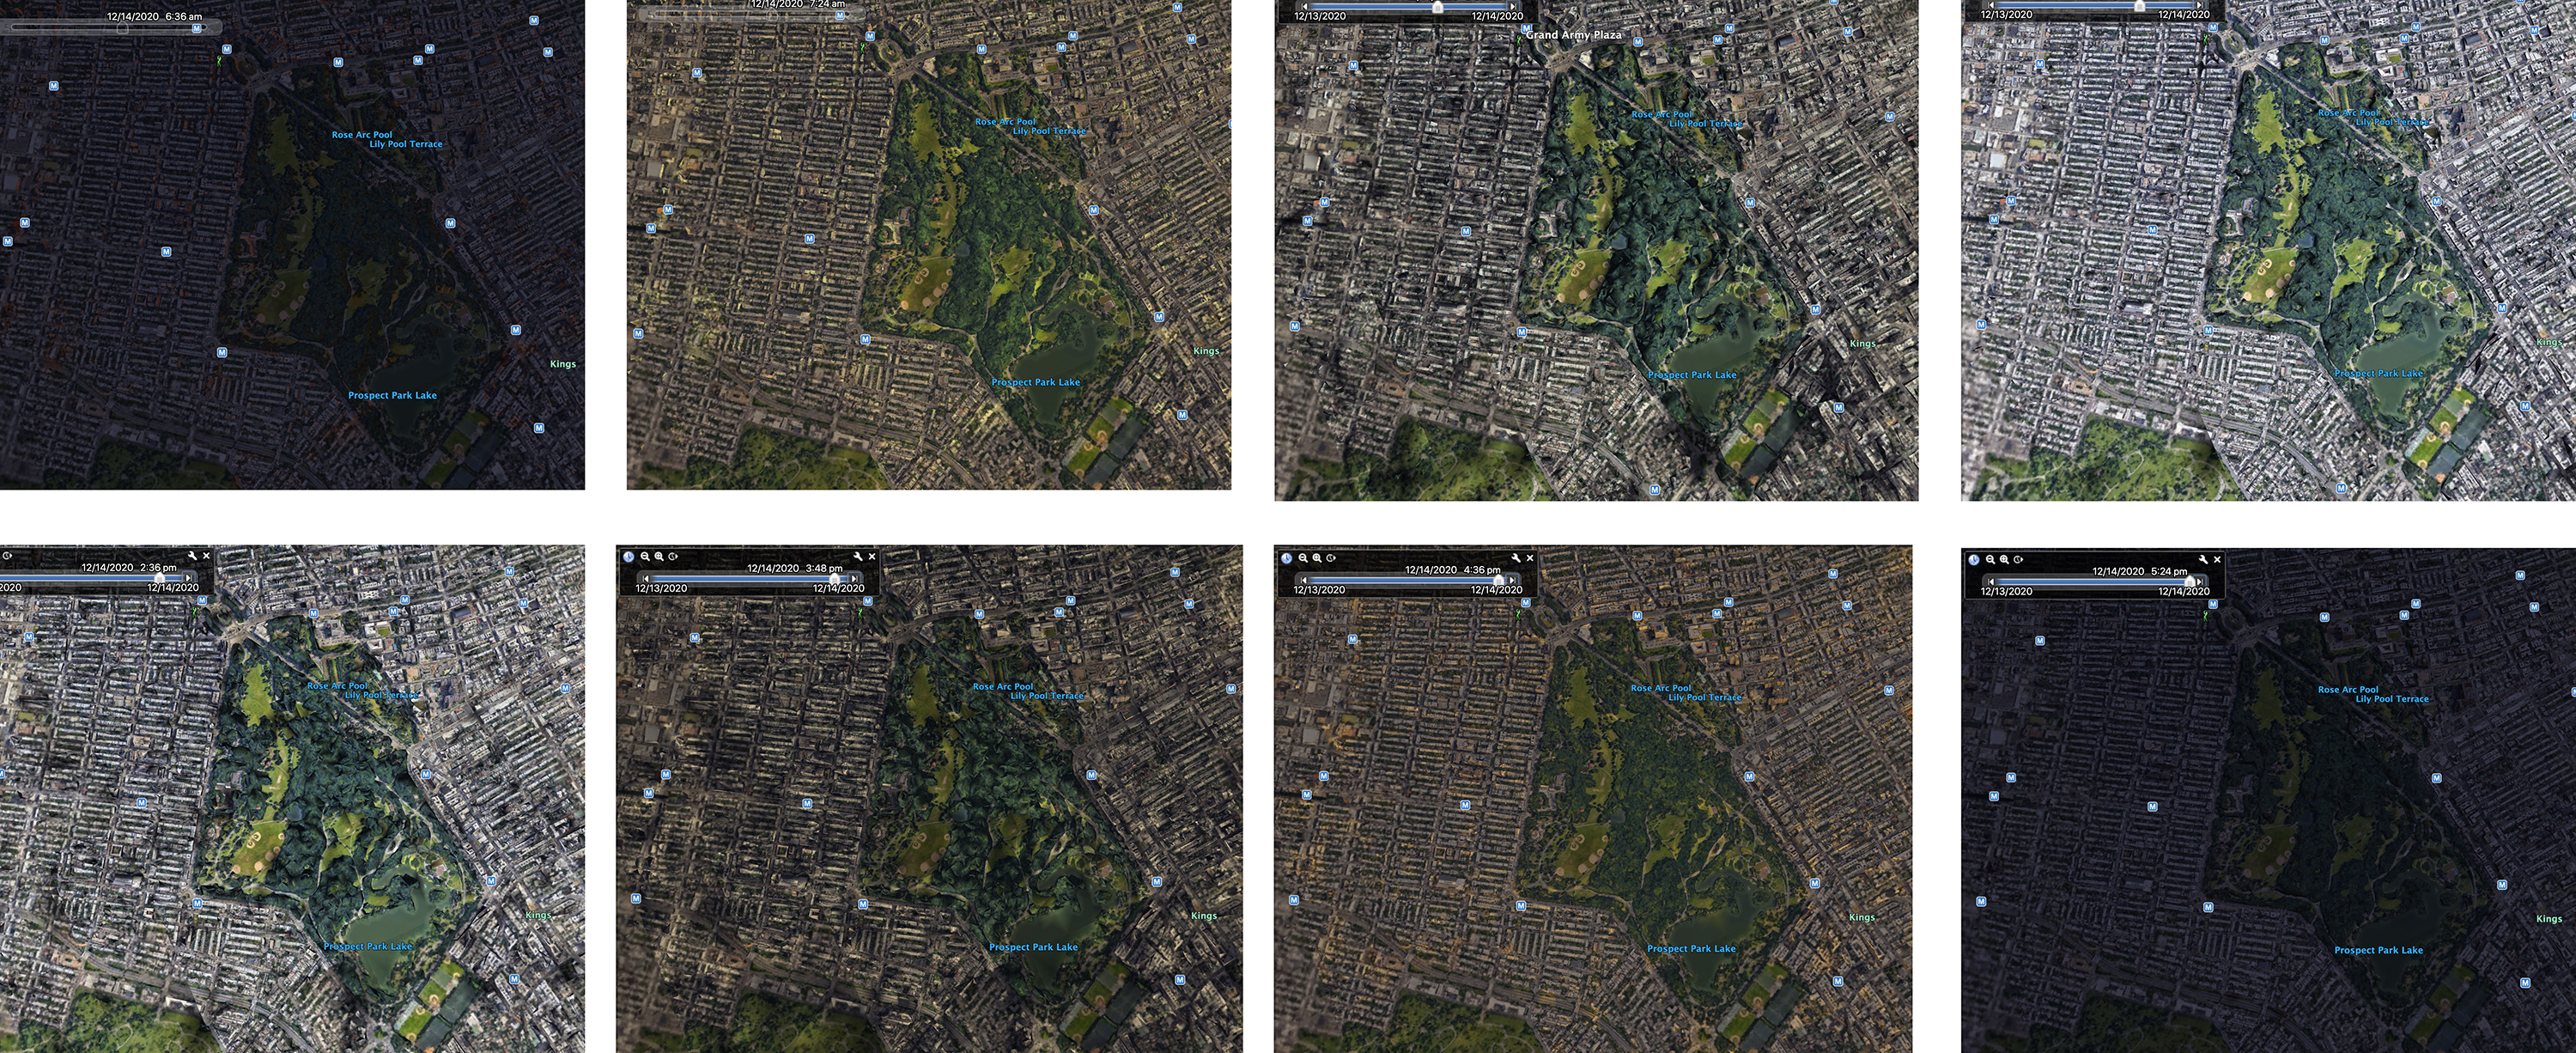
The second key tool for photographers to use is the Time-of-Day slider, which lets you move the position of the sun relative to the time in order to see how shadows will look in a specific place at a specific time. You’ll be able to envision if the side of a mountain is covered in shade or if there will be some trace highlights to liven up a scene, or you’ll be able to pick out whether certain areas are still in sunlight by the time of day you would be reaching them.
Finally, specific to photographing around populated areas, there is also the ability to toggle between Ground-Level View and Street View. Ground Level View will be a 3D rendering of a scene, whereas a Street Level View will use Google’s own photography to show the scene as it looks in real life. If you’re photographing something manmade in a populated area, then Street View is the way to go to get a realistic look at the scene, but Ground Level View does give insight into lighting.


There’s a huge number of additional features and quirks in Google Earth Pro that can keep you busy for hours at a time. One additional point worth noting is that all of your research can be saved using the Places tab, so you’ll be able to keep track of favorite shooting spots and locations you want to visit. This information will then be available from the mobile app so you can zip right to the spot when the time finally comes.
Do you have any experience using Google Earth Pro as a tool for your photography? What are some of the tips you can share about this application? Do you have any favorite features or tools for the app? Let us know in the Comments section, below.
