When I was a young AC, many years ago, I was day playing on a feature when suddenly a Steadicam showed up with a wireless follow focus, iris, and zoom system. Never having worked with one before and having no time to figure it out—the instructions made no sense—I did my best. But it was a horrible experience and I vowed never to give a wireless system the benefit of the doubt again. I will say that in the ensuing decades, wireless systems have become significantly more reliable and easier to work with, so when I had the opportunity to try the PD Movie Remote Air 2, from ikan, I jumped at the chance.
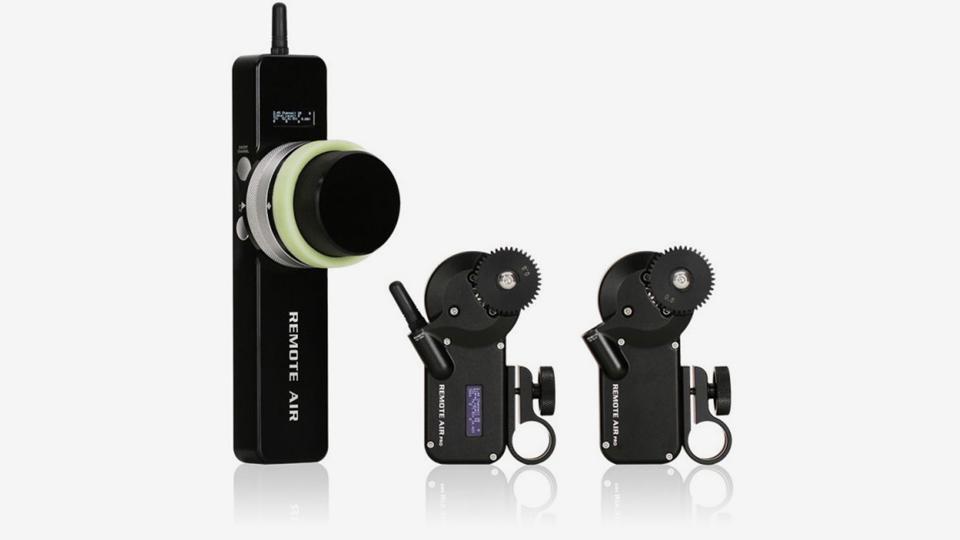
I tried out the single-axis PD Movie Remote Air 2 and two-axis PD Movie Remote Air 2 systems and found them both to be easy to set up and use, and with just a little bit of practice, I became very comfortable with them. The single-axis system allows you to control either focus, zoom, or iris, and the two-axis system allows you to control any two of focus, iris, zoom. I know that the systems are called single- or dual-channel systems, but channel here really refers to how many lens functions it can control, and is confusing when you consider that the system operates over a choice of 20 wireless channels, so I'm using the term axis to refer to focus, iris, or zoom.
For Cine Lenses
The first thing I noticed about the motors was that they were compact. The PD Air 2 Remote single-axis system comes with one motor, and the two-axis system comes with two motors. I'll say this: the motors are powerful and have lots of torque. So, this system is for cine lenses. It isn't that you can't use the system with DSLRs or mirrorless cameras, I did and you can, but the system is built to work with cinema-style lenses. Cinema-style lenses tend to be heavier, and more robustly built than DSLR and mirrorless lenses, which use lightweight materials that can be moved by tiny motors. It was a little distressing watching the motors torque my lens in the camera. Note, even though the motors are powerful, they are quiet, although at the high-speed setting they do purr a bit.
The System
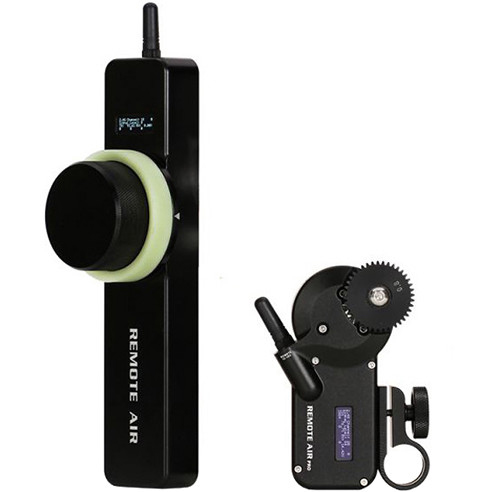
Each system comes in a hard, protective carry case with all the components you will need—nice, compact, and easy to take to and from location. The single-axis system features a hand controller, wireless motor (with cine-style 0.8 MOD gear), 19mm rod clamp, 15 to 19mm rod adapter bushing, two small and one large antennas, three glow-in-the-dark marking rings, a USB charger (for the hand controller), a variety of cables, a lanyard for hanging the controller off a stand, as well as a confusing instruction manual. Not to worry about that last bit though, I'll go over the important stuff, and you can find a video explaining how to set up the system on its product page on the B&H website. The two-axis system comes in a larger case with a slightly different hand controller and a second motor (with bracketry), and a daisy-chain LEMO cable. Why LEMO instead of some other connector? LEMOs are standard in the cine industry because they are durable and well up to the task of handling the conditions of a production day.
Setting Up
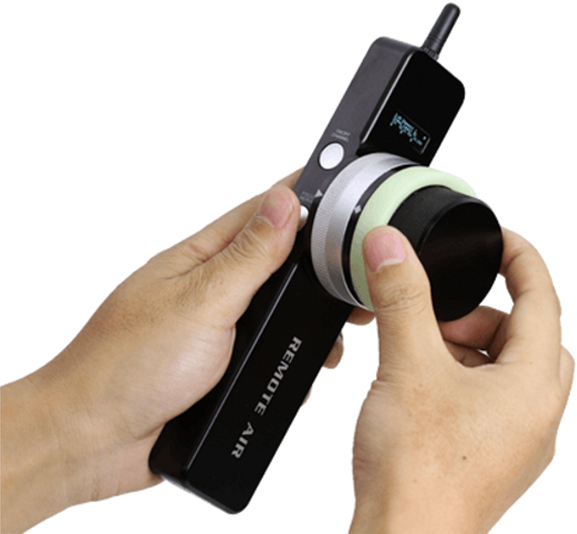
Once your camera and lens are built and mounted on a baseplate with rods, mount the motor, engage the motor with the gear on the lens, attach one of the small antennas to the motor, and power it from a D-tap power source using the included cable. Turn on the motor by pressing and holding the silver button on the bottom of the motor. Don't worry—the motor doesn't jump when turned on, so it won't eat your lens. A built-in OLED screen displays info about the motor; most important at this stage is the wireless channel to which it’s tuned. Now power-on the hand controller and check that the wireless channel on the hand controller matches that on the motor. If they don't, then press and release the power button. This will cause the channel on each to increment up by one. Once you have the channels matching, you press and hold the NERVE button and the motor will calibrate itself to your lens. The hand controller won't control the motor until the motor has calibrated itself. I recommend starting with the focus ring about halfway when calibrating. You don't have to, but it seemed to calibrate smoother with the lens in the middle of its focus travel rather than at one end. After calibration, you are ready to go.
Motor and Receiver in One
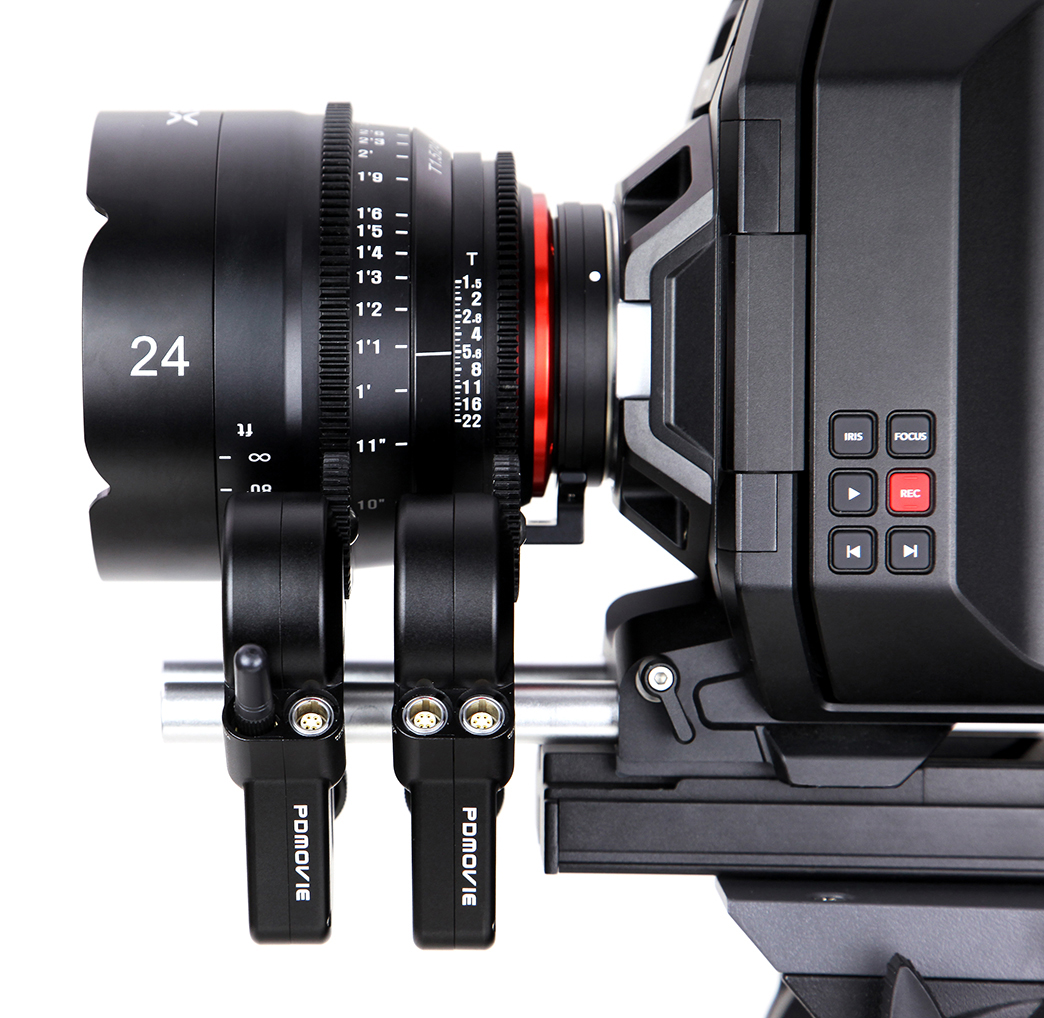
One of the things that I like about the PD Movie Remote Air 2 is that the motor contains the wireless receiver. So, I don't need to mount a receiver and distribution box on my camera and then feed the motors from there. Simpler, less weight, and less cumbersome. You may wonder about using a second motor for controlling iris? This is possible with the two-axis system. In a two-axis system, the second motor is “dumb” in that it doesn't have the wireless circuitry. To use a second motor, you route the power to the “dumb” motor, and then use the LEMO extension cable (included in the two-axis system) to connect the two motors together. This allows you to power both motors and to control both motors with a minimum of cabling—one power cable and one daisy-chain cable between the two motors. Very simple and sweet.
In Use
With just a little practice, it will only take about a minute more than mounting a manual follow focus unit to set up. The hand wheel has its own weight, which approximates the feel of working with an actual lens. The motors have three modes and three speed settings in each mode. The modes are just so that the motor knows to which control on the hand wheel to respond. A quick double tap on the motor’s power button changes mode from focus to iris to zoom. This is indicated by a colored LED. Tapping the power button five times quickly will change the speed of the motor, indicated by the color LED blinking fast, slow, or remaining illuminated. The motors come with rod-clamping brackets attached. These can be slid up and down the motor, essentially allowing you to adjust the height of the motor relative to the lens. I didn't like the position of the bracket on the motor, so I loosened it, slid it out of its slot, flipped it over, and slid it back into the mounting slot. Much nicer.
Once calibrated, the lens is automatically mapped to your controller, but you can enter your own start and stop points, which can be helpful. Simply position your lens to your start focus, press the NERVE button for a beat, wait a moment for the position to set, then move to your end focus mark and repeat. You get to set one start and one end position. Take your time doing this, since rushing will only confuse the system. Yes, we are rushing and losing the light and everyone is screaming, but it only takes a few seconds to do it right, so spend those extra couple of seconds here. To return to the full focus range, just press the NERVE button again.
Summing it Up
I found the system to be simple to use and flexible, although I will admit that it took me about 15 minutes, plus watching the video and placing a phone call to ikan, to figure it all out the first time. It feels good in the hand, and I had precise control over focus. Racking the hand wheel back and forth did not cause my marks to drift, and setting specific start and end points was simple and just as accurate. Swapping out lenses and recalibrating the new one is as easy as pressing and holding the NERVE button. No need to power-down to swap lenses.
It isn't all ice cream and cake, though. The motor must calibrate to the lens before you can pull focus and, if you are using an adapted stills lens that spins endlessly, calibration won't happen. So, I wish there was a way to manually calibrate the motor to the lens. Also, there is no reverse switch, so you can't put the motor on the other side of the camera and still pull in the normal direction, or work with a lens that focuses in the opposite direction to standard without mounting the motor on the other side of the lens. Plus, if you do have motors on opposite sides, the daisy-chain cable is too short, a longer cable is needed in that instance. But I may be nit-picking here.
The system is straightforward and easy to use, requires a minimum of set-up time, as well as a minimum of gear, and avoids the tangle of cables that a receiver box system requires. It is fast to work with, calibrates your lens quickly, and is quiet enough not to annoy the sound guy—except maybe with the motor at top speed. It is really designed for use with cine lenses and cameras, and would fit right in on a high-end shoot with a stabilizer system or jib/crane.
For more information, stop by the B&H SuperStore in New York, speak with a sales professional on the telephone at 1-800-606-6969 or contact us online via Live Chat.
