
Zoom, Hangouts, BlueJeans, Slack, and Teams. These are words that have taken on a whole new significance over the past few weeks. With so many of us now relying on livestreaming, video chat, and video conferences, the quality of connection and the quality of your image is increasingly important. It may be time to upgrade from the camera in your computer or the basic webcam that has been dangling off the side of your monitor for all these years. Joking aside, appearing clear, in focus, and well-lit is crucial when impressions are being made, whether that be for work situations or catching up with family and old friends. Fortunately, it’s very easy to turn your compatible DSLR or mirrorless camera into a high-quality webcam.
EOS Webcam Utility Beta Software
Canon has made it quite simple to use many of its EOS DSLRs, mirrorless cameras, and recent PowerShot cameras as a webcam for video conferencing with its new EOS Webcam Utility Beta Software. The free software, compatible cameras, and instructions to install are located here and you’ll only need your camera and a USB cable. After you install the software, you will have to restart your computer, but the plug-and-play set-up process is not complicated. Be aware that this beta software is not yet available for Mac systems and is supported only for U.S.- based users.
First, set your camera to Movie mode, and set the exposure to your liking (brighter for work meetings and dark and moody for a Zoom date?), then plug the USB cable into the compatible camera and into a USB port on your computer. Once the connection has been established, go to your preferred video meeting app, click camera settings, and open EOS Webcam Utility Beta and you are ready to go.
The improved imaging from a DSLR or mirrorless camera will be apparent immediately, but the advantages extend beyond just resolution quality. With zoom capability or with a selection of lenses and utilizing basic exposure adjustments, one can create a specific and more functional look. For example, use a wide-angle lens to include several folks in the screen image or a fish-eye lens for fun, or perhaps, macro to demonstrate details of an object. You can also adjust aperture for “cinematic,” shallow depth of field that will blur out the background and keep the viewer concentrated on your sharp features. Importantly, if your camera has tracking focus, the focus will adjust to stay on your face even when you lean back or move in.

One tip for EOS users, if your camera has “Highlight Tone Priority” built into it, turning it on while video conferencing or livestreaming could help bring out details when your overall scene is too bright.
Via HDMI
Canon doesn’t get to have all the fun. For any brand of camera that has clean HDMI output, there is another high-quality option. To clarify, “clean” HDMI refers to video output that does not contain any of the onscreen data indicators normally seen in the viewfinder or LCD, so your image appears on screen without all the setting numbers and letters surrounding your head.
To set this up, in addition to the compatible camera with a fully charged battery, you will need an HDMI cable, a video capture device or card, and the software that will recognize the signal from your camera and HDMI video-capture device. This part is crucial, because the capture device is what converts video signals into digital data compatible with your computer. And no, the HDMI output on your computer won’t work. Start by plugging in the HDMI cable to the video capture card, the other end of the HDMI cable into the port in your camera and the USB cable from the capture card into your computer.

After turning on your camera and switching it to movie mode, you will need to go into your camera’s menu and enable the clean HDMI, at whichever resolution you prefer or is compatible with your device. One thing to be aware of is to disable the “Auto Power Off” setting so your camera does not turn off in the middle of a conference. As mentioned, live video will burn through a battery charge, so, for long video conferences, either have a spare battery handy or use a compatible AC power adapter. Also, be aware that if your camera is in autofocus mode, the focus points might appear on your video feed.
Once your cables are hooked up, you will need to download and open a livestreaming software application such as Open Broadcaster Software (OBS) or XSplit. The software should recognize your camera system and give you the option to establish it as the video capture device, do so and then simply set your web conferencing or livestreaming software to recognize your camera as the capture device, and you are set to go.

Using a DSLR or mirrorless camera with clean HDMI capability creates a high-quality image for live video and Canon now offers its easy-to-use beta software for using a USB connection. There is non-proprietary software available for other cameras from other manufacturers, as well.
Accessories to Improve the Image
Whether you are using Canon or another brand of camera, the imaging capabilities of a quality camera will outshine a typical webcam immediately. However, you should be cognizant of a few things to create a look that best suits your needs. For starters, where will you place the camera? If it’s possible to place the DSLR behind your monitor, this is one option, but be careful it’s not so high as to create an awkward angle. Some people prefer the camera slightly below or to the side of the monitor for a more flattering view of your face. Depending on the size of your camera, a tabletop tripod might serve that function easily—just check its weight capacity before purchase. For larger cameras and more adjustable placement, consider grip options such as a magic arm that can clamp to your monitor or a light stand next to your desk. There is a range of options for placing your camera near your computer, including devices that won’t scratch or damage wood, such as The Green Pod, but do not place the camera too low, no one needs to know how many nose hairs you’re sprouting.

Lighting is also important. A flattering light set up can be created with household or desk lamps, but affordable LED options can really improve your look and enable brightness and color temperature adjustments that will serve you as the natural light in your home (or your mood) changes through the day. Small LED light kits can be placed on your desk or attached to your camera’s hot shoe mount.

Whatever lighting source you choose, consider the angle of the light and brightness. If possible, it’s better to avoid mixed lighting sources, for example, daylight on one side of your face and a warm incandescent bulb giving a yellow glow to the other side of your face. If you use a desk lamp that is very bright or directional, consider using a kind of diffusion for more balanced lighting or bouncing the light off of a nearby white wall. In general, placing the light or lights at eye level off to the side of your monitor is acceptable, and avoid lighting that is directly above your head or coming up from below unless heavy shadows or a horror film aesthetic is desired. Also remember that with longer cables and camera support, you don’t necessary have to sit in front of your monitor.
A final thought is to consider audio. Simple advice involves muting your microphone when you are not speaking to prevent folks hearing background noise or an inappropriate comment. Also remember that a hard floor and open space will create unwanted echo, so consider using rugs or rooms with drapes if that is problematic. Be sure to check the audio levels on your computer and within the apps you’re are using. In general, a mid-range setting is appropriate for standard conversations.
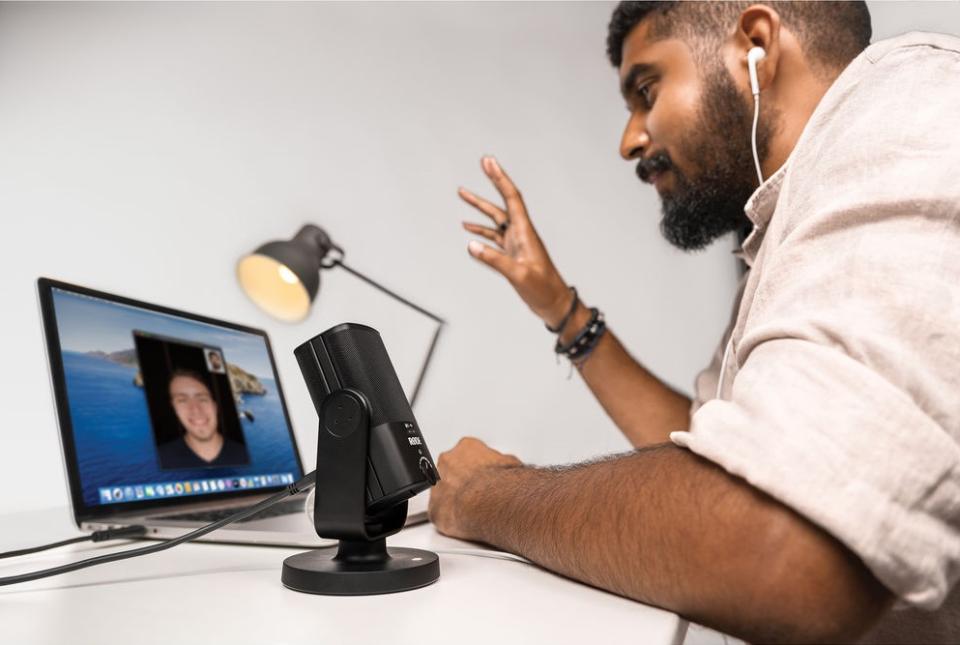
The audio provided by a DSLR’s built-in microphone is arguably better than that from your computer, but an external microphone will certainly improve the quality in each of these cases. Many DSLR cameras have an input for an external microphone and numerous desktop USB microphones are available and very simple to install. Also, a range of lavalier microphones, which can be clipped to your shirt, will improve your conversational audio output.
As we are realizing, the days of work from home, video conferencing, and livestream events will be common practice for the foreseeable future, so now is the time to consider using the quality cameras you have and perhaps investing in affordable accessories to create webcam solutions for improved communication with friends, family, and colleagues.
Use the Comments section, below, to suggest any solutions you have used to improve your video conferencing.
