
There’s an old adage that claims in order to be a wildlife photographer, you need a lot of time and a lot of money. This is only partly true. Many great wildlife photo opportunities can occur in urban parks and even in your own backyard, as long as we know what we’re doing. In this article, we’re going to cover a number of essential tips that will help you become a better wildlife photographer.
If you’ve read our introduction to wildlife photography, you may recognize some of the techniques mentioned below. These are universally beneficial tips that improve composition and put us in the best possible position to get the shots we want. IWithout any further ado, let’s get into the 12 tips to improve your wildlife photography without buying anything new.
1. Go with a Plan
While there’s certainly something magical about heading out into the woods and encountering something by chance, you’ll find much more success if you head out with a plan. What species are you hoping to photograph? Are you hoping to capture a flight shot or a portrait? Take into consideration the time of year. Many animals, especially birds, migrate as the weather shifts. One habitat may be incredibly active one month, then appear desolate the next. To properly plan an outing, we’ll need to know a thing or two about the subject we’re looking for.
2. Know Your Quarry
Familiarity with one’s subject matter can do a great deal in getting us the shots we want. A better understanding of a species you wish to photograph will allow you to not only predict behaviors but provide the opportunity to put yourself in the best position to get those shots. Rarely do photographers wing it (pun intended) and get the shot of a lifetime. It can happen, but more often than not, it comes from a mastery of one’s gear and a familiarity with the subject. Luck is preparedness meets opportunity.

3. Be Patient
You can be in the right place and have eyes on your desired subject, but that doesn’t mean the shot will miraculously present itself right then and there. Sometimes we have to wait and wait quite a bit. Some animals can rest for hours on end, only moving when absolutely necessary. We can’t expect to get jaw-dropping shots by just going on a walk, we need to respectfully stake out a subject at times. Keep a safe distance and let the animal do its thing. As the saying goes, good things come to those who wait.
With patience comes readiness. Imagine sitting on location for two hours waiting on an owl to pounce on its prey only to be looking at your phone when the owl to takes flight and hunts. Stay alert and keep your eye on the prize. Keep settings dialed in for the shot you desire to catch.

4. It’s All About the Light
This is a point that I’ll keep mentioning until I turn blue in the face. Far too often I see photographers heading out to the location while I’m walking back to the car. Even if you’re only bird watching and taking photos for identification reasons, there’s credence to being out in the early and late hours of the day.
Photography is all about the light, and when it comes to wildlife, we’ll primarily be working with natural lighting. Sunlight is at its best in the first and last hours of the day when it is sitting lower in the sky and subsequently casting a softer, warmer, directional light. Additionally, overcast days provide a diffuse, soft light throughout the day, meaning we can head out a little later and stay out in the field a bit longer.

We get that not everyone is a morning person, but the early hours of the day not only provide the best lighting, but a more photogenic subject matter. Wildlife tends to be more active in the early and late hours of the day, but there’s something even more special about mornings. It’s quiet. The drive is calmer and the parks are calmer.
Depending on where you go, you may have an entire patch of woods all to yourself. If not, it’s likely that you’ll be met by other photographers or bird watchers who are equally passionate about the subject. If there’s one point to take away from this guide, it’s this one. Get your butt out of bed and go outside!
5. Compose Images with Intent
Composition refers to how we position elements within the frame. It is what separates a picture from a photograph and determines how visually strong an image is. Think about what the subject is doing, where it’s going. Always put more space in front of the subject than behind, as this gives the impression of space for the animal to move into.
Including a bit of the environment can go a long way to add context to an image. Better yet, environmental features just in front of or behind the subject can not only add context, but depth to our image. Depth goes a long way to sell the “wild” look in a wildlife photo. Additionally, depth adds general intrigue to any work of art, setting aside from the typical portrait.

We’ve done a deep dive on the more technical aspects of this topic, but if you find yourself lacking inspiration, look at images from photographers you respect and notice how they implement the features above in the frame and where they shoot from. Are they looking up or down at their subject, or are they eye level?
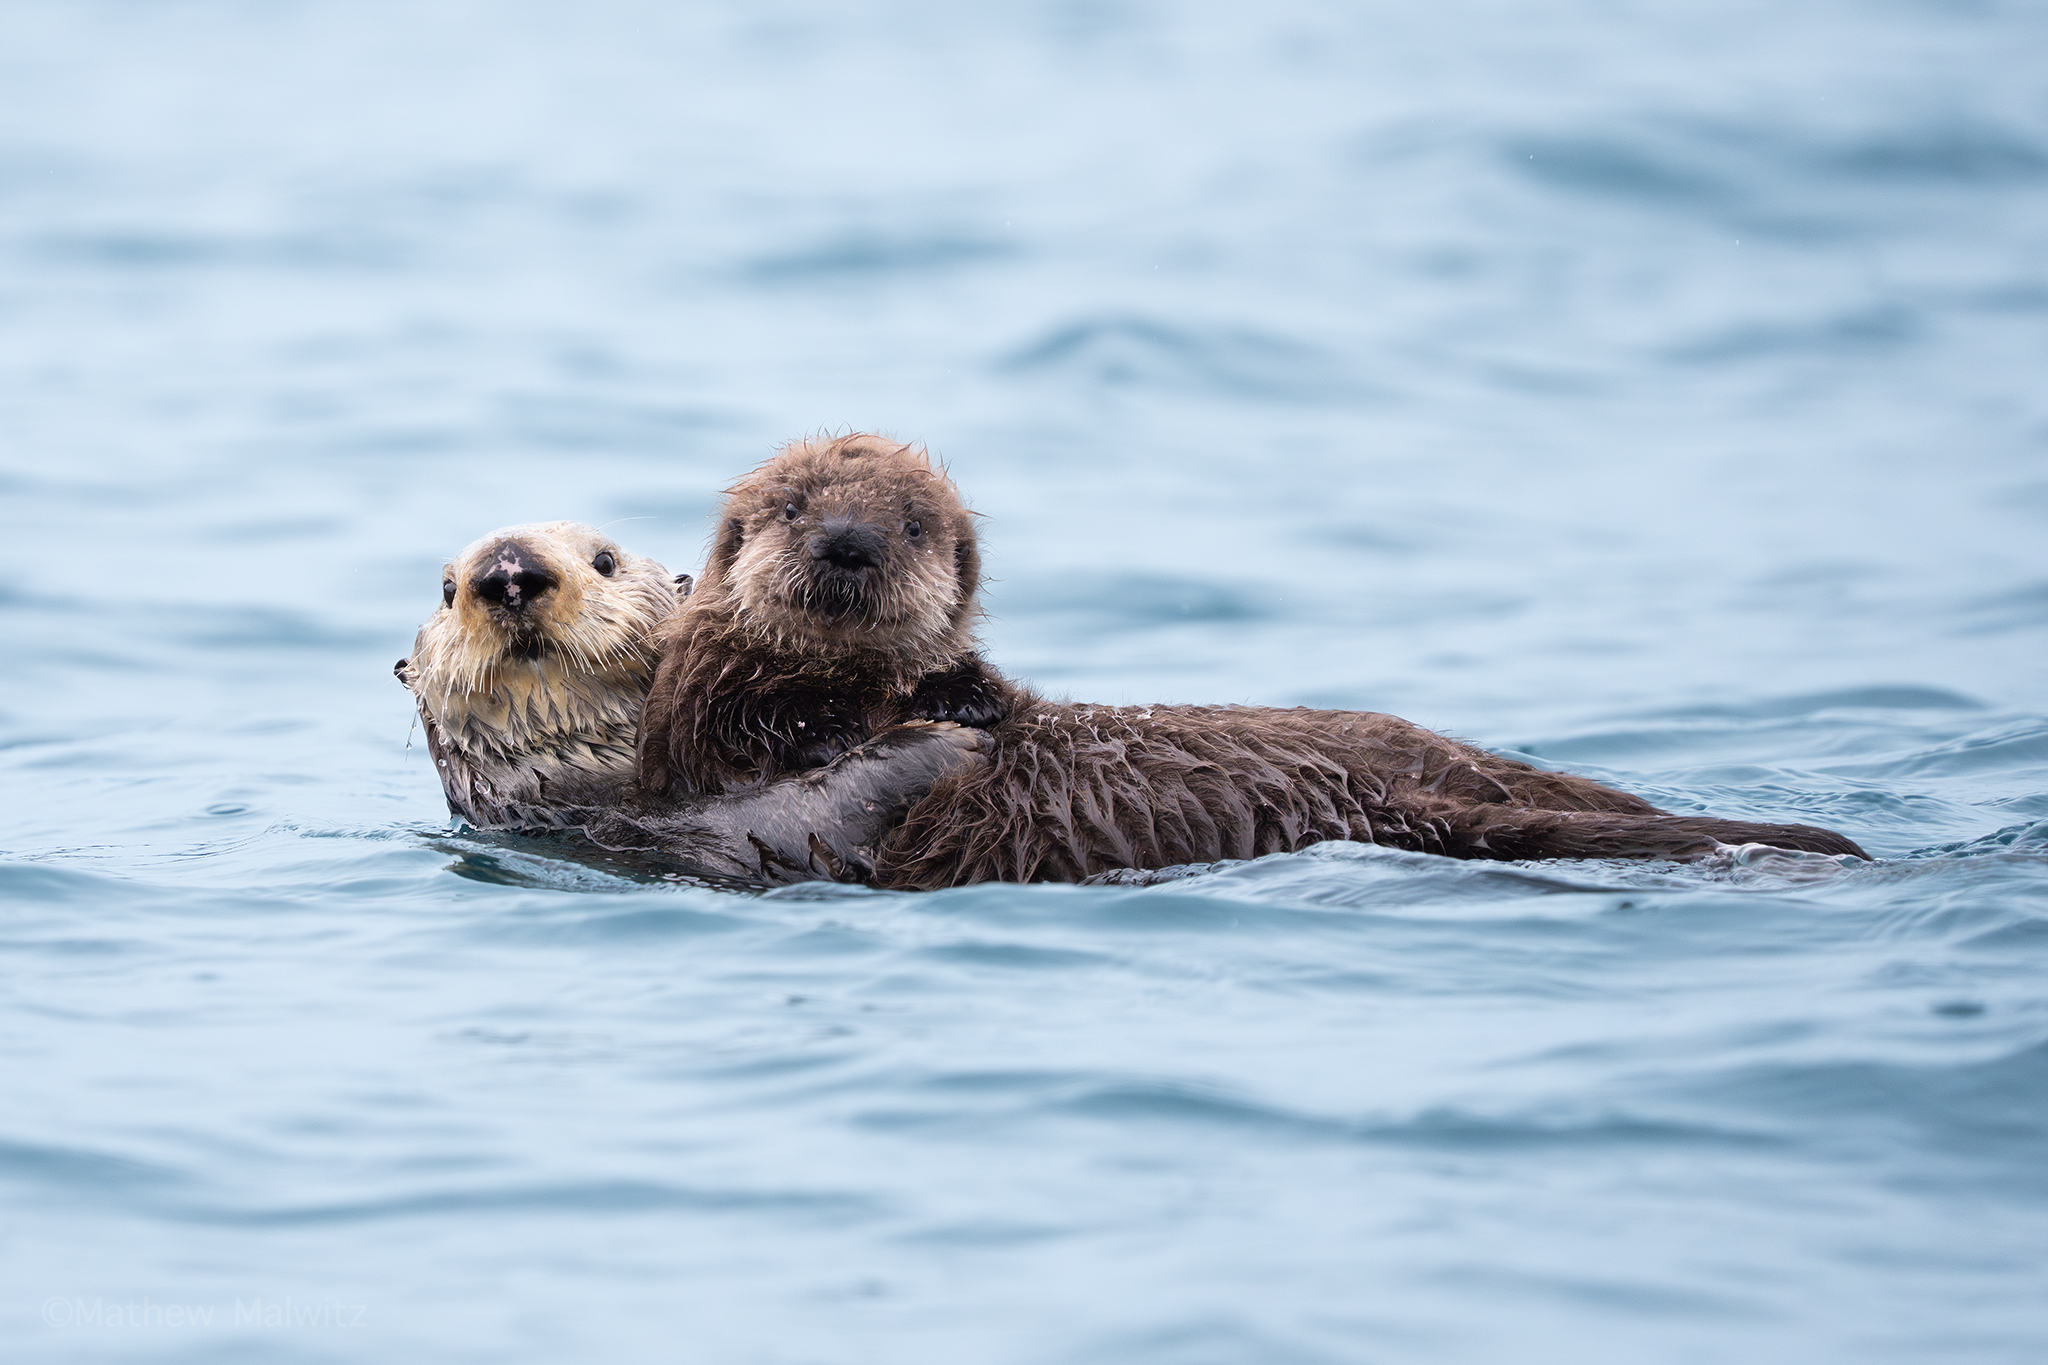
6. Shoot from Your Subject’s Eye Level
A lot can be learned by watching TV and movies. Shot composition can infer a lot about a scene, from character dynamics to the director’s artistic intent. If the goal is for a character to appear intimidated or weak, the shot is generally taken from above, looking down at the character. The same concepts can apply to photography.
When we view the natural world with the naked eye, we do often look down at the small creatures we wish to appreciate. One could read into the philosophical implications of the previous sentence, but that’s not our goal here. What we want to do is create an engaging image that draws our audience into the world of the animal they’re seeing. To put your audience in your subject’s world, you’ll want to shoot from its eye level. Whether this means getting down on the ground or raising our camera high overhead is situational.


This approach has the added benefit of putting a greater distance between your subject and the background, which allows said background to blur, adding separation between it and the subject. Backgrounds are an important element of all genres of photography, but in this case, we’re at the mercy of nature, so we need to be vigilant as we shoot.
7. Watch Your Backgrounds
The background of an image is just as important to your composition as the subject itself. If we’re not careful, a busy background can distract away from your subject. Avoid bright spots in the frame, as our eyes naturally go to the brightest area of an image. Additionally, watch out for twigs or sticks that intersect with the subject. This can also apply to horizon lines, depending on how well defined they are and the color difference between the ground and sky/backdrop.
The busier the background, the harder it will be to visually lock onto and focus on the subject. Aperture can aid us in getting a blurrier background, but more importantly is focal length and distance. Longer lenses naturally produce a shallower depth of field, and when paired with the right subject-background distance, we can capture a stunningly smooth background. The closer our subject is to the background, the better the separation we will achieve.


Another element of backgrounds that often goes unnoticed is the horizon. It’s very easy to let one side of the frame sag when shooting, especially when following a moving subject. It is very important that we keep our horizons as level as possible. For mirrorless users, activate your cameras built-in level! This can be used in both the viewfinder and rear LCD. DSLR cameras can make use of this feature when using the rear LCD only.

Animals are living, breathing, thinking creatures. Just as you get uneasy when someone or something is staring at you, so do our subjects. When working with a subject, know the behaviors that indicate fear and stress, and move accordingly. Never directly approach an animal, as this will likely only spook them and send them running. Instead, move toward them slowly and sporadically. Move in a serpentine pattern and if you can, get ahead of the subject. Allow it to come toward you.
8. Watch Those Head Angles
Above, we addressed that animals are living, breathing beings and being such, we want our audience to connect with them. How do we connect with one another? Eye-contact is the most significant point of connection in conversations, and when viewing images. If our subject is look away from the camera, even by just a few degrees, we’ve lost that engagement.


Head on shots don’t always look pleasing, especially when photographing birds. Mammals are another story.
9. Work the Subject
Work the subject. Don’t just take the first sharp image you can and run. Stay and keep taking photos. You never know when something spectacular will happen, so increase your chances by spending more time with a subject. Obviously, if you’re bothering an animal, don’t do this, but if you allow an animal to approach on its own or follow proper field craft, you’ll likely have plenty of opportunities to photograph a calm subject.
This extends to our next point, which is to work a location. If you find a relatively consistent subject, keep going back. The more time you spend on a subject, the better your chances of capturing that spectacular behavior. A lot can happen in even a brief period of time, so visiting time and time again will prove very fruitful.
If you have a relatively tame subject, experiment! Don’t stand in just one place. Move around and experiment with backgrounds. If you have a zoom, alter your focal length and see how it affects the image. When something interesting happens, just press the shutter and see what you get. Don’t waste time trying to adjust settings. In doing so, you’ll end up missing the moment.
10. Becoming Confident with Your Camera
Often times, it is an unfamiliarity with one’s own gear that is to blame for missed shots or unsharp images. If we had a dollar for every time someone said, “I’d take great shots too if I had a camera like that,” we’d have quite a few dollars. It is not the camera that takes a photo, it is the photographer.
Learn your gear like the back of your hand before upgrading to a new camera or lens. Some lenses, primarily zooms, can be sharper at slightly smaller apertures. Newer high megapixel cameras may also bring imperfections in our technique to light, showing vibrations and shaking more easily thanks to the higher pixel density.


Knowing your gear is also accepting its limits. One of the first mistakes we make is shooting no matter what. If we see wildlife, we take a picture and call it a day. This is fine if you’re a bird watcher taking a quick snap for future identification, but not if we’re trying to create a photograph. There will be times when we need to accept that a quality image is just not possible, whether it be due to distance, poor light, heat shimmer or other environmental factors.
11. Shoot RAW
Shoot in a RAW file format. RAW files unveil the maximum amount of detail your camera is capable of recording in both color and dynamic range (shadow and highlight detail). This will unlock the full potential of our gear, though it will rely on some editing software. RAW files are technically not image files, instead being loose data that requires editing to finalize and convert it to a more common file type such as a JPEG.


Post-processing—often shortened to just “editing”—is how we finalize our work and make it pop. Even in the dark room, photographers have been pushing and pulling their exposures, burning and dodging highlights and shadows to optimize their work. Today, the possibilities are endless, though there is such a thing as too much editing. We have the ability to remove distracting elements and with the aid of AI, can even add elements to our frame, though this blurs the line between photography and digital art.
12. Dress for the Weather
This may sound like filler, but it’s nothing of the sort. If you’re uncomfortable, you’ll never be able to focus on the task at hand. Try standing out in a field waiting for an owl to wake up with cold fingers, you’ll likely cave well before our feathery friends emerge. Layer up for the cold and know that you can shed layers as you hike and add them when stationary.
On the opposite end of the spectrum, don’t overdress for warm weather, but don’t underdress either. It’s best to opt for UV resistant, breathable materials in the heat instead of shedding layers, as temperatures can fluctuate depending on time of day and weather, plus. Just like in winter, our activity level will vary from shoot to shoot.
If you’re shooting from ground level, it may be advantageous to wear long pants and sleeves for a myriad of reasons. First and foremost, is sun protection. As wildlife photographers, the sun is our best friend, but too much of anything can be a bad thing. Second, and more importantly, is protecting our knees and elbows from friction burns, sharp broken shells, rocks, and bug bites.
Put It to Practice
There is much we can do with the gear that we have as long as we practice. Practice the techniques above, and you’ll be well on your way to taking sharp, well-lit, compositionally strong images. Know that no matter how skilled you become, you’ll still take more okay shots than great ones, but you’ll know when you strike gold. The more you do anything, the better you will become.
If you’d like to learn more about wildlife photography, check out our other guides in this series. We’re covering everything from the basics to choosing the right lens, and more advanced techniques such as capturing birds in flight. To read other photography guides, articles, and reviews, visit the B&H Explora page.
