
Welcome to Part 2 of my guide to Basic Backyard Astrophotography. If you missed Part 1, please click here and we will see you back on this page in a few minutes. In this segment, we talk about the gear you need to create your own astrophotos. We also touch on preparation for viewing the night sky, because you should know what you can see and what you might want to photograph.
Gear: The Bare Minimum
In keeping with our previously mentioned KISS (Keep it Simple, Stargazers) plan, here is your bare minimum gear list.
Camera
Any DSLR or interchangeable-lens mirrorless camera will do. If I owned a top-tier point-and-shoot camera, I wouldn’t be afraid to take that for a spin, as well. (Personally, I haven’t done astrophotos with a point-and-shoot, other than superzoom cameras, but, if you are out there doing it, definitely let us know about it.)
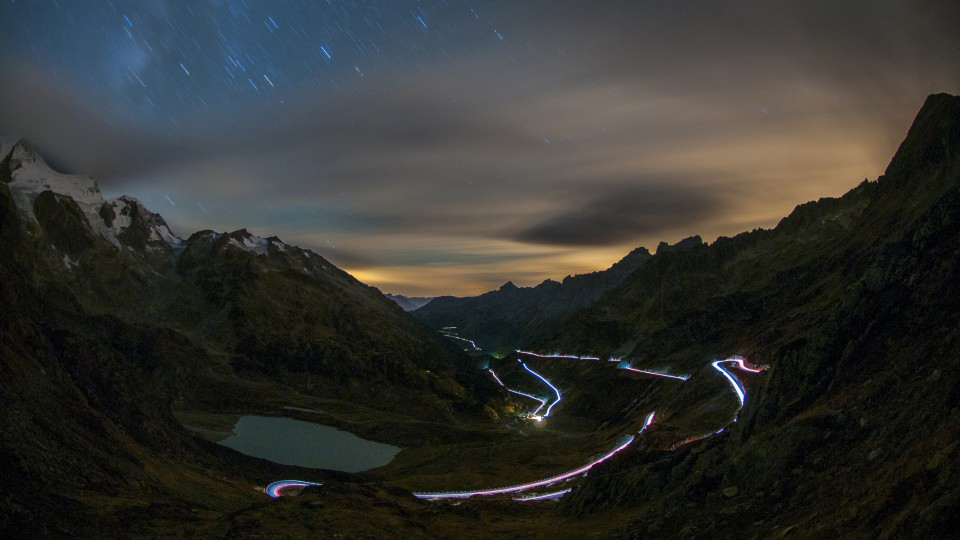
Photographs © Todd Vorenkamp

Lens
Yes, you can use your basic kit zoom lens(es). Without getting too far into the weeds, when it comes to astrophotography, there are significant advantages to lenses with wider maximum apertures, but it is possible to do high-quality astrophotos with basic kit zoom lenses. It’s important to realize that focal length has a very pronounced effect on the maximum shutter speed at which you can shoot. For now, know that the wider your field of view and the wider your aperture, the easier it is to avoid getting a photo of blurry or trailing stars caused by the rotation of the Earth. (We will discuss the trailing of stars in a photograph in Part 3.)

Tripod
A good tripod is an absolute necessity. Here is a list of recommended full-size models and travel tripods.

Gear: Basic Add-Ons
Remote Shutter Release
The remote shutter release could be cabled, wireless, or done via your mobile device. You basically need something, anything, that allows you to trigger your camera’s shutter without you touching the camera. In the absence of a remote shutter release, you may use the camera’s self-timer. It works!

Batteries
Camera batteries are taxed by long(er) nighttime exposures, especially when it is cold(er) out. Be sure to have sufficient battery power (or a plan) to keep shooting through the night. In digital photography, no battery means the game is over. You might find your night photo sessions consist of only a handful of images, but always have power in reserve.

Memory Cards
If you end up doing things like time-lapse photography or attempt to keep the shutter going to capture meteors burning up in the atmosphere, you run the risk of running out of memory before you are ready to go home. Bring a spare memory card or two.

Gear: Non-Photographic
Flashlight
In the dark, you’ll want a good flashlight to find your way around your yard, or light up your gear so you can see what you are doing when you change lenses or set up and break down your kit. A red light or lens will help preserve your night vision.

Headlamps
Carrying stuff in the dark gets easier if you can free up both hands while illuminating your work area with a headlamp. Not always at the forefront of fashion, rest assured that, in the dark, not too many people will see you and your non-fashion-forward accessory.

Stay Warm
When the sun is on the opposite side of the planet, things cool down, so use common sense and have a beanie, gloves, and layers ready to go, in case it gets cold out.

The Night Photography Mindset
Astrophotography is “night photography.” Many of the same skills, techniques, and gear are used to get images of the night sky. You will be using remote releases, mirror lock-up, manual mode, etc. If it is not yet dark outside, check out this article on night photography techniques and this one on night photography gear.
Preparation
The view of the night sky is, unfortunately for those of us stuck on the planet’s surface, affected by clouds, humidity, wind, light pollution, atmospheric turbulence, and more. Dark skies are nice, and the darker the skies, the better your view and photos, but you can do astrophotography from your yard or a nearby park. There is no need to road-trip to the desert southwest, unless you are driving and want me to come along. Even in New York City, you can still see the moon, planets, and bright stars.
It would behoove you to study the night sky a bit, since you’ll need to know where in the night sky to point your camera, even if your lens covers most of the expansive view. There are tons of books on this subject, as well as helpful websites. I personally enjoy the National Geographic Backyard Guide to the Night Sky and H.A. Rey’s classic from my childhood, Find the Constellations. Also, you can likely find local meet-up groups, astronomy clubs, and maybe even a nearby observatory to visit. Space is an exciting thing to explore with others—it can be way more social than the solitude of other types of nighttime photography.

When it comes to locating and identifying stars, there are numerous mobile applications that show the night sky with labels, and information on celestial objects. I use Sky Guide and Stellarium. If you want to save your phone’s battery or simply unplug from the grid, there is a ton of physical star finders you can use, and you can even print your own from NASA’s website.
When prepping for photos, one other awesome resource I depend on is the website ClearDarkSky. You can enter your location and hopefully a reporting station nearby will be listed where you may see an astronomer’s forecast chart, which shows specific atmospheric phenomena that may alter your view, and to what extent. Rule of thumb: If the stars are really twinkling a lot in the night sky, viewing (and photos) will be negatively affected.

Hopefully, all of what I just discussed serves to make you even more excited about taking photos of the night sky. Preparation is, definitely, part of the fun!
Is it dark out yet? Now that we are ready to take some photos, let’s head to Part 3.
