Video
- Recently Added
- Popularity
- Name
About 294 filtered results

by Steven Gladstone · Posted
Learning to speak and use the language of lighting can go a long way to creating images that move the audience, immersing them even further. It will also make working on set much more efficient, helping you create more powerful images in less time with your crew.
This article will cover basic lighting types, so you can become familiar with what is available.

by Steven Gladstone · Posted
When creating images for a film, you try to balance your shots so that you draw the audience into the movie, while at the same time they forget that they are watching a movie. Usually, the last thing you want is to break the illusion and have the audience snap out of their reverie.
As you read this article, you may want to pause and rewatch some classic films, or films that had a powerful effect on you. Examining the new and different techniques, lighting, and compositions used to create impact, mood, and feeling will help you grow as a
Posted
Filmmaker Cooper O’Hearn and photographer Derek Fahsbender team up to break down filmmaking to its core, from pre-production and camera settings to storytelling, theory, color-grading and more.
0:00 - Intro
7:58 - Photography vs. Videography
10:59 - Frame rates & Shutter speed
17:29 - ND filters
19:18 - Aperture& ISO
24:32 - White balance
26:17 - Peaking & zebras
29:49 - Audio
32:21 - Color Profiles
34:22 - Editing software
36:19 - File storage
42:23 - Types of shots
45:13 - Filming tips

by Zack Young · Posted
If you’re capturing a live event like a religious service, the best way to engage online viewers is by providing them with an even more dynamic view of the action than they could get in person. This is rarely achieved by throwing an iPhone on a tripod in the back of the room. Instead, we’ll show you how to use PTZ (pan tilt zoom) cameras to stream professional, high-quality versions of your events and services out to the general public. We’re breaking down the equipment, software, streaming services, and more.
Equipment Needs
On the most basic
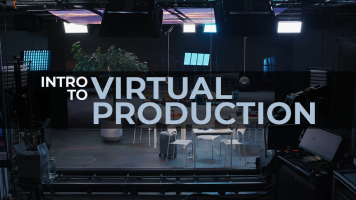
Virtual production (VP) is a filmmaking technique that combines live-action footage with digital imagery in real time. VP often happens on volume stages where interlocked LED panels display photo-real backdrops that change as the camera moves to create stunning in-camera virtual effects (ICVFX).

by Mary Latvis · Posted
Getting ready to prep or shoot your latest video project? In addition to being the largest photography store in the USA, B&H Photo also incorporates The Studio alongside a state-of-the-art technology space, The Studio Technology Center (STC). The team focuses on providing complete professional video solutions while The Technology Center serves as an access hub to latest cinema and broadcast technology,

by Steven Gladstone · Posted
Lighting hasn't really changed in the past few decades. Sure, new fixtures, faster cameras and lenses, and shooting styles may change, but the essence of lighting really hasn't changed. The look of the scene is still driven by the DP and still created by the lighting designer; it is still all about ratios, and no matter how technology advances, lighting is a powerful tool for putting realism and drama on screen.
What Is Image-Based Lighting?
Simply put, image-based lighting (IBL) is using lighting fixtures to mimic the effects of natural

by Steven Gladstone · Posted
The goal of this article is to provide you with an introduction to motion capture, its uses and requirements. As with any journey, it begins with the first few steps.
Motion Capture (MOCAP)
MOCAP is the process of recording high-resolution movement of objects or people and capturing it into a computer system. It has numerous applications, including military, sports, medical, and, of course, for entertainment. While you could trace the roots of motion capture all the way back to the seminal motion capture experiments like Muybridge’s exposures

by Zack Young · Posted
On-set virtual production (OSVP) is the real-time mixing of live-action footage with computer-generated imagery to create amazing in-camera visual effects (ICVFX). These days, most OSVP happens on a volume, a studio space with seamless LED panels (or cabinets, as they’re known in OSVP) grouped together to display rendered images that are then captured live in-camera alongside human talent. These cabinet configurations can be as simple as a flat backdrop stacked from the ground up, and as complicated as a full curved 360° wrap hung from trusses

by Zack Young · Posted
Virtual production (VP) is a professional video technique that combines live-action footage with computer-generated imagery (CGI) in real time. Virtual production typically happens on “volume” stages where seamless interlocked LED panels display rendered photo-real backdrops that change and adapt as the camera moves. This creates impressive in-camera virtual effects (ICVFX) that require little to no post-production work. Let’s jump into the exciting capabilities of
by Steven Gladstone · Posted
Your virtual production (VP) system isn't just playing back high-resolution video in the background. To work as believable 3D your system must be able to render in real-time and in high frame rate realistic 3D environments. To create and playback these environments you need creation software.
What Is Unreal Engine?
Simply put, it is an advanced real-time creation tool that powers your virtual production. It is based on 3D computer graphics gaming engine, and I remember playing Unreal as a multiplayer first-person shooter game, way back in the

by Zack Young · Posted
With all the time and effort it takes to set up a virtual production volume, it’s vitally important to schedule regular maintenance on your LED panels to ensure they stay clean, calibrated, and ready to be used at a moment’s notice. Knowing how best to repair, store, and transport cabinets is also an important part of lengthening the lifespan of these hefty investments. The number one resource is always going to be the documentation that came with your OSVP panels, whether that be a manual, an online database, manufacturer best practices, or

by Zack Young · Posted
A media server is a key step in the on-set virtual production (OSVP) pipeline, sending assets like background plates, LUTs, and tracking data over a network so that they can be used to create unique real time in-camera virtual effects (ICVFX). Whether it be a rendered set from Unreal Engine or an uncompressed prerecorded background plate, the media server is what stores and transmits these virtual pieces to the LED walls and processors. Let's dive deeper into what these servers do.
What's Important in a Media Server?
Media servers for virtual

by Steven Gladstone · Posted
Welcome to Part 2 of Keys to a Happy and Healthy Production Life.
Hopefully you’ve read Part 1, but if not, be sure to check it out.
Working on productions, and making films at every level can be fun, exciting, thrilling, and rewarding. The key to longevity in the business is both being easy to work with and being valuable to those who hire you. If you’re a director, you must figure out how to balance getting what

Posted
Doug discusses more advanced concepts to help deepen your understanding of frame rates. Both editors and videographers will find this video useful, since it will allow them to work in better tandem. We'll cover timecode basics, fractional frame rates (such as 29.97 fps and 23.98 fps), variable frame rates, and more.
0:00 - In This Video
0:39 - Timecode & Drop-Frames
5:36 - Variable Frame Rates
7:02 - Interlaced Video
10:34 - Telecine & Pulldown
12:47 - Mismatched Frame Rates & Refresh Rates
14:54 - Practical Tips