
Many photographers like to work with available light or “daylight.” Daylight, at the right time of day and under the right conditions, can make for beautiful lighting. However, it can be controlled only to a point. Photographers often want complete control over shaping the light. This leads to shooting in a studio environment with a studio lighting kit.

Using a 2-monolight setup.
Model: Baron Jackson
The first thing to decide on when acquiring your studio lighting is how many lights you need. This is determined by how you want to light your subject and background. For more dramatic lighting, you can get by with a one-light setup, using a collapsible reflector for bouncing light from the key light to fill in shadows.
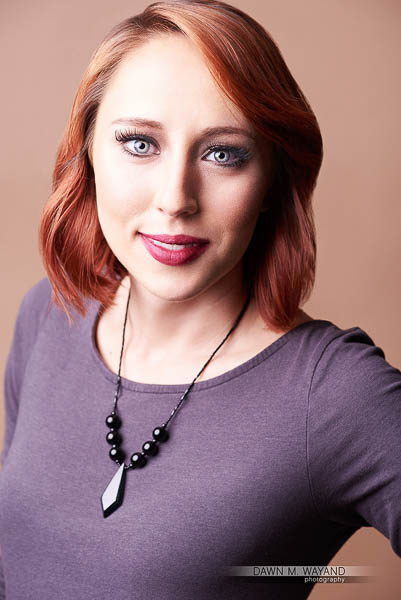
One-light setup.
Model: Tara Virada
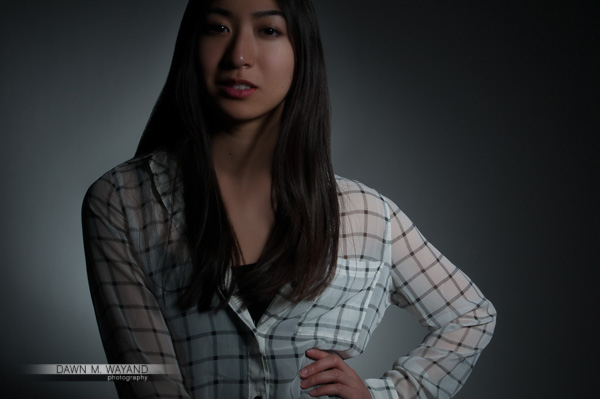
A two-light setup is truly a good starting point because one light would serve as a key light, and the second light can be used in a variety of ways, such as a fill light, background light, or rim light.

Two-light setup using a front key light and a rear rim light.
Model: Xavier Lujan
In the image below, I used a three-light setup: one background light and two lights on each side behind my subject.
A three-light setup.
Model: Celeste Smith
The idea is to start with one light and build up your lighting. The more lights you add, the more well-lit your image will be, depending on placement and intensity.

A four-light setup.
Model: Katie Buell
Now that you know how many lights you need, here are eight lights and accessories to consider when purchasing a kit or building your own.
Continuous Lights
Continuous lights come in tungsten, fluorescent, or LED form and have several benefits, the first being “WYSIWYG” (“What You See Is What You Get”). By moving a continuous light around a subject at different angles and distances, a photographer can see the light on the subject before capturing the image. Young children and babies tend to be more relaxed under constant light rather than the sudden, bright flash of a strobe.

CRI
It’s important to understand the Color Rendering Index (CRI) of a light when deciding which type of continuous light to purchase. CRI is a measure of a light's ability to reveal accurate colors, hues, and skin tones.

The higher the CRI number, the better the quality of light. I would not consider anything less than a CRI of 90 when choosing continuous lights.
The following are examples of continuous lighting.
Tungsten Lights
Tungsten lights, also known as “hot lights” because of the heat they produce, can create beautiful warm light for portraits. I like the Lowel LC-44EX Rifa-Lite EX44 Softbox Light because it’s easy to use and includes a softbox. Other great choices include:
- ikan Lightstar 300-Watt Tungsten Fresnel Light
- Elinchrom SCANLITE Halogen Light
- Lowel DV Creator 44 Kit
- ikan Lightstar 3-Point Tungsten Light Kit with 650W Open Face & 150W/300W Fresnels
Fluorescent Lights
Fluorescent lights are a great alternative to tungsten lights because they more closely match daylight in CRI rating and are cooler to the touch. The Impact Fluorescent 19" Ring Light produces a nearly shadowless image when photographing a person against a wall or seamless background—perfect for small shooting spaces where you cannot position your subject far enough away from the background. Other popular choices are:
LED Lights
LED lights are also cool-touch lights and more compact than tungsten or fluorescent lights. Newer LED lights have color temperature and intensity adjustments. My favorite LED light is the Fiilex P360EX Variable Color LED Light. These are portable and have a 3000-5600k continuous-tuning color range. Other excellent choices include:
- Rotolight Anova Pro BI-S Bi-Color LED Light
- ikan White Star WS-F350 6" Fresnel 350W LED Light
- Westcott Ice Light 2 LED Light
- Rotolight AEOS 2-Light LED Kit
- Litepanels Lykos Bi-Color Flight Kit
Speedlights
Speedlights are a good option for photographers who work in and out of a studio because they are small, portable light sources that can be used anywhere. Unless you purchase a battery pack, one downside to using speedlights is that they burn through AA batteries. Rechargeable batteries might save you money. Some speedlights are controlled by optical transmission (“line of sight” only) or radio-frequency triggers.

I own a Nikon SB-700 AF Speedlight, which offers wireless TTL optical transmission. The Canon Speedlite 600EX II-RT, which requires the ST-E3 Speedlite Transmitter, provides optical and radio transmission options with a recycle time of 0.1-5.5 seconds. A budget-friendly competitor is the Nissin Di700A Flash Kit, which includes the speedlight and transmitter in Nikon, Canon, Fujifilm, Sony, and Micro Four Thirds camera versions.
Monolights
Monolights are self-contained flash light sources in which the head contains the lamp and power supply. One benefit of using a monolight is that many have fast recycling times, which is important when shooting moving subjects such as children or fashion models. Numerous modifiers can also be used with monolights, providing you with limitless light-shaping options.

I’ve used the Profoto B1 500 Air Battery-Powered 2-Light Location Kit on more than one occasion. I love this two-light kit because it’s battery powered and includes an extra battery for each head, plus a convenient backpack to carry it all. Other monolights worth looking at include:
- Interfit S1 500Ws HSS TTL Battery-Powered Monolight
- Elinchrom ELC Pro HD 500 Flash Head
- Broncolor Siros 800 S WiFi/RFS 2.1 Monolight
- Elinchrom D-Lite RX 4/4 Softbox To Go Kit
- Hensel Integra 500 Plus Freemask 3 Light Kit
Power Packs
Power-pack systems feature lights that must be connected to a battery pack. This is a great option for shooting on location and in the studio because you do not need a power outlet. You can use one battery to power more than one light and control the power level of all of your connected lights in one place, which can save you a great deal of hassle when your lights are positioned in hard-to-reach places.

I like the Dynalite MK4-2302V RoadMax 400W/s 2 Pack 3 Head Kit (120V) because it’s priced appropriately and includes two battery packs, three lights, two umbrellas, and a case. The Profoto B2 250 Air TTL Location Kit is also an excellent option because it’s lightweight, has a fast 0.03-1.35 second recycling time, and functions in TTL and high speed sync. Other great choices include:
- Elinchrom ELB 400 Dual Pro To Go Kit
- Broncolor Senso Kit 22
- Profoto Acute 2 1200W/s 2 Head Value Pack
Light Stands
A tripod light stand is the most common type of light stand. Usually made from aluminum, these stands are lightweight and good for the studio and/or on location. C-stands are more durable, but are not practical for use outside the studio because of their weight. A boom arm is also a great accessory for angling a light, such as a hair light, over your subject.

A few reliable light stands I work with in my studio include:
Sandbags
Always position your light over a light-stand leg and use sandbags on the back legs to help prevent it from falling and destroying your expensive lighting or injuring someone on set.
Modifiers

Collapsible reflectors are foldable lighting tools that are used to diffuse or reflect light onto or absorb light from a subject. They are mainly used to fill in shadows caused by a main/key light source.

Left to right: without a reflector and with a silver reflector.
Model: Katie Buell
Umbrellas are available in white or shoot-through, silver, and gold options. While shoot-through umbrellas serve as a diffuser to your light source, they can also spread light. One downside to shoot-through umbrellas is that the light is harder to control because it spills everywhere.

Image result using a silver umbrella.
Model: Katie Buell
Reflective umbrellas, such as silver or gold umbrellas, are much more controlled, bouncing light from the inside of the umbrella and reflecting it back. Silver adds specular highlights and gold adds a warm hue.
Softboxes evenly spread light and can be placed extremely close to a subject. While softboxes come in a variety of shapes and sizes, many photographers prefer round softboxes because they leave a pleasing round catchlight in a subject’s eyes.

I like the interesting result of using a square softbox.
Model: Xavier Lujan
However, squares, rectangles and strips also have a place. Universal softboxes typically require a speedring to attach to your brand of light, which you may need to purchase separately.

The Westcott 43" Apollo Orb is one of the most convenient softboxes out there because it opens like an umbrella with only the need to attach a baffle and diffuser cover.
Light Meters
Accurate exposure is important. In the same lighting scenario, every shade or color reflects a different amount of light, and this is where a light meter becomes handy.

Most handheld light meters will have three metering capabilities: incident, reflected, and flash modes. If you shoot video, a color temperature meter like the Sekonic C-700-U SpectroMaster Spectrometer is a great tool. Looking for the percentages of the sources of your exposure (ambient, LED, fluorescent, and/or tungsten lighting versus flash lighting)? The Sekonic Litemaster Pro L-478DR is known to possess this feature. For the photographer who needs a meter to be able to fire their strobe “wirelessly,” the Sekonic Speedmaster L-858DRU Light Meter will fill the bill.
Putting It All Together
There are several avenues for studio lighting, each with its own benefits and drawbacks. Determine your chosen subject and location so you can determine your needs for light type, number, and recycling time. Think about the overall mood you gravitate toward, because dramatic lighting requires less output than high-key-style work. This will also help you determine which modifiers might work best for you. Last, consider your budget. This knowledge will help you to decide what the best studio lighting setup is for you.
Do you have any questions about initial studio-lighting setups or how to modify your existing studio? Let us know in the Comments section, below!
